
Managing Testany Notifications
Table of Content
General
This document will guide you through utilizing our Notification Gateway effectively.
Glossary
To ensure that users can effectively interact with our test environment using notifications, it is important to understand key terminology and phrases specific to TestAny. Here are some terms & lingos commonly used in our Notification Gateway:
Short-term lingo | Meaning | Explanations |
|---|---|---|
Notification method | The way we deliver the result. | This usually indicates the message channel you receive our notification. E.g. E-mail, WebEx, MS Teams, etc. |
Individual notification receiver | A specific user’s primary contact method. | This is a user-specific receiver, we only support the user’s primary E-mail address at the moment. |
Group notification receivers | A set of receivers for a specific workspace. Notifies group or channel. | These are workspace-level shared receivers, which may include one or several WebEx spaces, MS Teams Channel, etc. |
Webhook dispatch | A set of receivers for a specific plan or gatekeeper. Programmably deliver data to a URL-specific endpoint. | These are resource-level receivers for a specific plan or gatekeeper. It will programmable invoke the provided URI with a specific set of data. |
Changes and deprecations
Since version 2.10, we performed follow changes to the existing notification-related operations:
the “watchers” in a plan or gatekeeper will be replaced with an “Individual receiver“ and maintain the original preference.
the “watchers“ section in a plan is no longer viewable/editable on the plan’s detail and edit page.
the “watchers“ section in a plan is no longer viewable/editable on the gatekeeper’s detail page.
Manage execution results notification for a Plan or Gatekeeper
Managing notification for a plan or gatekeeper requires you are:
owner of the plan or gatekeeper
admin of the corresponding workspace
You can simply access the plan’s or gatekeeper’s detail page that you’d like to manage.
Manage Individual Receivers
On the bottom of the page, you’ll discover the “Result notification“ section, which looks like the following:
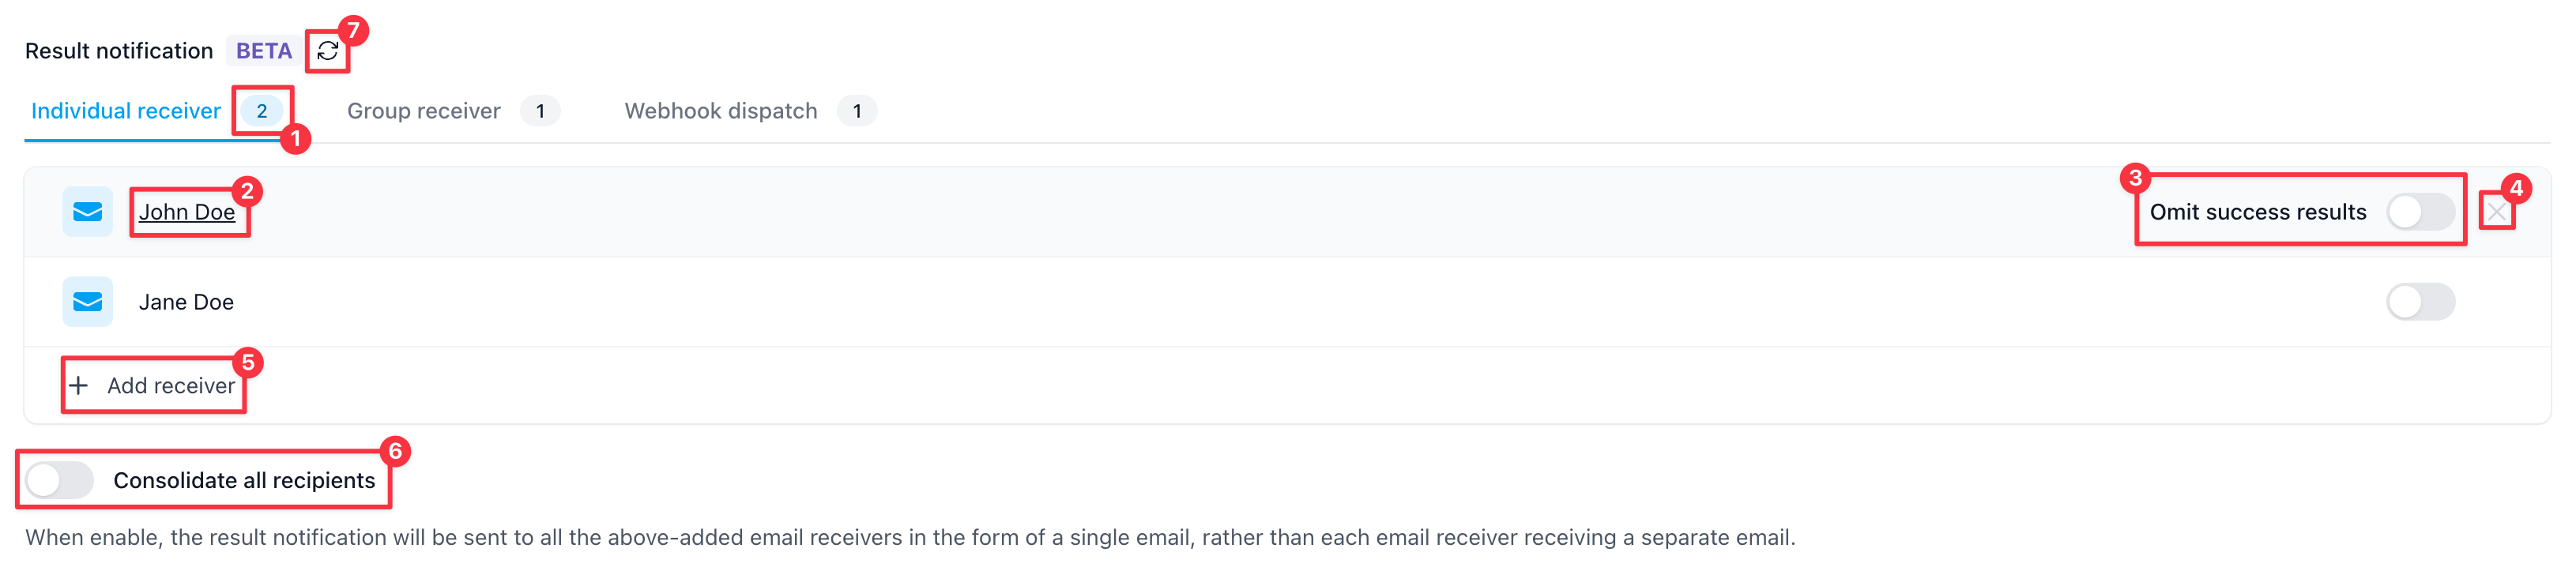
Individual receiver configuration pane of a plan/gatekeeper
Explanations of annotations:
Shows the total count of the configured receiver by type.
Shows the receiver’s name.
Indicating the preference of the plan/gatekeeper execution results for this receiver, receiving either all execution result conditions or failed execution result only.
Remove this receiver.
Add an individual receiver.
Indicating if results should merge into a single email for better context-sharing.
Refresh the status of the notification configurations.
Add an individual receiver
To add an individual receiver, simply click the “+ Add receiver“. Then, input the name or email address you’d like to let them receive the execution result notification.
You can only add the person that already registered in the Testany platform of your tenant. The customized E-mail address is not supported at this time.
You can type in more characters to narrow down the results.
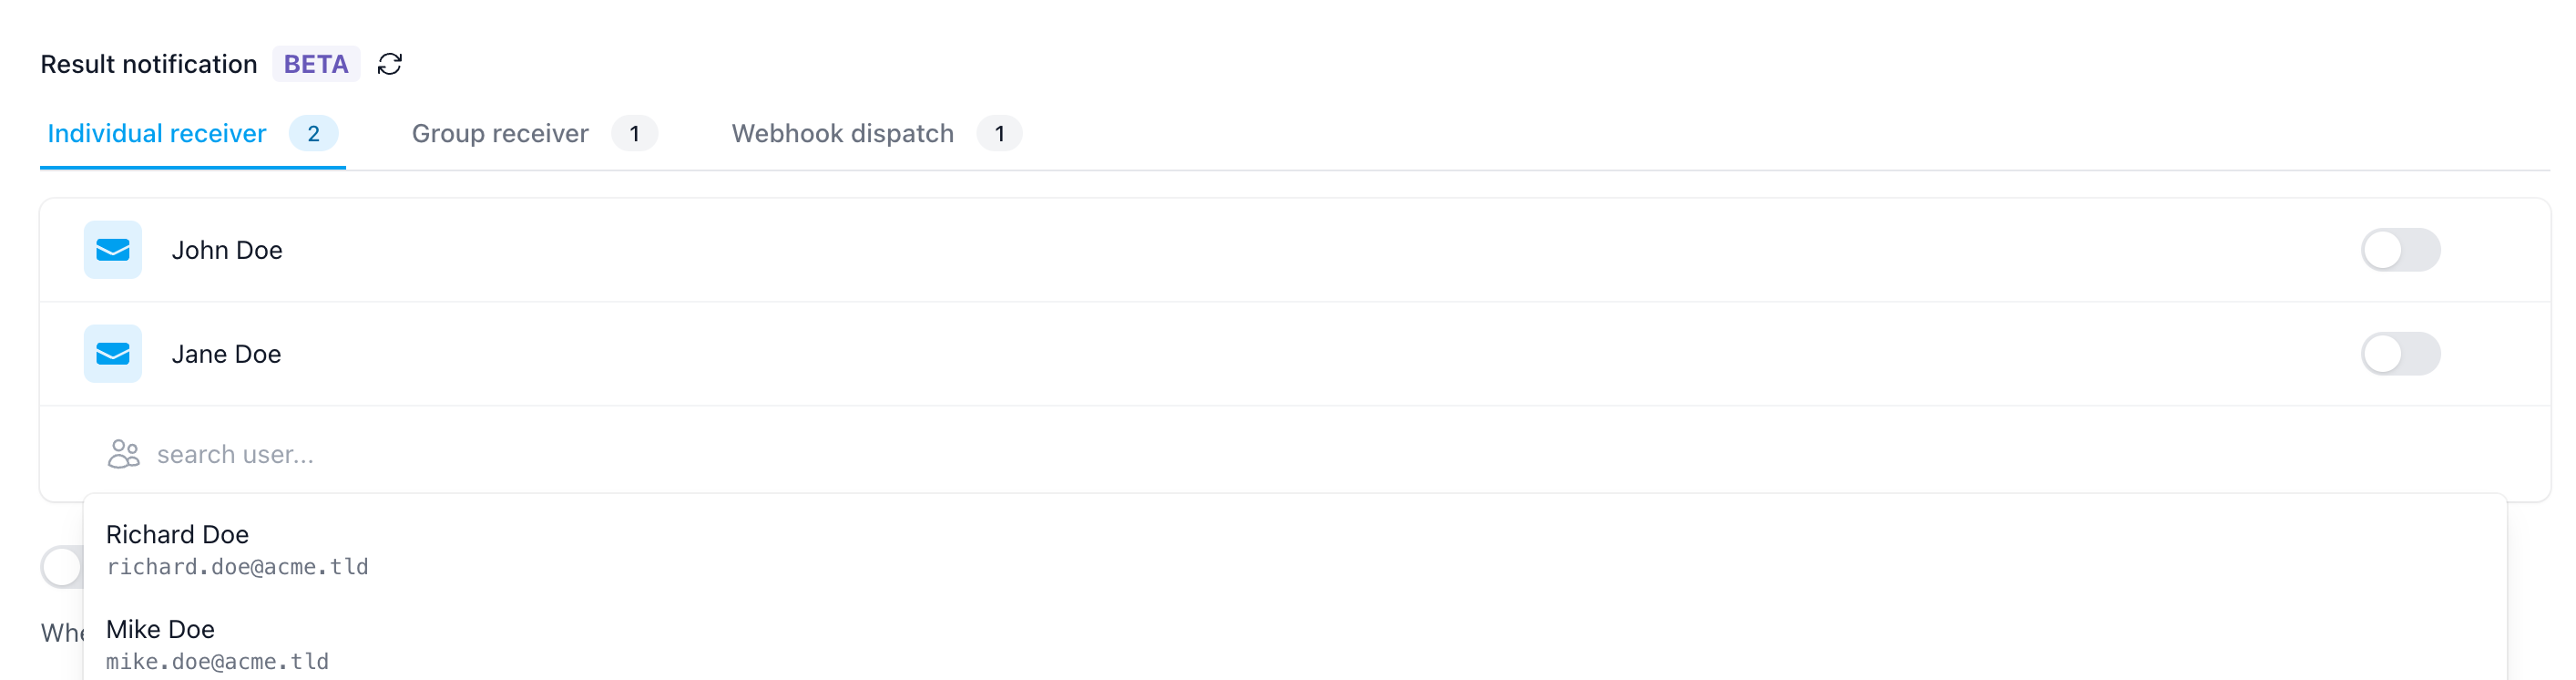
adding individual receiver
Remove an individual receiver
To remove an individual receiver, simply click the “X” mark on the receiver you’d like to remove.
The owner of the Plan/Gatekeeper can’t be removed as the individual receiver.
Update preference for an individual receiver
To update the preference for an individual receiver, simply click the toggle on the receiver you’d like to update.
The open state indicates this receiver will only receive failed execution results, and vice versa.
Manage Group Receivers
The fundamental logic is the same as the individual receiver management.
Under the “Result notification“ section, by clicking the “Group receiver“, you’ll discover the group receiver configuration pane, which looks like the following:

Group receiver configuration pane of a plan/gatekeeper
Explanations of annotations:
Shows the type of group receiver.
Shows the group receiver’s name. Click the name will redirect to the space/channel.
Indicating the preference of the plan/gatekeeper execution results for this receiver, receiving either all execution result conditions or failed execution result only.
Remove this receiver.
Add a group receiver.
The available group receivers are managed by the workspace admin. If you can’t add a group receiver, please contact the workspace admin for further assistance.
Manage Webhook
Under the “Result notification“ section, by clicking the “Webhook dispatch“, you’ll discover the webhook configuration pane, which looks like the following:
Webhook entries only affect the current plan/gatekeeper. It will not work on or be used by others.

Webhook configuration pane of a plan/gatekeeper
Explanations of annotations:
Add a webhook.
Add a webhook
Click the bottom right “+“ button to create a new webhook entry.

You can also input information like the downstream application’s name, the webhook name for identification, and a description for further explanation.
Paste the webhook link you’ve obtained from the system you’d like to notify, into the “Webhook URL“ section.
After clicking the check mark, your webhook will be saved.
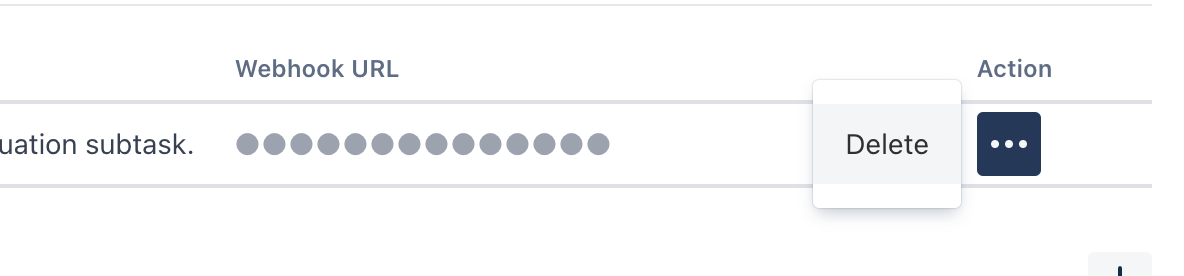
Remove a webhook
To remove a webhook, simply click the “…“ at the end of the webhook entry you’d like to remove, and then click “Delete“.
Webhook Payload Definitions
Please refer: <Understanding the Payload of a Notification Webhook>
Manage group notification receivers
This section is only available for workspace admin
Managing group notification for a workspace requires you are:
admin of the workspace
You can access the “Notification” page under “Workspace settings“ to manage group receivers.
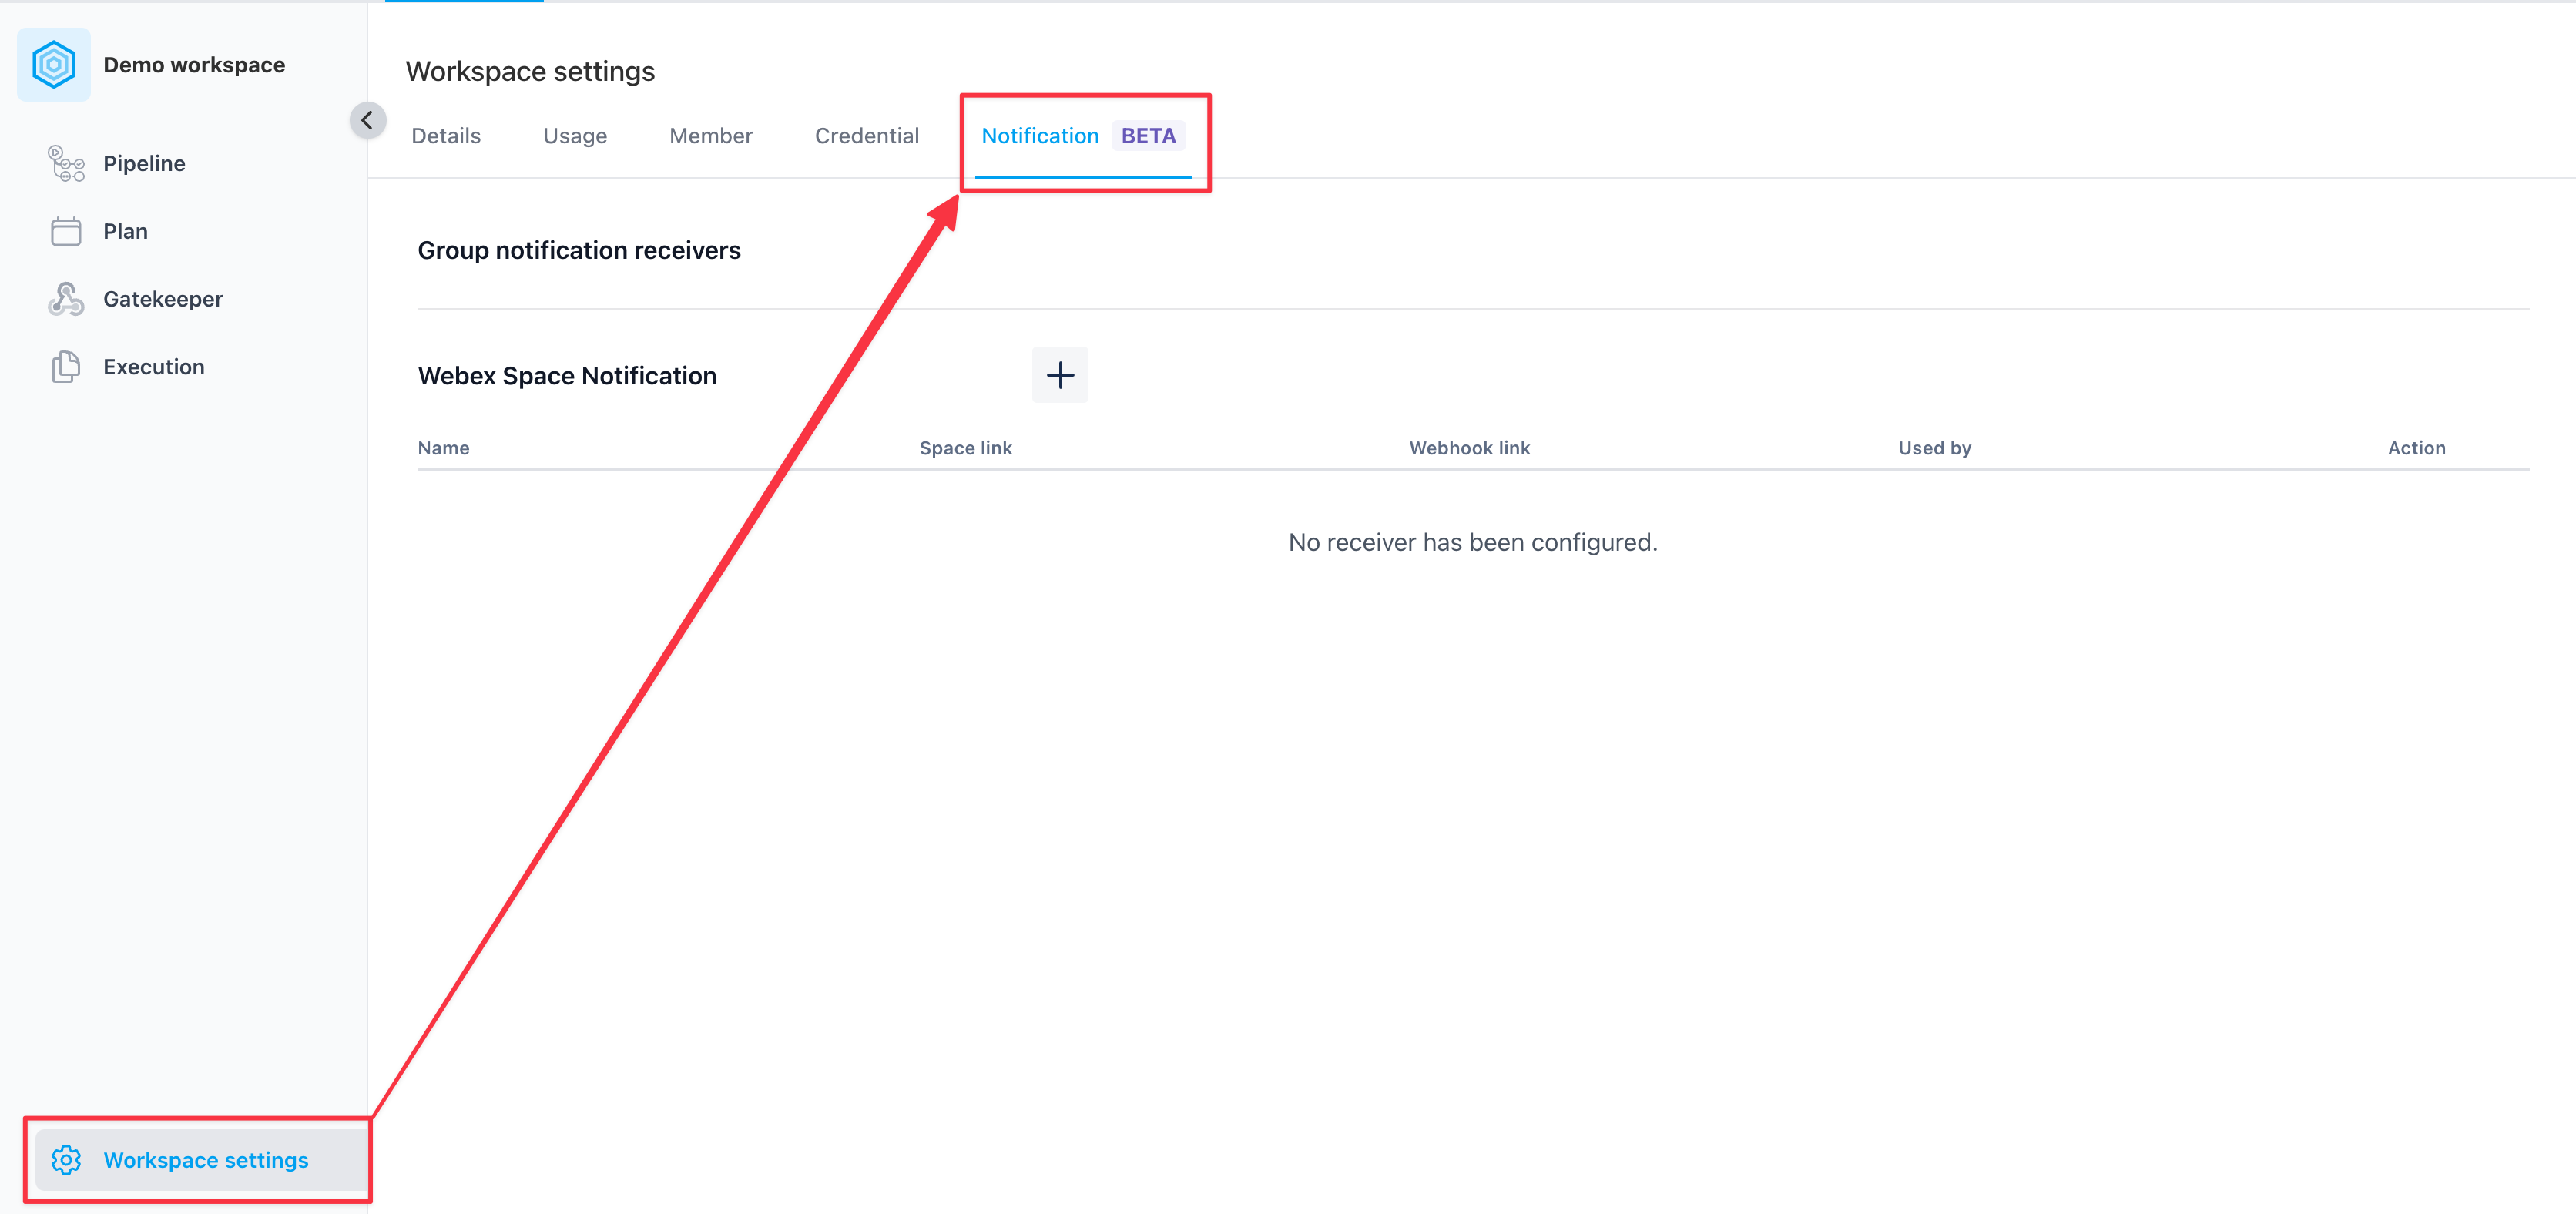
Group receiver management
Add a Group Receiver
Under the type of group receiver you’d like to add, click “+“
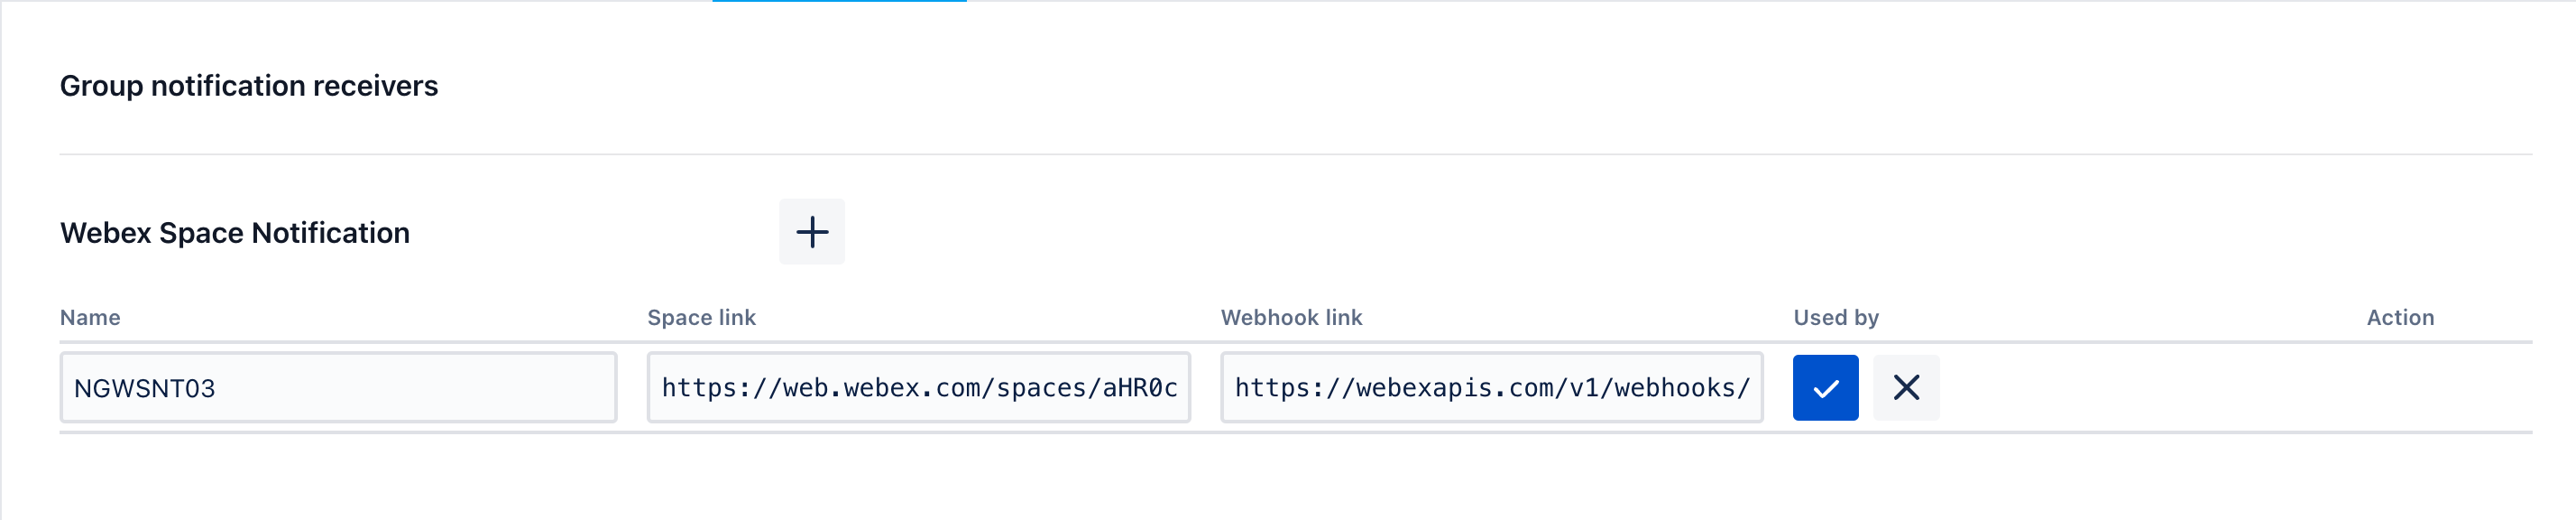
add a group receiver
Name: indicate the name of this group receiver
Space Link: when clicking, navigate to the chat space/bridge
Webhook Link: the URL that receives the result of an execution
After clicking the check mark button, a group receiver will be saved and ready to be used by any plan/gatekeeper in this workspace.
Update a Group Receiver
To make changes on a group receiver, simply click the “…“ at the end of the webhook entry you’d like to update, and then click “Edit“.
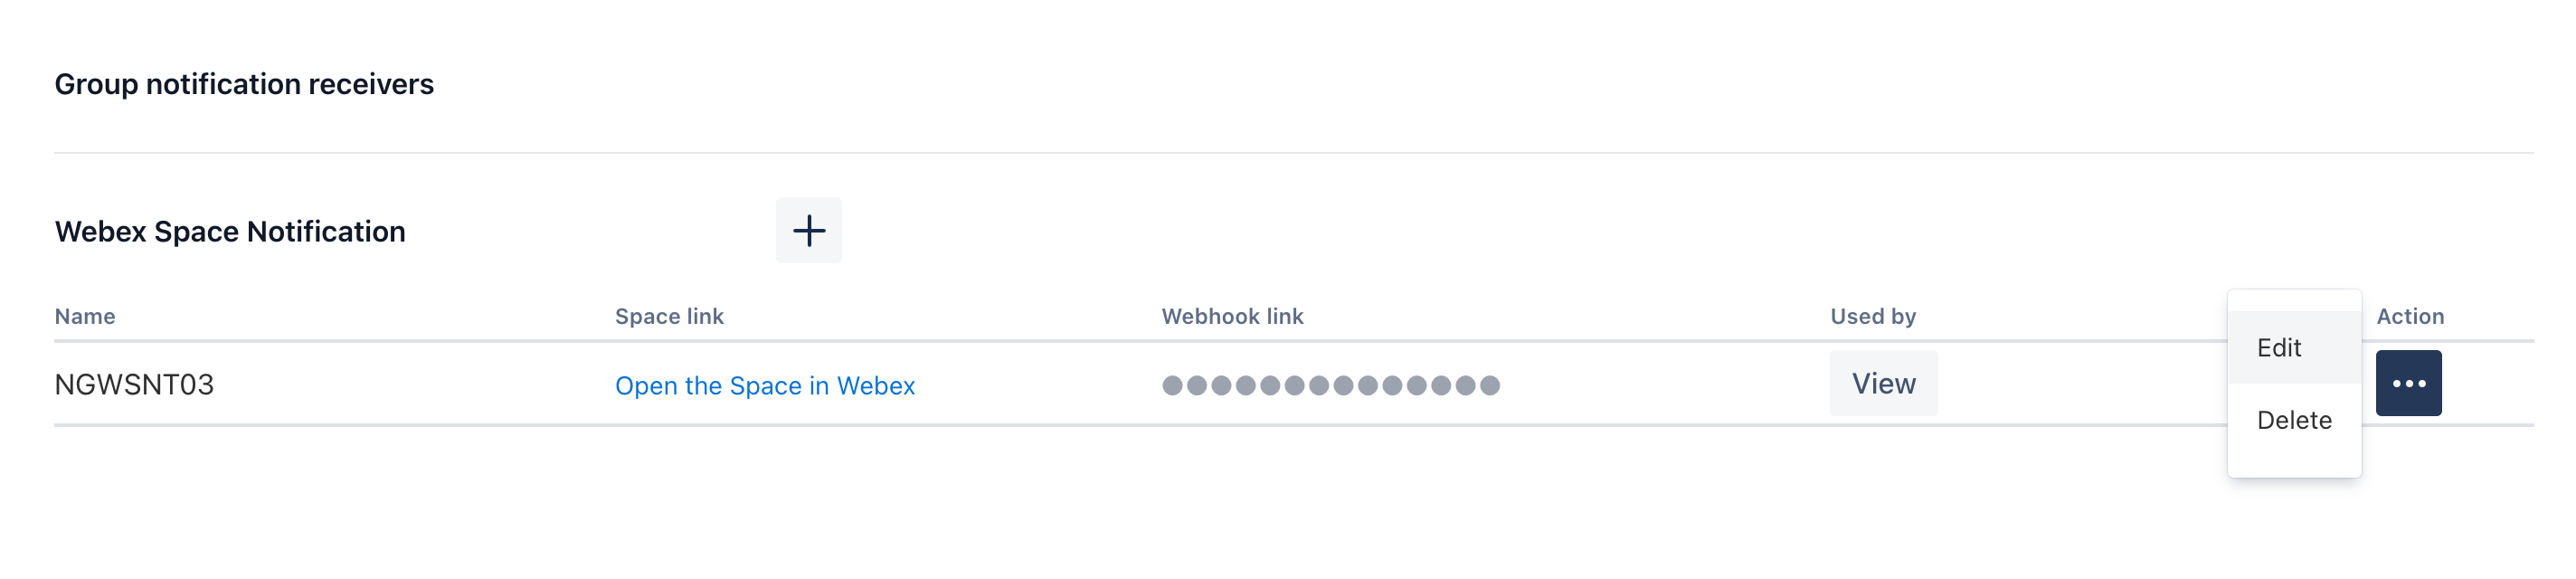
Update a group receiver
Click the check mark button to save your changes.
Remove a Group Receiver
To remove a group receiver, simply click the “…“ at the end of the webhook entry you’d like to remove, and then click “Delete“.
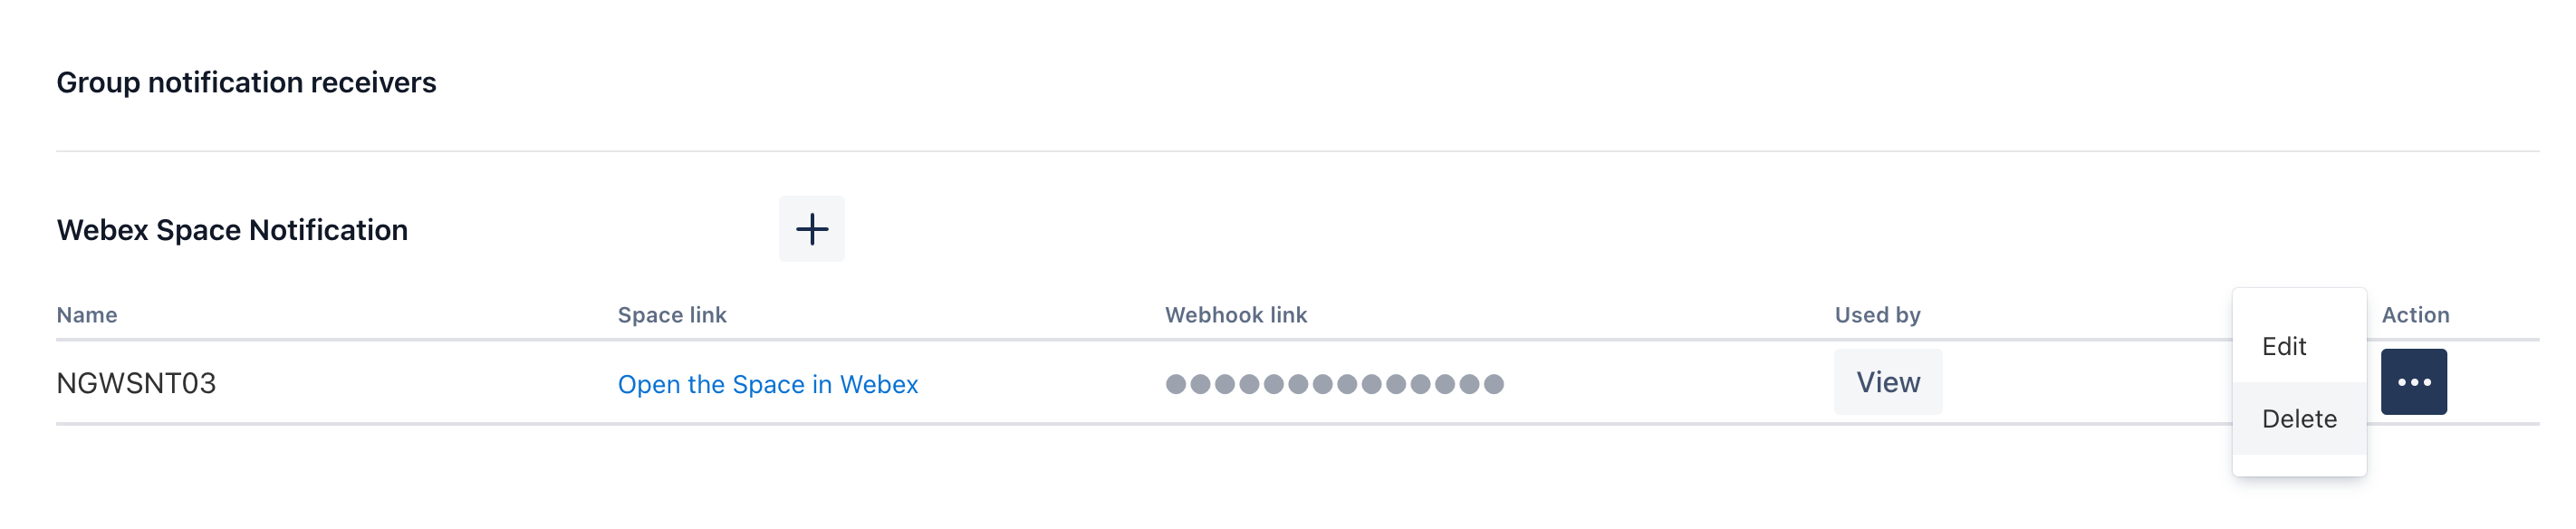
Remove a group receiver
Then, confirm your operation.
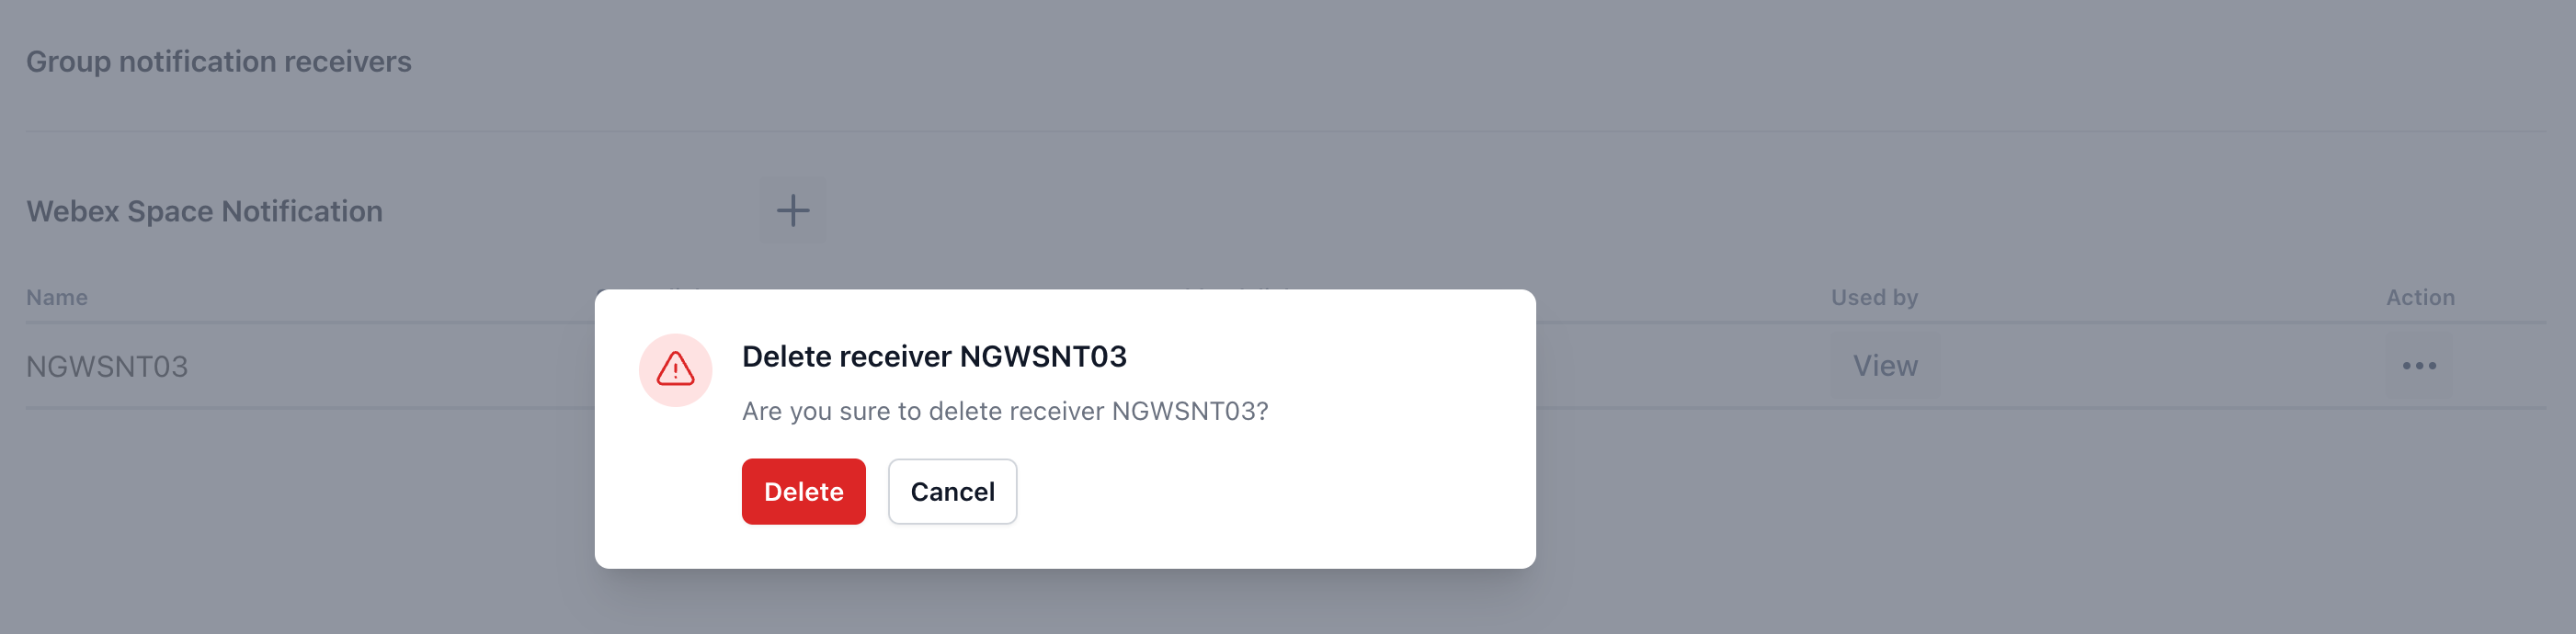
Deletion confirm prompt
Manage notification methods
This section is only available for global admins
Managing notification methods for your tenant requires you are:
global admin of the tenant
You can access the “Global settings” page under “Cog Icon“ located at the top right corner, to manage group receivers.
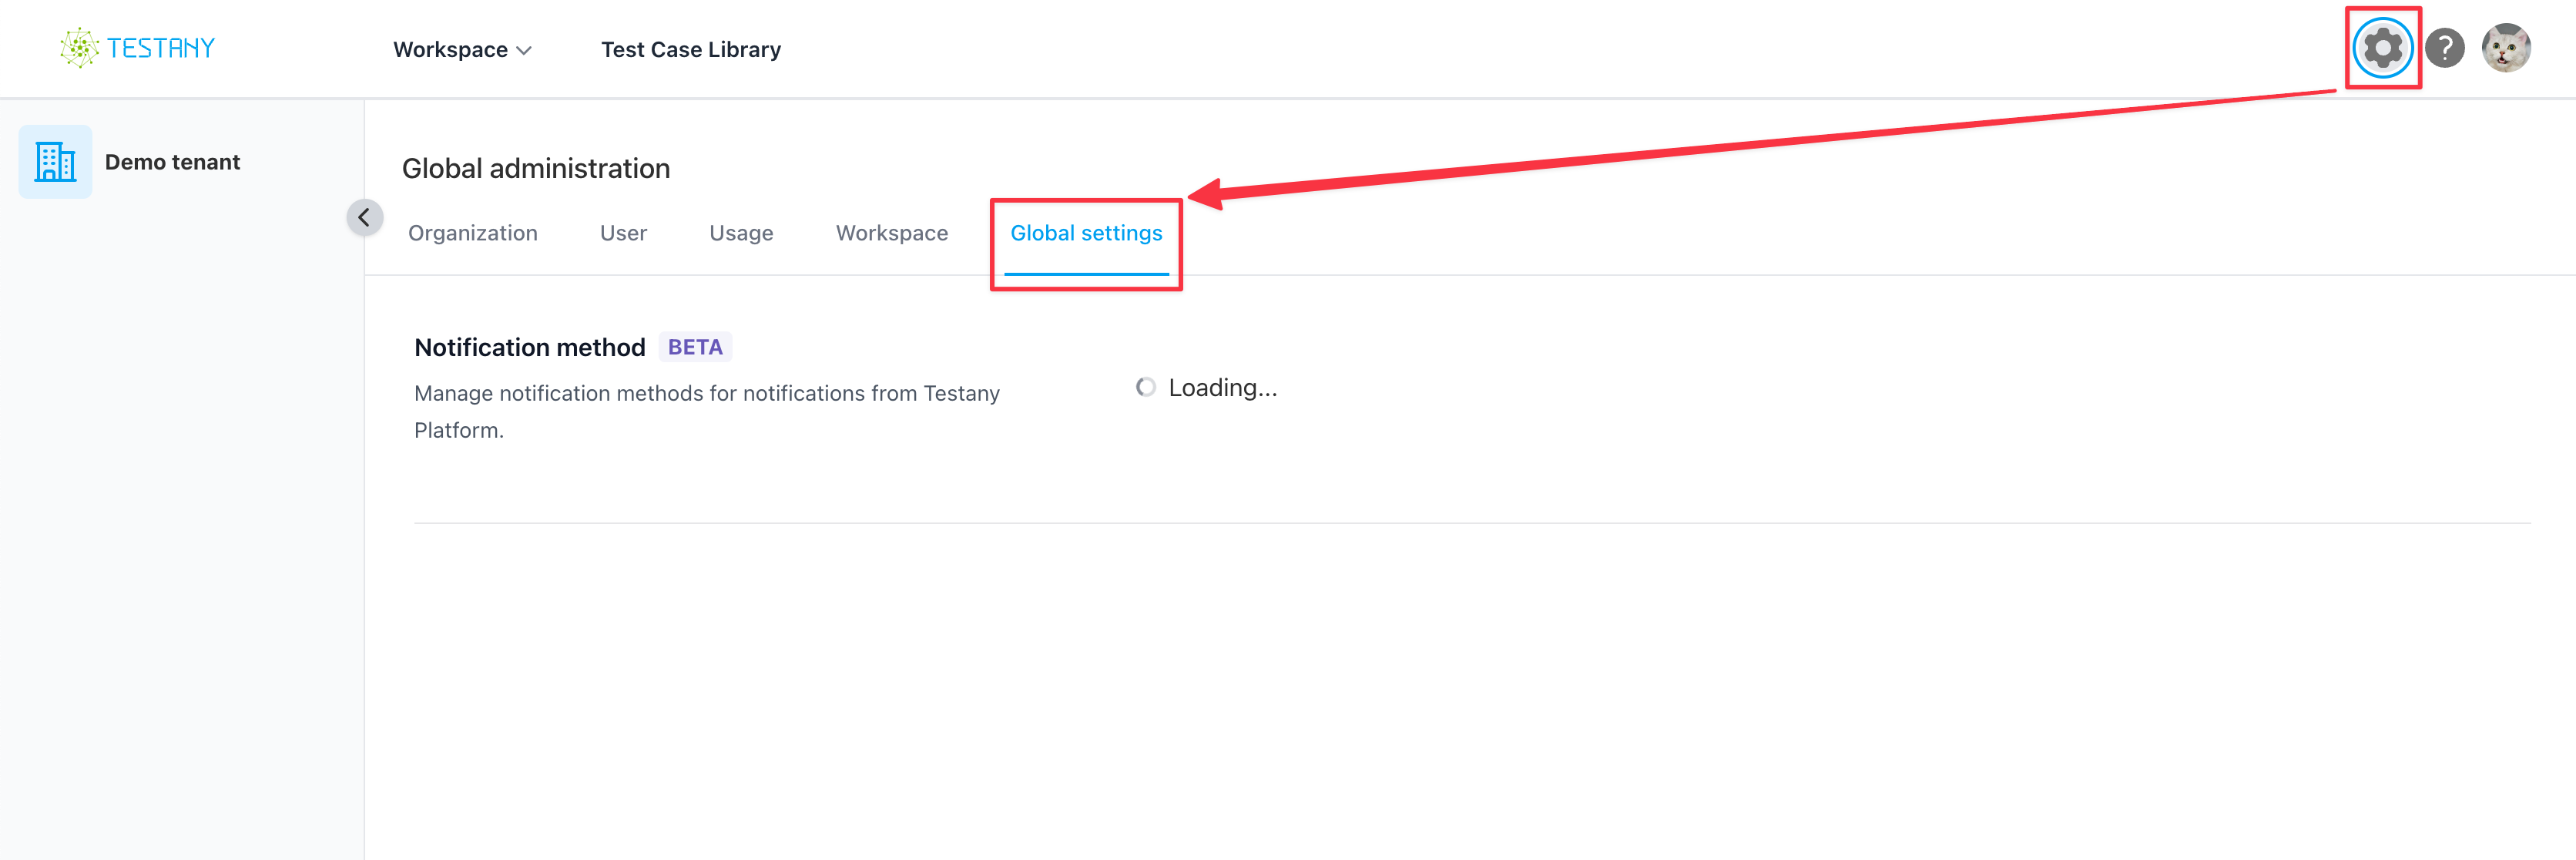
Accessing notification method management
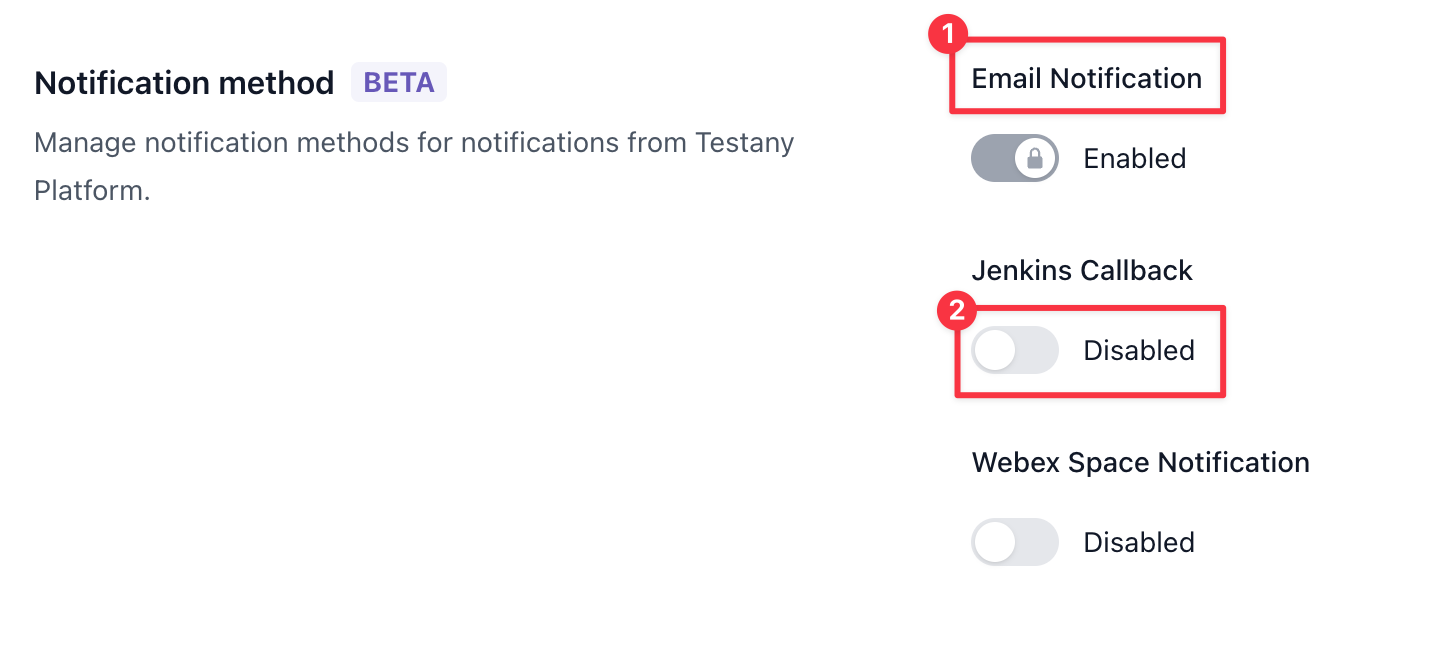
Explanations of annotations:
Shows the name of the notification method
Shows the current status of the notification method
The locked toggle means this method status can not be changed.
Enable/Disable a notification method
Enabling a notification method allows users to configure the Notification Gateway, and receive notifications via this method.
To enable or disable a notification method, simply click on the toggle of the desired method, and vice versa.