
Playwright Codegen Best Practice
1. Overview
This guide will walk you through using Playwright’s built‑in recorder (codegen) to capture your first end‑to‑end tests—no heavy scripting required. You’ll learn how to:
Prepare the environment.
Launch the recorder and interact with your application visually.
Generate a basic test script automatically as you click and type.
Save and run the recorded script with a single command.
Make the smallest edits needed.
By the end, you’ll feel comfortable recording, tweaking, and executing lightweight Playwright tests without diving deep into code—giving you a solid foundation to explore more advanced features later.
For more introduction of Playwright, please visit its official site: https://playwright.dev.
2. Prerequisites
2.1 Set Up the Environment
2.1.1 Create a Local Directory
Open your system's file manager (Windows Explorer / macOS Finder), create a new folder at your preferred location (e.g., Desktop, Documents), and name it playwright. This will be your project root.
2.1.2 Install Node.js
Go to https://nodejs.org and download the LTS installer. Follow the instructions to complete installation.
2.1.3 Navigate to the Playwright Folder
Use a terminal or the VS Code integrated terminal to navigate to the folder created in step 2.1.1.
Without IDE: Open Terminal / Command Prompt manually.
With IDE: Open the terminal within VS Code at the bottom.
cd /your/full/path/to/playwright2.1.4 Install Playwright
Run the initialization command:
CODEnpm init playwright@latestChoose the scripting language:
TypeScriptorJavaScript. Use the arrow keys to select and press Enter.CODEDo you want to use TypeScript or JavaScript? _ › TypeScript JavaScriptChoose where to save your test files: The default is
tests, but you can change it toe2eor any folder name you prefer.CODEWhere to put your end-to-end tests? › testsAdd a GitHub Actions Workflow?
CODEAdd a GitHub Actions workflow? (y/N) › falseSelect
Yto generate a CI workflow file at.github/workflows/playwright.yml, which lets GitHub automatically run tests and generate reports when you push code.Select
Nto skip this (you can configure CI later manually).
Install Playwright browsers (Must choose
true, press Enter)CODEInstall Playwright browsers (can be done manually via 'npx playwright install')? (Y/n) › true
After completion, you'll see:
Happy Hacking!The setup will automatically:
Create or update
package.json(adds dependencies and scripts)Generate
playwright.config.jsor.tsCreate the specified test directory with a sample test file
Generate the GitHub Actions workflow file (if you chose to enable it)
2.2 Configure Playwright
To get the best experience with recording → playback → debugging, we recommend enabling key features in your playwright.config.js:
Line 16: Set test timeout to 30 seconds
Line 34: Collect a trace on every run
Line 35: Record a video on every run
Lines 41–74: Define which browsers to test against in parallel
// @ts-check
import { defineConfig, devices } from '@playwright/test';

/**
 * Read environment variables from file.
 * https://github.com/motdotla/dotenv
 */
// import dotenv from 'dotenv';
// import path from 'path';
// dotenv.config({ path: path.resolve(__dirname, '.env') });

/**
 * @see https://playwright.dev/docs/test-configuration
 */
export default defineConfig({
  timeout: 30 * 1000,
  testDir: './tests',
  /* Run tests in files in parallel */
  fullyParallel: true,
  /* Fail the build on CI if you accidentally left test.only in the source code. */
  forbidOnly: !!process.env.CI,
  /* Retry on CI only */
  retries: process.env.CI ? 1 : 0,
  /* Opt out of parallel tests on CI. */
  workers: process.env.CI ? 1 : undefined,
  /* Reporter to use. See https://playwright.dev/docs/test-reporters */
  reporter: 'html',
  /* Shared settings for all the projects below. See https://playwright.dev/docs/api/class-testoptions. */
  use: {
    /* Base URL to use in actions like `await page.goto('/')`. */
    // baseURL: 'http://127.0.0.1:3000',

    /* Collect trace when retrying the failed test. See https://playwright.dev/docs/trace-viewer */
    trace: 'on',
    video: 'on',
    // headless: false,
  },

  /* Configure projects for major browsers */
  projects: [
    {
      name: 'chromium',
      use: { ...devices['Desktop Chrome'] },
    },

    // {
    //   name: 'firefox',
    //   use: { ...devices['Desktop Firefox'] },
    // },

    // {
    //   name: 'webkit',
    //   use: { ...devices['Desktop Safari'] },
    // },

    /* Test against mobile viewports. */
    // {
    //   name: 'Mobile Chrome',
    //   use: { ...devices['Pixel 5'] },
    // },
    // {
    //   name: 'Mobile Safari',
    //   use: { ...devices['iPhone 12'] },
    // },

    /* Test against branded browsers. */
    // {
    //   name: 'Microsoft Edge',
    //   use: { ...devices['Desktop Edge'], channel: 'msedge' },
    // },
    // {
    //   name: 'Google Chrome',
    //   use: { ...devices['Desktop Chrome'], channel: 'chrome' },
    // },
  ],

  /* Run your local dev server before starting the tests */
  // webServer: {
  //   command: 'npm run start',
  //   url: 'http://127.0.0.1:3000',
  //   reuseExistingServer: !process.env.CI,
  // },
});
For screenshot and video recording, you can also consider the following options. They help save storage and make it easy to pinpoint failures:
screenshot: 'only-on-failure',     // Save screenshot only on failure
video: 'retain-on-failure',        // Save video only on failure
trace: 'on-first-retry',           // Collect trace only on failure
2.3 Install VS Code & Playwright Extension (Optional – only needed if you’ll edit scripts)
Download and install VS Code from https://code.visualstudio.com
Launch VS Code and click the Extensions icon.
Search for Playwright Test for VSCode and install it.
Open the folder you created in step 2.1 (the playwright directory) via File → Open Folder… → playwright.
2.4 Understand Playwright Codegen’s Strengths & Limitations
Strengths
One‑click recording of user flows
Auto‑generated semantic locators (e.g. getByRole, getByText)
Visual replay via Trace Viewer
Cross‑browser support and cloud execution
Limitations
The recorder only captures simple, visible in‑page actions (clicks, typing, etc.). Any behavior that requires extra orchestration or isn’t directly triggered by a DOM event must be added manually via Playwright’s API. Common gaps include:
Scrolling & delays
The recorder won’t capture page scrolls, zooms, or arbitrary “wait” pauses. You must insert snippets or copy example code (e.g. page.mouse.wheel, page.waitForTimeout, etc.) after recording.
Locator precision
Automatically generated selectors can be overly broad (e.g. #root). Right‑click in the Inspector to switch to more semantic locators like getByRole or getByText.
Custom interactions
For hover menus, drag & drop, right‑click/context menus, file upload/download, browser dialogs, keyboard shortcuts, window/tab switching, etc., the recorder cannot produce the necessary code.
3. Step‑by‑Step Guide
3.1 Recording Your Script
3.1.1 Start Recording
Run in your system terminal — or click Record Playwright Script in VS Code’s Testing panel:
npx playwright codegenThis opens:
A browser window, where you click, type, and navigate.
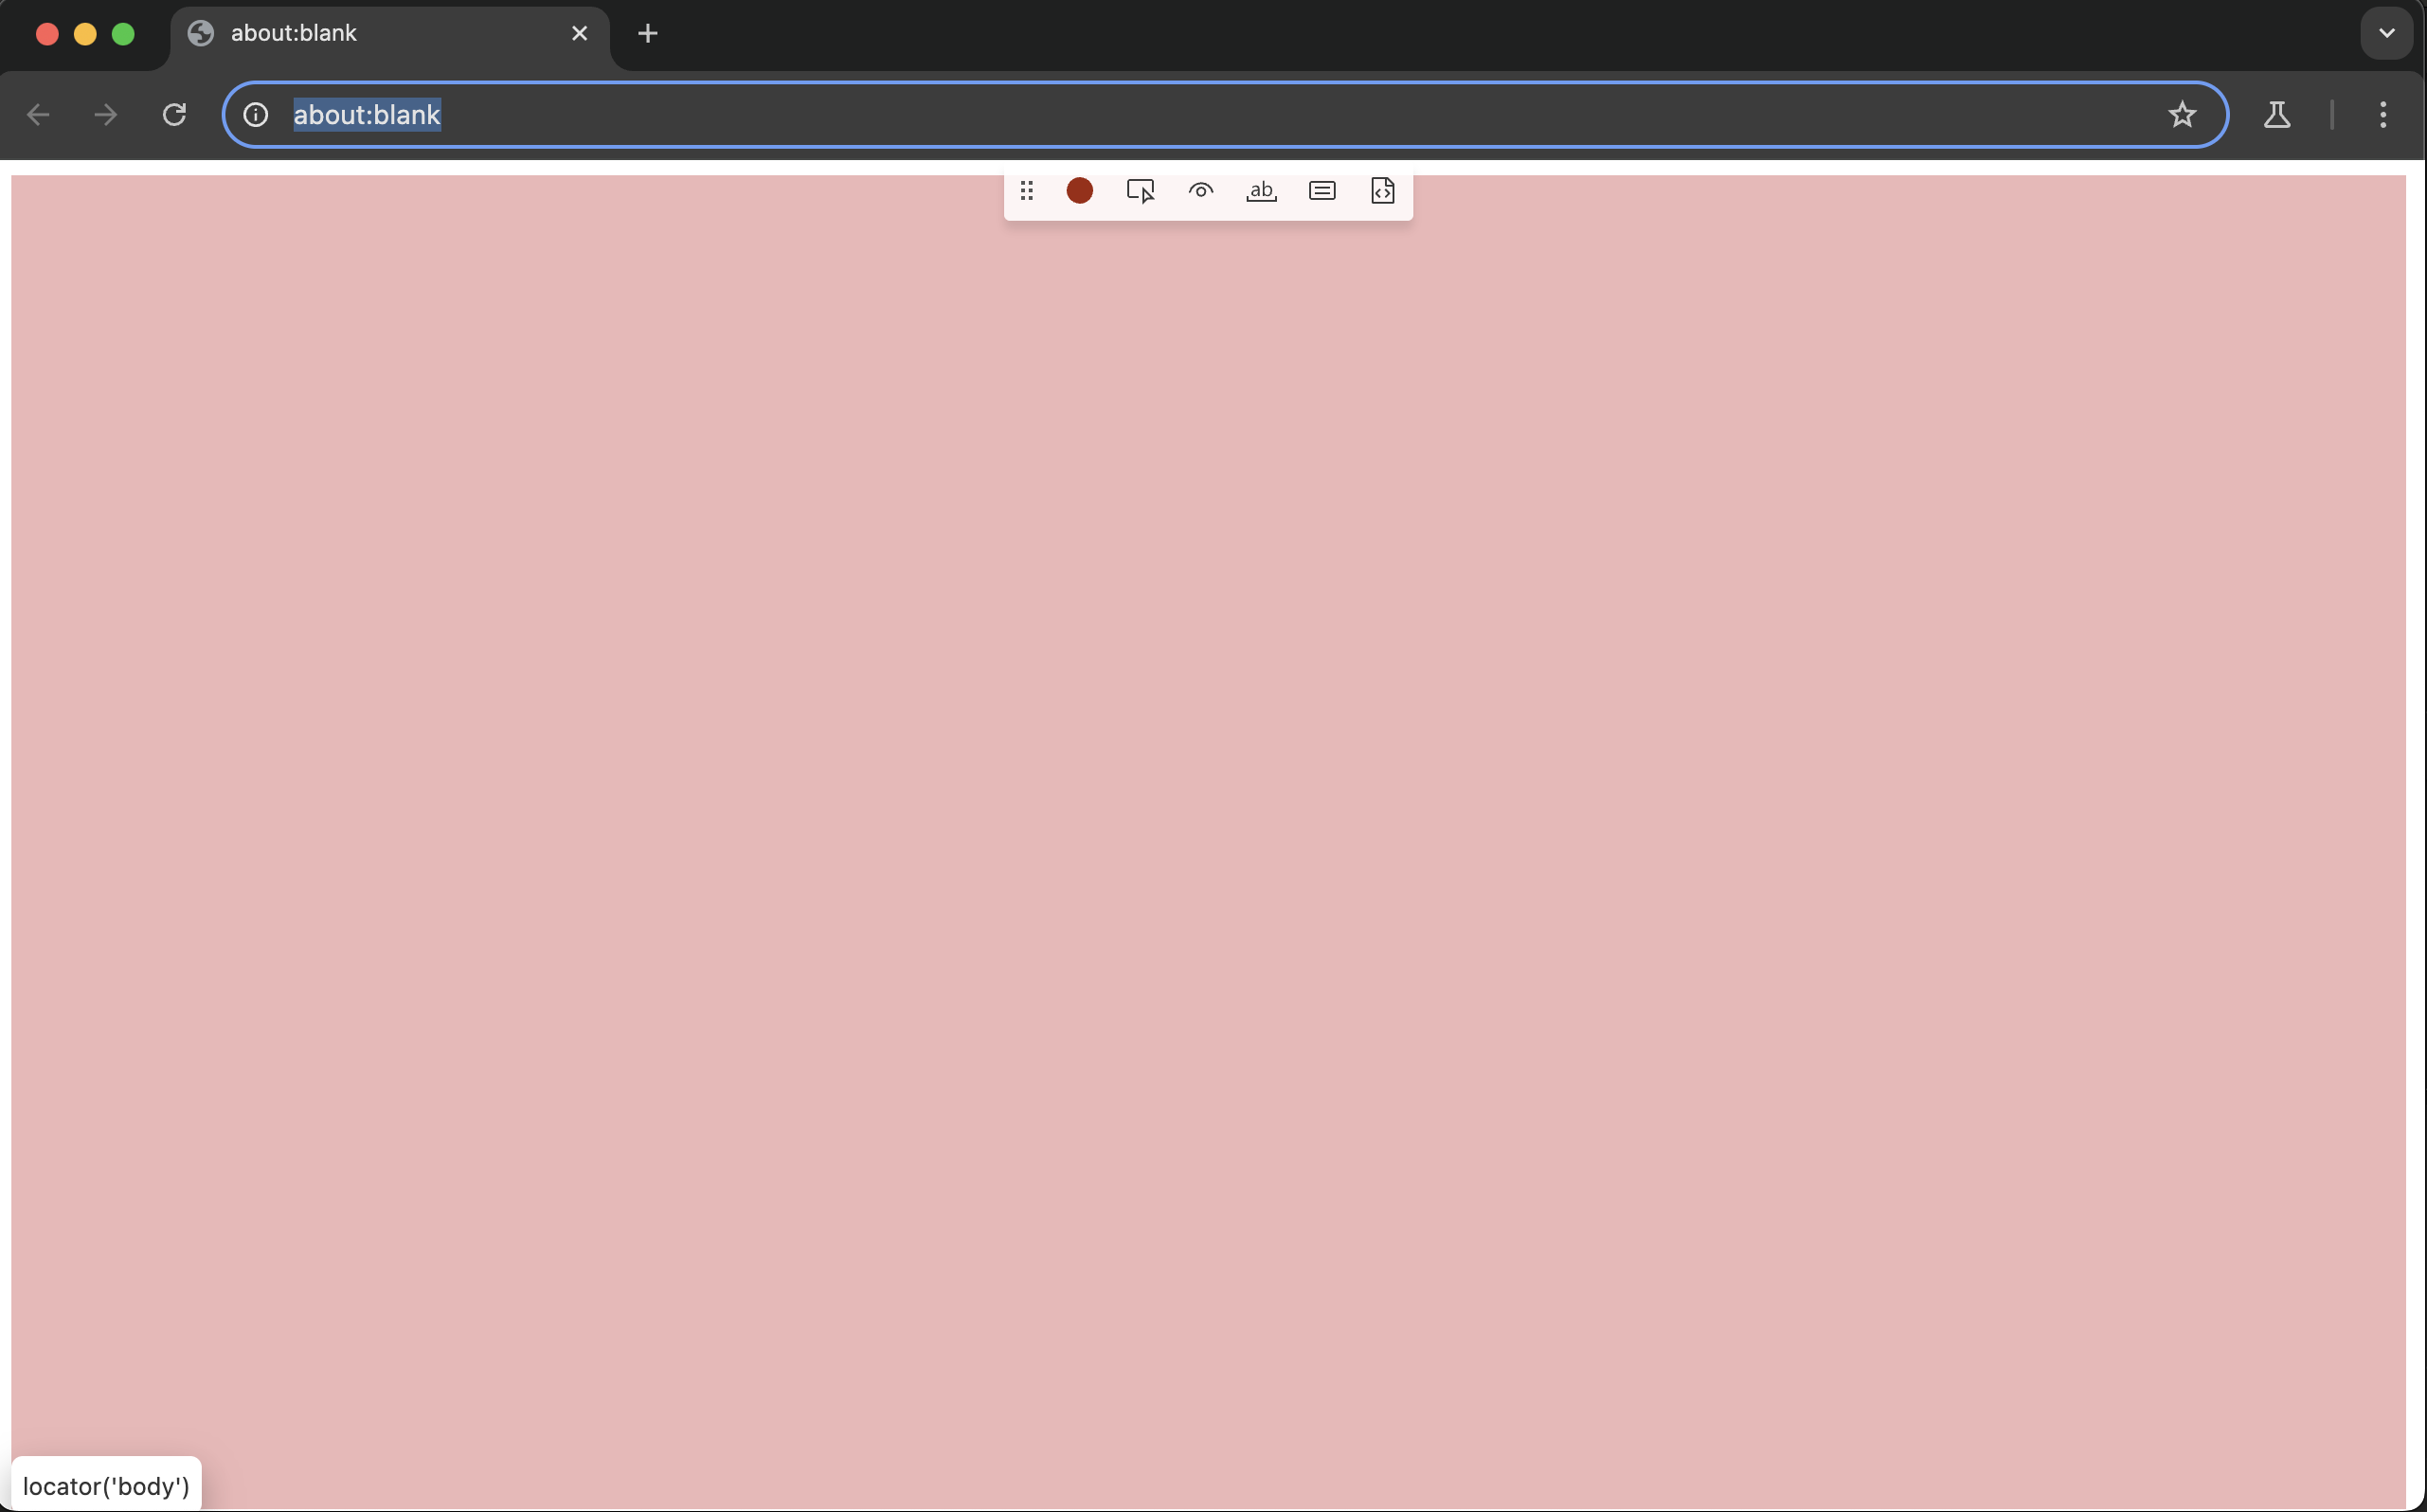
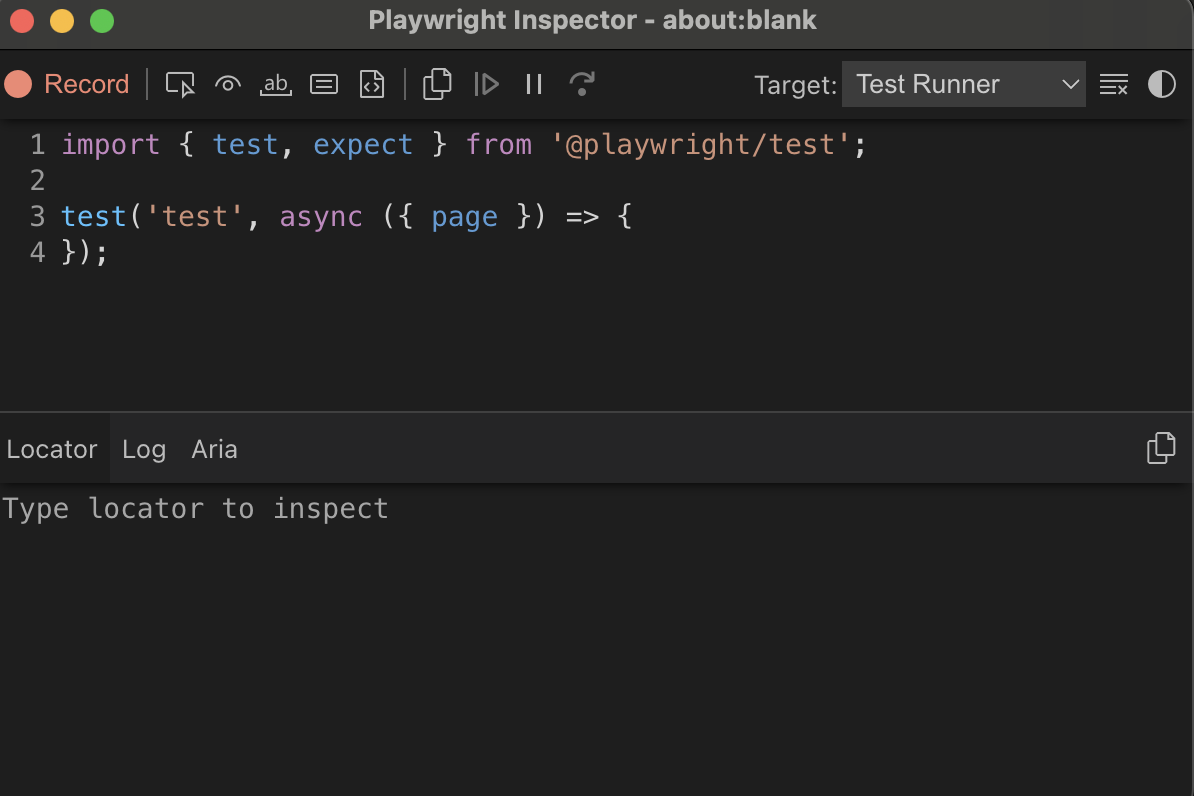
The Inspector, which shows a toolbar and the script being generated in real time.
3.1.2 Execute Your Business Flow
In the browser, perform the steps you want to automate. Use the Inspector tools:
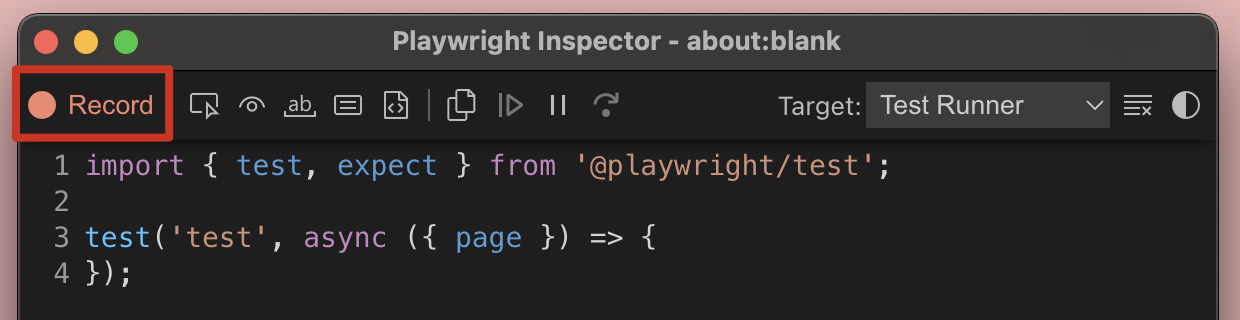
🔴 Record / Stop
Purpose: Verify that the target element is rendered and visible on the page (not hidden, covered, or transparent).
Usage: Select the Record/Stop tool in the Inspector, then carry out your actions in the browser.
Pick Locator
Purpose: Display the recommended Playwright locator for any element.
Usage: Select the Pick Locator tool, then click any element in the browser; its locator appears in the Inspector’s Locator pane.

Assert Visibility
Purpose: Generate a visibility assertion that the element is present and visible.
Usage: Select Assert Visibility, then click the element in the browser.
Example codes generated by codegen:
await expect(page.locator('button#submit')).toBeVisible();Assert Text
Purpose: Generate a text assertion for any element type (e.g.,
<div>,<span>,<li>,<h1>).How it works: Reads the element’s
innerText, trims whitespace, and matches exactly or via regex.Example codes generated by codegen:
await expect(page.locator('h1.page-title')).toHaveText('欢迎使用 MyApp');Assert Value
Purpose: Assert the
valueattribute of form controls (<input>,<textarea>,<select>).How it works: Reads and compares the element’s
.valueproperty instead of its text content.Example codes generated by codegen:
await expect(page.getByRole('textbox', { name: '邮箱' })).toHaveValue('example@example.com');Assert Snapshot
Purpose: Compare an element’s snapshot of its Accessibility Tree (ARIA tree) in YAML format.
How it works: Captures the element and its subtree in the browser’s accessibility representation—including roles (heading, paragraph, button), names (visible text), and hierarchy (e.g., heading levels)—then flattens it into YAML for regression testing or structure validation.
Example codes generated by codegen:
await expect(page.locator('#comp-lp6ttrri')).toMatchAriaSnapshot(`
  - heading "Rapid Fault Detection" [level=3]
  - paragraph: Advanced capabilities for quick identification and pinpointing of issues, minimizing downtime and enhancing software reliability.
  - paragraph
  - heading "Seamless DevOps Integration" [level=3]
  - paragraph: Effortlessly integrates with existing DevOps tools, providing insightful analytics and secure testing, all within a streamlined workflow.
  - paragraph
  - heading "Streamlined Automation" [level=3]
  - paragraph: Automates repetitive testing tasks, enabling continuous and efficient testing throughout the DevOps cycle.
  - paragraph
  - heading "Comprehensive Testing Environments" [level=3]
  - paragraph: Supports multi-environment testing, including complex user journey simulations, ensuring thorough software validation.
`);
3.1.3 Save scripts
After completing your flow, save scripts:
With IDE: Click Stop Recording in the Inspector toolbar; the script loads into VS Code.
Without IDE: Click Copy script, then paste into a new
*.spec.jsfile underplaywright/testsand save.
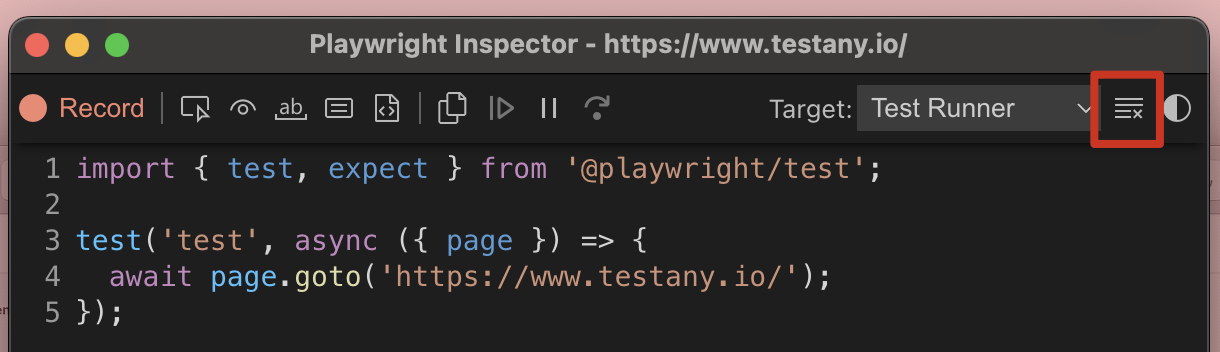
Accidental action? Click Clear to remove the last recorded step from your script.
3.2 Manually Extend Your Script (Optional)
While Playwright’s codegen tool excels at recording basic interactions, it cannot automatically capture certain specialized actions or may produce suboptimal recordings for them — requiring manual supplementation afterward. The categories below outline common operations that the recorder cannot accurately capture, along with example code.
3.2.1 Scroll Page
// Scroll page down 500px
await page.mouse.wheel(0, 500);
3.2.2 Explicit Wait
// Wait until the button is visible and then click it
await page.waitForSelector('button:has-text("Submit")');
await page.click('button:has-text("Submit")');
3.2.3 Wait for Network Response
await page.click('button:has-text("Search")');
await page.waitForResponse(resp =>
  resp.url().includes('/api/search') && resp.status() === 200
);
3.2.4 Hover Interactions
await page.locator('.menu-button').hover();
await page.click('.menu-item:has-text("Settings")');
3.2.5 Drag-and-Drop
await page.locator('#source').dragTo(page.locator('#target'));3.2.6 File Upload
await page.setInputFiles('input[type="file"]', 'tests/assets/example.png');3.2.7 Window or Tab Switching
const [newPage] = await Promise.all([
  page.waitForEvent('popup'),
  page.click('a[target="_blank"]'),
]);
await newPage.waitForLoadState();
await expect(newPage).toHaveURL(/dashboard/);
3.2.8 Download / Dialog Handling
// handle alert
page.on('dialog', async dialog => {
  expect(dialog.message()).toContain('Are you sure');
  await dialog.accept();
});

await page.click('button:has-text("Delete")');

// Download file
const [ download ] = await Promise.all([
  page.waitForEvent('download'),
  page.click('button:has-text("Download")'),
]);
const path = await download.path();
Note: These examples are curated from the official Playwright documentation, community discussions, and real user feedback. Please adapt them based on your project context.
3.3 Run and Replay Script
In your terminal, run:
npx playwright test --uiThis launches the Playwright Test Runner UI.
3.3.1 One-Click or Per-Test Execution
Run button (▶):
▶ at file level: runs all tests in the file
▶ at test level: runs a specific test only
Run All Tests button: executes all cases in parallel
3.3.2 Real-Time Logs
The right panel shows logs, assertions, and console.log output. Clicking any test navigates to the relevant logs.
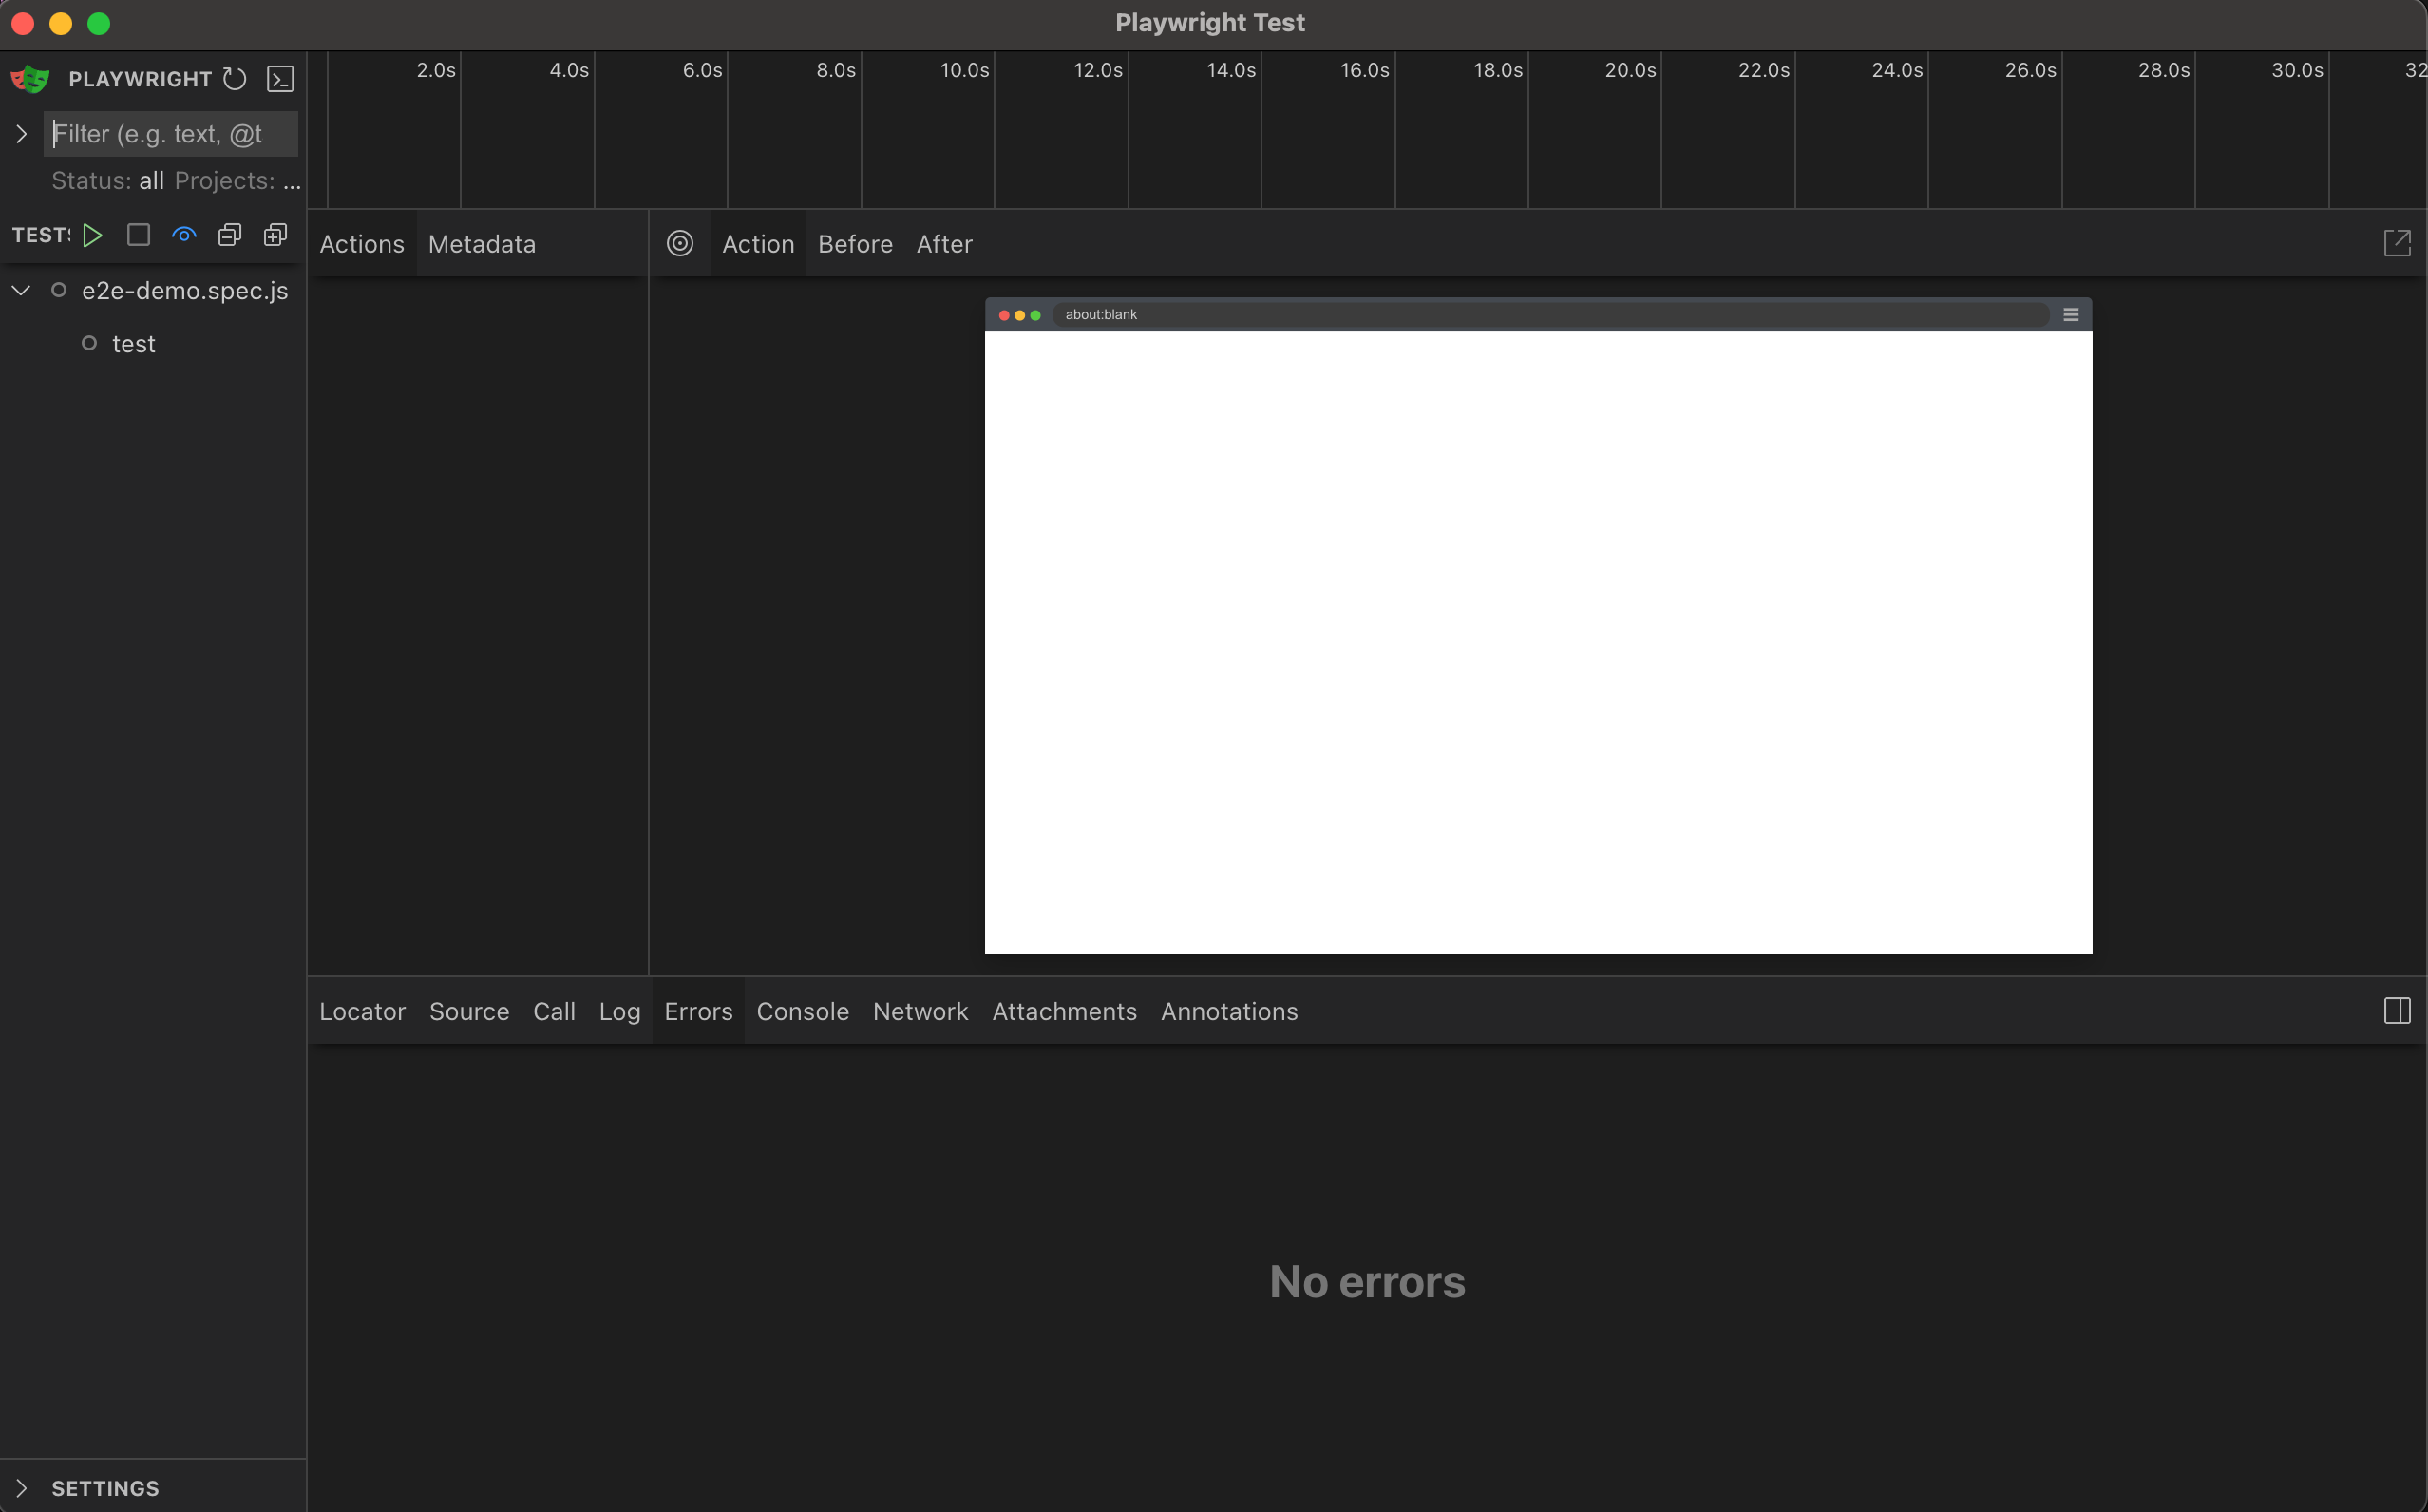
3.3.3 Trace Viewer
If trace: 'on' is enabled or the test failed, you will see a timeline of actions.
Step-by-step replay
DOM snapshots, network logs, and screenshots per step
For more details, refer to the official Playwright Trace Viewer documentation.