
Managing Test Gatekeeper
Introduction to Gatekeeper
In the dynamic world of software development, efficiency and responsiveness are key. "Gatekeeper," a feature in our Testany platform, stands as a testament to this, offering users the ability to trigger specific groups of tests through webhooks.
Defining Gatekeeper and Its Key Components
Feature Overview
Gatekeeper empowers users to establish triggers for executing predefined pipeline groups when specific events occur, thereby enhancing ongoing product optimization and issue monitoring. This feature is not only beneficial for product teams aiming to improve release and deployment quality, but it is also invaluable for Operations teams. It allows for automatic testing of specific user journeys or features based on alert signals from monitoring platforms such as Splunk or Dynatrace. This capability significantly boosts troubleshooting efficiency during, and even before, the occurrence of incidents.
Understanding the Gatekeeper Key
Each Gatekeeper is assigned a unique identifier, the "Gatekeeper Key." This 10-character key, starting with 'G', represents the Gatekeeper and the corresponding workspace.
Webhook in Gatekeeper
Gatekeeper's functionality is enhanced by the integration of webhooks. These webhooks are essential for triggering the execution of test pipelines. Users can configure these webhooks to respond to various events, enabling the automated execution of tests in response to defined conditions. This integration is pivotal for maintaining an efficient and responsive testing environment, adapting quickly to changes and new data within the operational ecosystem.
Role of the Gatekeeper Owner
The Gatekeeper Owner plays a pivotal role, having authority to edit and manage Gatekeepers. They define the conditions under which tests are triggered and ensure the right team members are notified.
Setting Up a Gatekeeper
Creating a Gatekeeper involves a few straightforward steps:
Creating a Gatekeeper:
If you’re a member of a workspace, you may see a new tab in the left-side bar named “Gatekeeper”. Click it and you’ll be redirected to the Gatekeeper section.

After you click the “Create Gatekeeper” button at the top-right corner, a create wizard will pop up:
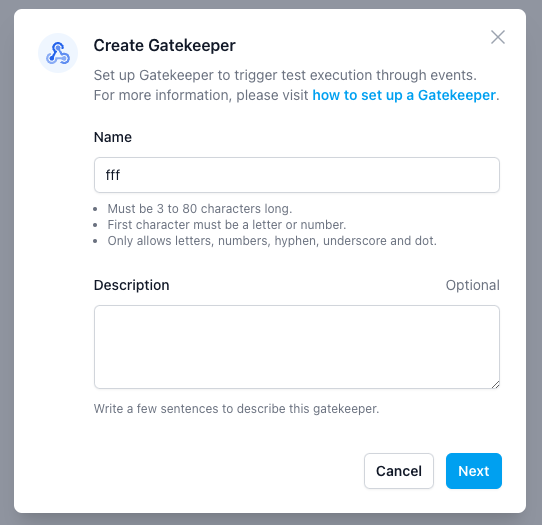
After you put a name for the Gatekeeper as well as the description (optional), click next. You’ve already created a new Gatekeeper.
Configuring Webhooks and Test Pipelines:You can get into the Gatekeeper detail page to further edit the Gatekeeper.
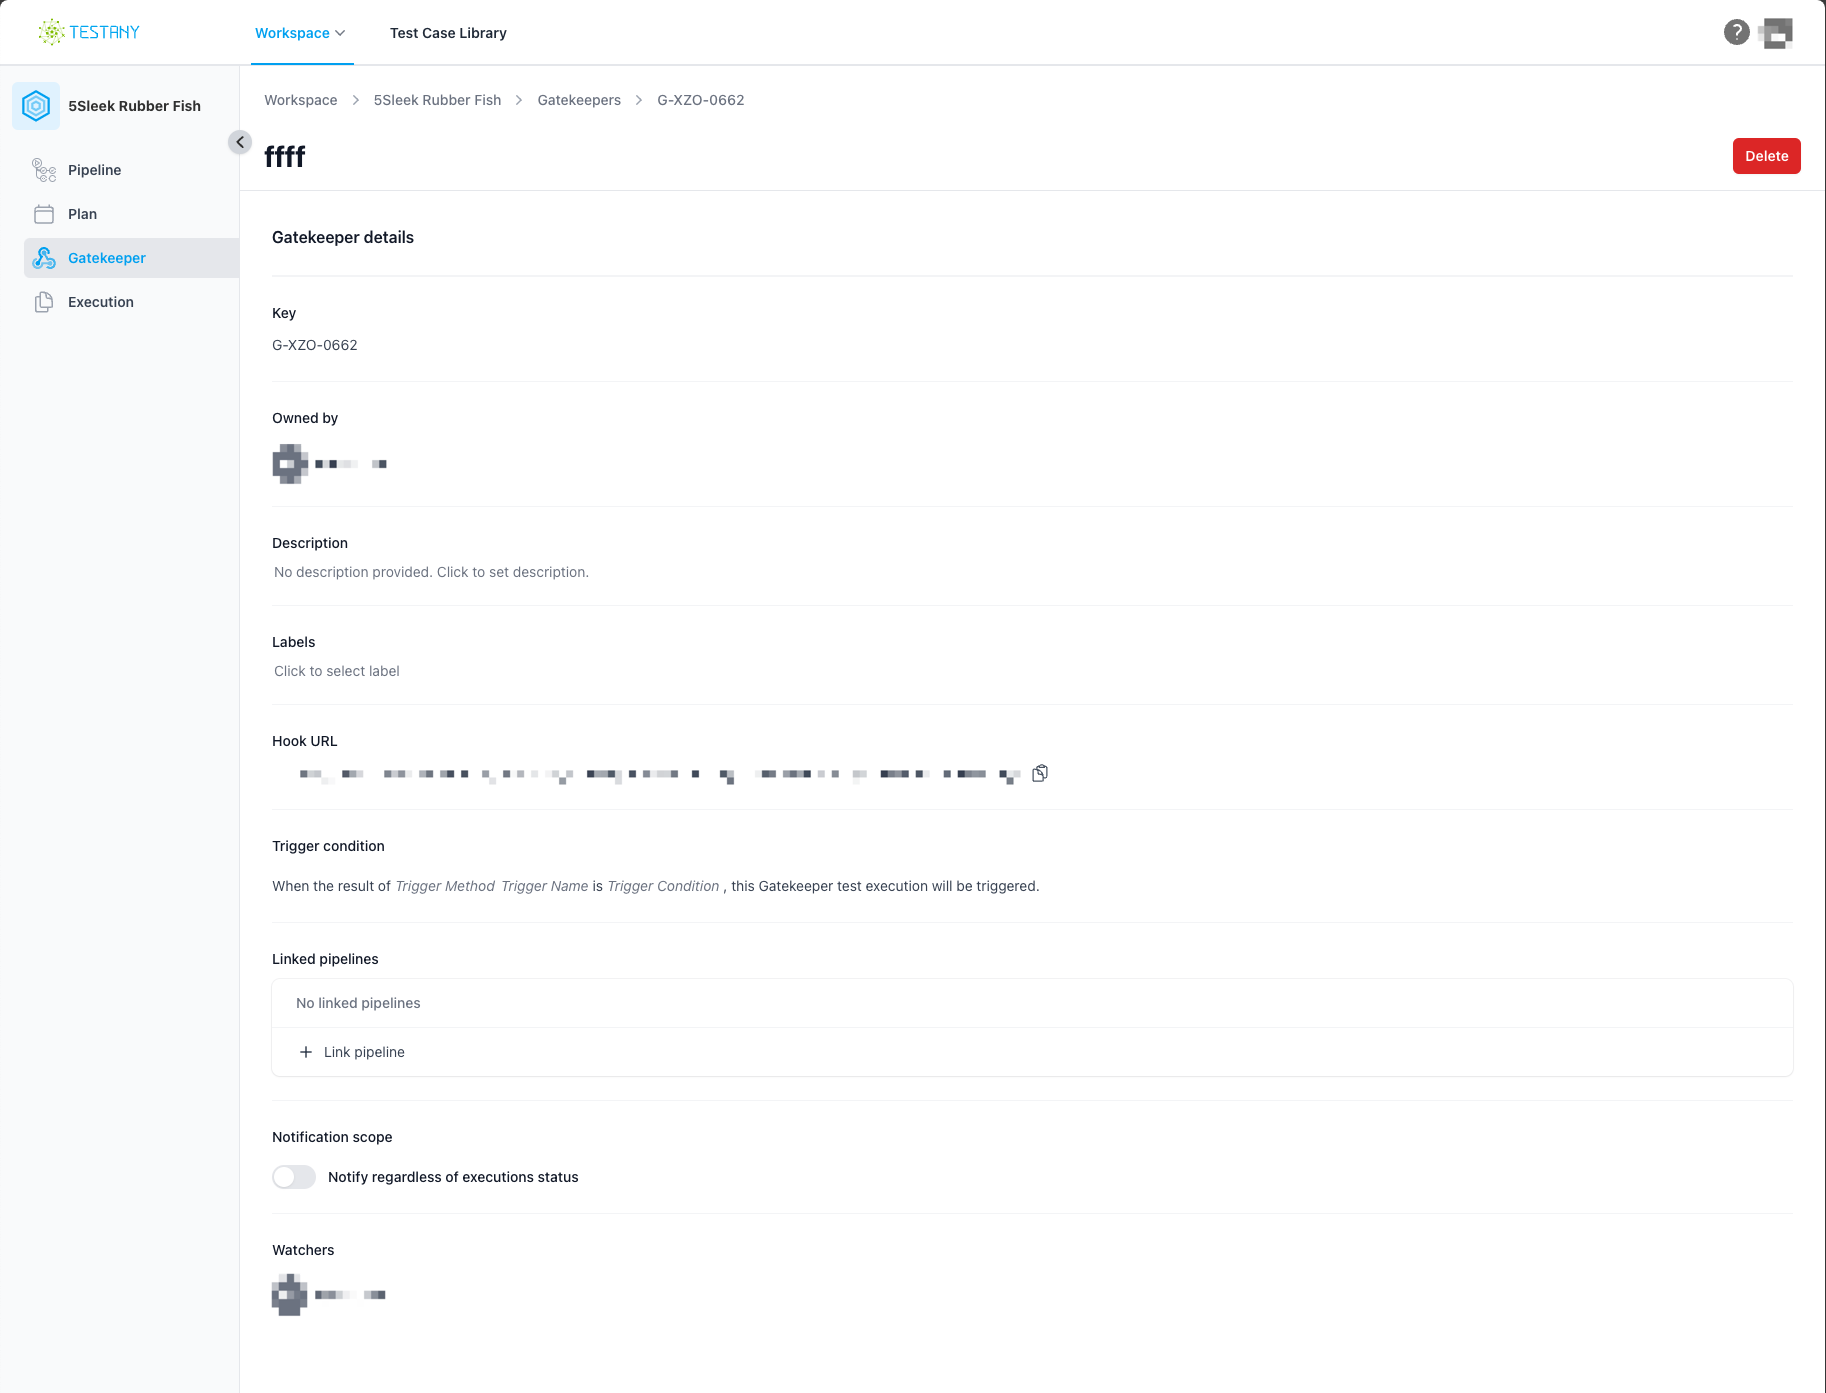
The Gatekeeper detail page is an inline edit page. If you have the permission to edit it, you may follow “click-to-edit, save-on-blur” method to edit all fields in the page except Gatekeeper key.
Please note:Trigger Method,Trigger NameandTrigger Conditionfield in the Trigger Condition section is very important for you and other users to understand the Gatekeeper you setup, please fill it as precise as possible.
Defining Trigger Conditions: The Gatekeeper Owner sets the criteria for test execution.
Managing Gatekeepers
Gatekeepers can be easily managed by:
Editing and Updating Gatekeepers: Make changes to configurations as needed.
Adding Users to the Watcher List: Ensure relevant team members are kept in the loop.
Transfer ownership to other workspace members: to make sure the Gatekeeper is well maintained.
Best Practices for Using Gatekeepers
Example 1: Jenkins CI/CD Pipelines Integration
Integrating Gatekeeper with Jenkins CI/CD pipelines can automate test executions during various CI/CD steps. To set up a webhook in Jenkins, follow these steps:
Configure Jenkins for GitHub. Jenkins Documentation
Set up a GitHub Webhook. GitHub/Jenkins: Setting up Webhooks
Configure webhook in Jenkins Pipeline. Adding a GitHub Webhook in Your Jenkins Pipeline
Example 2: Splunk Integration for Metric-Based Triggers
Setting up Gatekeeper with Splunk enables the triggering of automated tests when certain metrics reach predefined levels. For configuring a webhook in Splunk, consult the following resources:
Creating a Search Query
login into your Splunk, create your business query.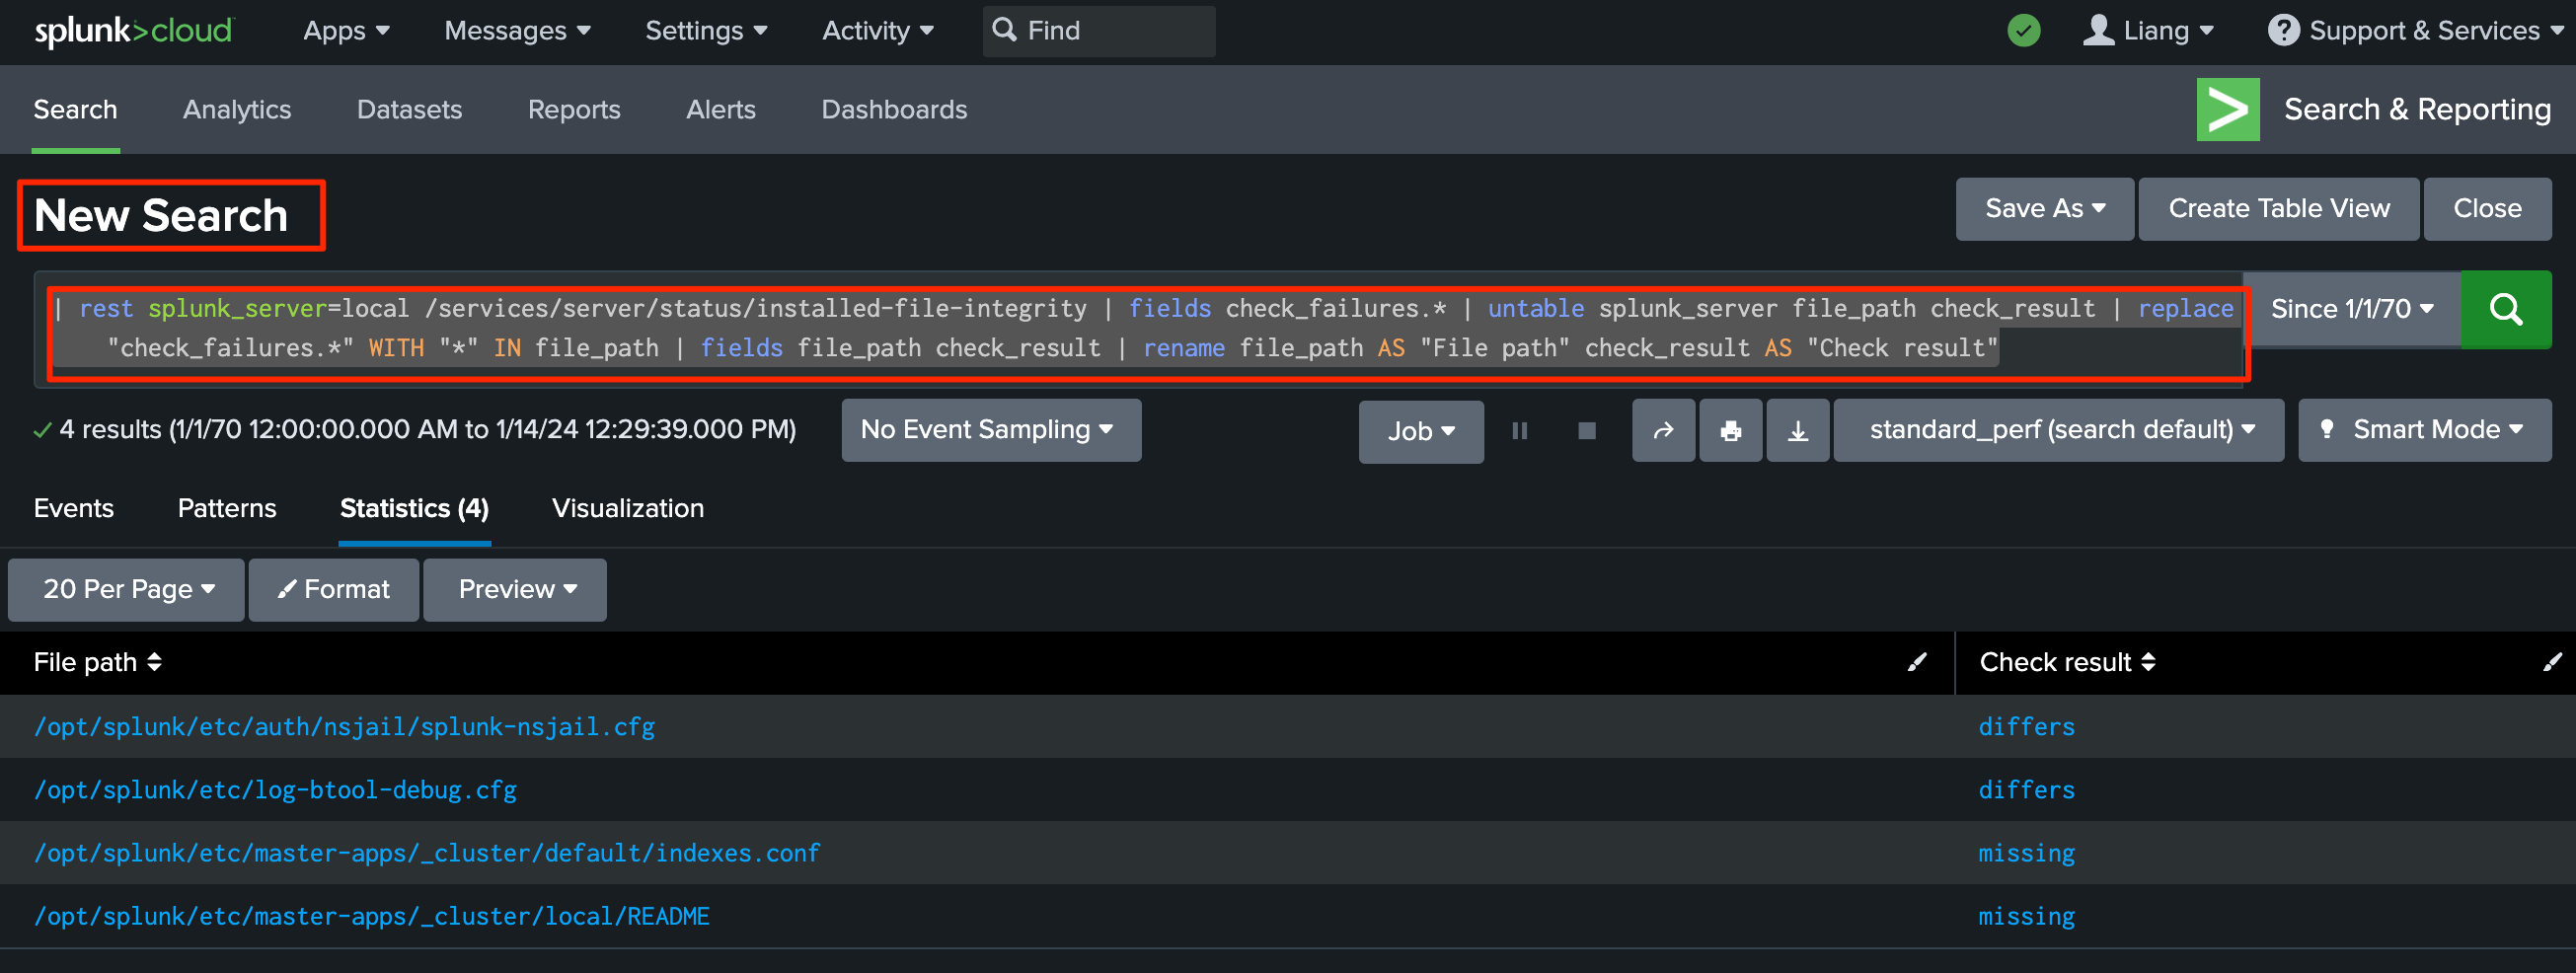
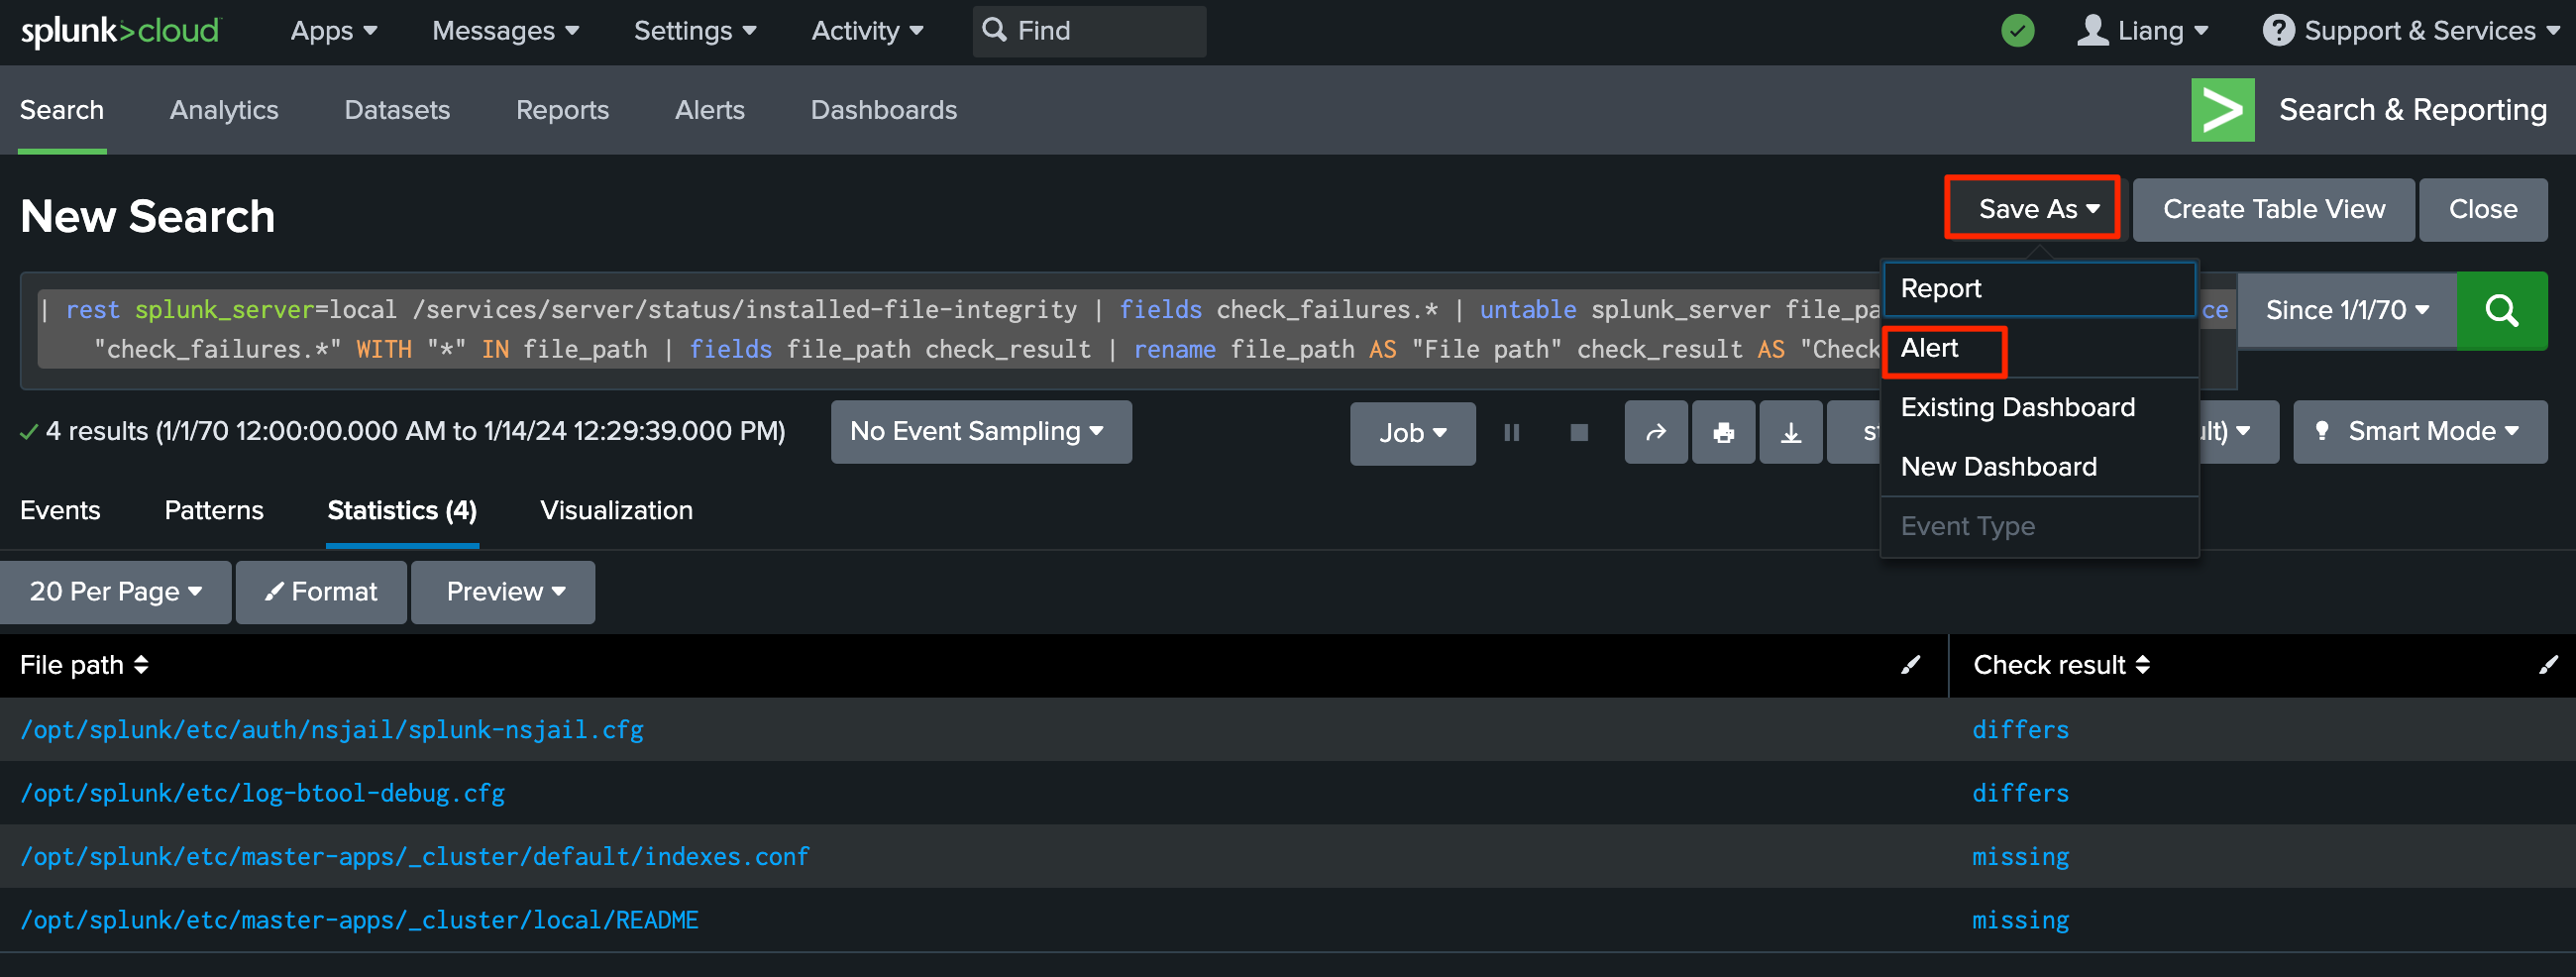
Saving the Search as an Alert
Configuring Alert Conditions
Configure the conditions under which your alert should trigger. This involves setting thresholds, time ranges, and specifying the severity of the alert.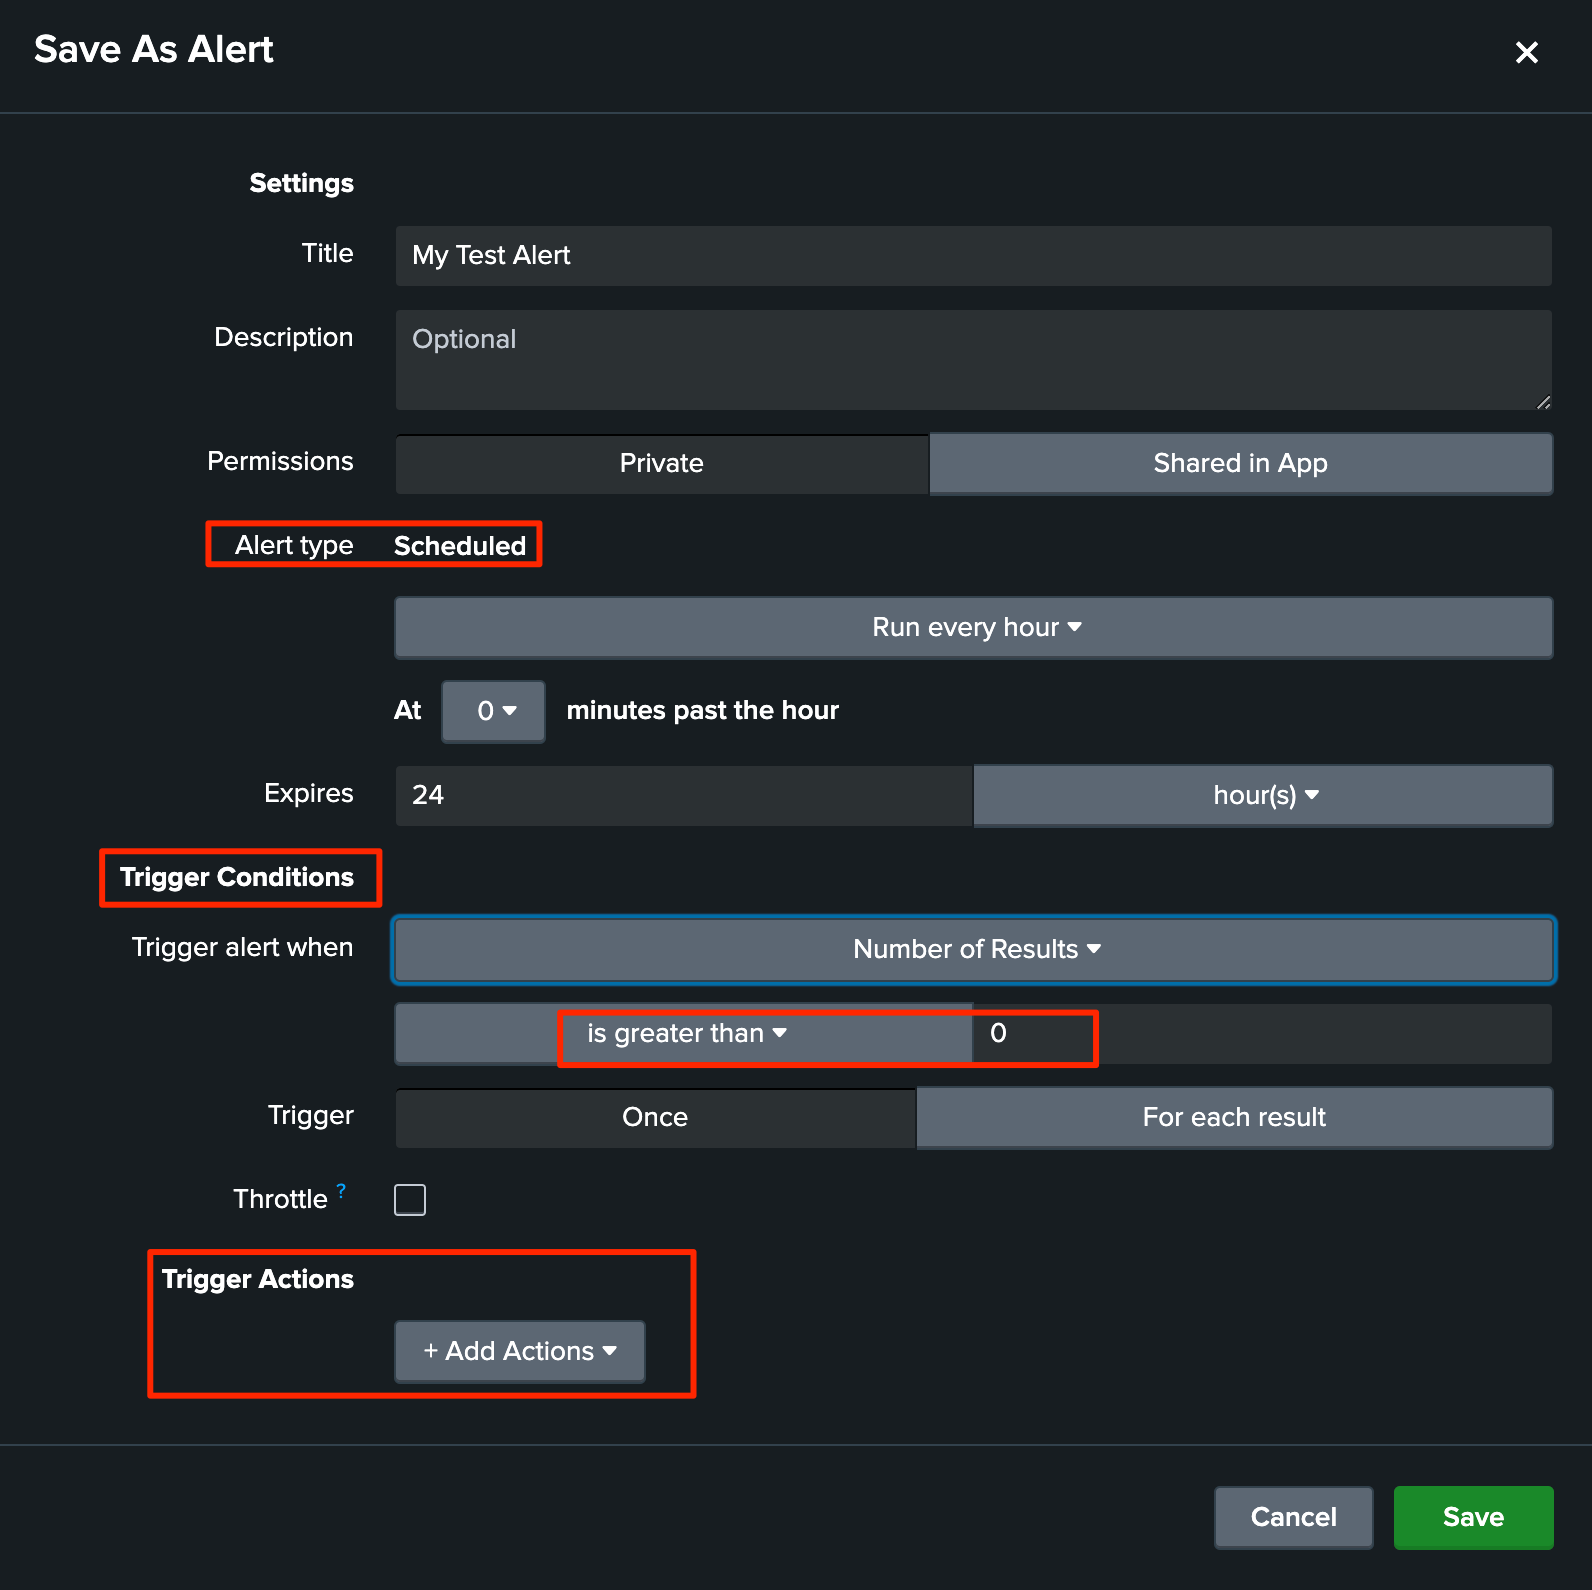
Setting up the Webhook
Click 'Add Actions' then Choose ‘Webhook'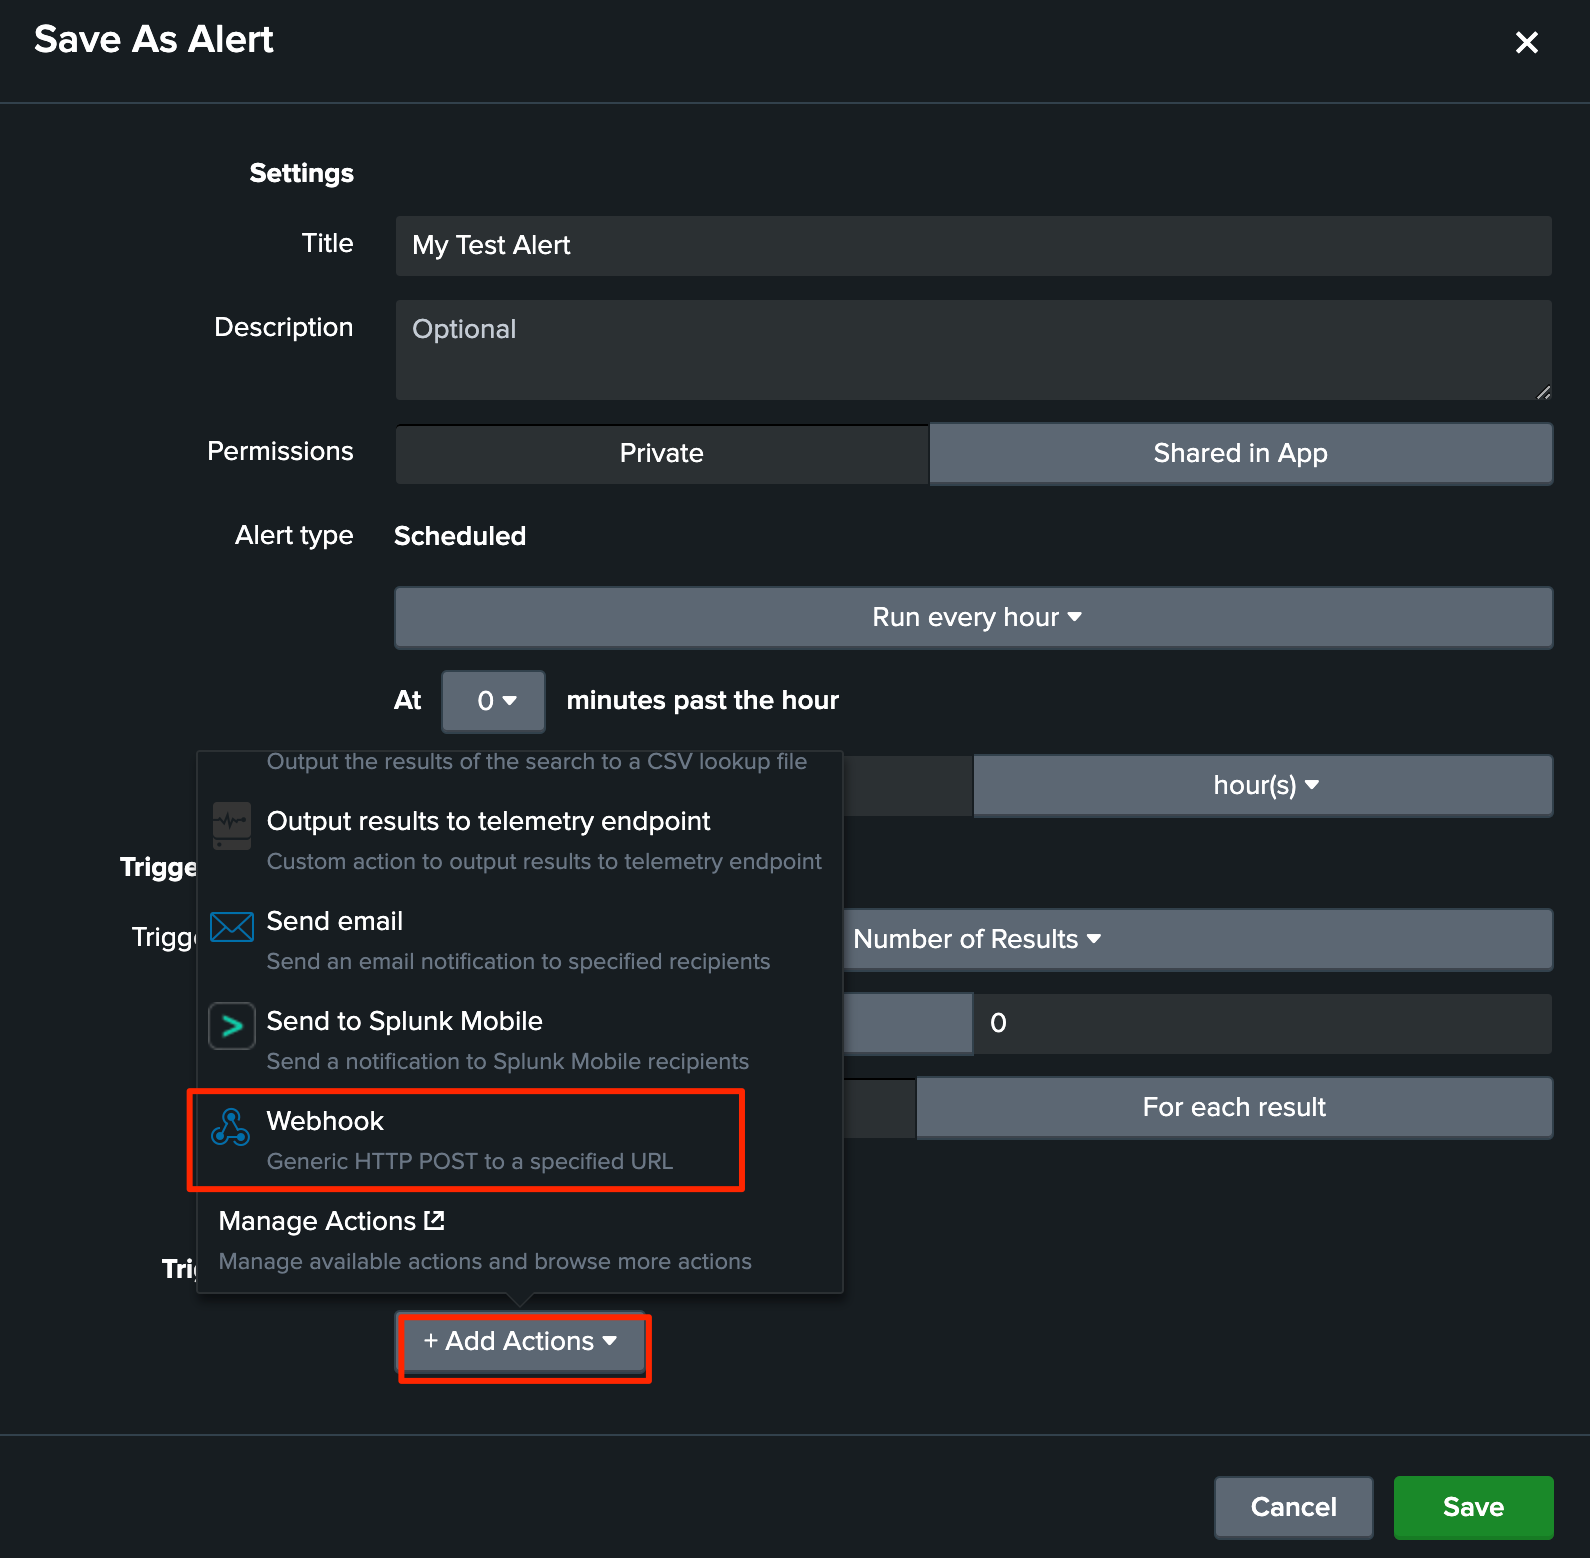
Paste your gatekeeper hook URL which get from Testany gatekeeper
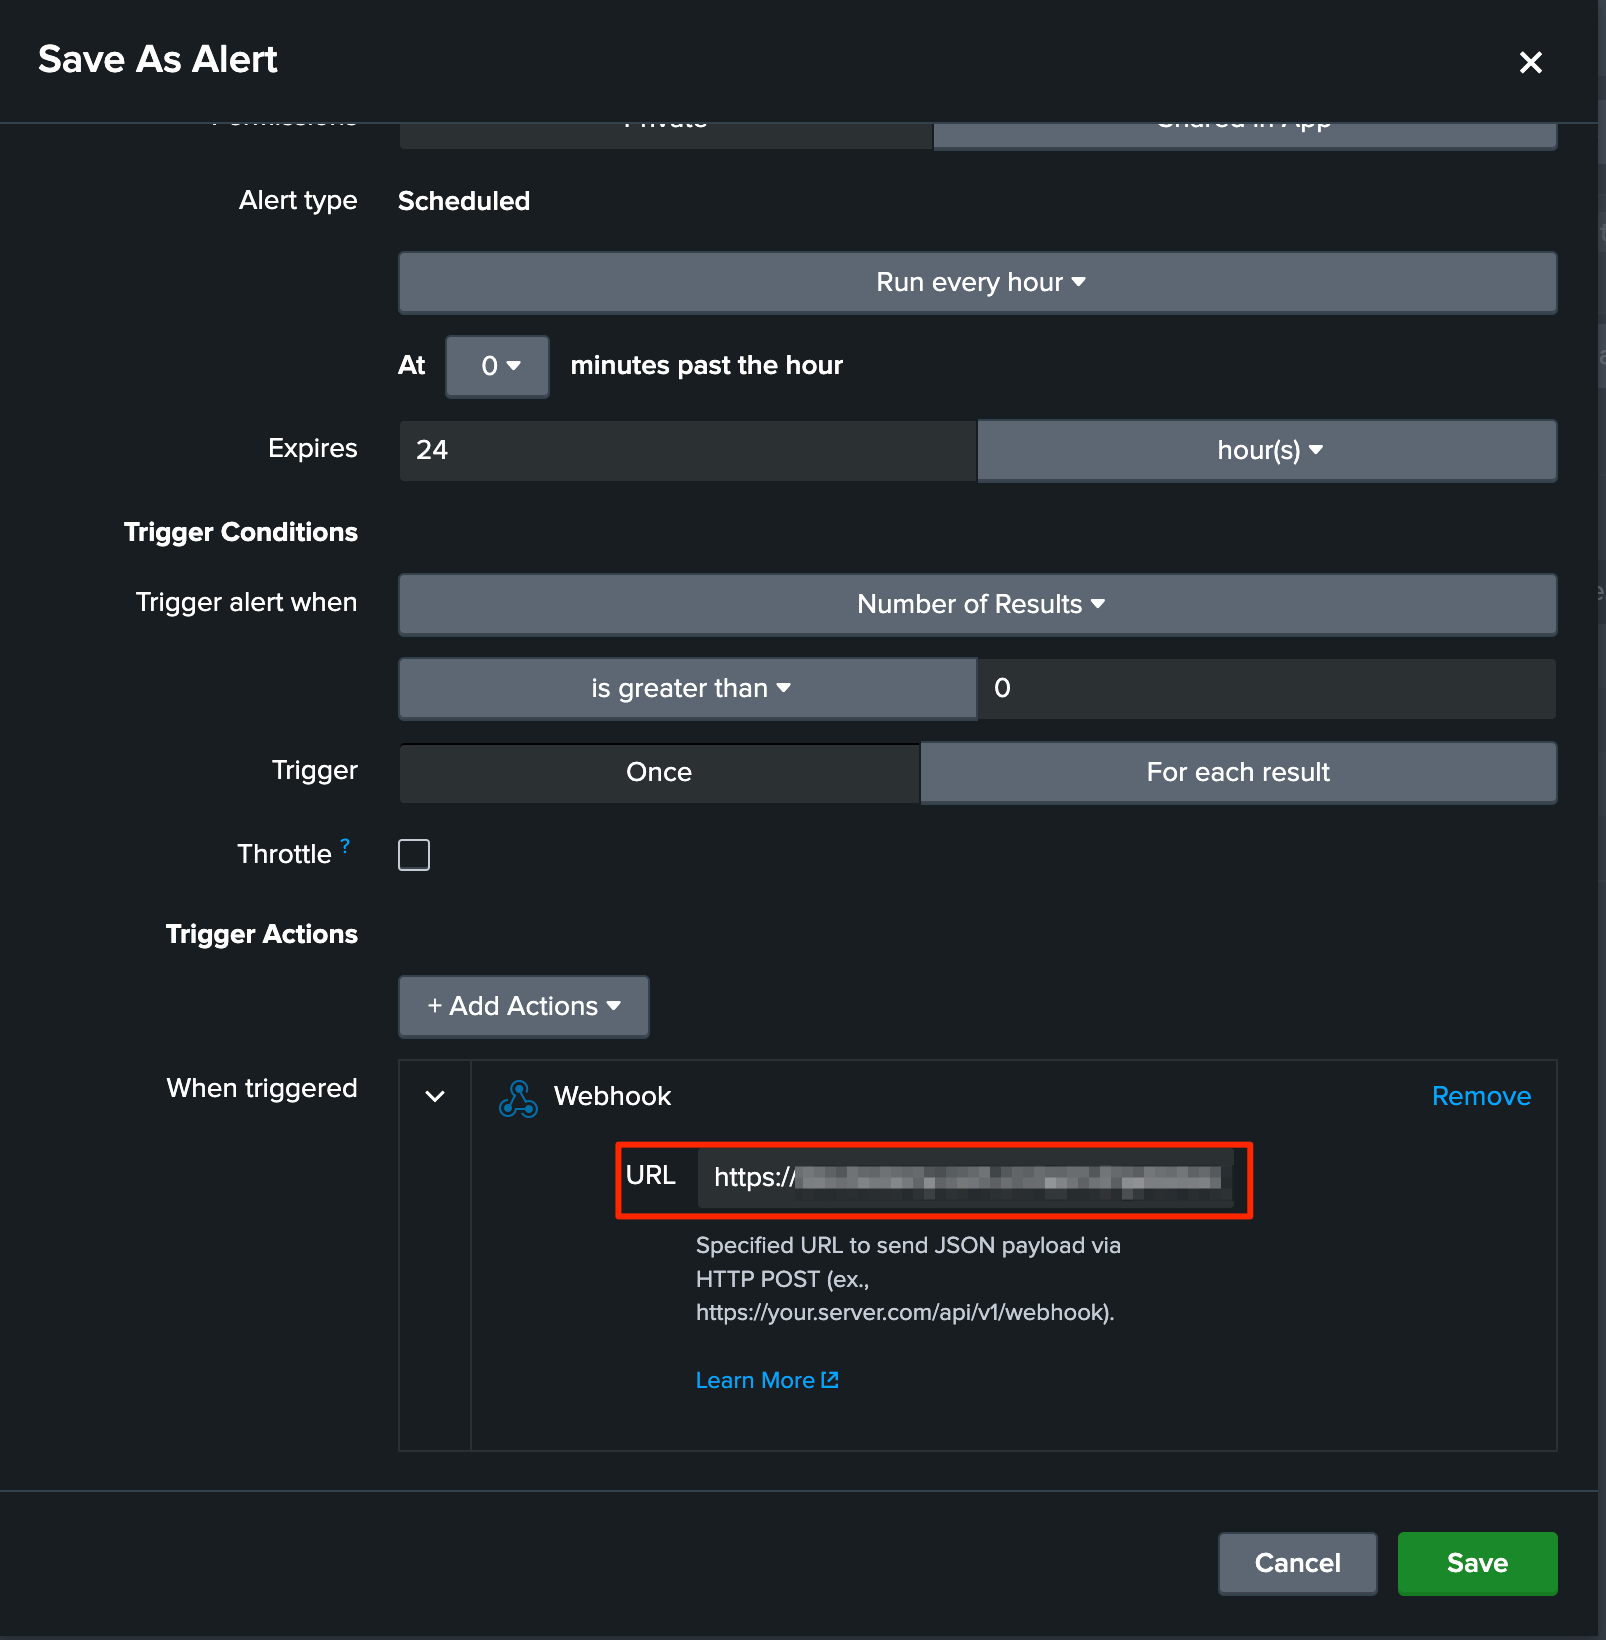
Testany Hook URL
Saving and Enabling the Alert
Click 'Save'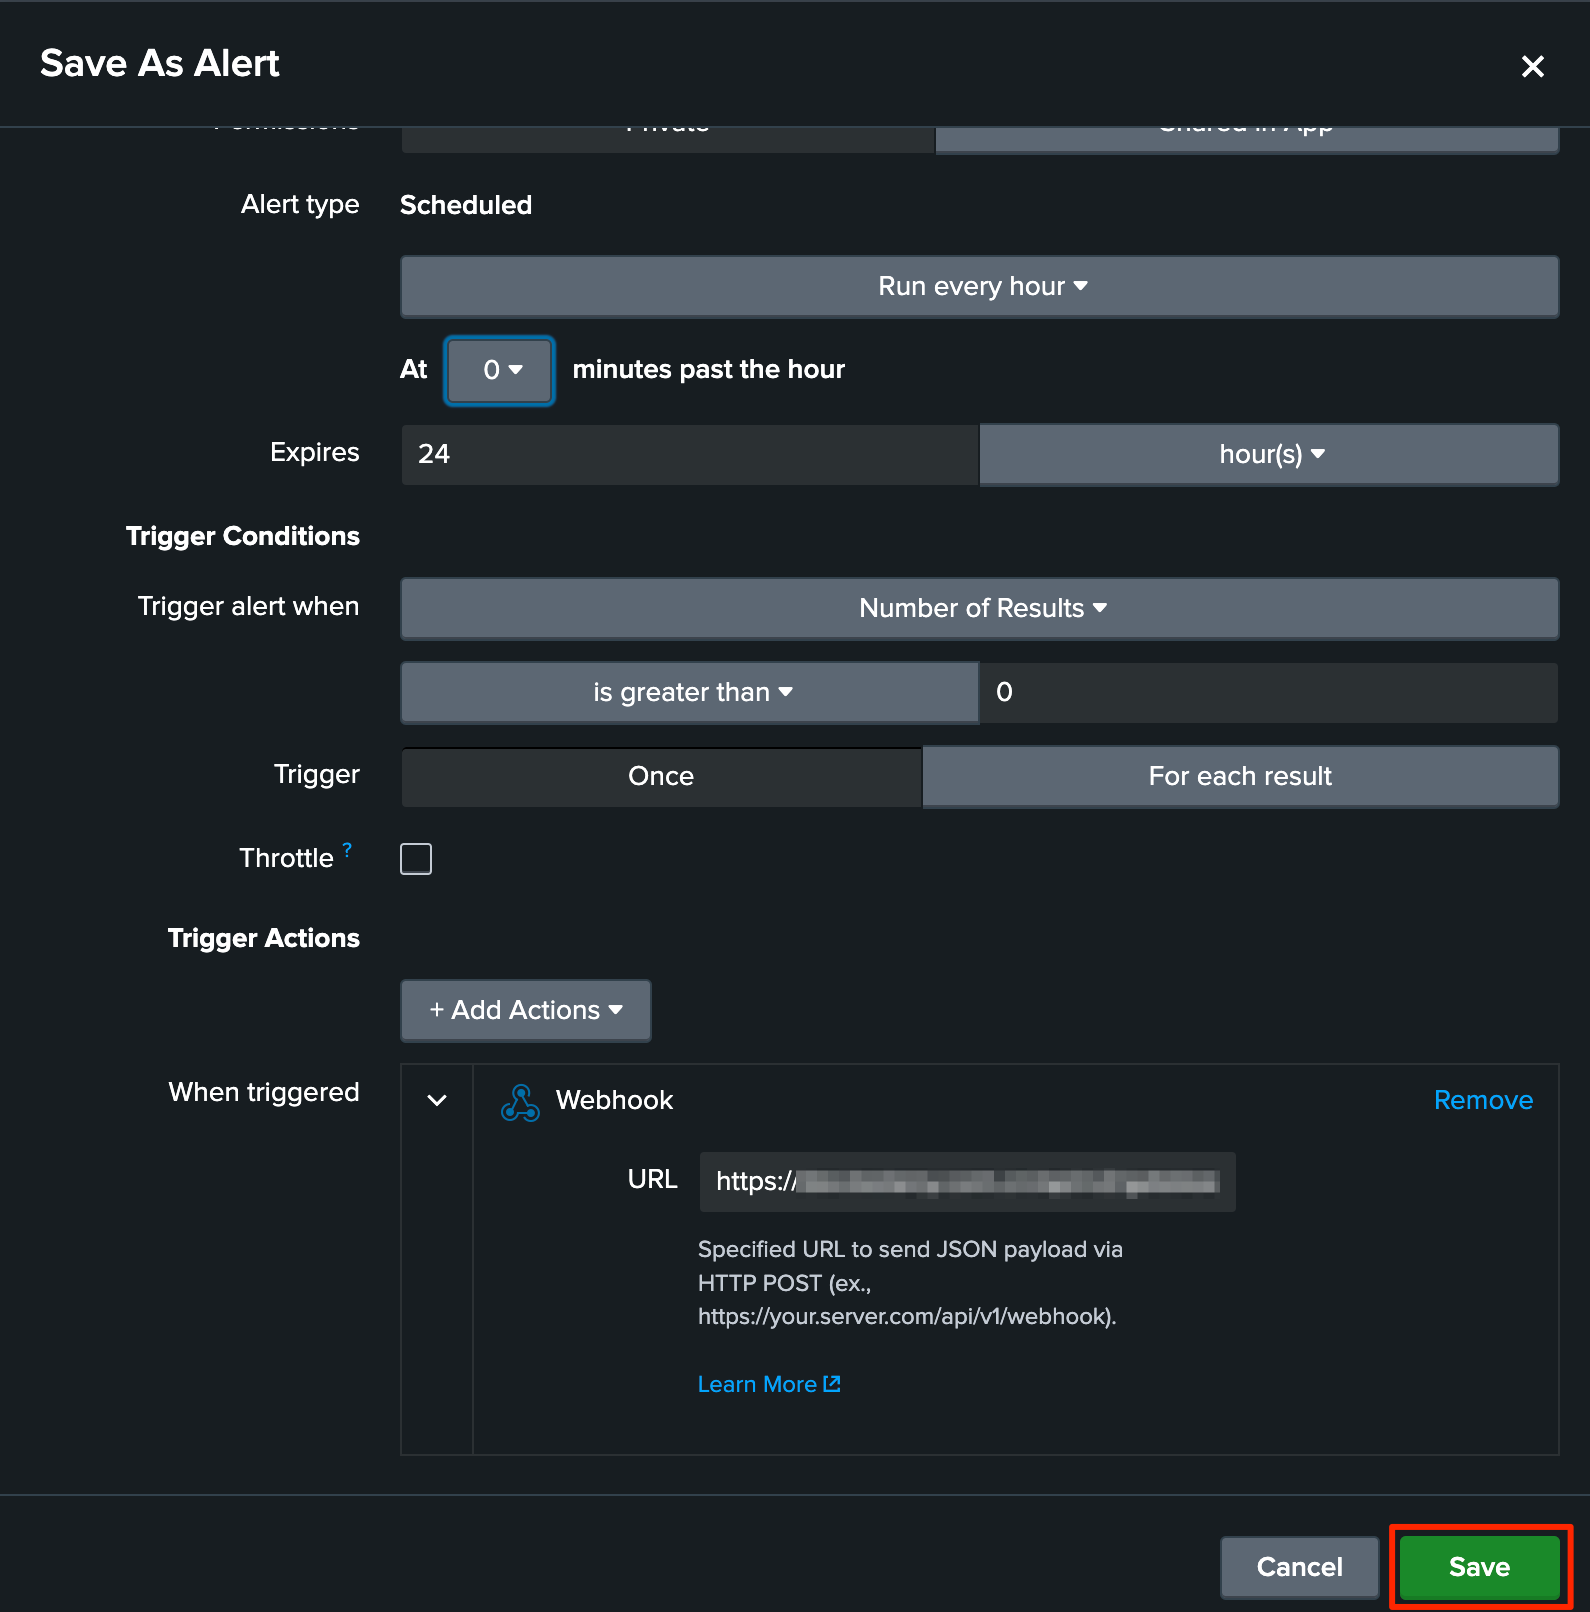
Click 'View Alert'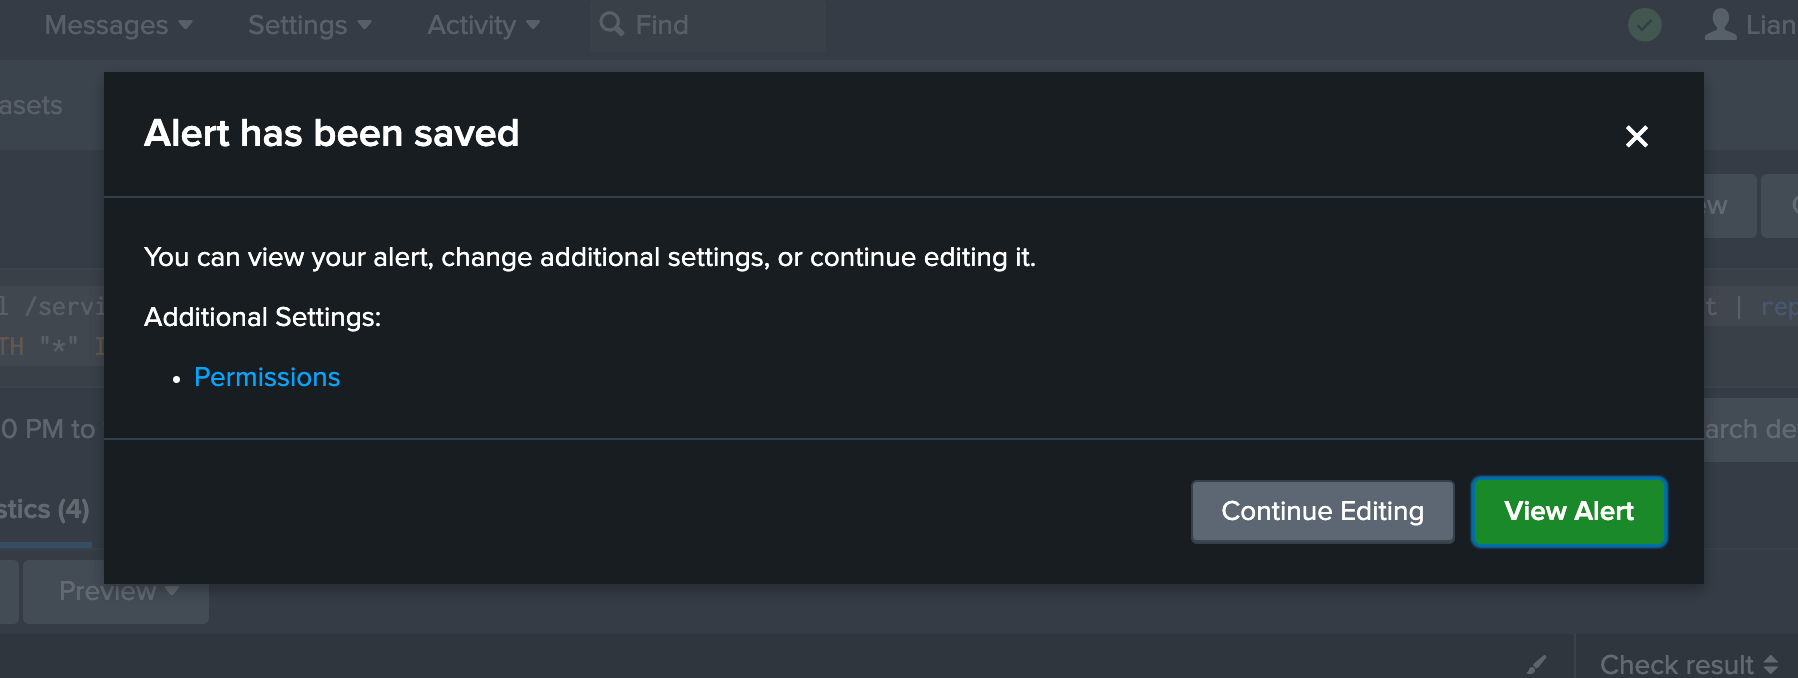
Conclusion
Gatekeeper is a powerful tool in the Testany platform, offering streamlined and efficient test management. By understanding and utilizing its features effectively, teams can significantly enhance their testing processes and overall product quality.