Playwright Codegen 最佳实践
1. 概览
本指南将带你使用 Playwright 内置的录制器(codegen),轻松捕捉你的第一个端到端测试——无需繁重的脚本编写。你将学会:
准备本地环境。
启动录制器,并可视化地与目标应用交互。
自动生成基础测试脚本,随着你的点击和输入实时记录。
保存并运行 录制好的脚本,仅需一条命令。
对脚本做最小限度的编辑。
完成后,你将能够自信地录制、微调并执行轻量级的 Playwright 测试,而无需深入编写代码,为日后学习更高级功能打下坚实基础。更多关于 Playwright 的内容,请查看官方文档:playwright.dev 。
2. 前提条件
2.1 搭建环境
2.1.1 创建本地目录
打开文件管理器(Windows Explorer / macOS Finder),在您指定的路径(如桌面、文档等)新建文件夹,命名为 playwright。
该目录将作为 Playwright 项目的根目录,用于后续安装和脚本存放。
2.1.2 安装 Node.js
前往 https://nodejs.org 下载 LTS 安装包,双击安装。
2.1.3 切换到 Playwright 目录
用终端或 VS Code 集成终端切换到2.1.1创建的 Playwright 的目录
无 IDE:打开系统终端(Terminal/命令提示符)输入命令。
有 IDE:在 VS Code 底部打开集成终端执行。
cd Playwright文件夹绝对路径2.1.4 安装 Playwright
下载并执行初始化脚本
CODEnpm init playwright@latest选择语言(
JavaScript/TypeScript),用↑↓键选择后按回车CODEDo you want to use TypeScript or JavaScript? _ › TypeScript JavaScript选择测试目录:默认
tests,也可改成e2e或其他文件名等CODEWhere to put your end-to-end tests? › tests是否添加 GitHub Actions Workflow
CODEAdd a GitHub Actions workflow? (y/N) › falseY:在 .github/workflows/playwright.yml 下生成一个 CI 配置,让您 push 到 GitHub 后自动在 GitHub Actions 上运行 Playwright 测试、生成报告和上传视频/截图。N:跳过,需要自行配置 CI。
安装 Playwright 浏览器(必须选
true,可直接回车)CODEInstall Playwright browsers (can be done manually via 'npx playwright install')? (Y/n) › true
完成提示
Happy Hacking!脚本会自动:
更新或创建 package.json(添加依赖、测试脚本命令)
生成
playwright.config.js/.ts创建测试目录和示例文件
生成 GitHub Actions 配置(如果选了)
2.2 配置 Playwright
要在 Playwright 中获得录屏→回放→调试的最佳体验,建议您根据个人需求选择以下 playwright.config.js 的关键配置来开启截图(screenshot)、操作轨迹(trace)和视频录制(video)。
第16行:设置超时时间为30s
第34行:设置每次执行都收集 trace
第35行:设置每次执行都生成视频
第41-74行:选择在哪些浏览器上并行测试
// @ts-check
import { defineConfig, devices } from '@playwright/test';

/**
 * Read environment variables from file.
 * https://github.com/motdotla/dotenv
 */
// import dotenv from 'dotenv';
// import path from 'path';
// dotenv.config({ path: path.resolve(__dirname, '.env') });

/**
 * @see https://playwright.dev/docs/test-configuration
 */
export default defineConfig({
  timeout: 30 * 1000,
  testDir: './tests',
  /* Run tests in files in parallel */
  fullyParallel: true,
  /* Fail the build on CI if you accidentally left test.only in the source code. */
  forbidOnly: !!process.env.CI,
  /* Retry on CI only */
  retries: process.env.CI ? 1 : 0,
  /* Opt out of parallel tests on CI. */
  workers: process.env.CI ? 1 : undefined,
  /* Reporter to use. See https://playwright.dev/docs/test-reporters */
  reporter: 'html',
  /* Shared settings for all the projects below. See https://playwright.dev/docs/api/class-testoptions. */
  use: {
    /* Base URL to use in actions like `await page.goto('/')`. */
    // baseURL: 'http://127.0.0.1:3000',

    /* Collect trace when retrying the failed test. See https://playwright.dev/docs/trace-viewer */
    trace: 'on',
    video: 'on',
    // headless: false,
  },

  /* Configure projects for major browsers */
  projects: [
    {
      name: 'chromium',
      use: { ...devices['Desktop Chrome'] },
    },

    // {
    //   name: 'firefox',
    //   use: { ...devices['Desktop Firefox'] },
    // },

    // {
    //   name: 'webkit',
    //   use: { ...devices['Desktop Safari'] },
    // },

    /* Test against mobile viewports. */
    // {
    //   name: 'Mobile Chrome',
    //   use: { ...devices['Pixel 5'] },
    // },
    // {
    //   name: 'Mobile Safari',
    //   use: { ...devices['iPhone 12'] },
    // },

    /* Test against branded browsers. */
    // {
    //   name: 'Microsoft Edge',
    //   use: { ...devices['Desktop Edge'], channel: 'msedge' },
    // },
    // {
    //   name: 'Google Chrome',
    //   use: { ...devices['Desktop Chrome'], channel: 'chrome' },
    // },
  ],

  /* Run your local dev server before starting the tests */
  // webServer: {
  //   command: 'npm run start',
  //   url: 'http://127.0.0.1:3000',
  //   reuseExistingServer: !process.env.CI,
  // },
});
对于截图与视频录制,您还可以考虑以下方案。它可以既节省存储、也能针对失败用例快速定位。
screenshot: 'only-on-failure',     // 失败用例才截图
video: 'retain-on-failure',        // 失败用例才录屏
trace: 'on-first-retry',           // 首次重试时收集 trace
2.3 安装 VS Code & Playwright 插件(可选,仅修改脚本时需)
从 https://code.visualstudio.com 下载 VS Code 并安装。
启动 VS Code,点击“扩展”图标,搜索 ”Playwright Test for VSCode“ 并安装。
打开第 1 步创建的 playwright 文件夹:File → Open Folder… → playwright 。
2.4 了解 Playwright Codegen 的优势与局限
优势:
一键录制、自动生成 getByRole/getByText 定位、可视化回放、跨浏览器云端执行。
局限:
录制器主要记录页面内简单直观的操作(点击、输入文本等)。对于需要额外编排或无法通过浏览器事件直接获知的操作,录制器无从自动生成有效代码。测试人员需要基于Playwright提供的API手动编写这些步骤,以实现完整的用户场景。
滚动 & 延时:录制器不会捕获页面滚动、页面缩放、等待类操作,需要在生成脚本里用“插入片段”或复制示例代码来补充。
定位精度:录制器有时会生成宽泛选择器(如顶层 #root),建议在 Inspector 中右键替换为更语义化的定位器(getByRole/getByText)。
自定义交互类操作:当操作涉及悬停 (Hover)、拖拽 (Drag and Drop)、右键/上下文菜单、文件上传/下载、浏览器对话框、其他特殊交互(包括键盘组合键、窗口切换、新标签页打开等)时,录制器无法自动生成有效代码。
3. 分步指引
3.1 录制脚本
3.1.1 启动录制
在系统自带终端运行以下命令,或在 VS Code 左侧 “Testing” 面板,点击“Record Playwright Script”按钮。
npx playwright codegen此操作会自动打开:
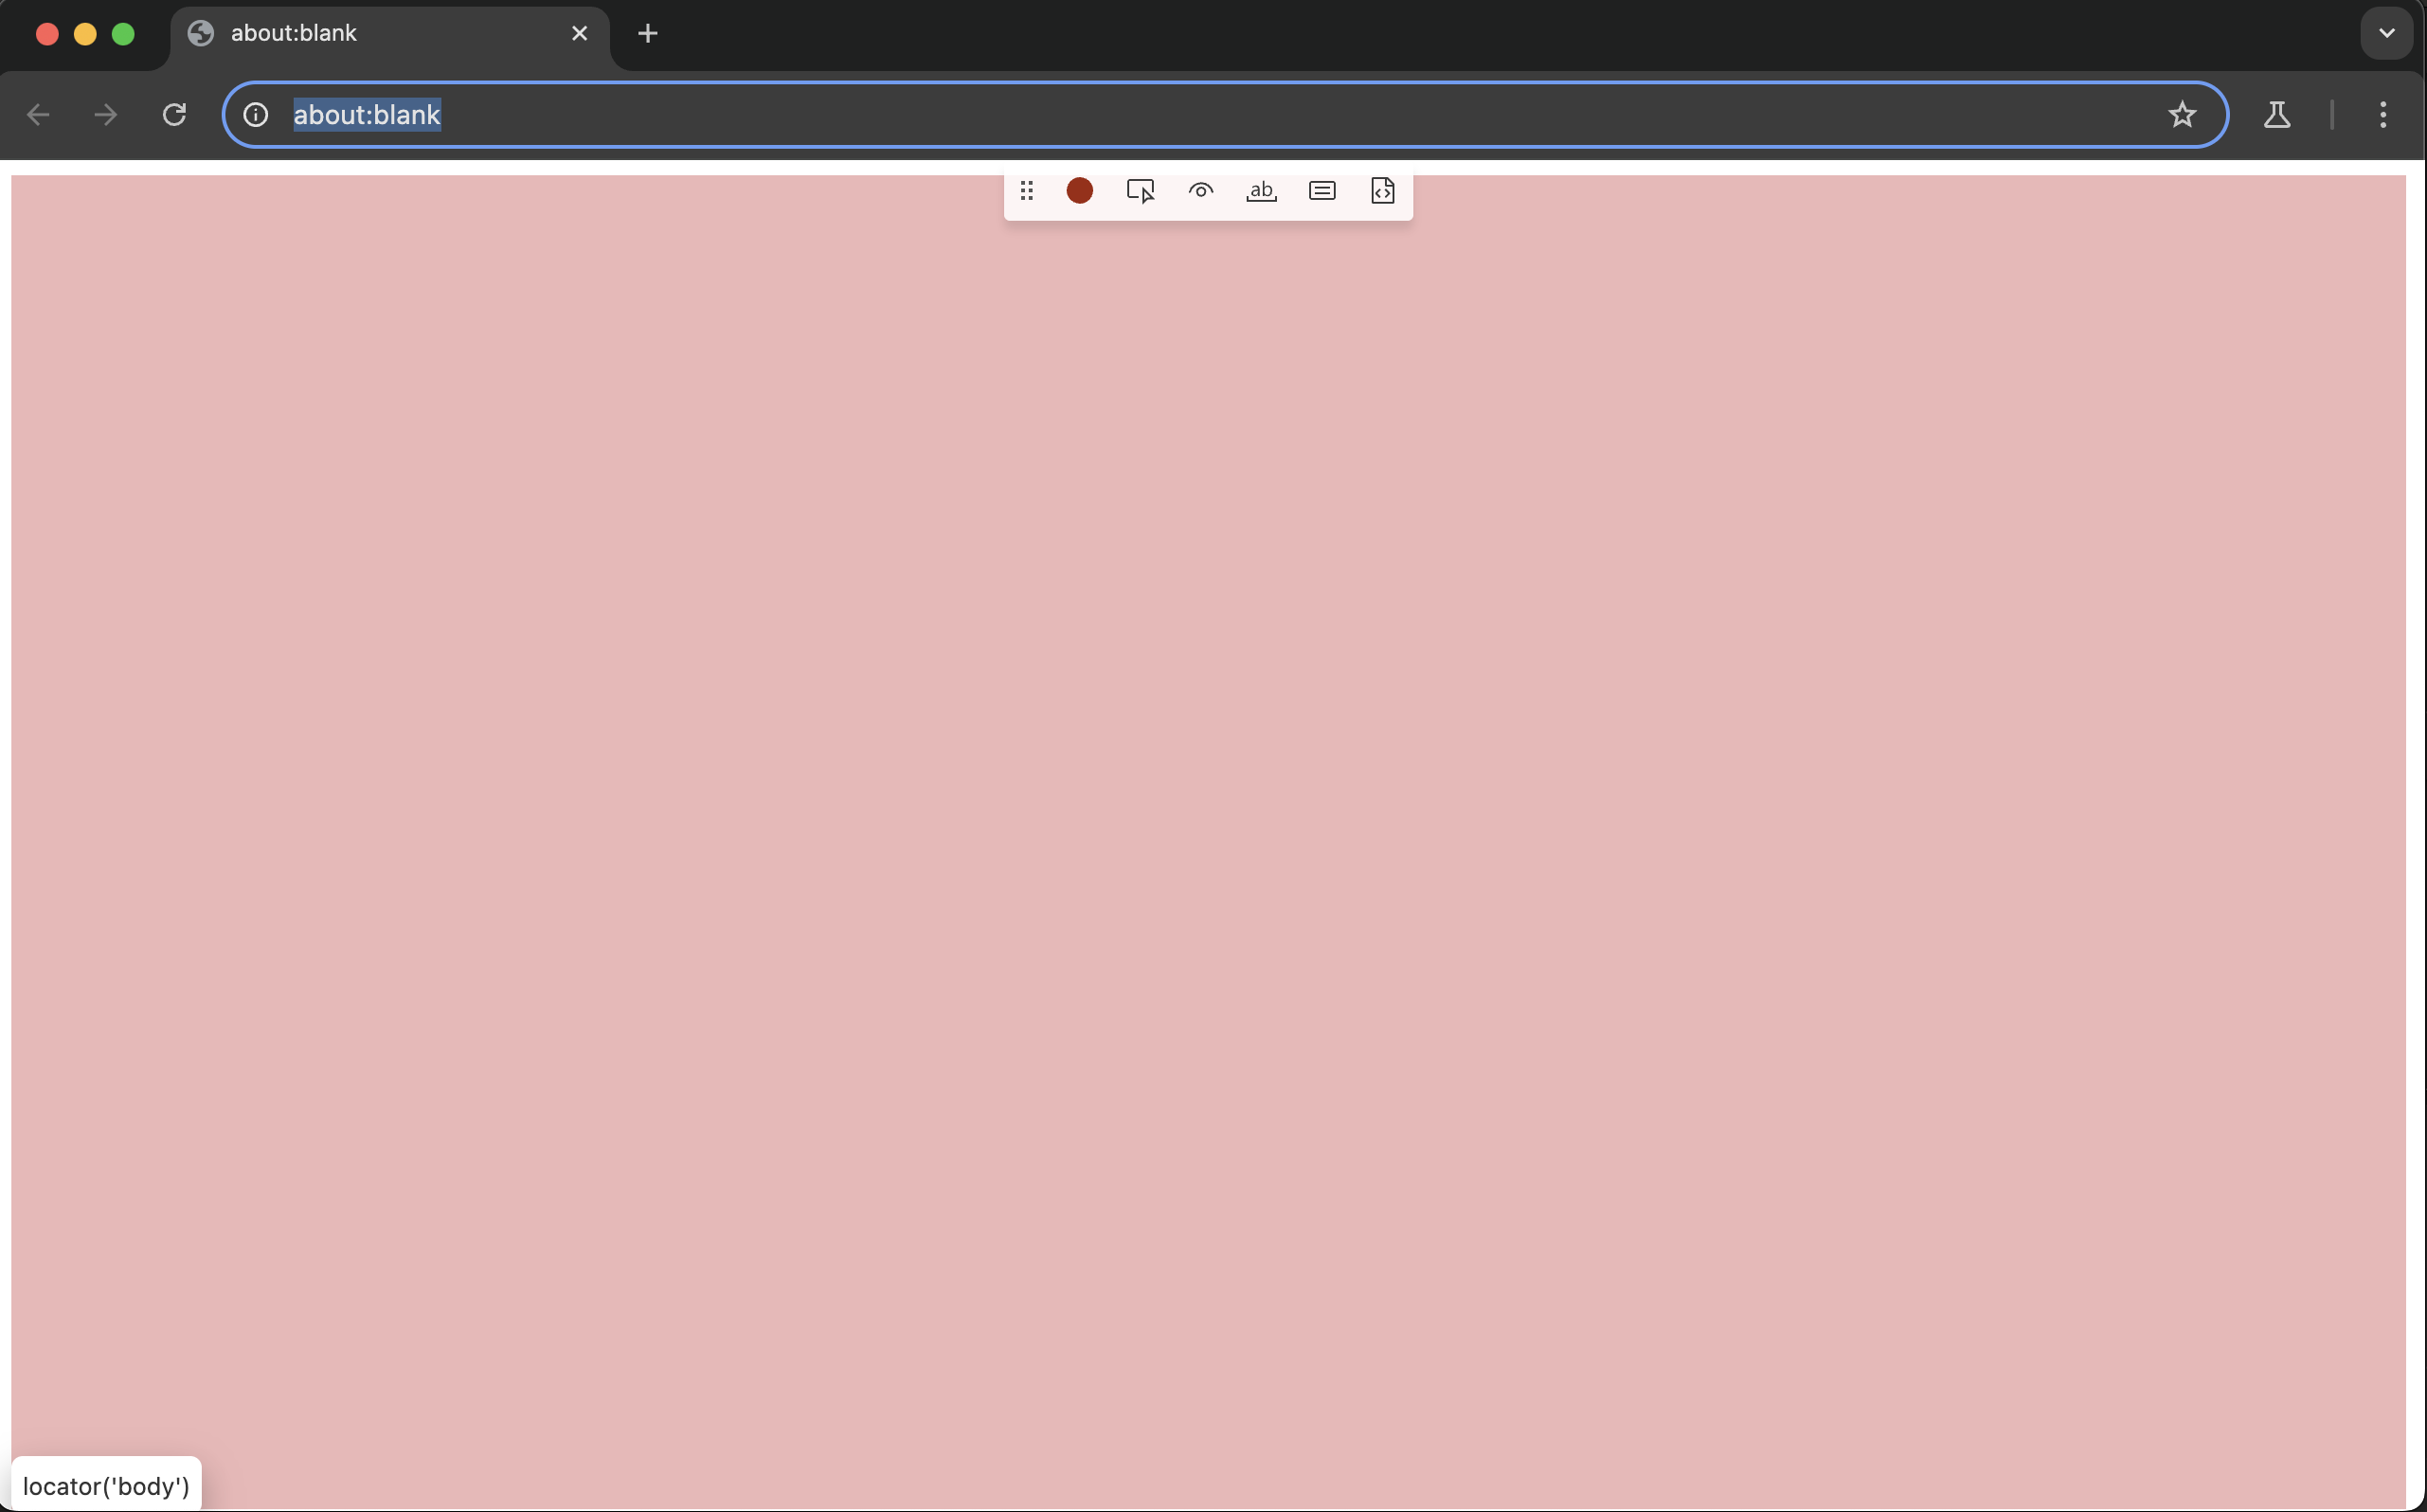
浏览器窗口:在这里进行点击、输入、导航等操作。

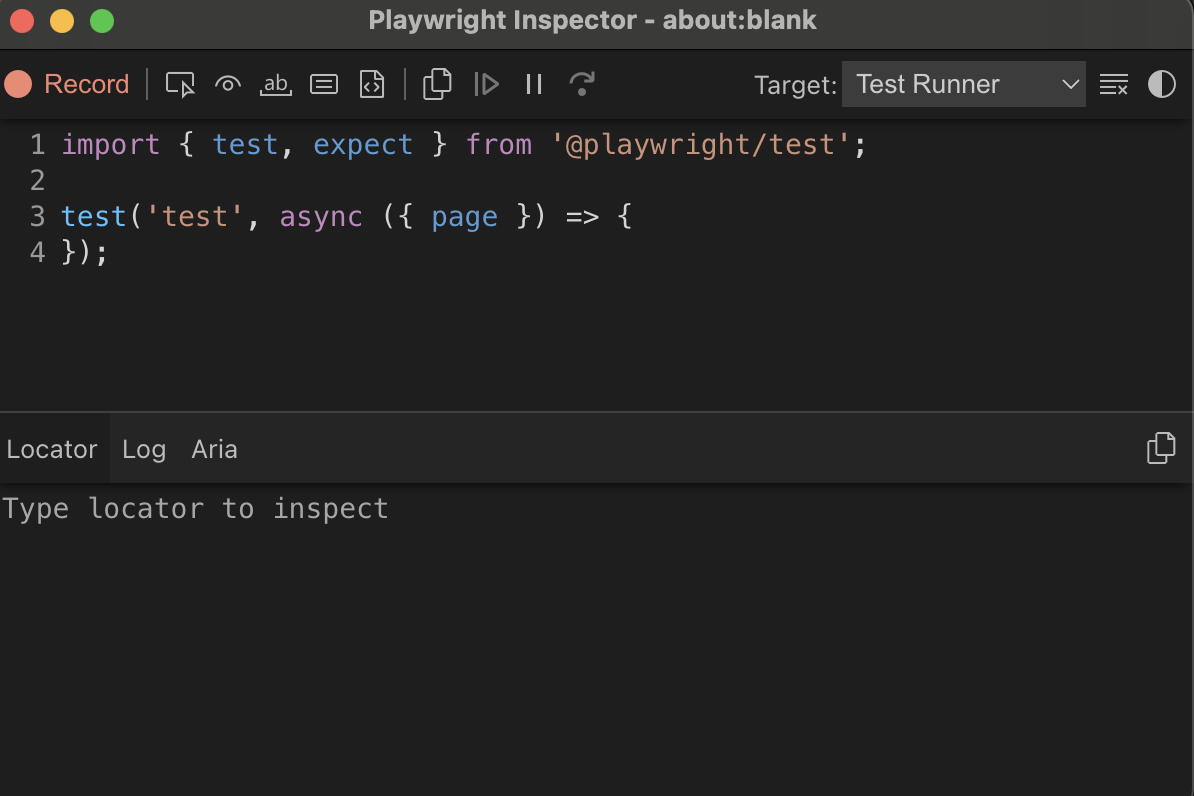
Inspector 窗口:工具栏+实时生成的脚本。

3.1.2 执行业务流程
在打开的浏览器中执行业务流程。
🔴 Record / Stop(录制/停止)
作用:校验目标元素已在页面中渲染并且对用户可见(非隐藏、非遮挡、非透明)。
操作:选择该工具后,在浏览器里执行操作。
Pick Locator(选择定位器)
作用:显示推荐的 Playwright 定位器。
操作:选择该工具后,点击浏览器里任何元素会在 Inspector 的 “Locator” 窗口显示推荐的 Playwright 定位器。

Assert Visibility(断言可见性)
作用:校验目标元素已在页面中渲染并且对用户可见(非隐藏、非遮挡、非透明)。
操作:选择该工具后,在浏览器里点某个元素。
生成代码示例:
await expect(page.locator('button#submit')).toBeVisible();Assert Text(断言文本内容)
作用:校验任意元素(<div>、<span>、<li>、<h1> 等)的 可见文本 与预期字符串是否一致。
底层原理:读取元素的 innerText(渲染后文本),自动去掉多余空白后进行精确或正则匹配。
生成代码示例:
await expect(page.locator('h1.page-title')).toHaveText('欢迎使用 MyApp');Assert Value(断言表单值)
作用:校验表单控件(<input>、<textarea>、<select> 等)的 value 属性是否与预期一致。
底层原理:直接读取并比较元素的 .value 属性,而不是其文本节点。
生成代码示例:
await expect(page.getByRole('textbox', { name: '邮箱' })).toHaveValue('example@example.com');Assert Snapshot(断言 ARIA 语义快照)
作用:对比元素在可访问性树(Accessibility Tree)里的语义和文本结构是否与预期一致(非图片对比)。
底层原理:捕获元素及其子树在浏览器内核里的 Accessibility Tree 表示,包括每个节点的角色 (heading、paragraph、button 等)、名称(对用户可见的文字)、层级信息(如 heading 的 level)等。将这棵树“扁平化”为一段 YAML‐风格的文本,用来做可访问性回归测试或内容结构校验。
生成代码示例:
await expect(page.locator('#comp-lp6ttrri')).toMatchAriaSnapshot(`
  - heading "Rapid Fault Detection" [level=3]
  - paragraph: Advanced capabilities for quick identification and pinpointing of issues, minimizing downtime and enhancing software reliability.
  - paragraph
  - heading "Seamless DevOps Integration" [level=3]
  - paragraph: Effortlessly integrates with existing DevOps tools, providing insightful analytics and secure testing, all within a streamlined workflow.
  - paragraph
  - heading "Streamlined Automation" [level=3]
  - paragraph: Automates repetitive testing tasks, enabling continuous and efficient testing throughout the DevOps cycle.
  - paragraph
  - heading "Comprehensive Testing Environments" [level=3]
  - paragraph: Supports multi-environment testing, including complex user journey simulations, ensuring thorough software validation.
`);
3.1.3 保存脚本
业务流程执行完后,保存脚本
有 IDE:Inspector 工具栏点击“Stop Recording”,脚本自动载入 VS Code 编辑器。

无 IDE:Inspector 工具栏点击“Copy script”,然后在任意文本编辑器中新建 *.spec.js 粘贴并保存至
playwright/tests文件夹下。
如果您不小心误操作,可通过”Clear”按钮清除最近一次误操作的脚本。

3.2 补充脚本(可选)
Playwright codegen 工具在记录基础操作时非常有效,但对于一些特殊操作,无法自动录制或录制效果不理想,需要后期手动补充。以下分类列出部分常见的无法被录制器被准确捕捉的操作,并提供示例。
3.2.1 滚动页面操作
// 手动添加页面往下滑 500px
await page.mouse.wheel(0, 500);
3.2.2 显式等待
// 等待按钮出现再点击
await page.waitForSelector('button:has-text("提交")');
await page.click('button:has-text("提交")');
3.2.3 等待网络响应
await page.click('button:has-text("搜索")');
await page.waitForResponse(resp =>
  resp.url().includes('/api/search') && resp.status() === 200
);
3.2.4 渲源 hover 手动交互
await page.locator('.menu-button').hover();
await page.click('.menu-item:has-text("设置")');
3.2.5 拖拽
await page.locator('#source').dragTo(page.locator('#target'));3.2.6 文件上传
await page.setInputFiles('input[type="file"]', 'tests/assets/example.png');3.2.7 窗口/标签页切换
const [newPage] = await Promise.all([
  page.waitForEvent('popup'),
  page.click('a[target="_blank"]'),
]);
await newPage.waitForLoadState();
await expect(newPage).toHaveURL(/dashboard/);
3.2.8 下载/对话框
// 处理 alert
page.on('dialog', async dialog => {
  expect(dialog.message()).toContain('Are you sure');
  await dialog.accept();
});

await page.click('button:has-text("删除")');

// 处理文件下载
const [ download ] = await Promise.all([
  page.waitForEvent('download'),
  page.click('button:has-text("下载")'),
]);
const path = await download.path();
声明:上述列举的操作类型和示例基于 Playwright 官方文档、社区评论和实际用户反馈综合考虑,目的是为初学者和自动化测试工程师提供一个明确可扩展的指南。其中列举的示例不必然适用于所有项目,请根据自己的场景选择合适的解决方案。
3.3 执行和回放脚本
在系统自带终端运行以下命令。
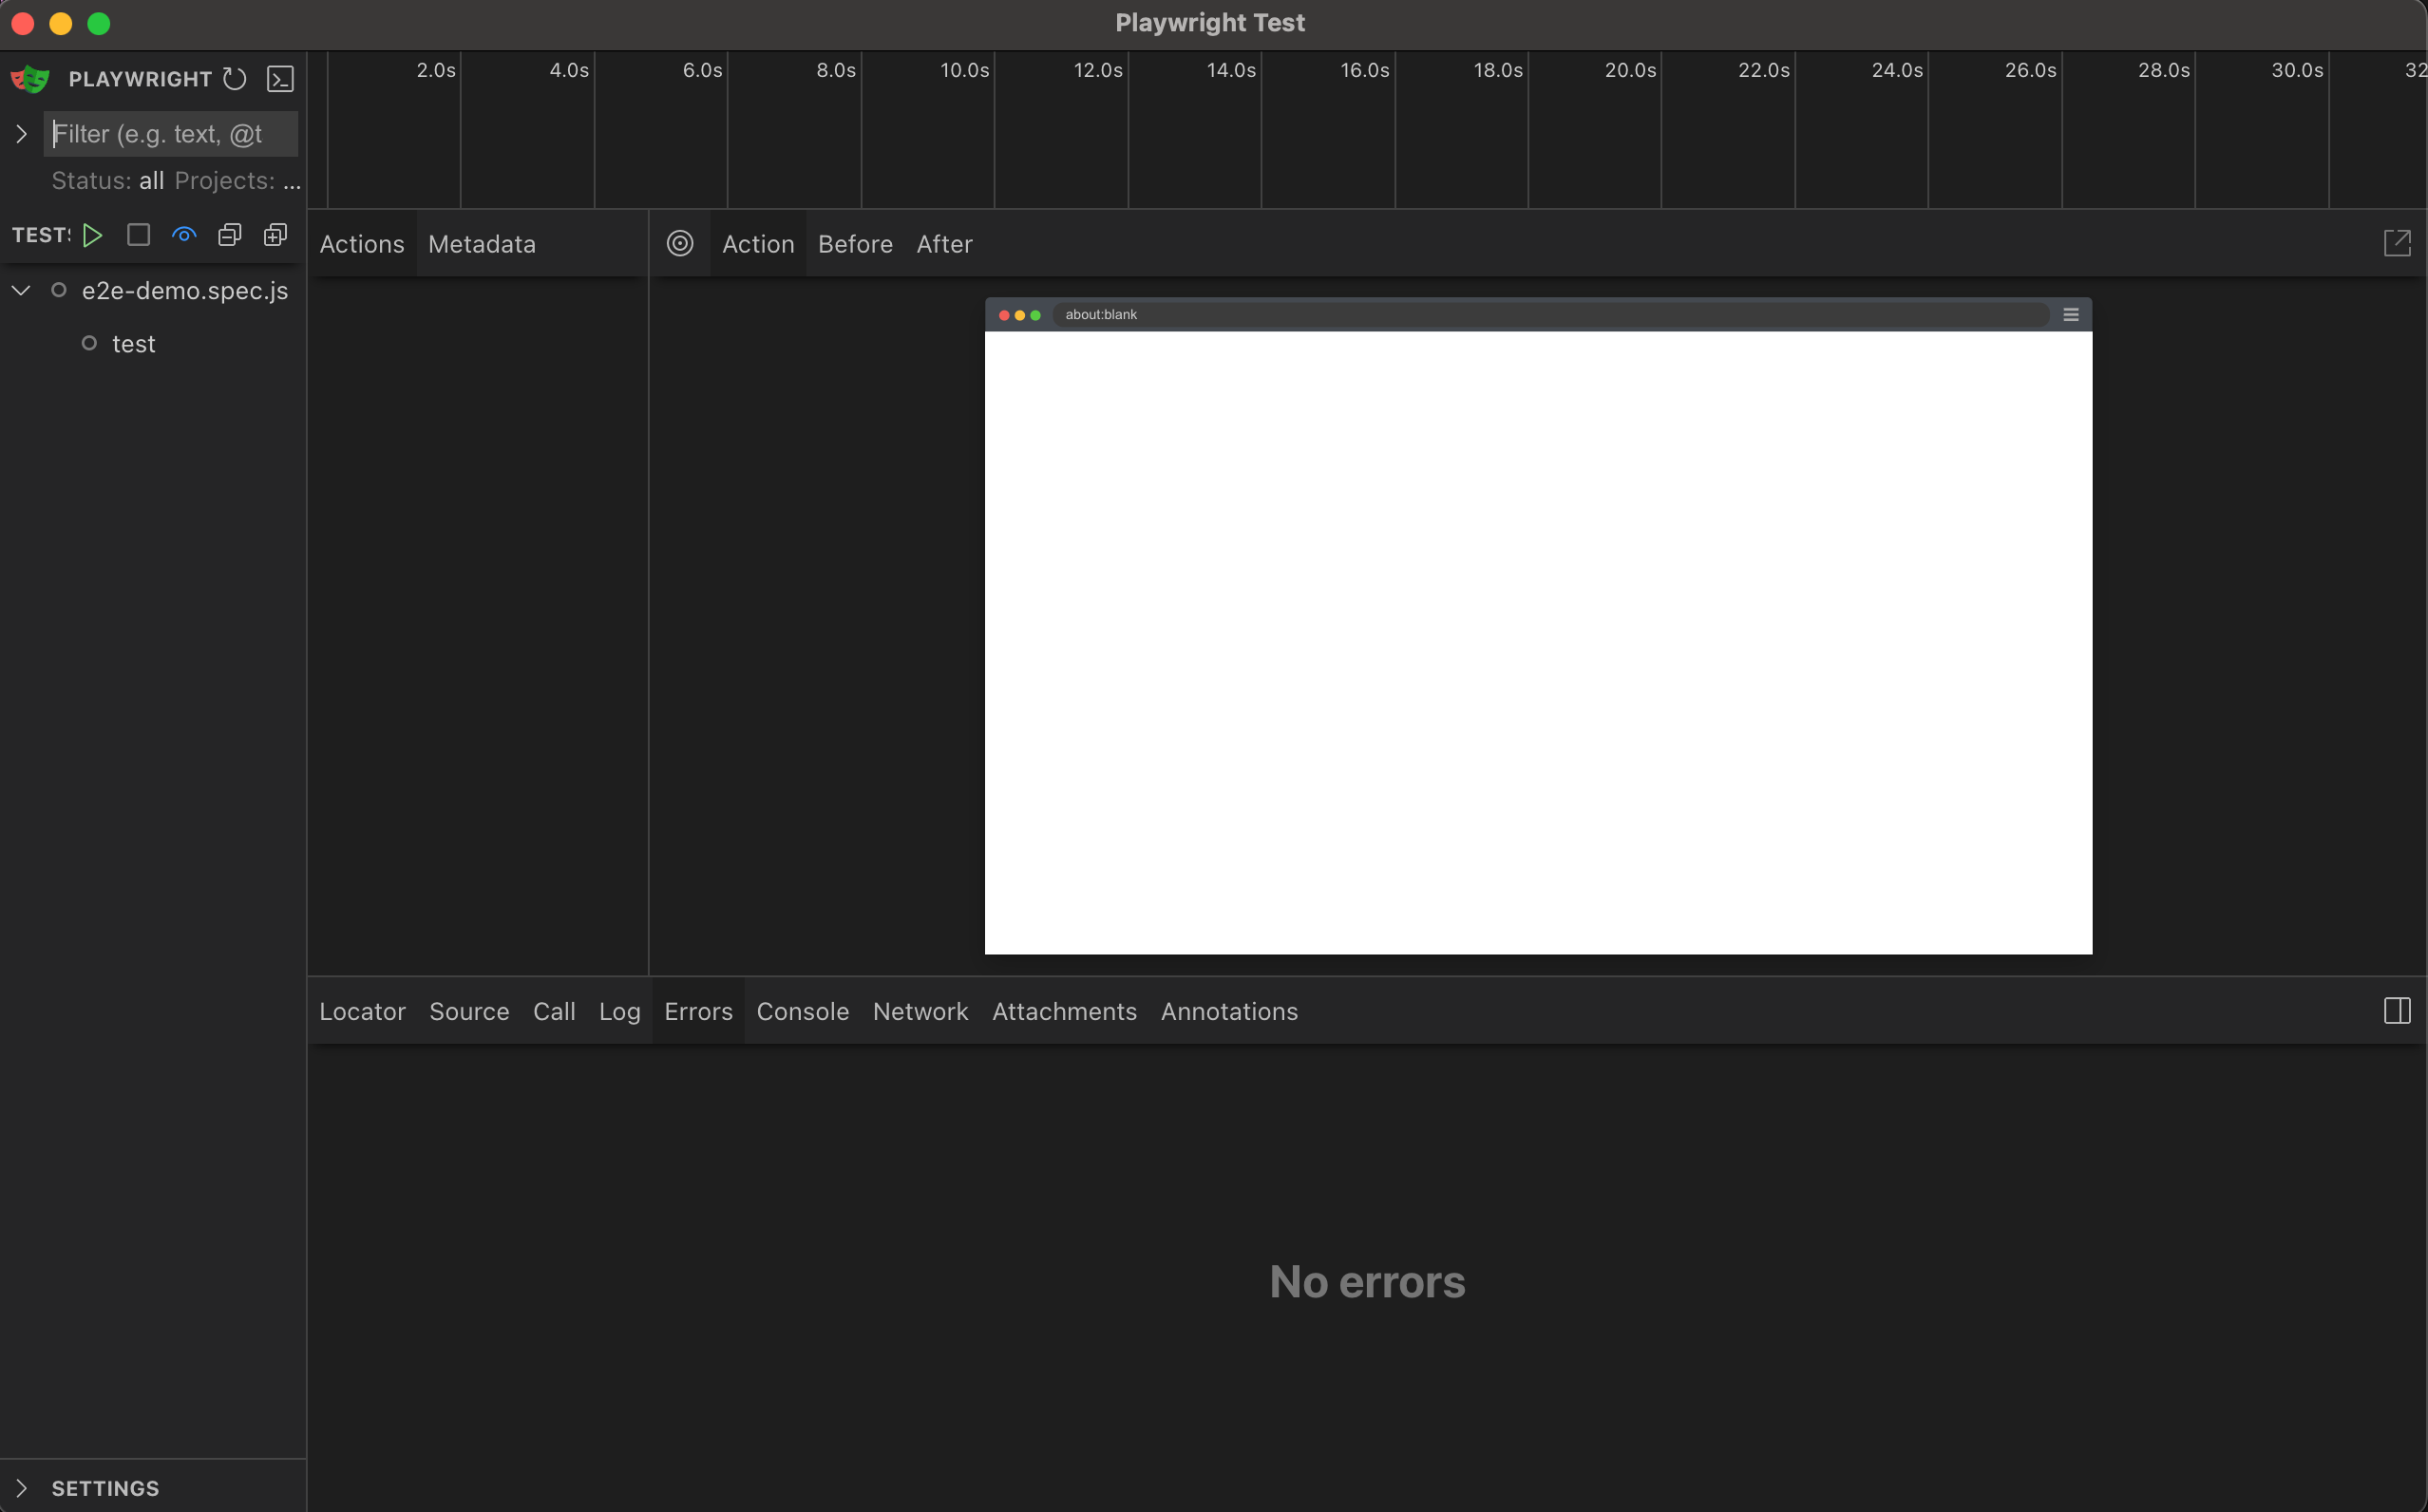
npx playwright test --uiPlaywright 会在本地启动一个图形化的 Test Runner UI 窗口。

3.3.1 一键运行 & 单测执行
Run(▶)按钮:
文件级的 ▶:运行整个文件内所有测试
用例级的 ▶:只运行该条测试
Run All Tests 按钮:在窗口顶部或侧边栏可一键启动所有测试的并行执行。
3.3.2 实时日志输出
右侧主面板:显示当前测试的执行日志、断言结果、控制台输出(
console.log)等。滚动定位:当您点击某个测试或用例,它会自动跳到对应的日志和错误堆栈。
3.3.3 可视化回放
操作时间线:如果您在配置里启用了
trace: 'on'或者测试失败时保留 trace,您可以看到操作时间线。逐步回放:Trace Viewer 会按时间线展示每一步操作对应的 DOM 快照、网络请求、截图等信息。
更多关于 Trace Viewer 的介绍,请查阅 Playwright Trace viewer 官方文档。
