Bulk Manage Test Cases
1. Overview
The Bulk Manage Test Cases feature in Testany enables users to manage multiple test cases simultaneously. This feature streamlines your test management process by supporting bulk operations—such as moving, appending, replacing, and deleting test cases—thereby saving time and reducing manual effort. It helps maintain consistency and efficiency across large test suites, allowing you to focus on quality assurance and rapid development.
Key Benefits:
Efficiency: Perform bulk operations on numerous test cases with just a few clicks.
Consistency: Apply uniform updates across all selected test cases.
Time Savings: Automate repetitive tasks, reducing the need for manual updates.
Flexibility: Quickly adjust, modify, or remove test cases to meet evolving requirements.
Available Bulk Operations:
Bulk Move
Bulk Append
Bulk Replace
Bulk Delete
2. Prerequisites
Permissions
You can only perform bulk actions on test cases you own — with one exception: you may add labels to any test cases visible to you.
3. Steps-by-steps Guide
3.1 Pre-steps
3.1.1 Navigate to List View
Go to the List View in the Test Case Library to start a bulk action.

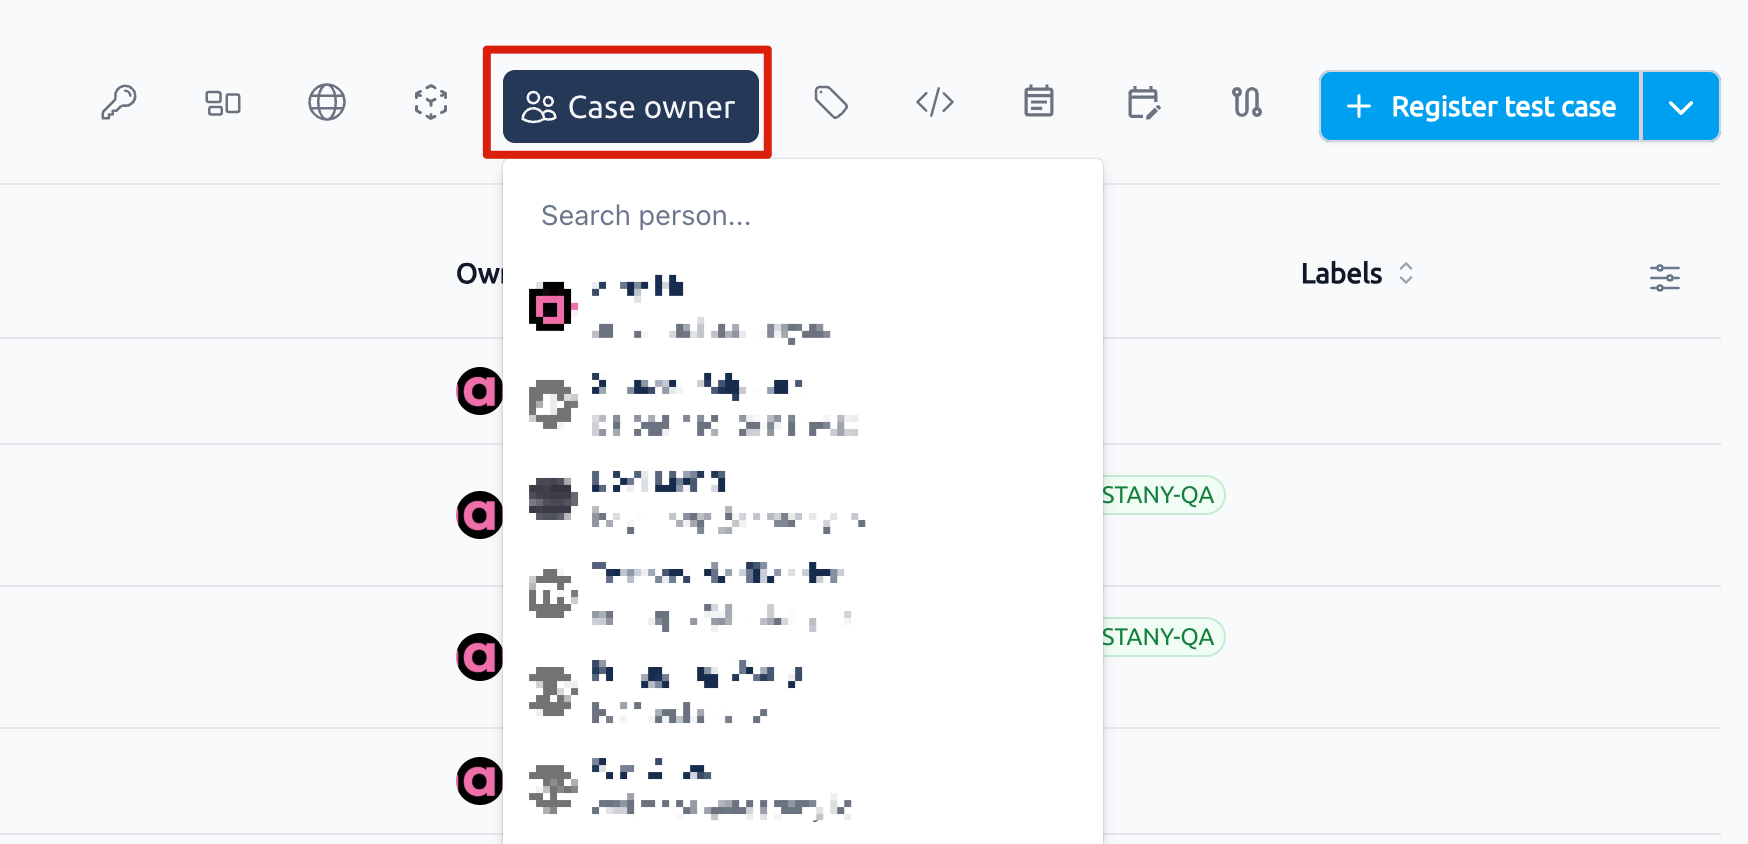
3.1.2 Select case owner
Open ‘Case owner’ dropdown and select yourself.
3.1.3 Select cases and trigger bulk action
Choose one or more test cases you want to manage, then click 'Bulk actions' in the action bar at the table footer.

3.2 Bulk Move
3.2.1 Select bulk action
Before performing a bulk move, ensure that:
The target directory view is set as the active view, see 3.2.3 Set an Active Directory View.
The target directory has been added to the active directory view.
Click ‘Bulk Move’ radio button and click ‘Next’
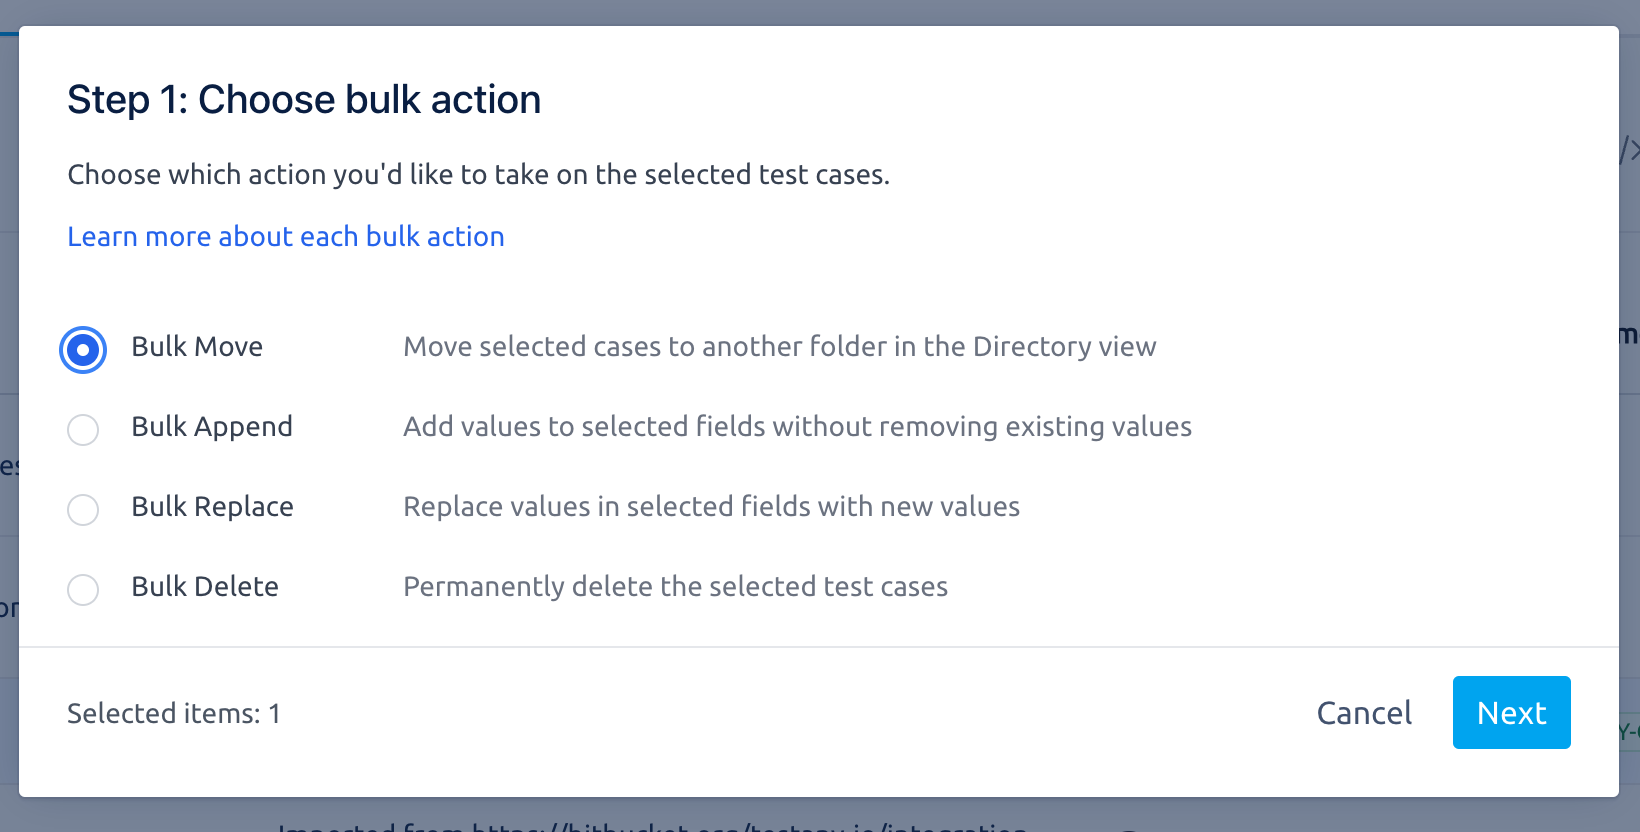
The number of selected cases displays in 'Selected items'.
3.2.2 Select target directory
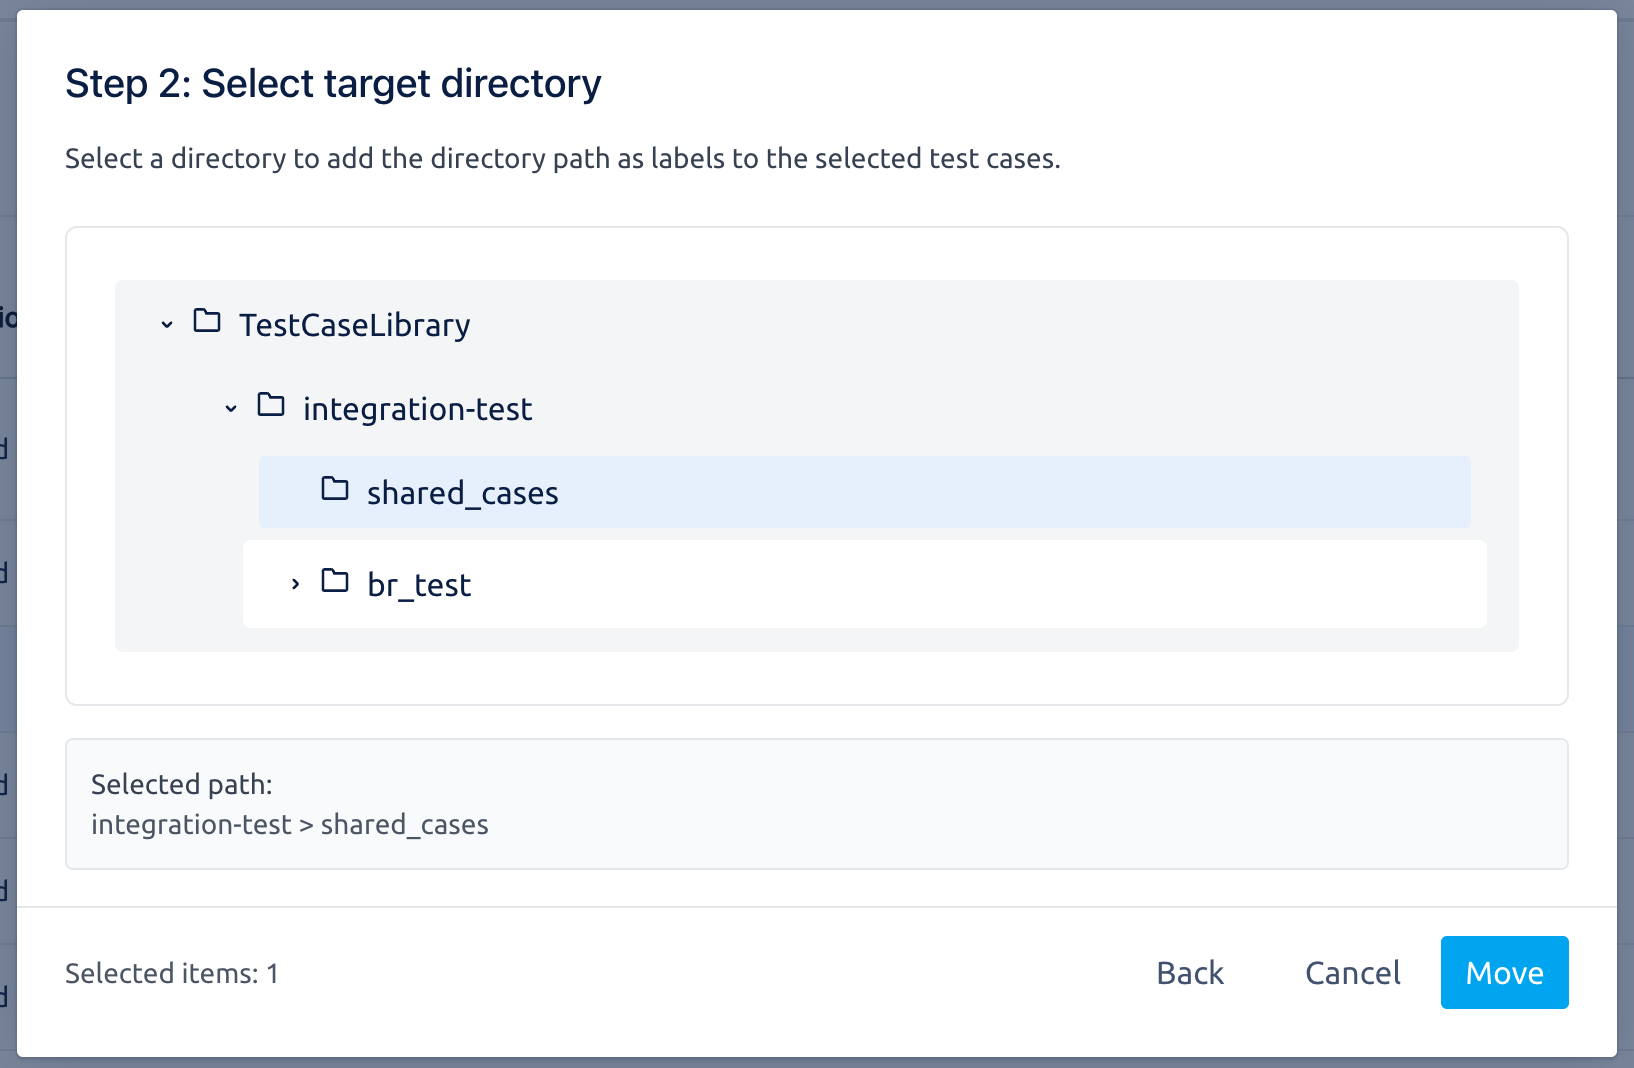
Select the target directory where you’d like the selected cases to move to. Then, click ‘Move’.
Moving to the ‘TestCaseLibrary’ directory will automatically CLEAR ALL labels from the selected cases. Please proceed with caution.
Moving to any other target directory will automatically append the target directory’s name (and its parent directories) as labels to the selected cases.
For ‘Selected path’:
If no directory is selected, ‘Selected path’ doesn’t display.
If ‘TestCaseLibrary’ is selected, the path is empty.
If another directory is selected, the path shown is relative to the root directory.
3.3 Bulk Append
3.3.1 Select bulk action
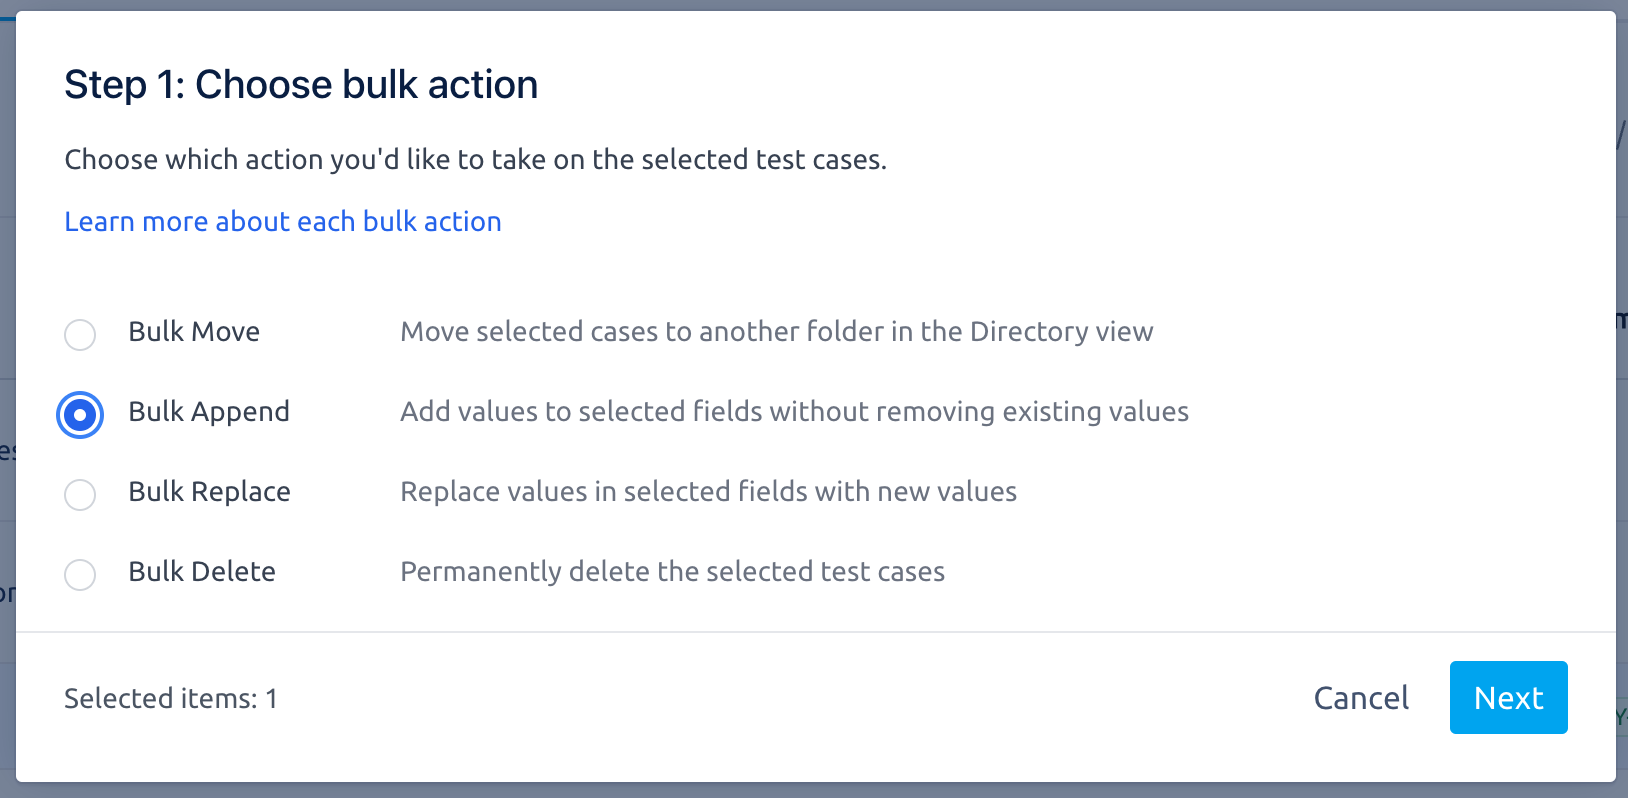
Click ‘Bulk Append’ radio button and click ‘Next’.
3.3.2 Select case fields
Choose one or more fields you want to append values to.
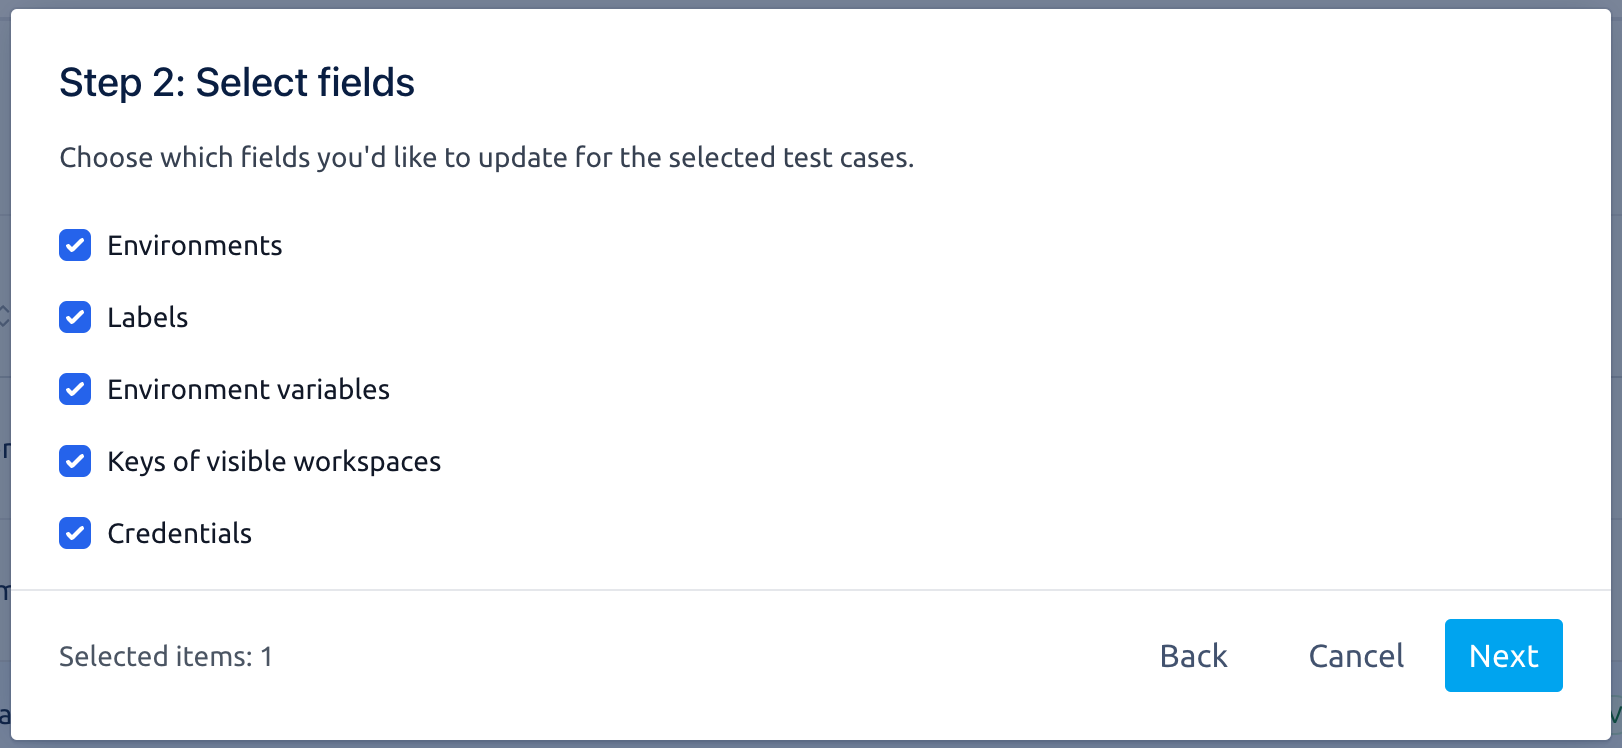
3.3.3 Edit field values
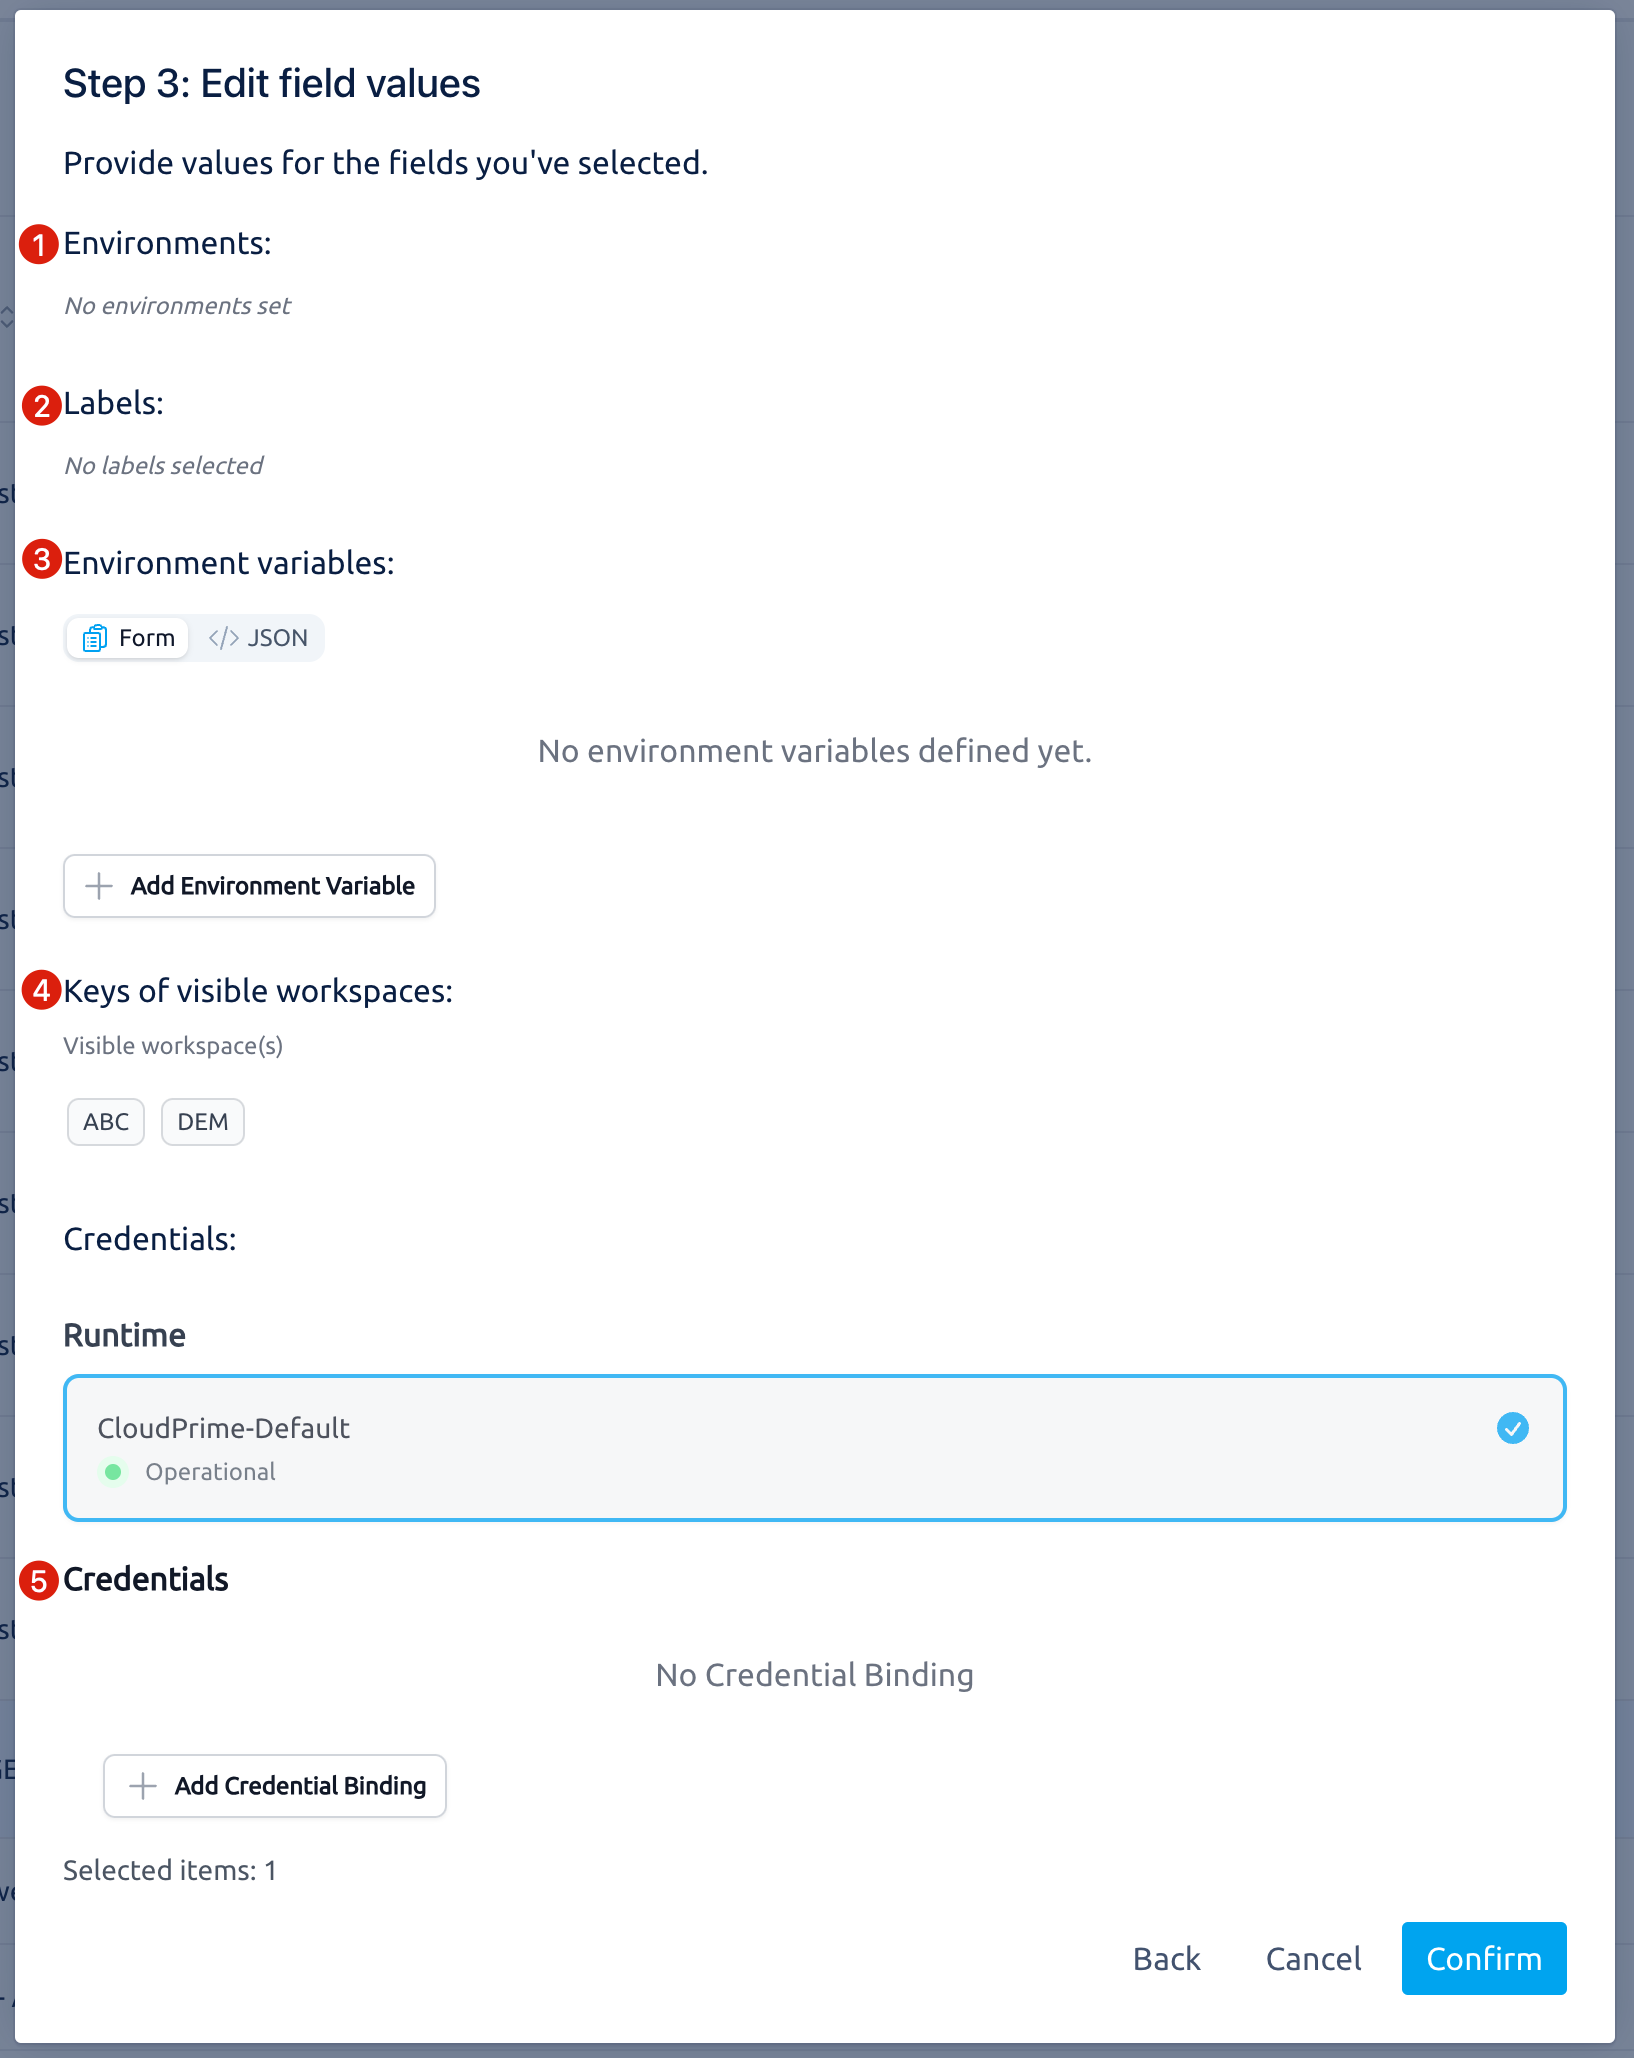
3.3.3.1 Environments
Select one or more existing environments from the dropdown or type to create new ones. Then, click ✅ to apply.

3.3.3.2 Labels
Select one or more existing labels from the dropdown or type to create new ones. Then, click ✅ to apply.

3.3.3.3 Environment variables
Click ‘Add Environment Variable’ and enter the key, value, type and description. Then, click ✅ to apply.
Appending a duplicate key to a case will OVERWRITE its current value.

3.3.3.4 Keys of visible workspaces
Ensure ALL of the selected cases are restricted cases (visibility is ‘Restrict’, see Glossary - Case Visibility, Glossary - Workspace Restricted Visibility).
All keys of workspaces you have member access to are shown by default. Select one or more keys and click ✅ to apply.

3.3.3.5 Credentials
Bulk actions can only be performed on test cases within the same runtime.
Click ‘Add Credential Binding'’ and select workspace -> safe -> credential. Then, click ✅ to apply.

After all values are set, click ‘Confirm’ to complete the bulk action.
After the bulk action is complete, the selected test cases remain highlighted, allowing you to proceed with additional bulk actions. You can also click the refresh button :refresh: at the bottom-right corner of the table to view the latest information for these test cases.
3.4 Bulk Replace
3.4.1 Select bulk action
Click ‘Bulk Replace’ radio button and click ‘Next’
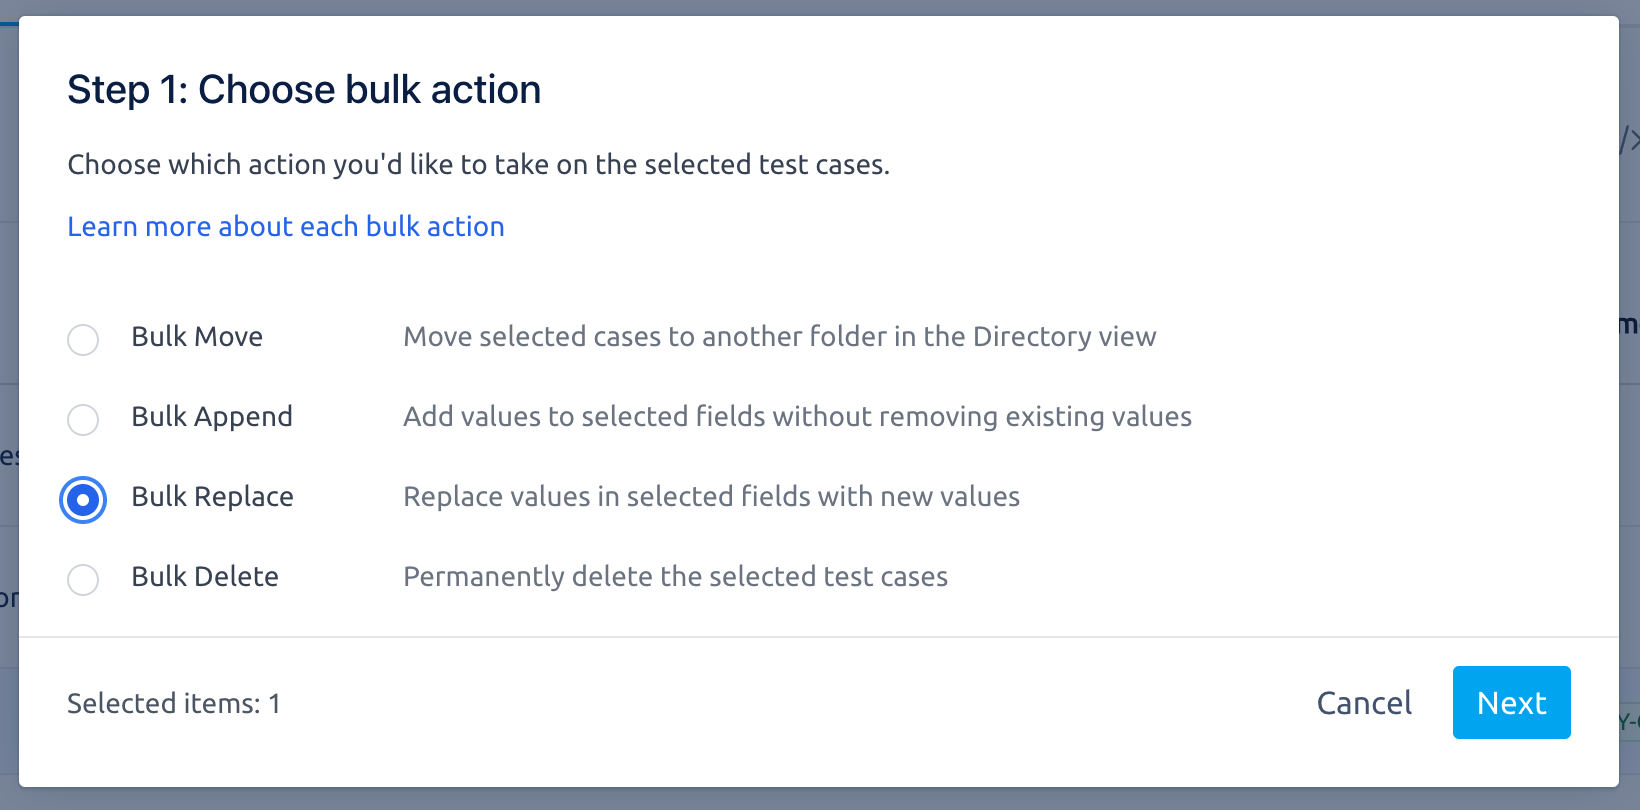
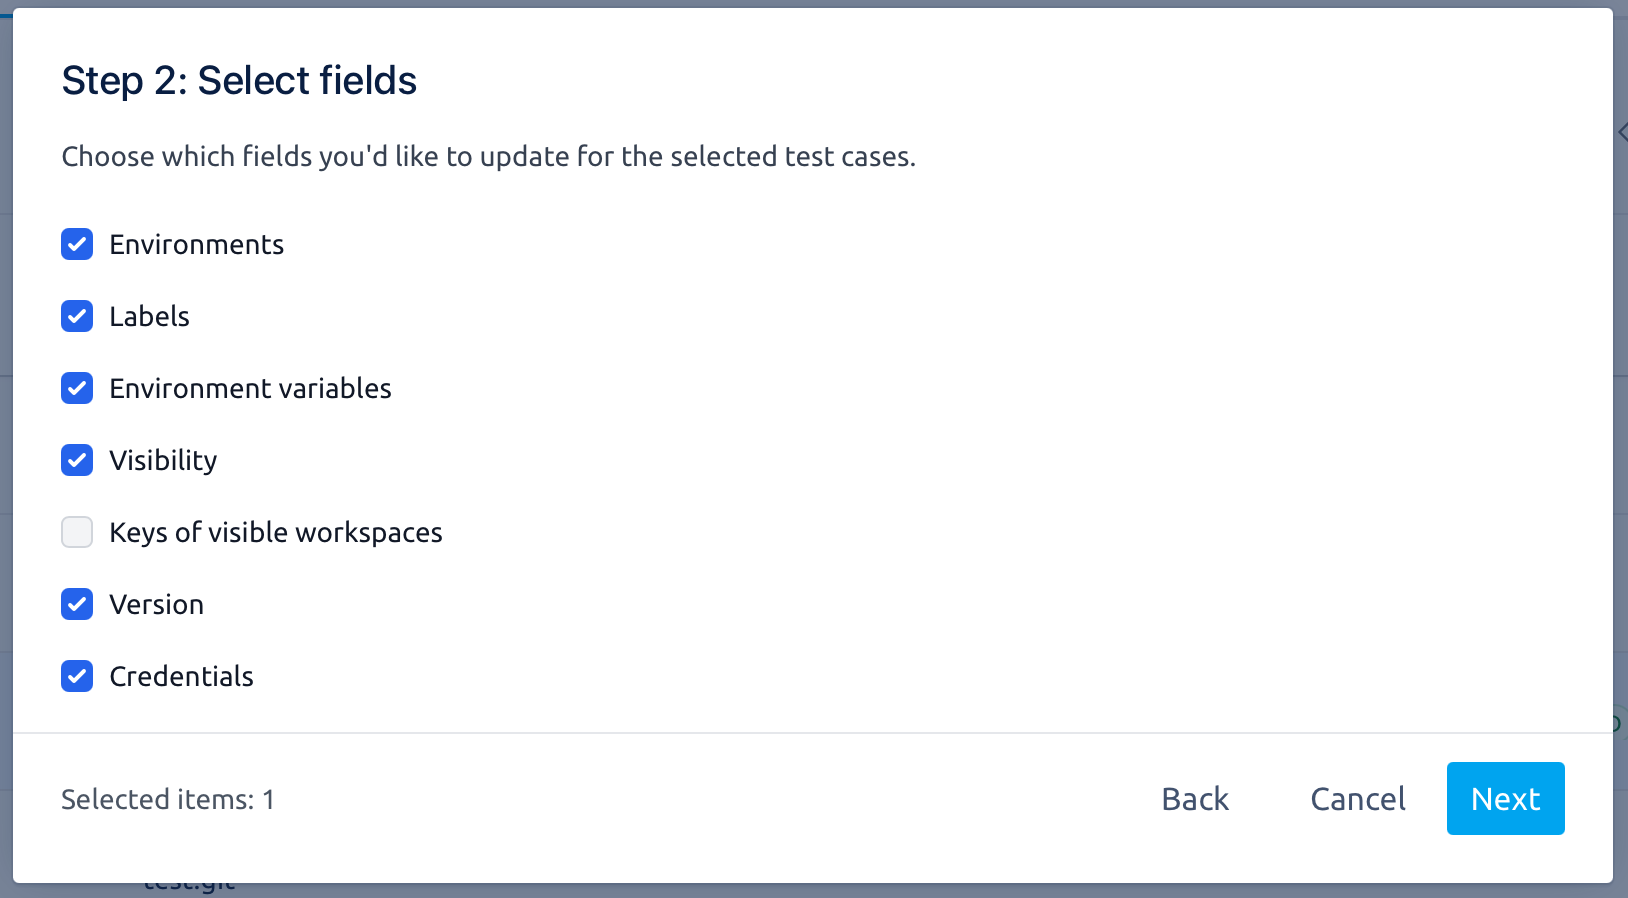
3.4.2 Select case fields
Choose one or more fields for bulk replace.
You cannot replace both “Visibility” and “Workspace Keys” in the same bulk action.
3.4.3 Edit field values
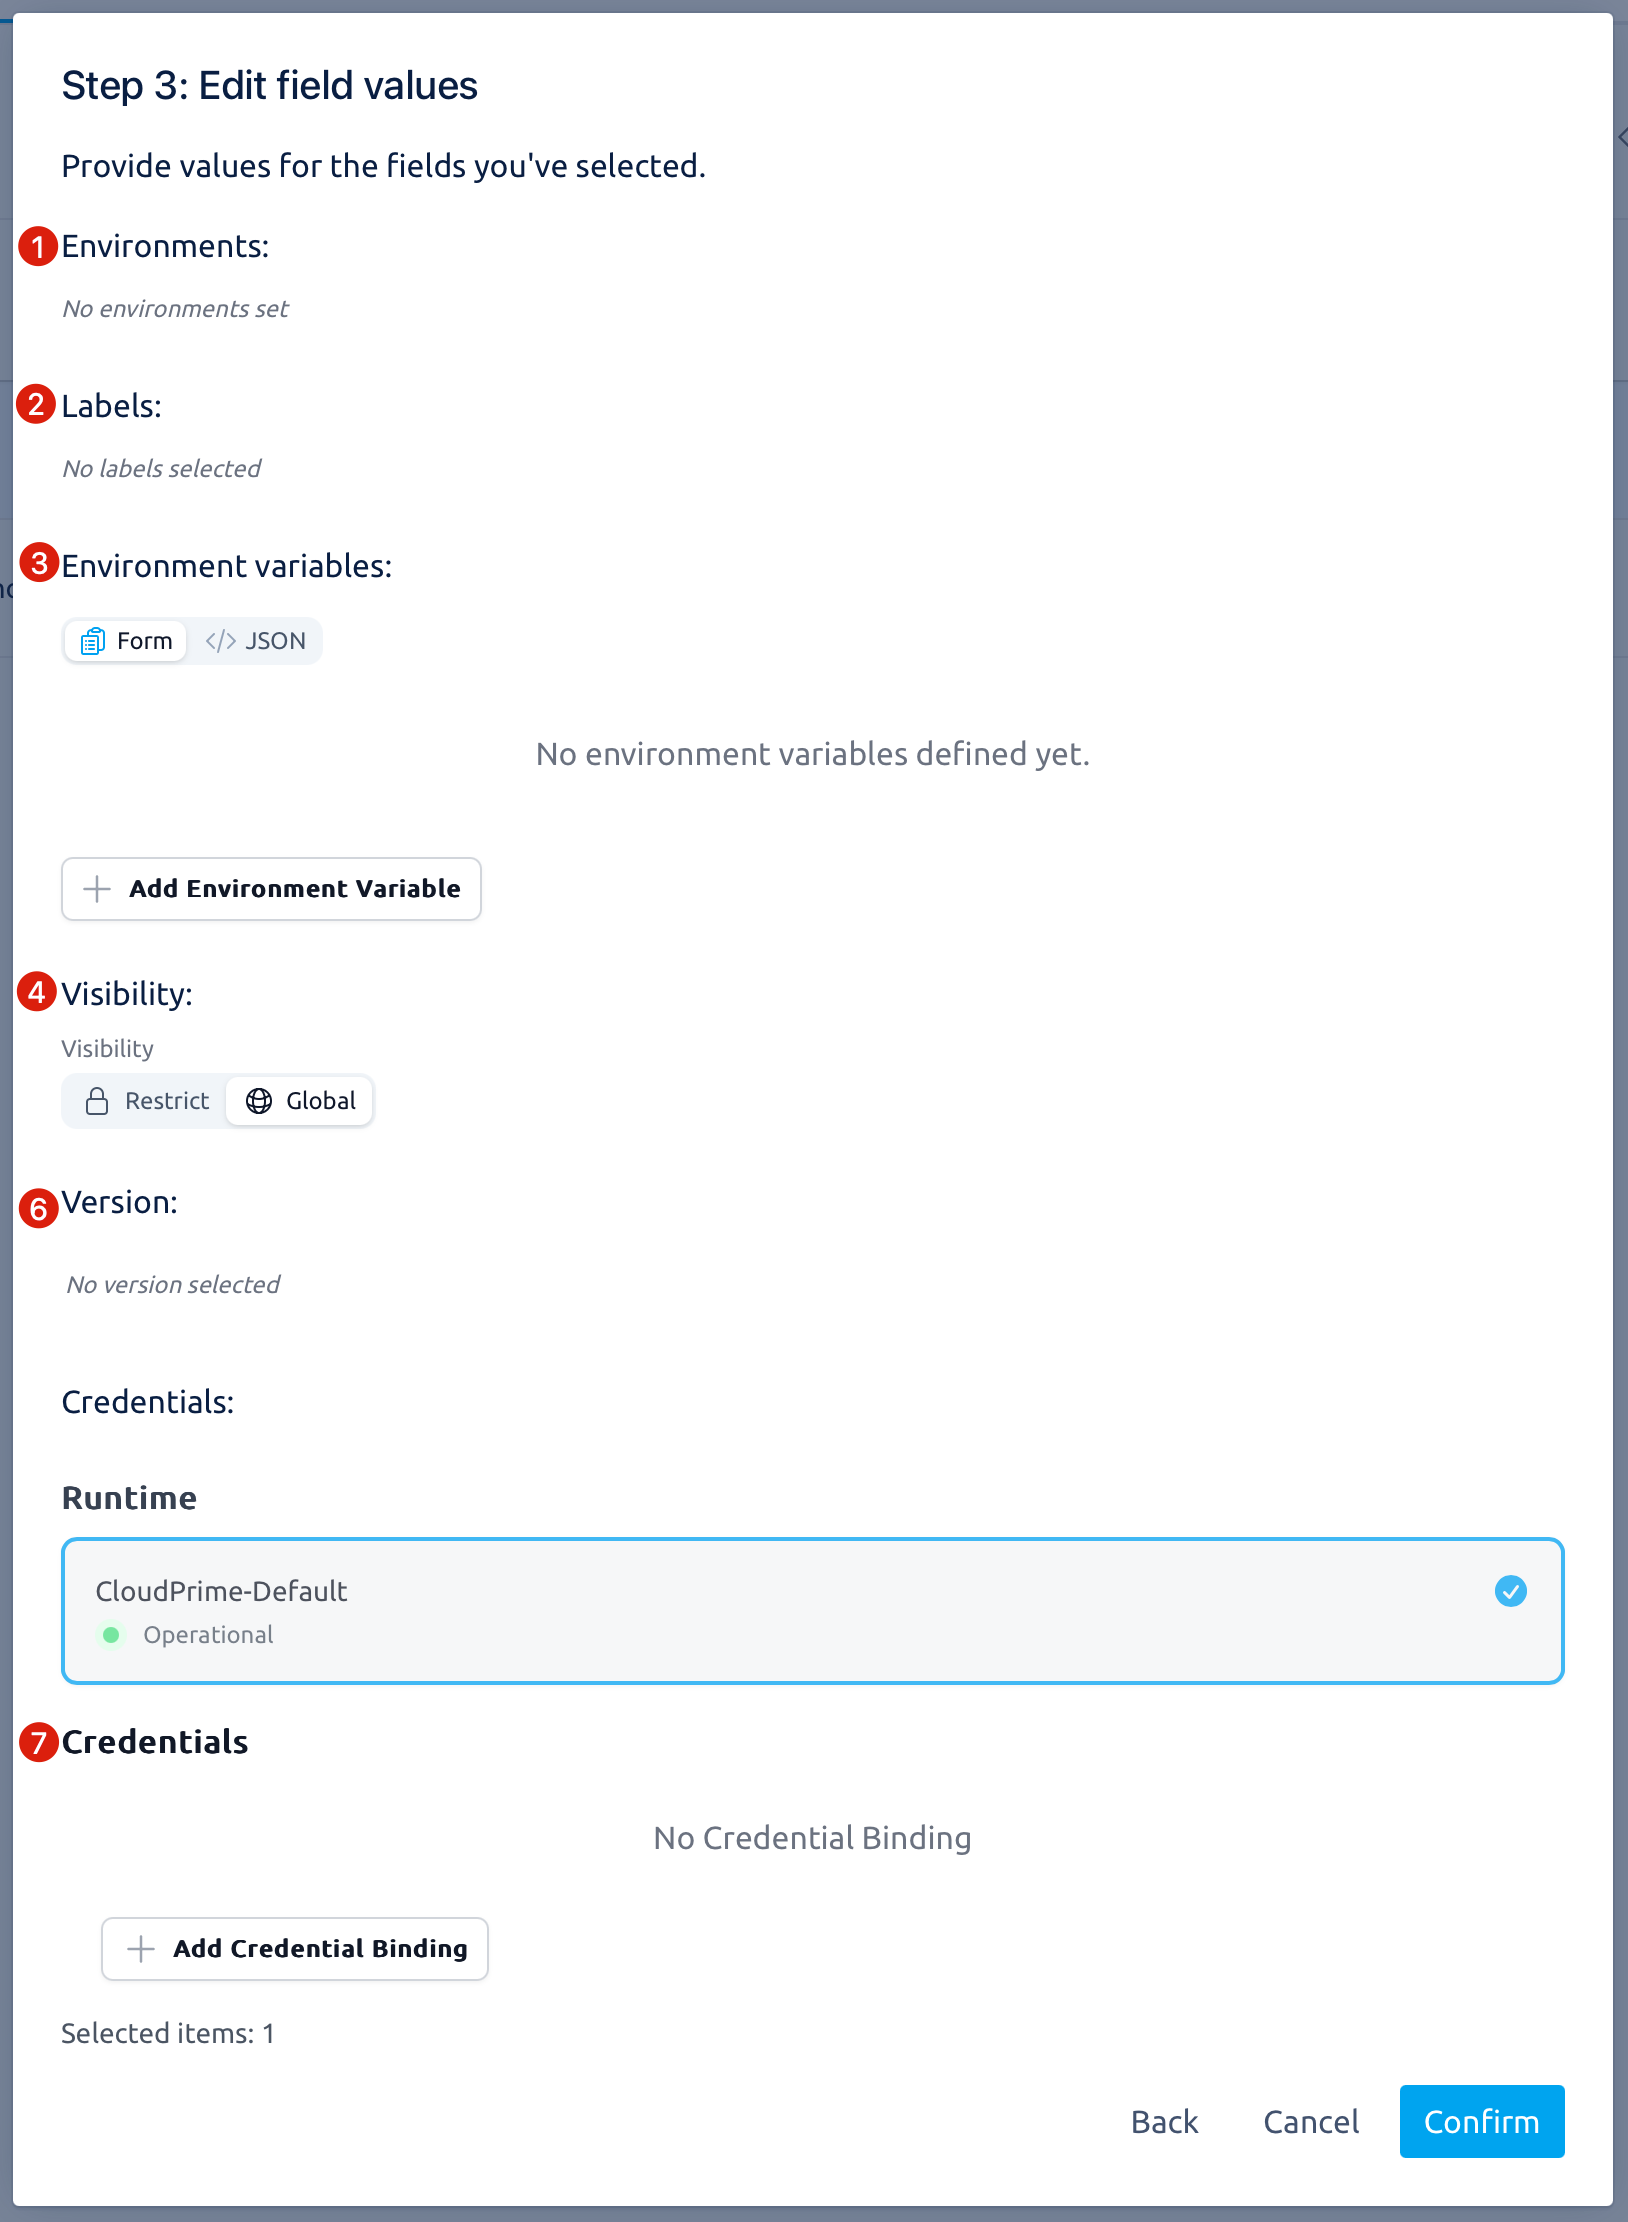
3.4.3.1 Environments
Select one or more existing environments from the dropdown or type to create new ones. Then, click ✅ to apply.

3.4.3.2 Labels
Select one or more existing labels from the dropdown or type to create new ones. Then, click ✅ to apply.

3.4.3.3 Environment variables
Click ‘Add Environment Variable’ and enter the key, value, type and description. Then, click ✅ to apply.

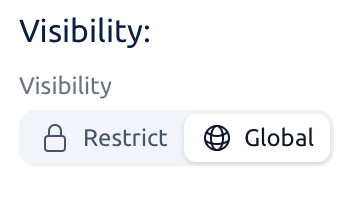
3.4.3.4 Visibility
Toggle 'Global' or 'Restrict', see related concepts here.
3.4.3.5 Keys of visible workspaces
All keys of workspaces you have member access to are shown by default. Select one or more keys and click ✅ to apply.
This bulk replace CANNOT proceed if:
The selected cases include any global test cases.
Any workspace keys linked to the selected cases are missing from the workspace keys chosen as replacement values (for example, if case
ABCD1234is used by pipelineDEM-0001andRMB-0002. and workspace keysDEMandRMBare not selected, the action will be blocked).

3.4.3.6 Version
Select an existing version from the dropdown or type to create a new version. Then, click ✅ to apply.
3.4.3.7 Credentials
Bulk actions can only be performed on test cases within the same runtime.
Click ‘Add Credential Binding'’ and select workspace -> safe -> credential. Then, click ✅ to apply.

After all fields are set, click ‘Confirm’ to complete the bulk action.
The selected test cases remain selected afterward, so you can perform further bulk actions or refresh the page to see the updated status.
3.5 Bulk Delete
3.5.1 Select bulk action
Before performing a bulk delete, ensure that:
You are the owner of ALL the selected test cases.
NONE of the selected test cases are linked to any pipeline.
NONE of the selected test cases were imported from git.
Click ‘Bulk Delete’ radio button and click ‘Next’.
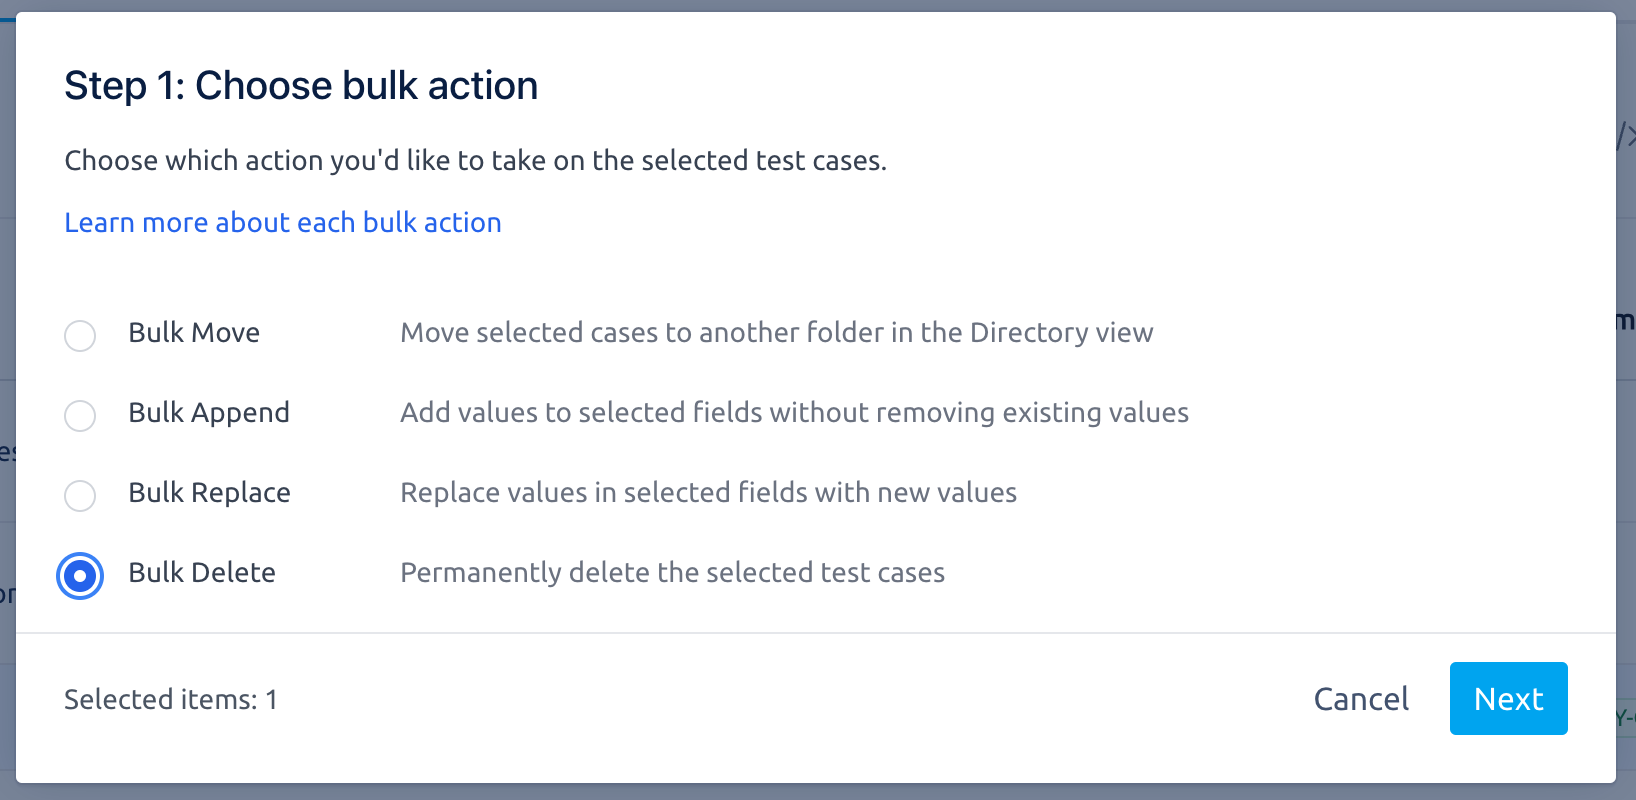
The number of selected cases displays in 'Selected items'.
3.5.2 Confirm deletion
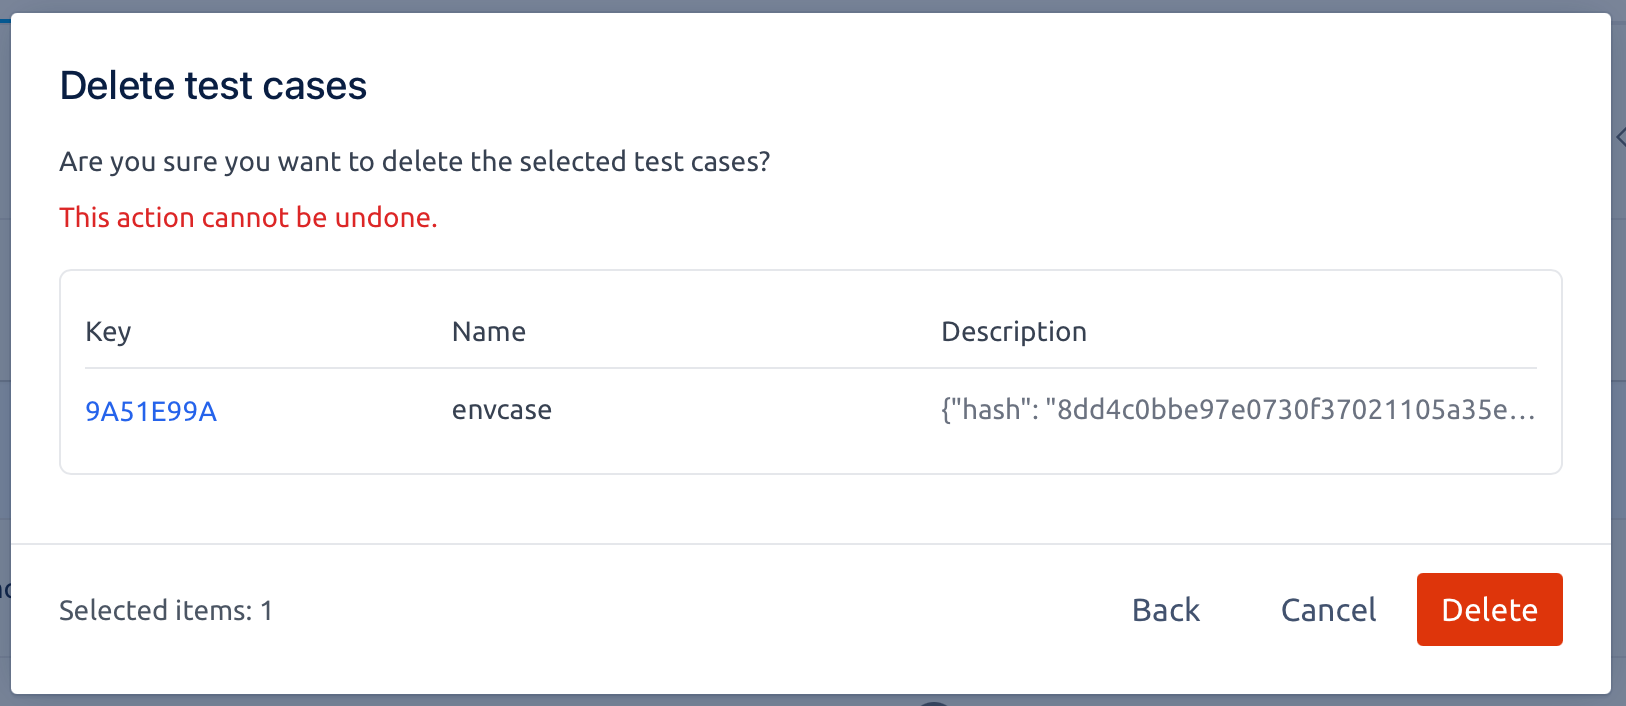
This action is irreversible. Please proceed with caution.
Click ‘Delete’ to complete the bulk action.
5. Frequently Asked Questions (FAQ)
![]() Why do I see the error “Cases [XXX] are global cases.”?
Why do I see the error “Cases [XXX] are global cases.”?
💡 Global test cases are restricted from appending and replacing workspace keys. To proceed with the action you intended, convert these global cases to restricted cases first, then retry the bulk action.
![]() Why do I see the error “You do not have permission to update cases [XXX].”?
Why do I see the error “You do not have permission to update cases [XXX].”?
💡 You’re attempting to update test cases that you don’t own. Verify that you are the owner of these cases or have the required permissions. If not, contact the case owner to perform update or raise a request to change case owner.
![]() Why do I see the error “Cases have different runtime.”?
Why do I see the error “Cases have different runtime.”?
💡 The selected test cases belong to different runtimes, and bulk operations can only be performed on test cases within the same runtime. Filter test cases by runtime, ensuring all selected cases share the same runtime before attempting a bulk action again.
![]() Why do I see the error “Cases [XXX] are currently imported from Git, delete not allowed.”?
Why do I see the error “Cases [XXX] are currently imported from Git, delete not allowed.”?
Test cases imported from Git cannot be directly deleted through the bulk delete feature. Please refer to the guide Delete an Import History to delete these cases.
