Bulk Import Test Cases from Git
1. Overview
The Bulk Import Test Cases from Git feature in Testany allows users to import multiple test cases from a Git repository in an automated manner. This helps maintain a structured and up-to-date test case repository by syncing with source control.
Key Benefits:
Automates the import of test cases, reducing manual effort
Ensures test cases remain in sync with the latest code changes
Supports both Bitbucket and GitHub repositories
2. Prerequisites
2.1 Create git repository credentials
To access git resources in a read-only mode, generate an access token and store it securely in:
Azure Key Vault
AWS Secrets Manager
👉 Reference:
Once the token is created, request your workspace admin to register the credential in Testany.
👉 Reference: Managing Test Credential
2.2 Organize directory structure in git
A well-organized Git directory structure enhances the efficiency of test case management.
Key considerations:
Maintain a consistent directory structure, and keep test scripts in a structured, predictable directory format.
Understand the impact of directory changes on imported test cases:
If script files are deleted, renamed, or restructured, they will be automatically removed from import history and unlinked from Testany.
Additionally, the corresponding registered test cases in Testany will be automatically deleted or unlinked (see section #3.2).
📝 Recommendation: To prevent unnecessary deletions and re-imports of cases, it is essential to carefully plan directory structures prior to the initial bulk import. Should changes be required, strategically update the import history to minimize disruptions to Testany test cases.
2.3 Identify the branch and version and import history owner
Before initiating the bulk import, determine:
Branch: Choose a stable branch for reliable test execution.
Version: Import either the latest commit or a specific commit ID.
Import History Owner: Plan what should be imported and who is responsible for performing the import. Each repository should have designated owner(s) to ensure proper maintenance and accountability.
3. Steps-by-steps Guide
3.1 Create a New Import
3.1.1 Access ‘Import from Git’ UI
Navigate to ‘Test Case Library’.
Click the ‘↓’ arrow next to ‘Register test case’.
Select ‘Import from Git’.

3.1.2 Create a new import
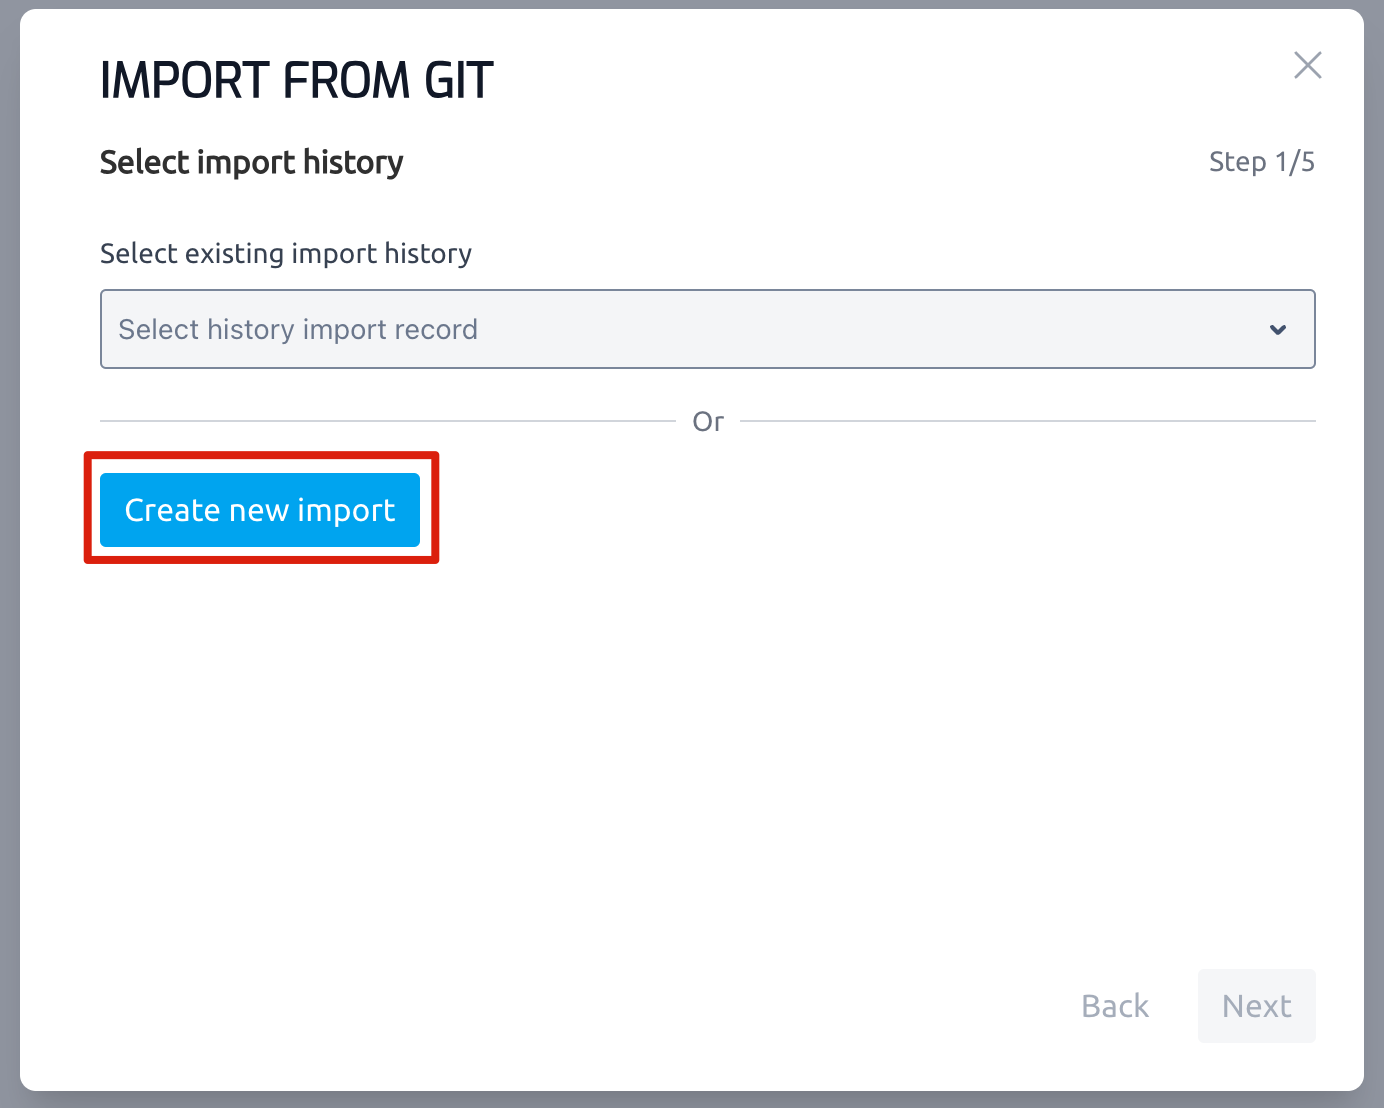
In ‘Step 1/5’ of import wizard, click ‘Create new import’.
3.1.3 Select a runtime
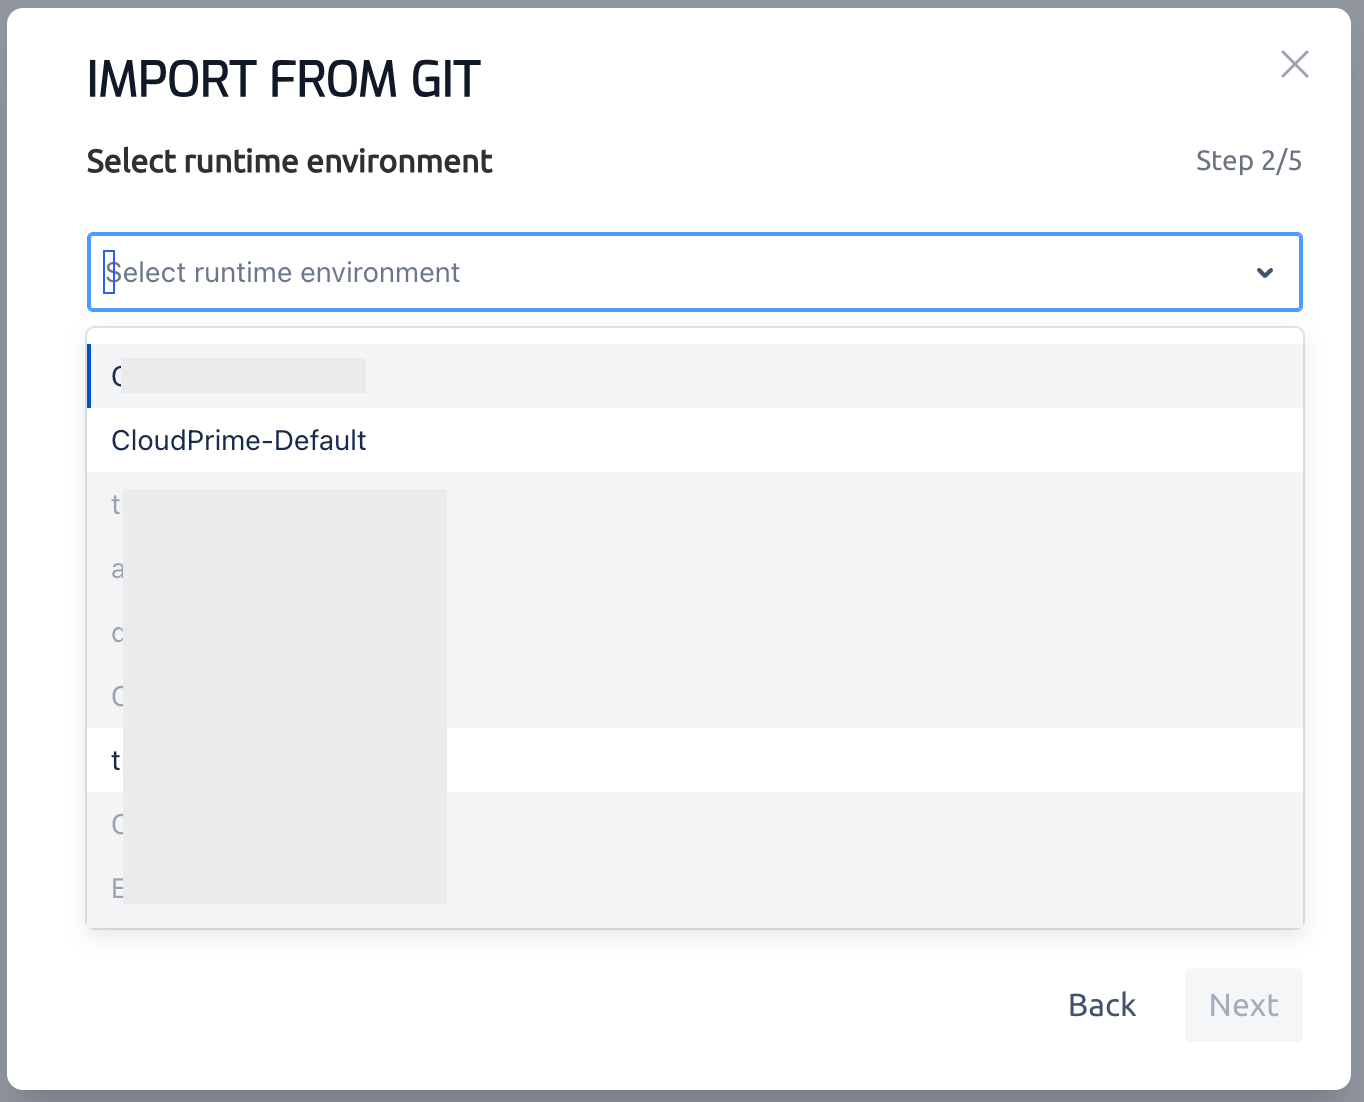
In ‘Step 2/5’ of import wizard, expand runtime dropdown list and select a runtime, and then click ‘Next’. If a runtime is non-operational, it will be greyed out.
3.1.4 Add repository information
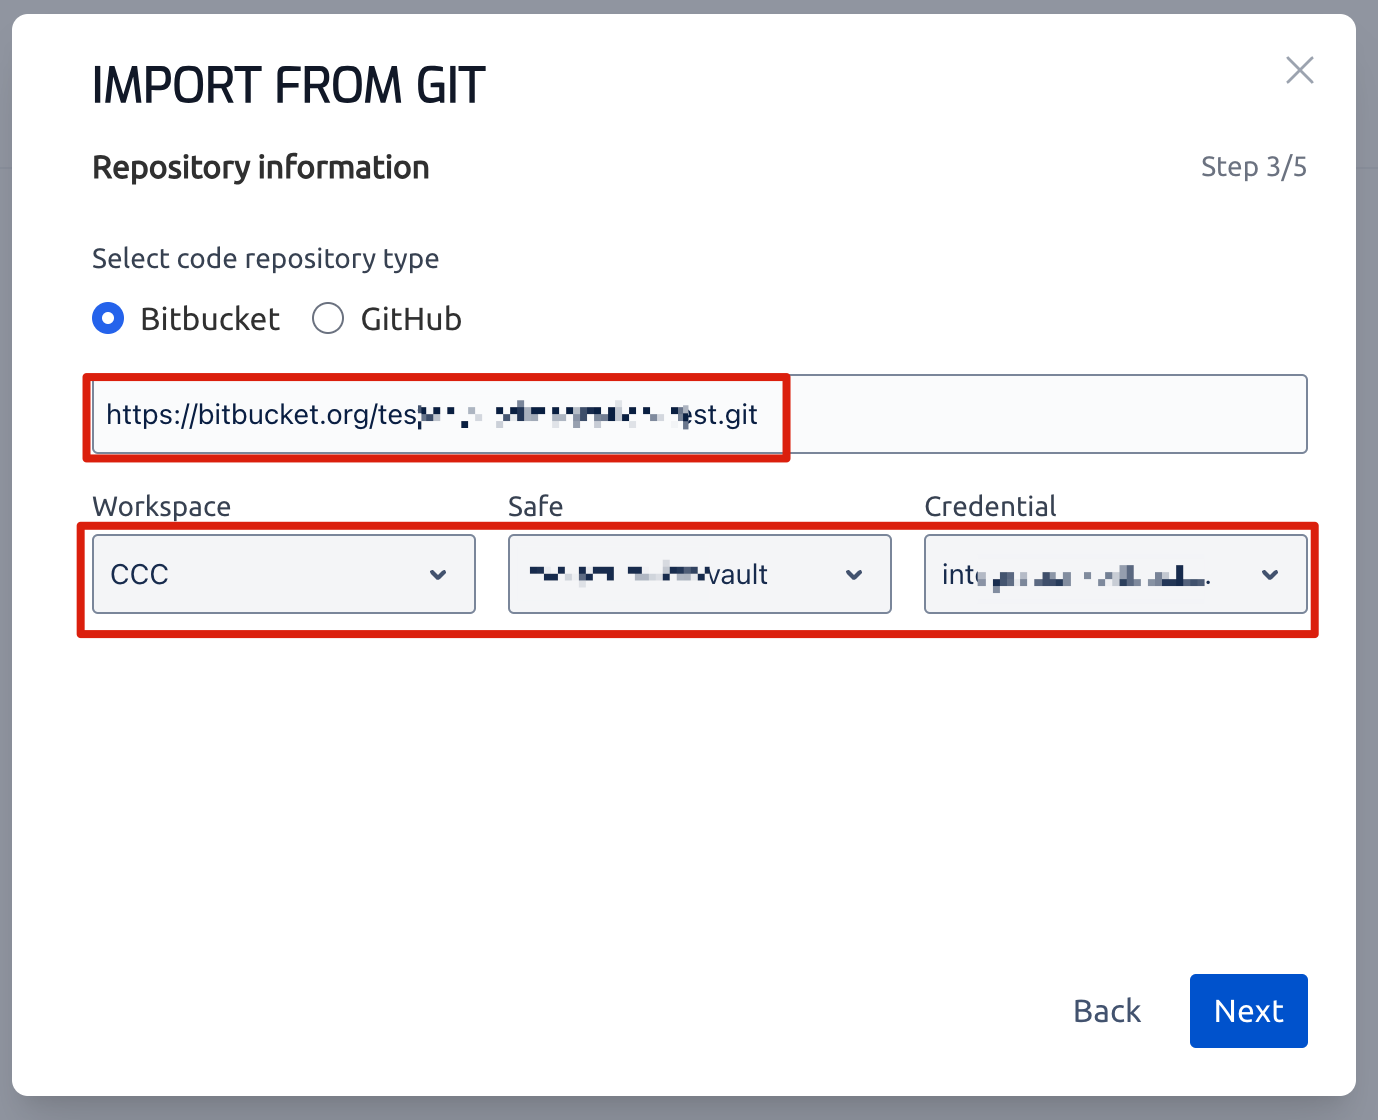
In ‘Step 3/5’ of import wizard, fill in the following details and click ‘Next’:
Repository type: Bitbucket or GitHub
Repository URL:
https://bitbucket.org/workspace/repo.gitorhttps://github.com/username/repo.gitAccess Credential: Select the pre-configured credential (see section #2.1)
3.1.5 Select directory
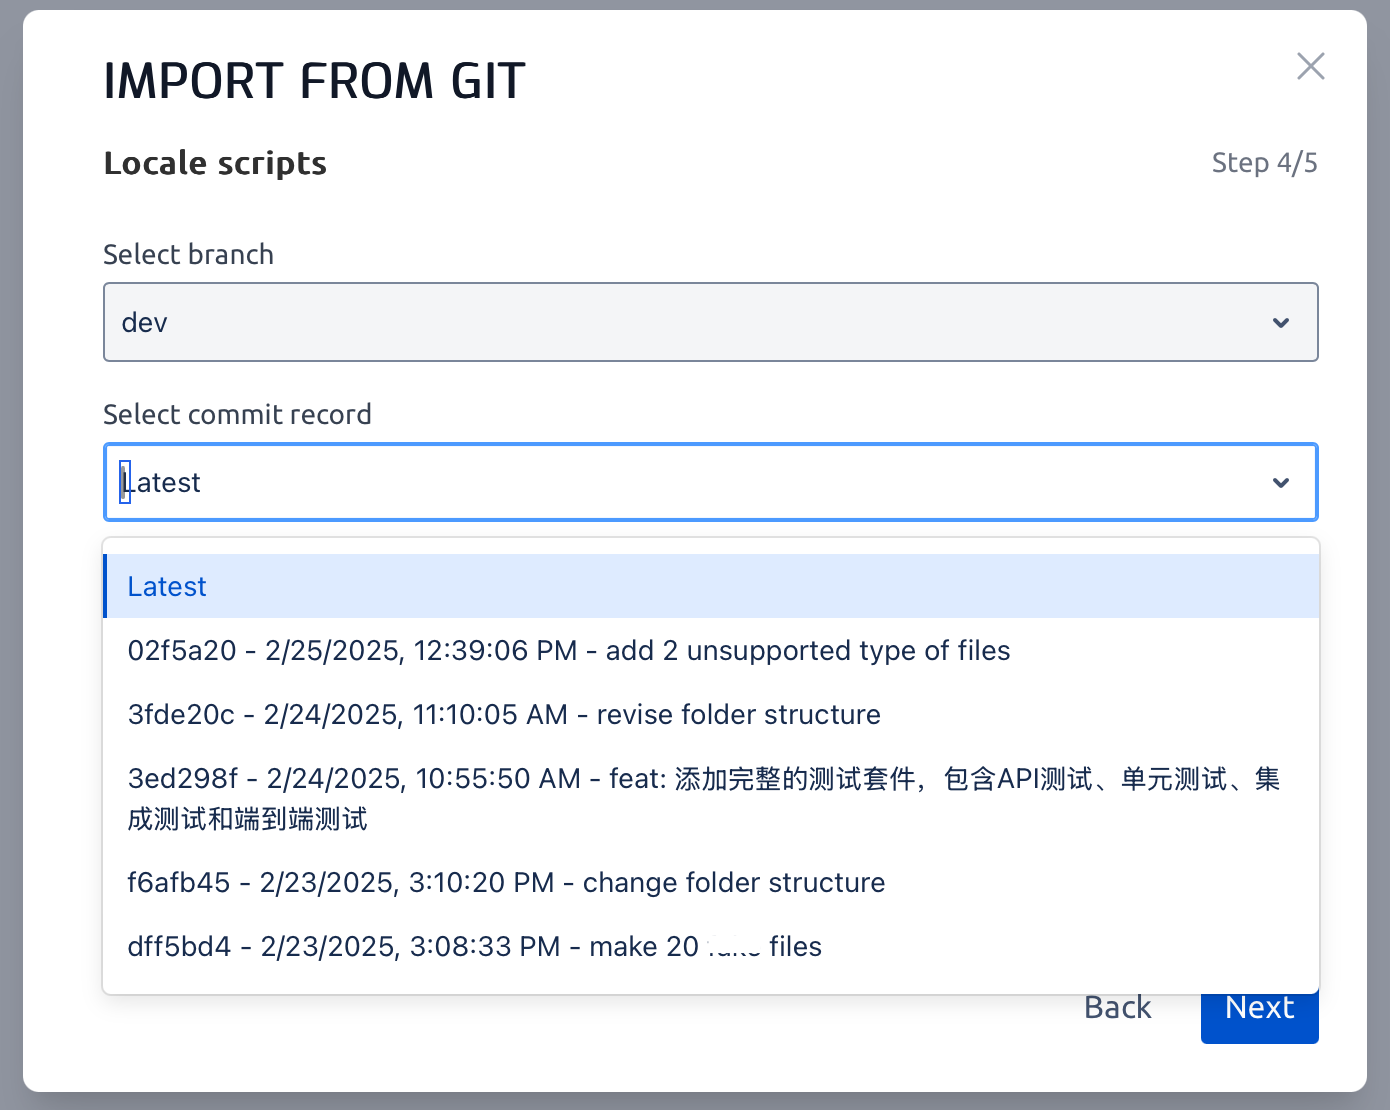
In ‘Step 4/5’ of import wizard, provide below information and click ‘Next’.
Branch: Choose a branch with stable test case files.
Commit:
Latest commit: The latest version of script files of the select branch will be imported.
A specific commit: A specific version of script files based on the chosen commit will be imported.
Root directory:
If you want to import the entire repository, DO NOT select any directory
If you select a specific directory, only scripts within that directory (and its subdirectories) will be included in the import.
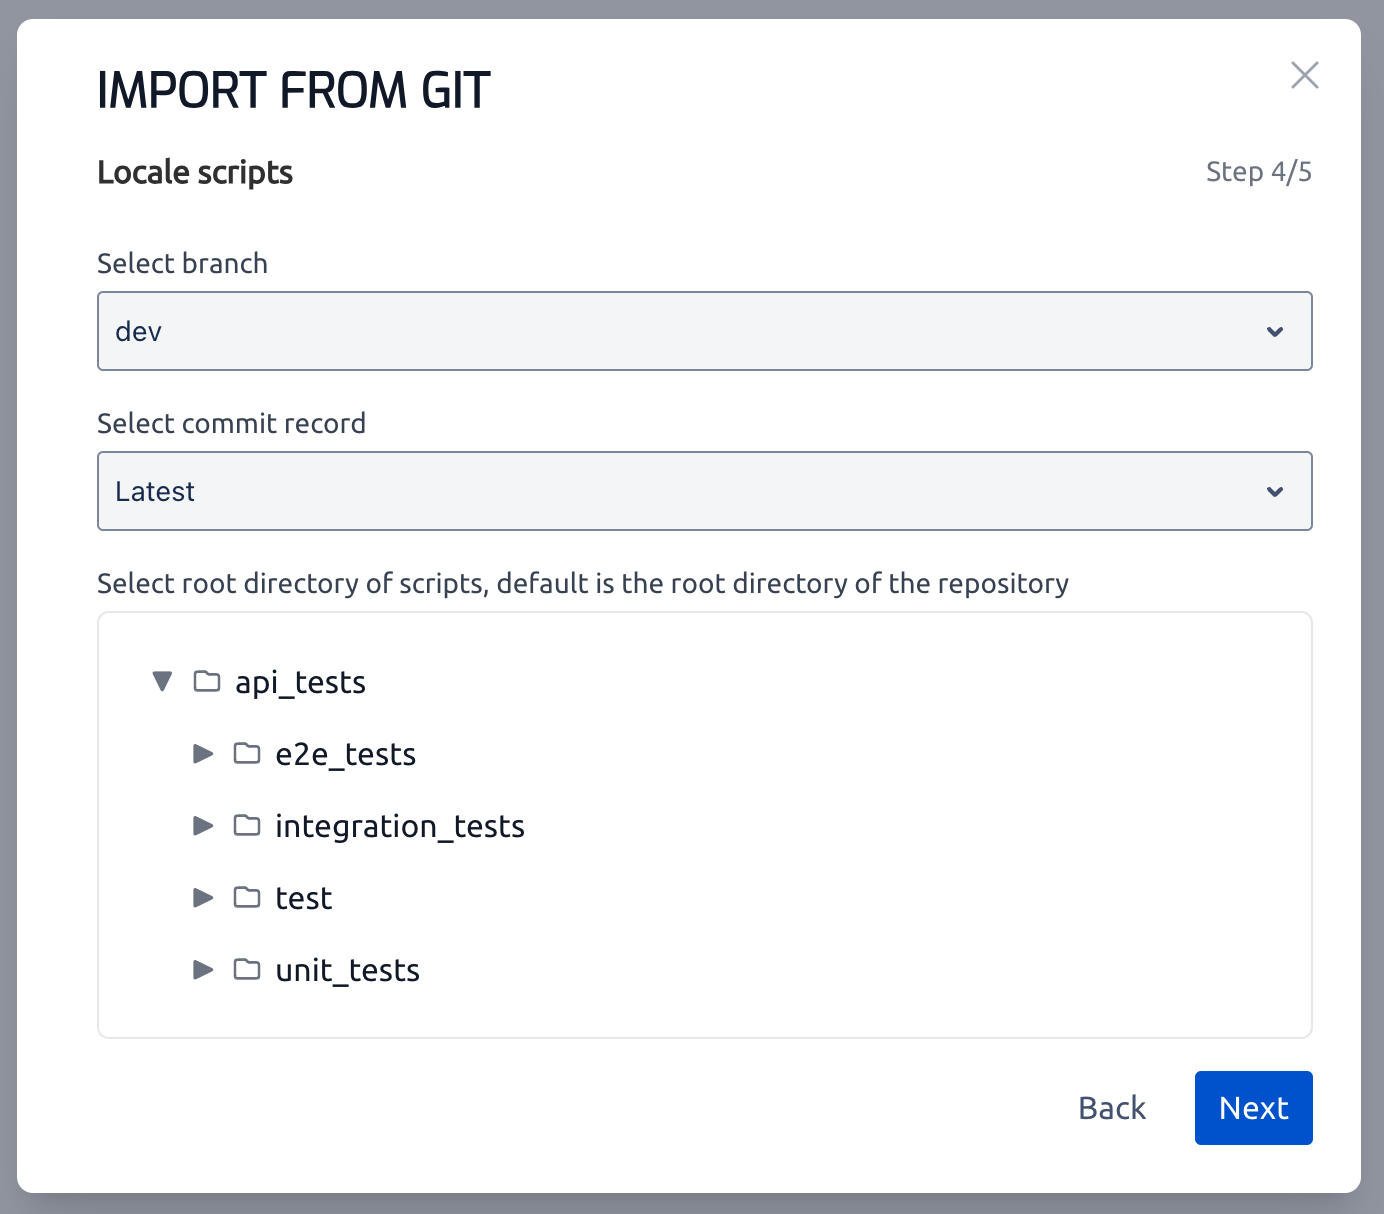
If you accidentally select a directory but actually intended to import the entire repository, you cannot undo the selection within the same import session. To import the entire repository, you must restart the bulk import process and begin again.
3.1.6 Choose scripts
In ‘Step 5/5’ of import wizard, choose scripts to import and click ‘Submit’.
Select all: Selects all supported script files (*.py, *.json, *.java, *.jmx)
Select specific files: Pick test script files from the directory
✔️ Tips:
The chosen file will act as the primary execution script. If your test case includes multiple files, only select the main execution file; there is no need to select all supporting files.
Each selected file will be registered as a Testany test case.
The total number of selected scripts will be displayed in the bottom left corner of the wizard.
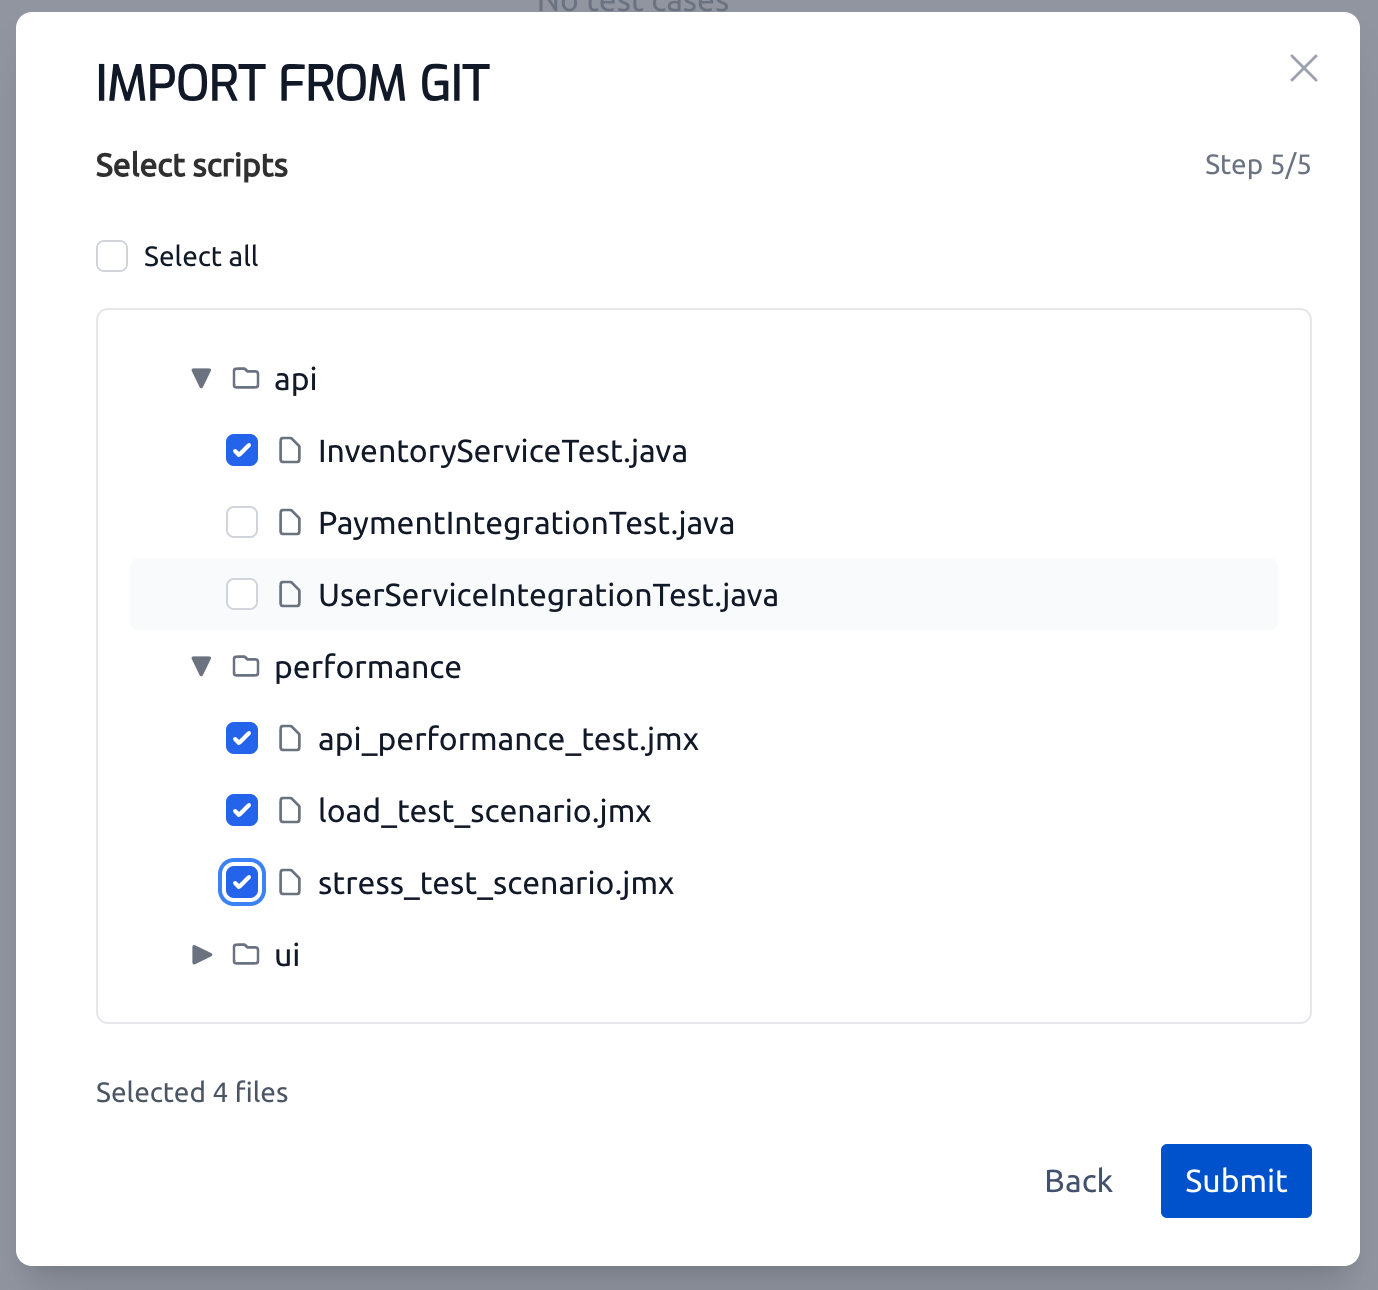
After submitting the import request, an import history is automatically created. You can access and modify it later if needed (see section #3.2.2).
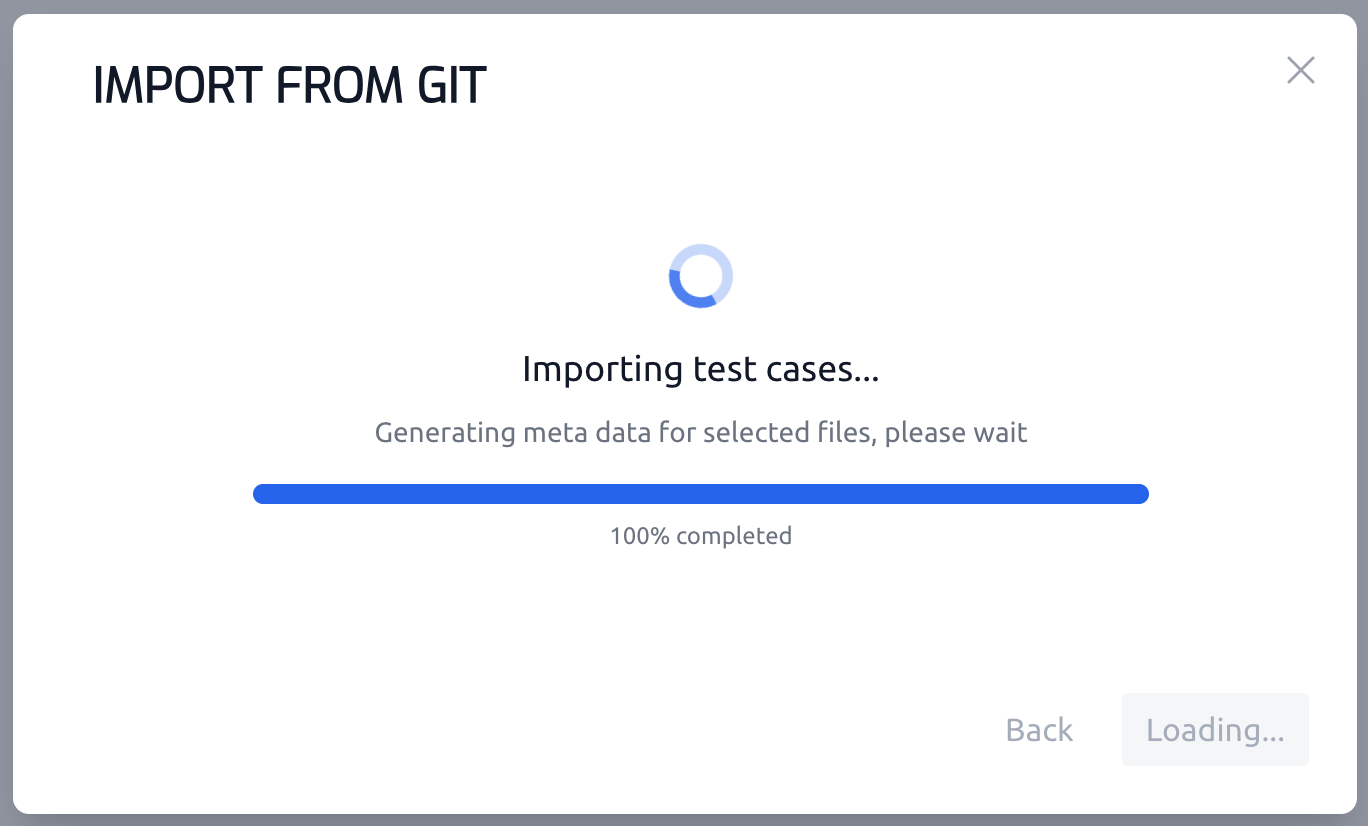
The import process will begin and may take some time to complete (see below screen capture), especially when importing a large number of test cases. Please wait until the process finishes.
3.1.7 Validate test case
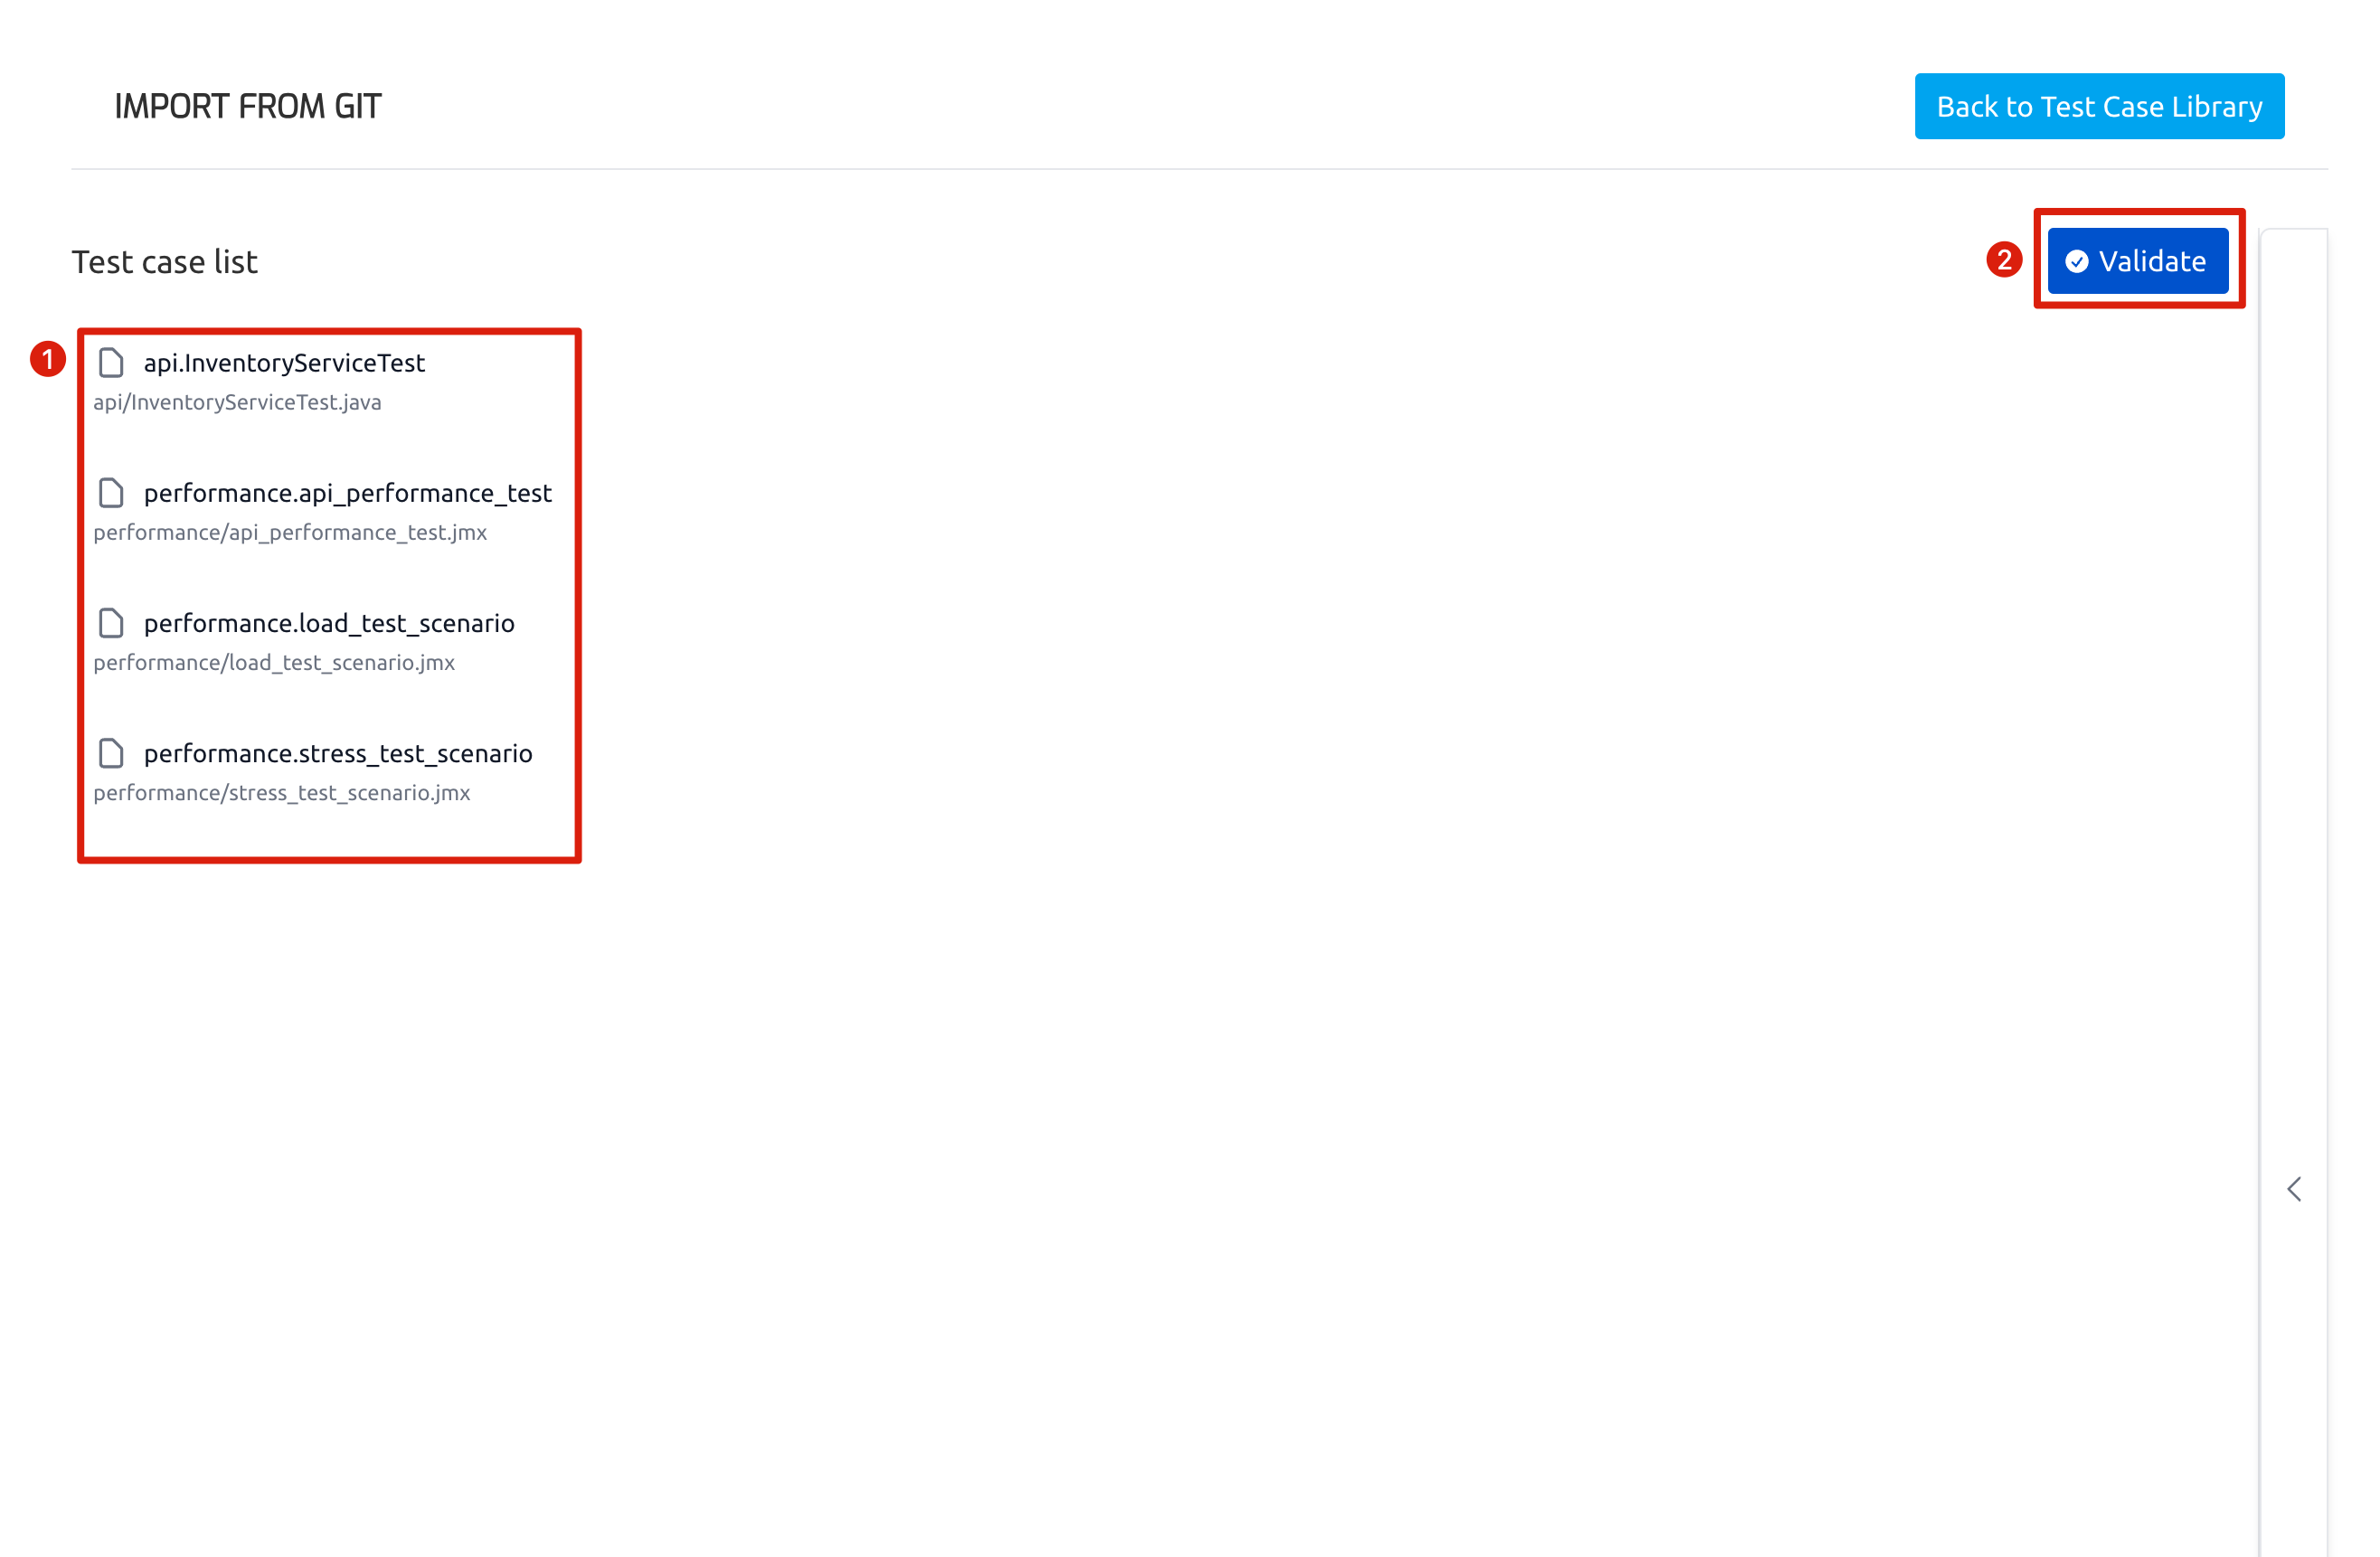
Once the import is finished, review case detail in ‘Validation’ page before bulk registration.
3.1.7.1 Review case details (optional)
In the ‘Validation’ page, clicking on a test case in the 'Test case list' panel will expand the 'Test case details' panel, showing all the specifics of that case. If you want to tweak any field values, you can either edit them one by one at this step or go for a bulk edit (refer to Bulk Manage Test Cases) after the import process.
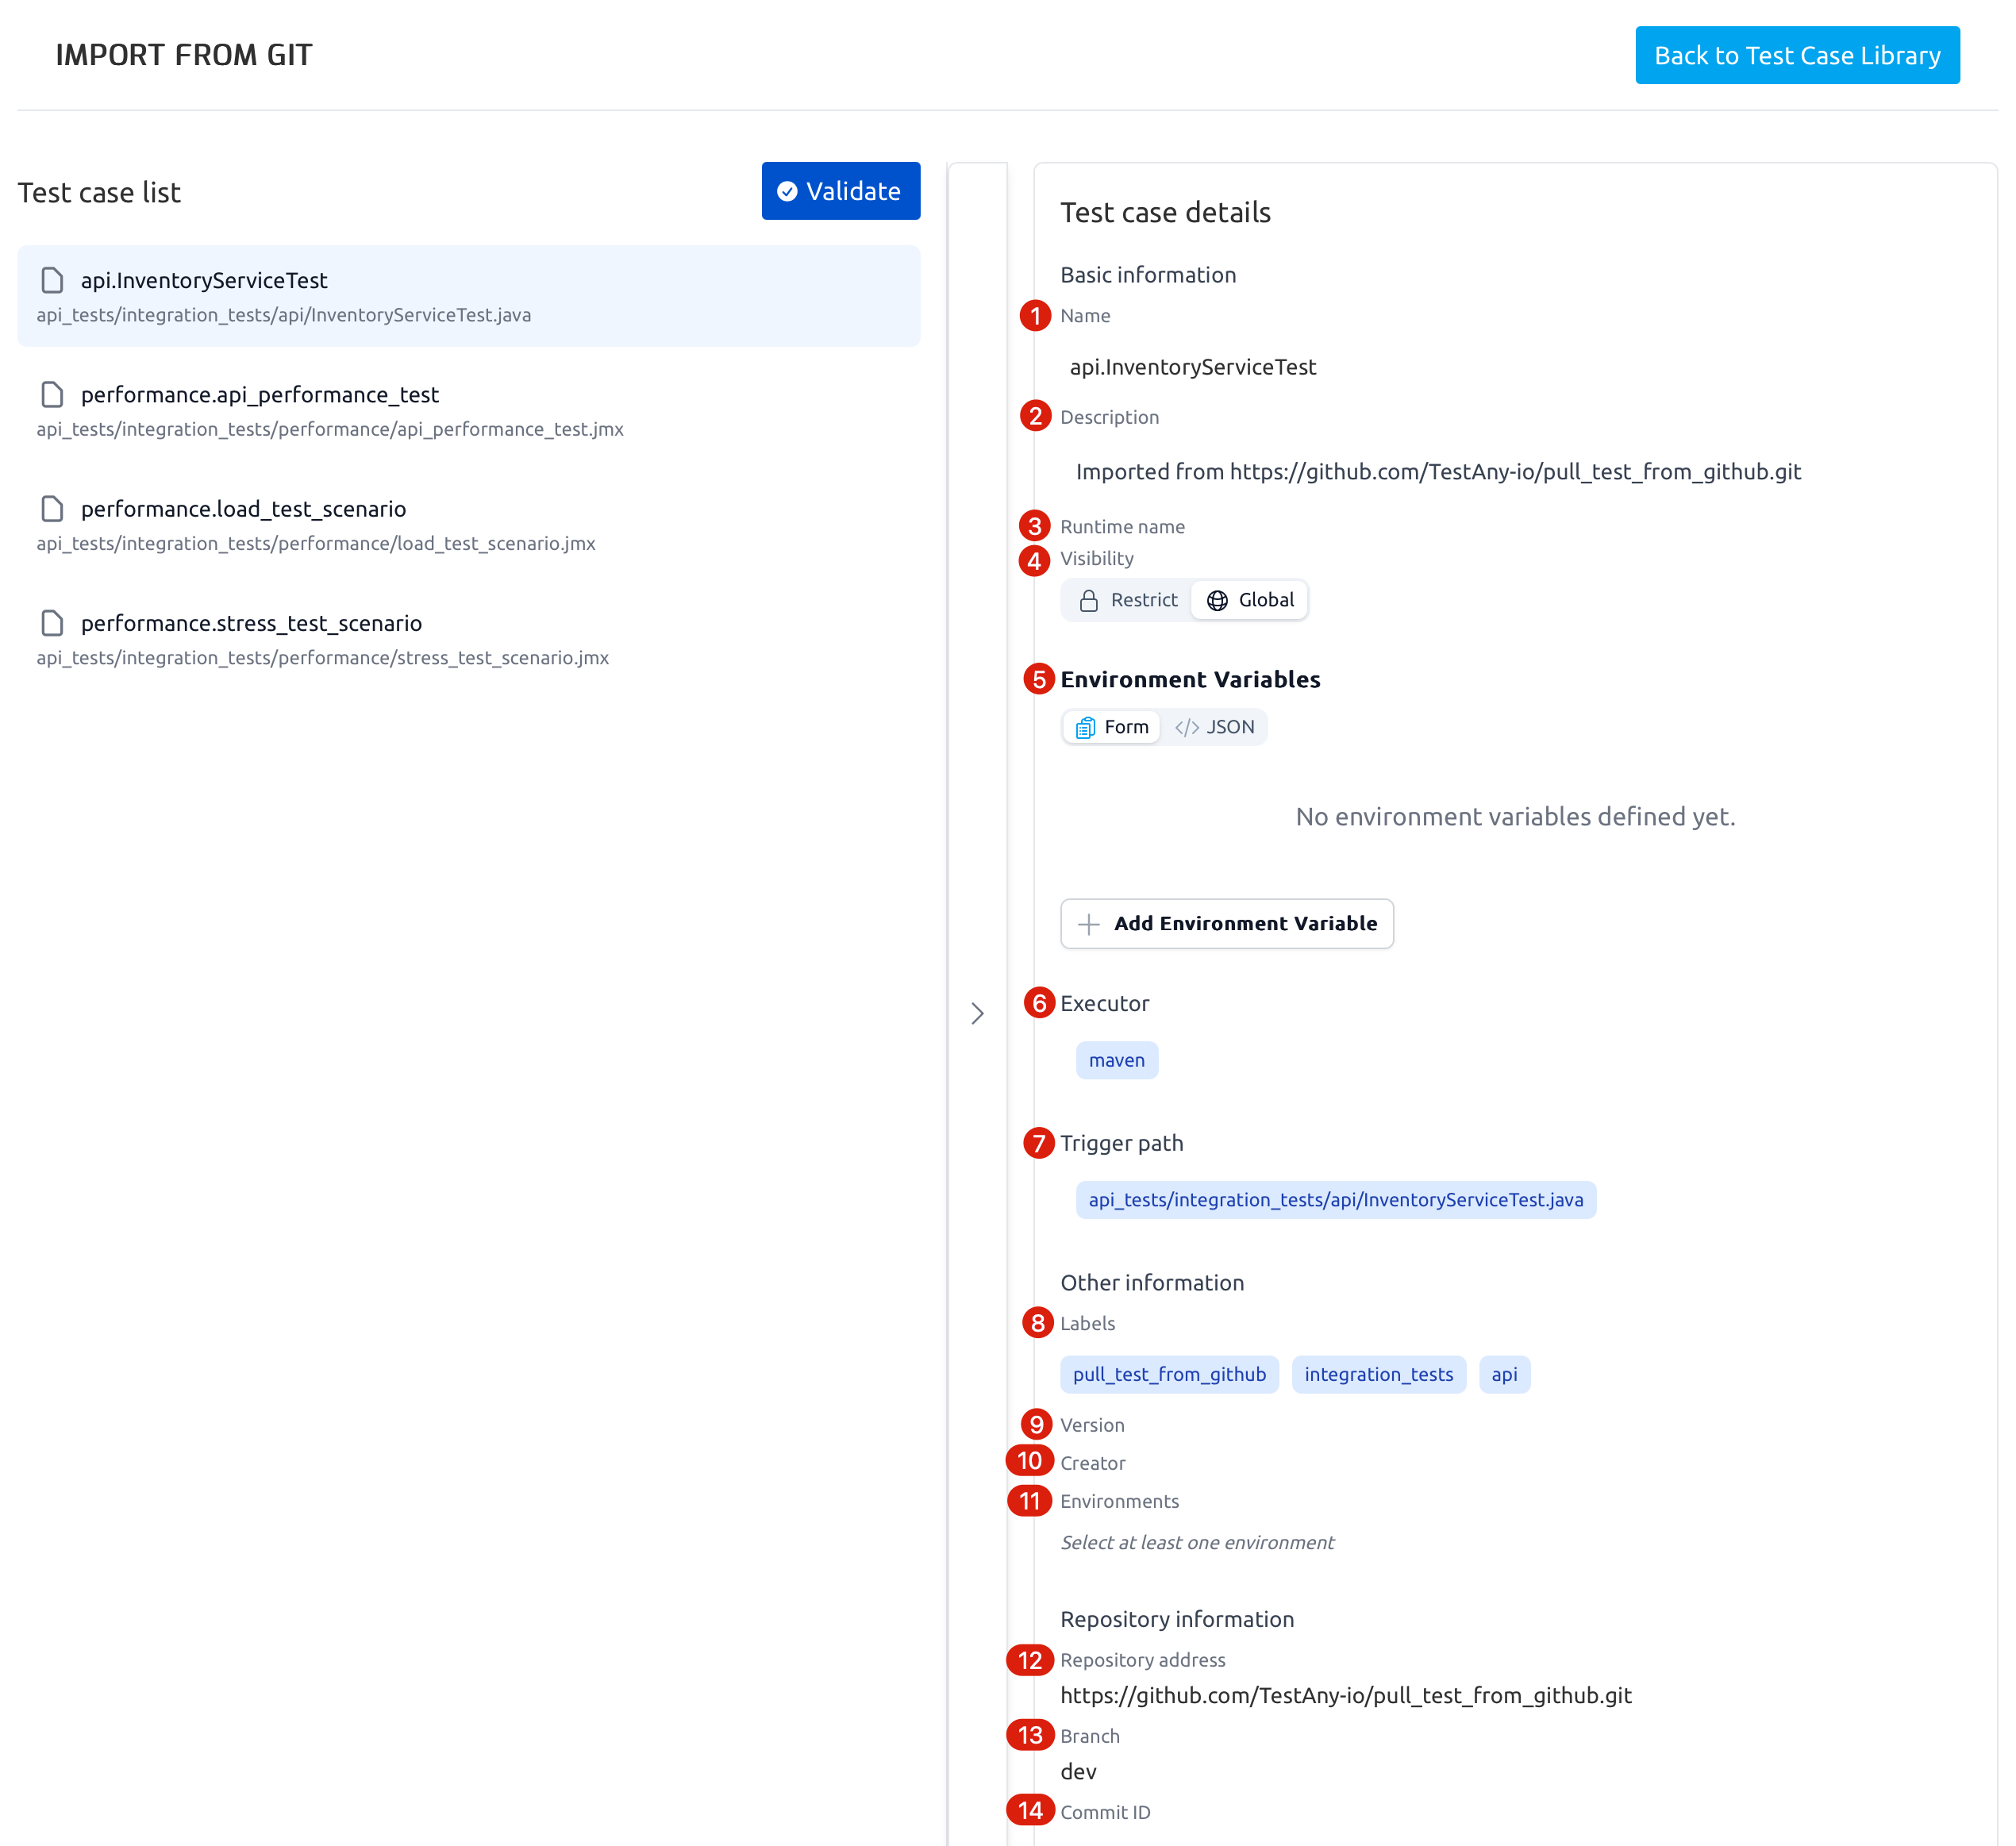
Case Field | Default Value | Editable | |
|---|---|---|---|
| 1 | Name |
| Yes |
| 2 | Description | ”Import from | Yes |
| 3 | Runtime name | Selected runtime during import | No |
| 4 | Visibility |
| Yes |
| 5 | Environment Variables | - | Yes |
| 6 | Executor | Based on file type:
| Yes |
| 7 | Trigger command / trigger path | Based on executor:
| Yes |
| 8 | Labels | Parent directory names in the relative path to the selected root directory are assigned as labels | Yes |
| 9 | Version |
| No |
| 10 | Creator | Testany user who performs the import | No |
| 11 | Environments | - | Yes |
| 12 | Repository address | Git repository URL | No |
| 13 | Branch | Selected branch | No |
| 14 | Commit ID |
| No |
3.1.7.2 Validate (mandatory)
Before proceeding with bulk registration, all imported test cases must pass validation by Testany.
Click ‘Validate’ button before bulk registration. If the validation is successful, a message will appear: “All test cases validated successfully!”.
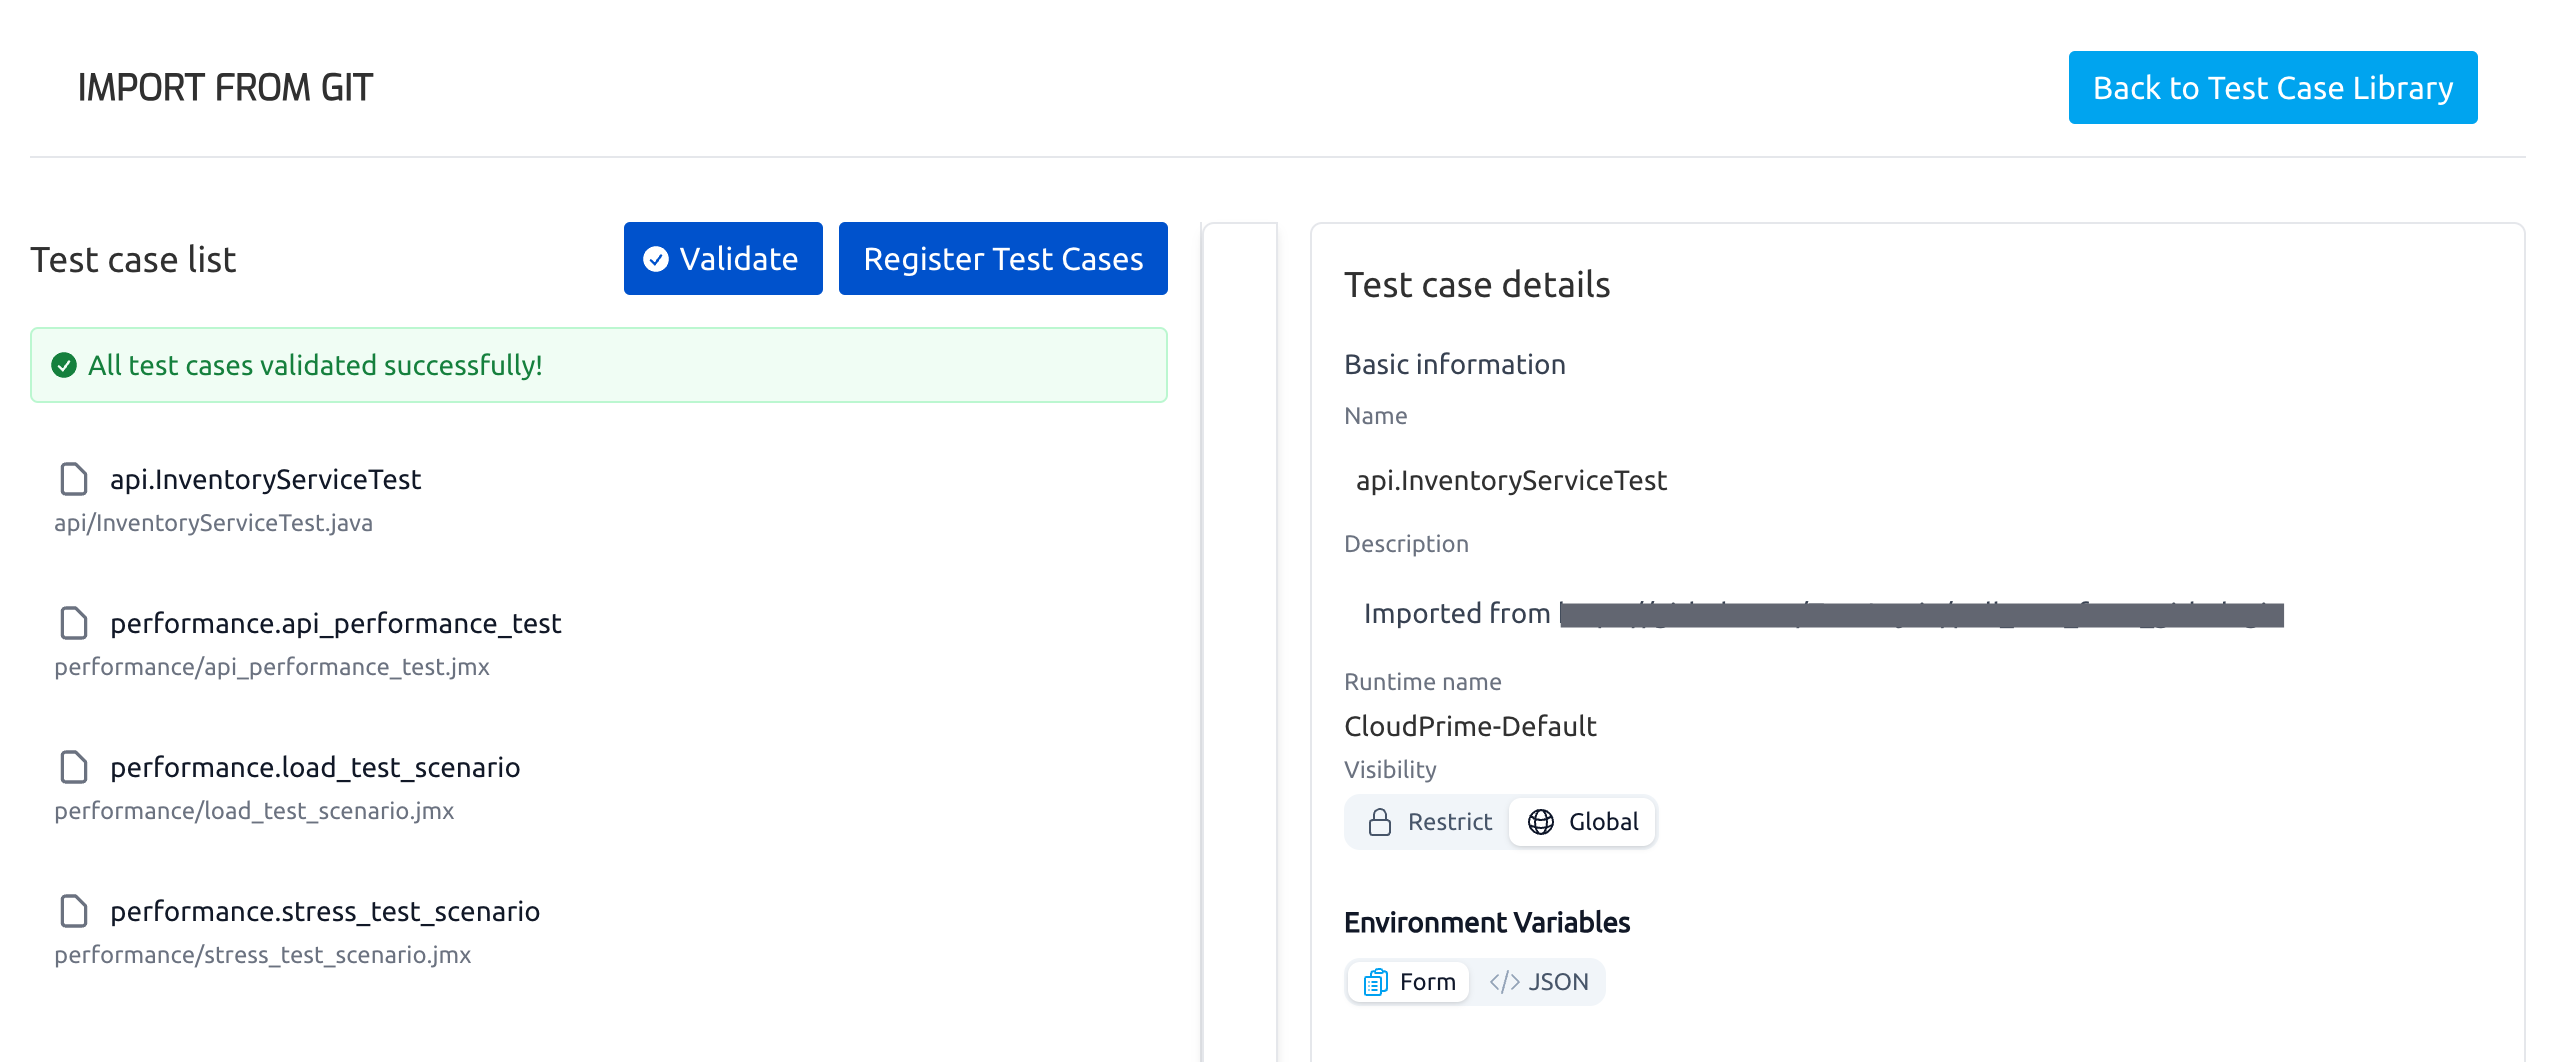
3.1.8. Bulk register test cases
Click ‘Register Test Cases’ button to finish the import. A confirmation message will appear once the test cases are successfully registered.

3.1.9 View registered test cases
You can perform a combination search by labels = {repository_name} & created_from = {registration_date} & owner = {user_id}.

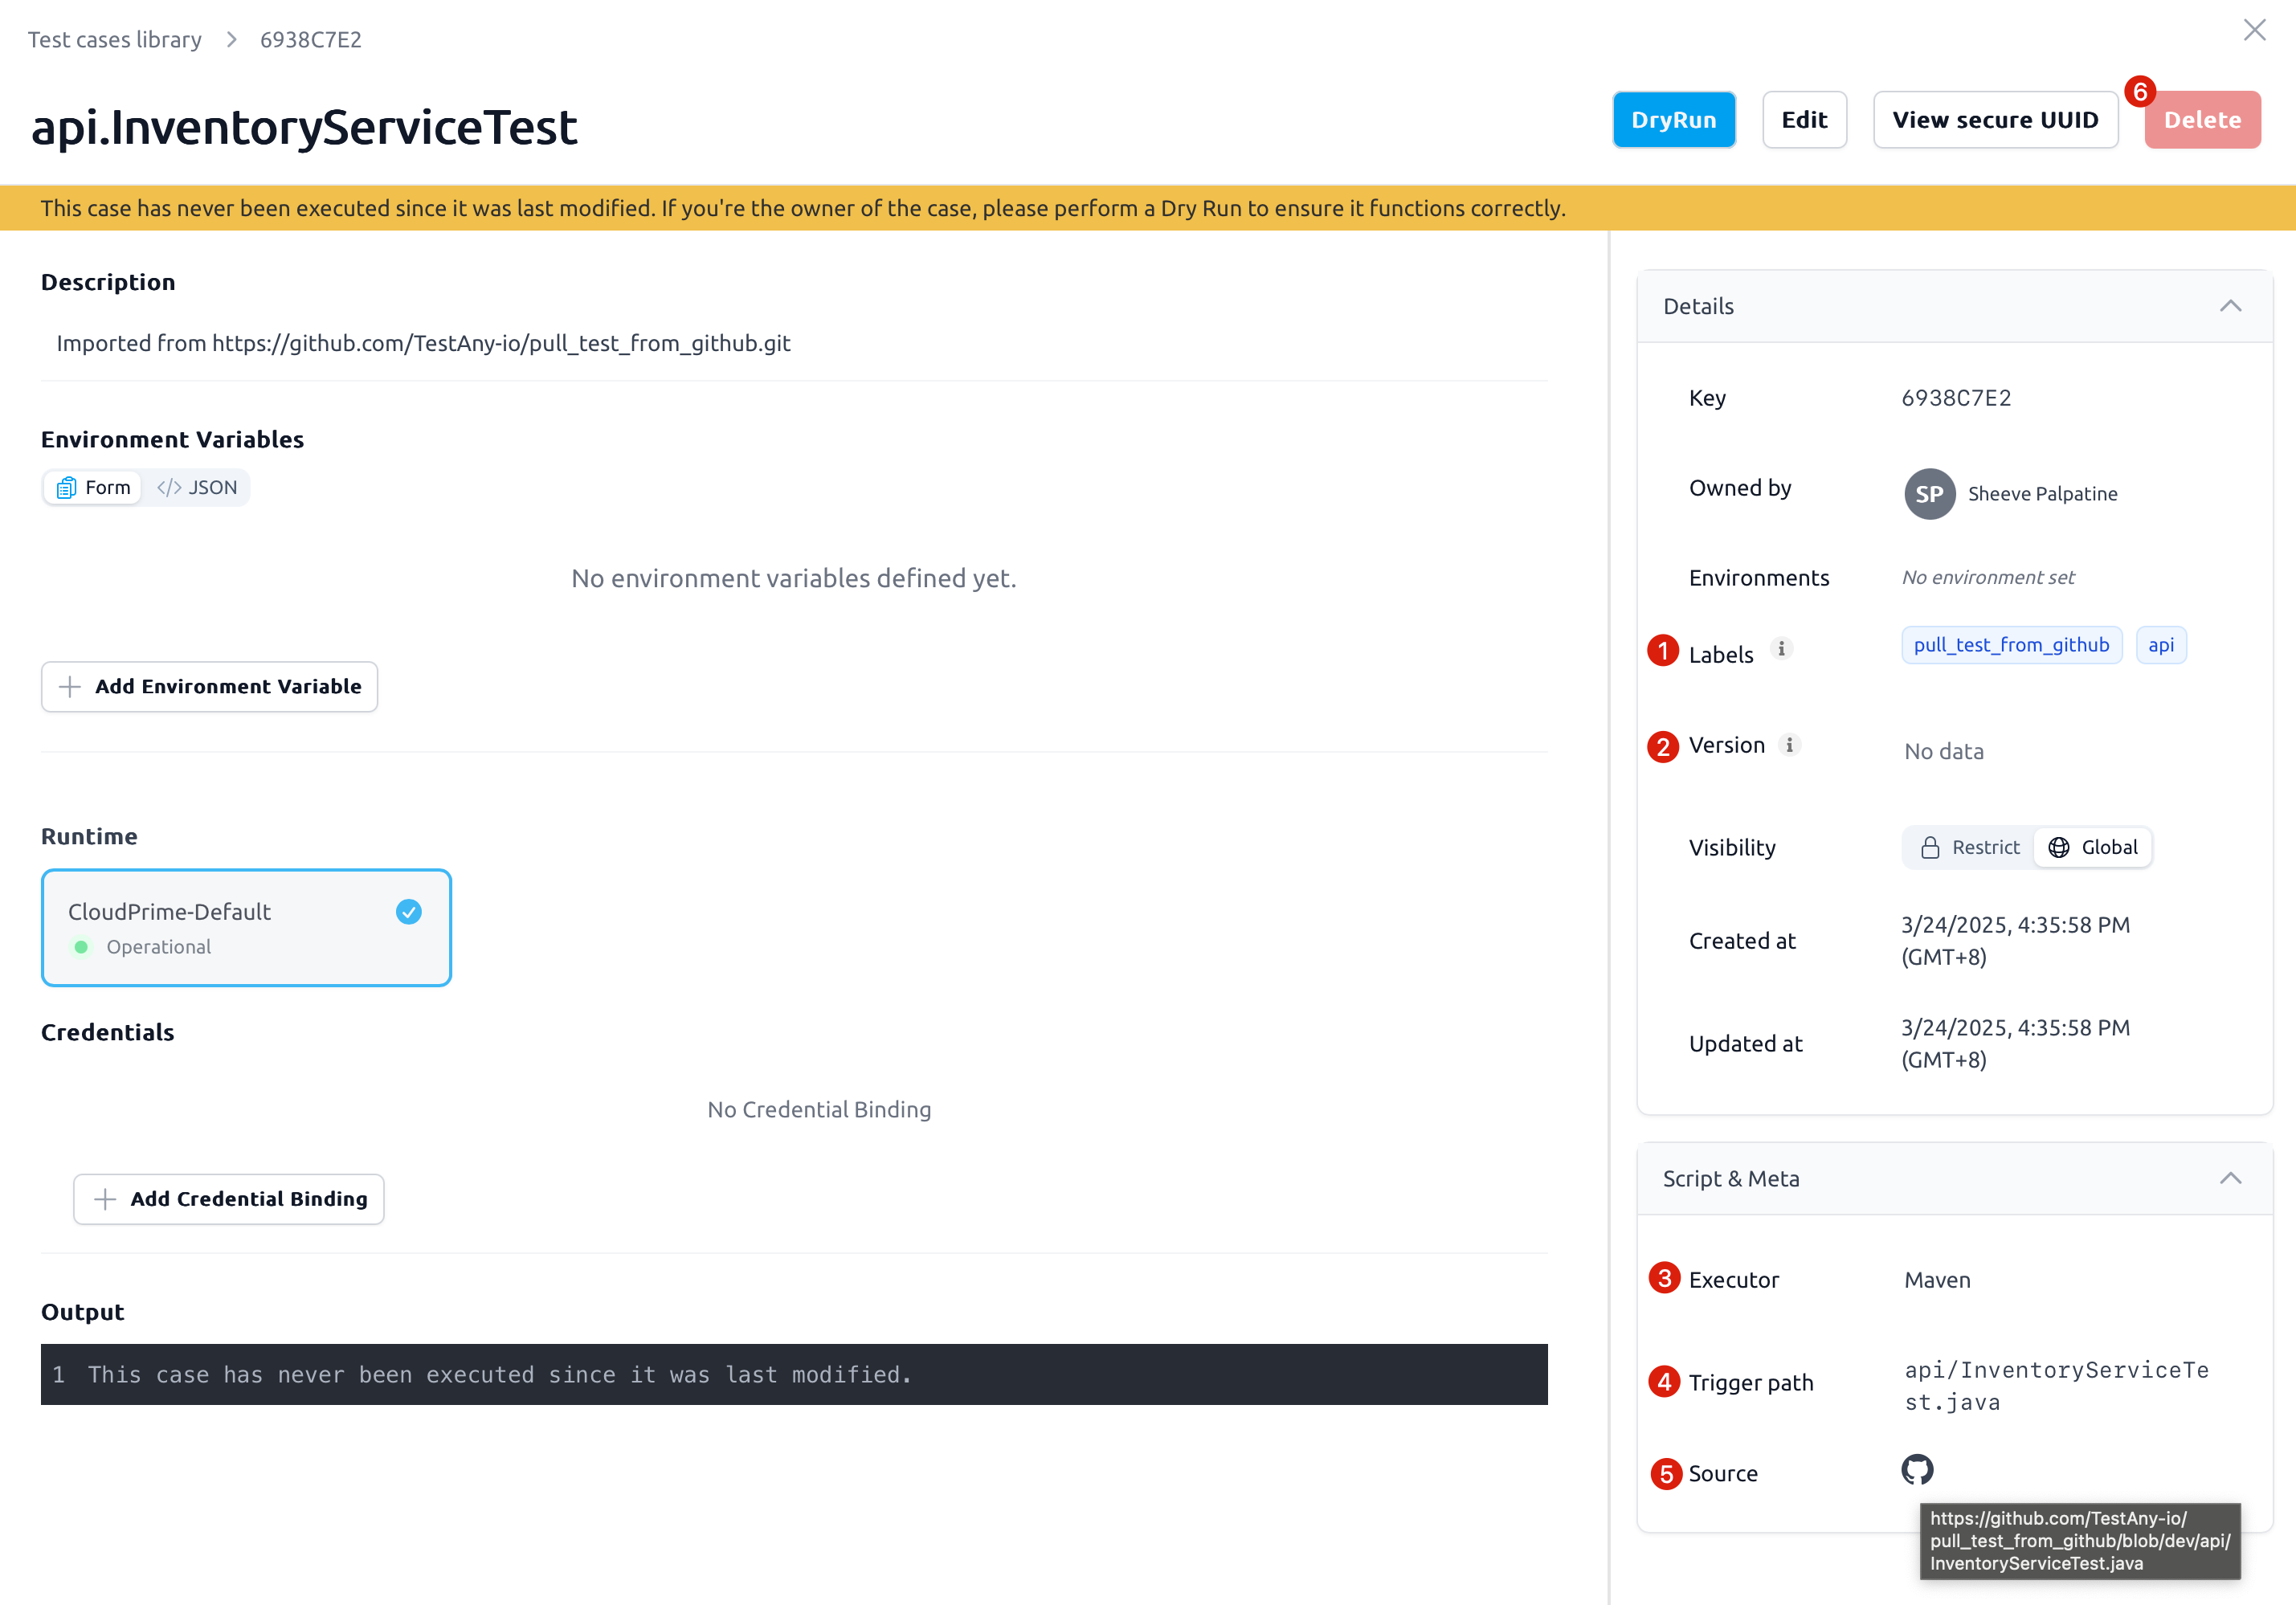
You can also find the git information mentioned in section #3.1.7.1 in case details.
Labels
Version
Executor
Trigger path / command
Source: the full URL of the source file. Clicking the icon will open the source file in a new tab.
Delete button is disabled, you may refer to section #3.2.3 or #3.3 to delete the case.
3.2 Update an Import History
3.2.1 Access ‘Import from Git’ UI
Navigate to ‘Test Case Library’
Click the ‘↓’ arrow next to ‘Register test case’
Select ‘Import from Git’

3.2.2 Select an import history
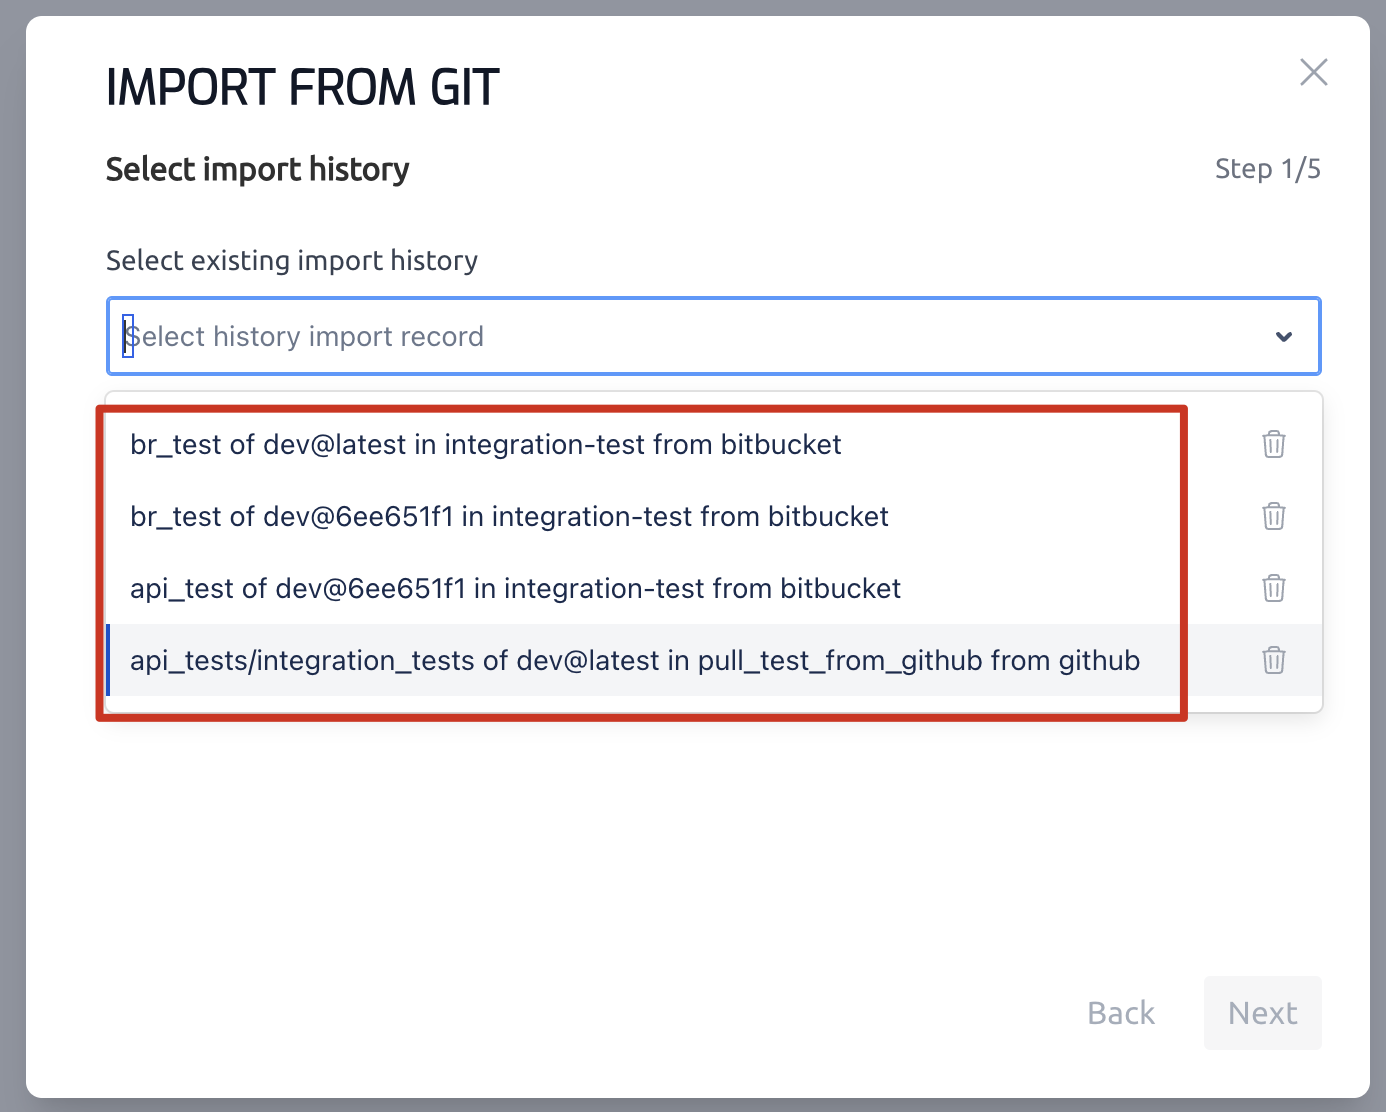
In ‘Step 1/5’ of import wizard, expand ‘import history’ dropdown
Select an item you wish to edit
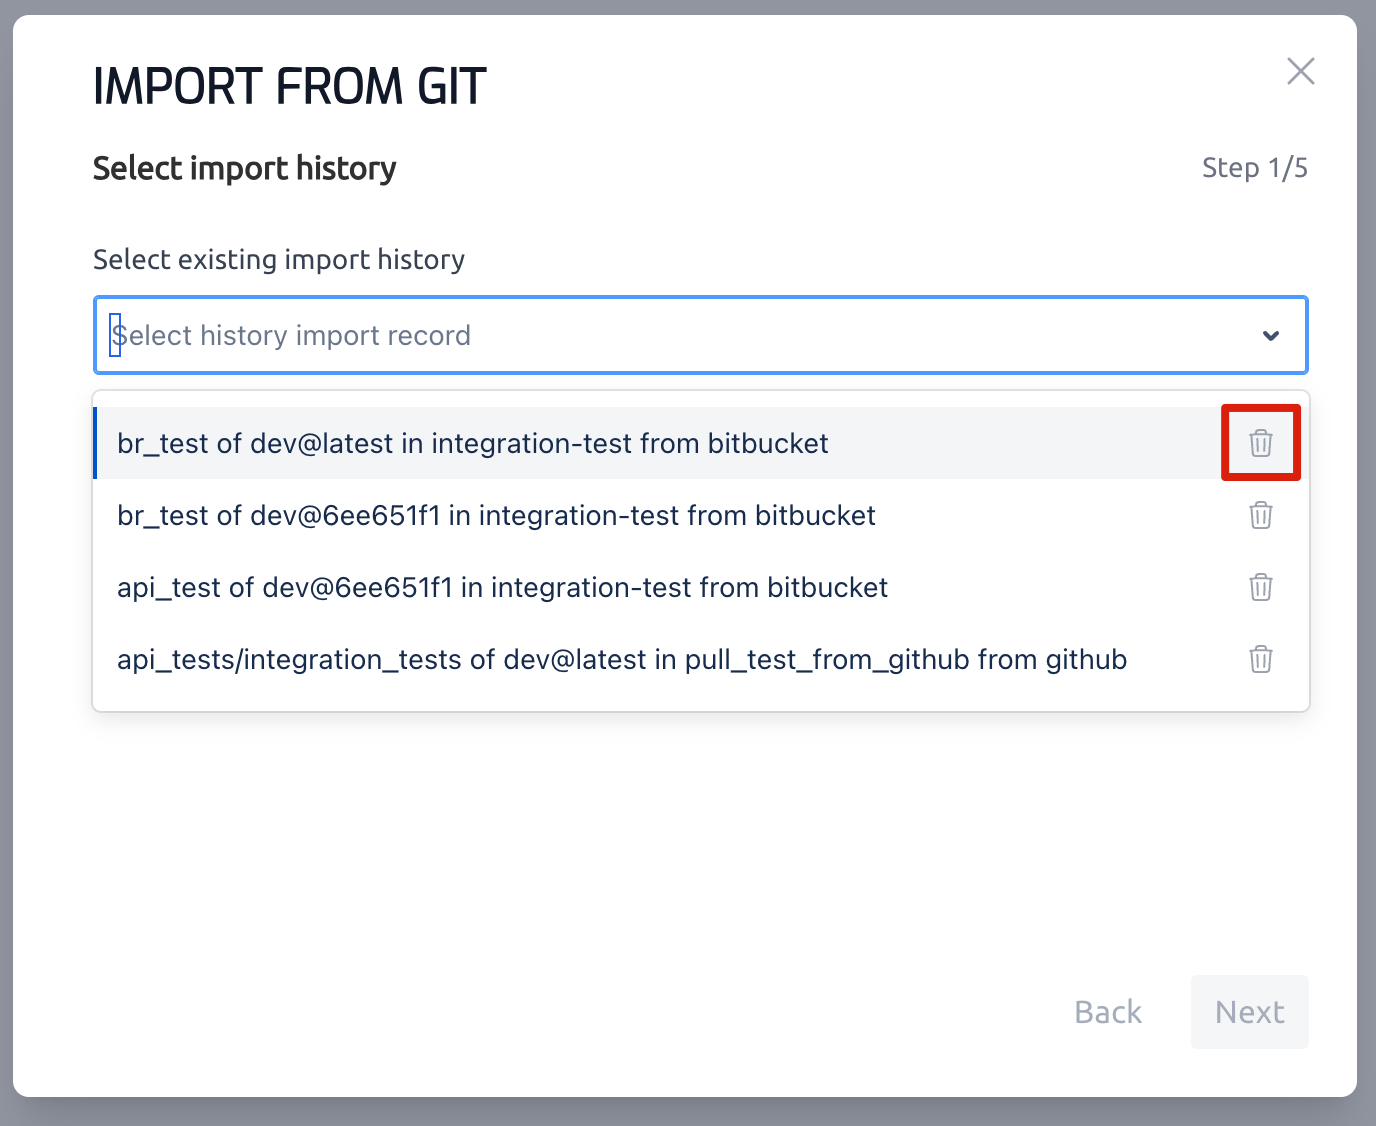
✔️ Tip: naming convention of the import history is “{selected_root_directory} of {branch}@{commit_id} in {repository_name} from {repository_type}“
3.2.3 Modify selection
In ‘Step 5/5’ of import wizard, previously imported files are pre-selected. Modify the selection as needed, then click “Submit” to proceed.
Key notes:
If a previously imported file has been renamed or moved, it will no longer appear in the import wizard. As a result, its registered test case will be either deleted or unlinked upon completion of the import process (see section #3.3.2).
If a previously imported file is manually unselected, it will be removed from this import history (a confirmation message will be displayed). As a result, its registered test case will be either deleted or unlinked upon completion of the import process (see section #3.3.2).
For the import history with ‘latest commit', files that did not exist in the last import (including newly created, renamed, or restored files) will appear in the dialog but remain unselected by default.
For the import history with ‘a specific commit', files that did not exist at the selected commit (including newly created, renamed, or restored files) will not appear in the import wizard.
3.2.4 Validate test case
Once the import is finished, review case details in ‘Validation’ page and click ‘Validate’ to proceed. If you want to tweak any field values, you can either edit them one by one at this step or go for a bulk edit (refer to Bulk Manage Test Cases) after the import process.
Case Field | Default Value | Editable |
|---|---|---|
Name | Latest value | Yes |
Description | Latest value | Yes |
Runtime name | Latest value | No |
Visibility | Latest value | Yes |
Environment Variables | Latest value | Yes |
Executor | Latest value | Yes |
Trigger path | Latest value | Yes |
Labels | Latest value | Yes |
Version |
| Yes |
Creator | Latest value | No |
Environments | Latest value | Yes |
Repository address | Latest value | No |
Branch | Latest value | No |
Commit ID | Latest value | No |
Key notes:
For previously imported files:
All case details, except for
version, are pre-loaded with their latest values and will not be overridden unless explicitly modified them in this step.The
versionvalue is always updated in every import process.
3.2.5. Bulk register test cases
Click ‘Register Test Cases’ button to finish the import. A confirmation message will appear once the test cases are successfully registered.
3.3 Delete an Import History
3.3.1 Access ‘Import from Git’ UI
Navigate to ‘Test Case Library’
Click the “↓” arrow next to ‘Register test case’
Select ‘Import from Git’

3.3.2 Select and delete an import history
Before deleting an import history, carefully evaluate its impact on the test cases registered through this import.
Impact of deletion:
Test cases not assembled into any pipeline → Permanently deleted from Testany.
Test cases assembled to pipeline(s) → Will remain in Testany but will be unlinked from the Git repository. You can remove these test cases from the associated test pipelines before proceeding with this operation, or manually delete them after removing the import history.
In ‘Step 1/5’ of import wizard, expand ‘import history’ dropdown
Select an item you wish to delete and click its delete button :trash: next to it (
 No confirmation message will be displayed before deletion. Ensure the action is intentional before proceeding.)
5. Frequently Asked Questions (FAQ)
![]() Why am I seeing a “Failed to fetch branches, please check the repository address and access token” error in step 3/5 of creating a new import?
Why am I seeing a “Failed to fetch branches, please check the repository address and access token” error in step 3/5 of creating a new import?
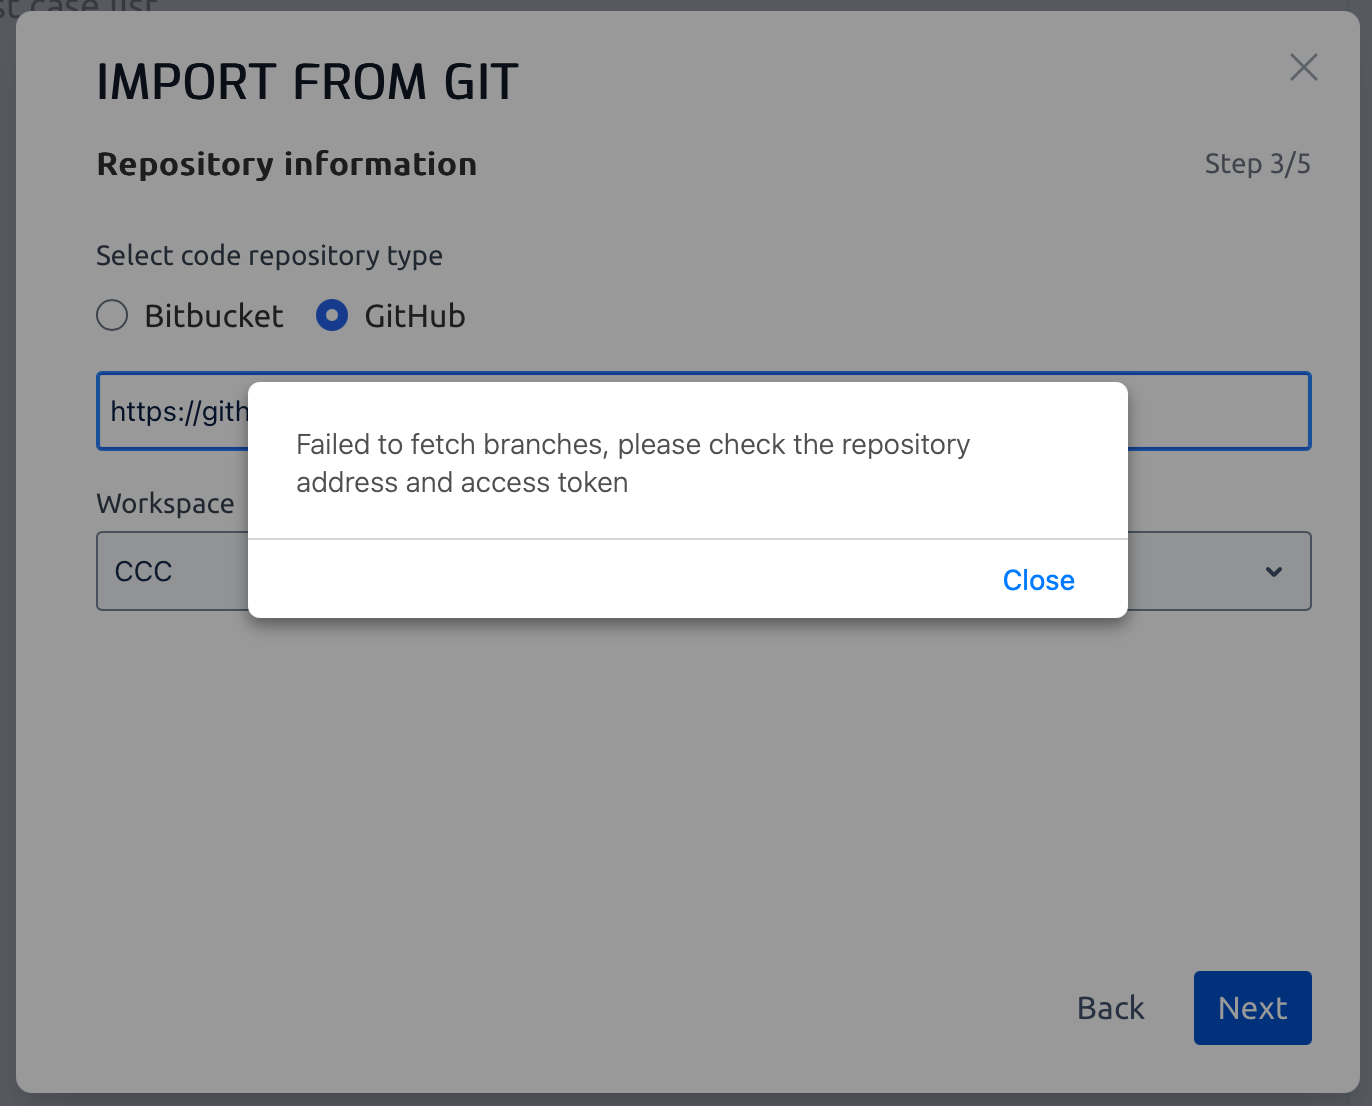
💡 Ensure the git URL is accessible and its credential is selected, see section #3.1.4.
![]() Why am I seeing a “The import history already exists, please select the history to continue“ error in step 5/5 of creating a new import?
Why am I seeing a “The import history already exists, please select the history to continue“ error in step 5/5 of creating a new import?
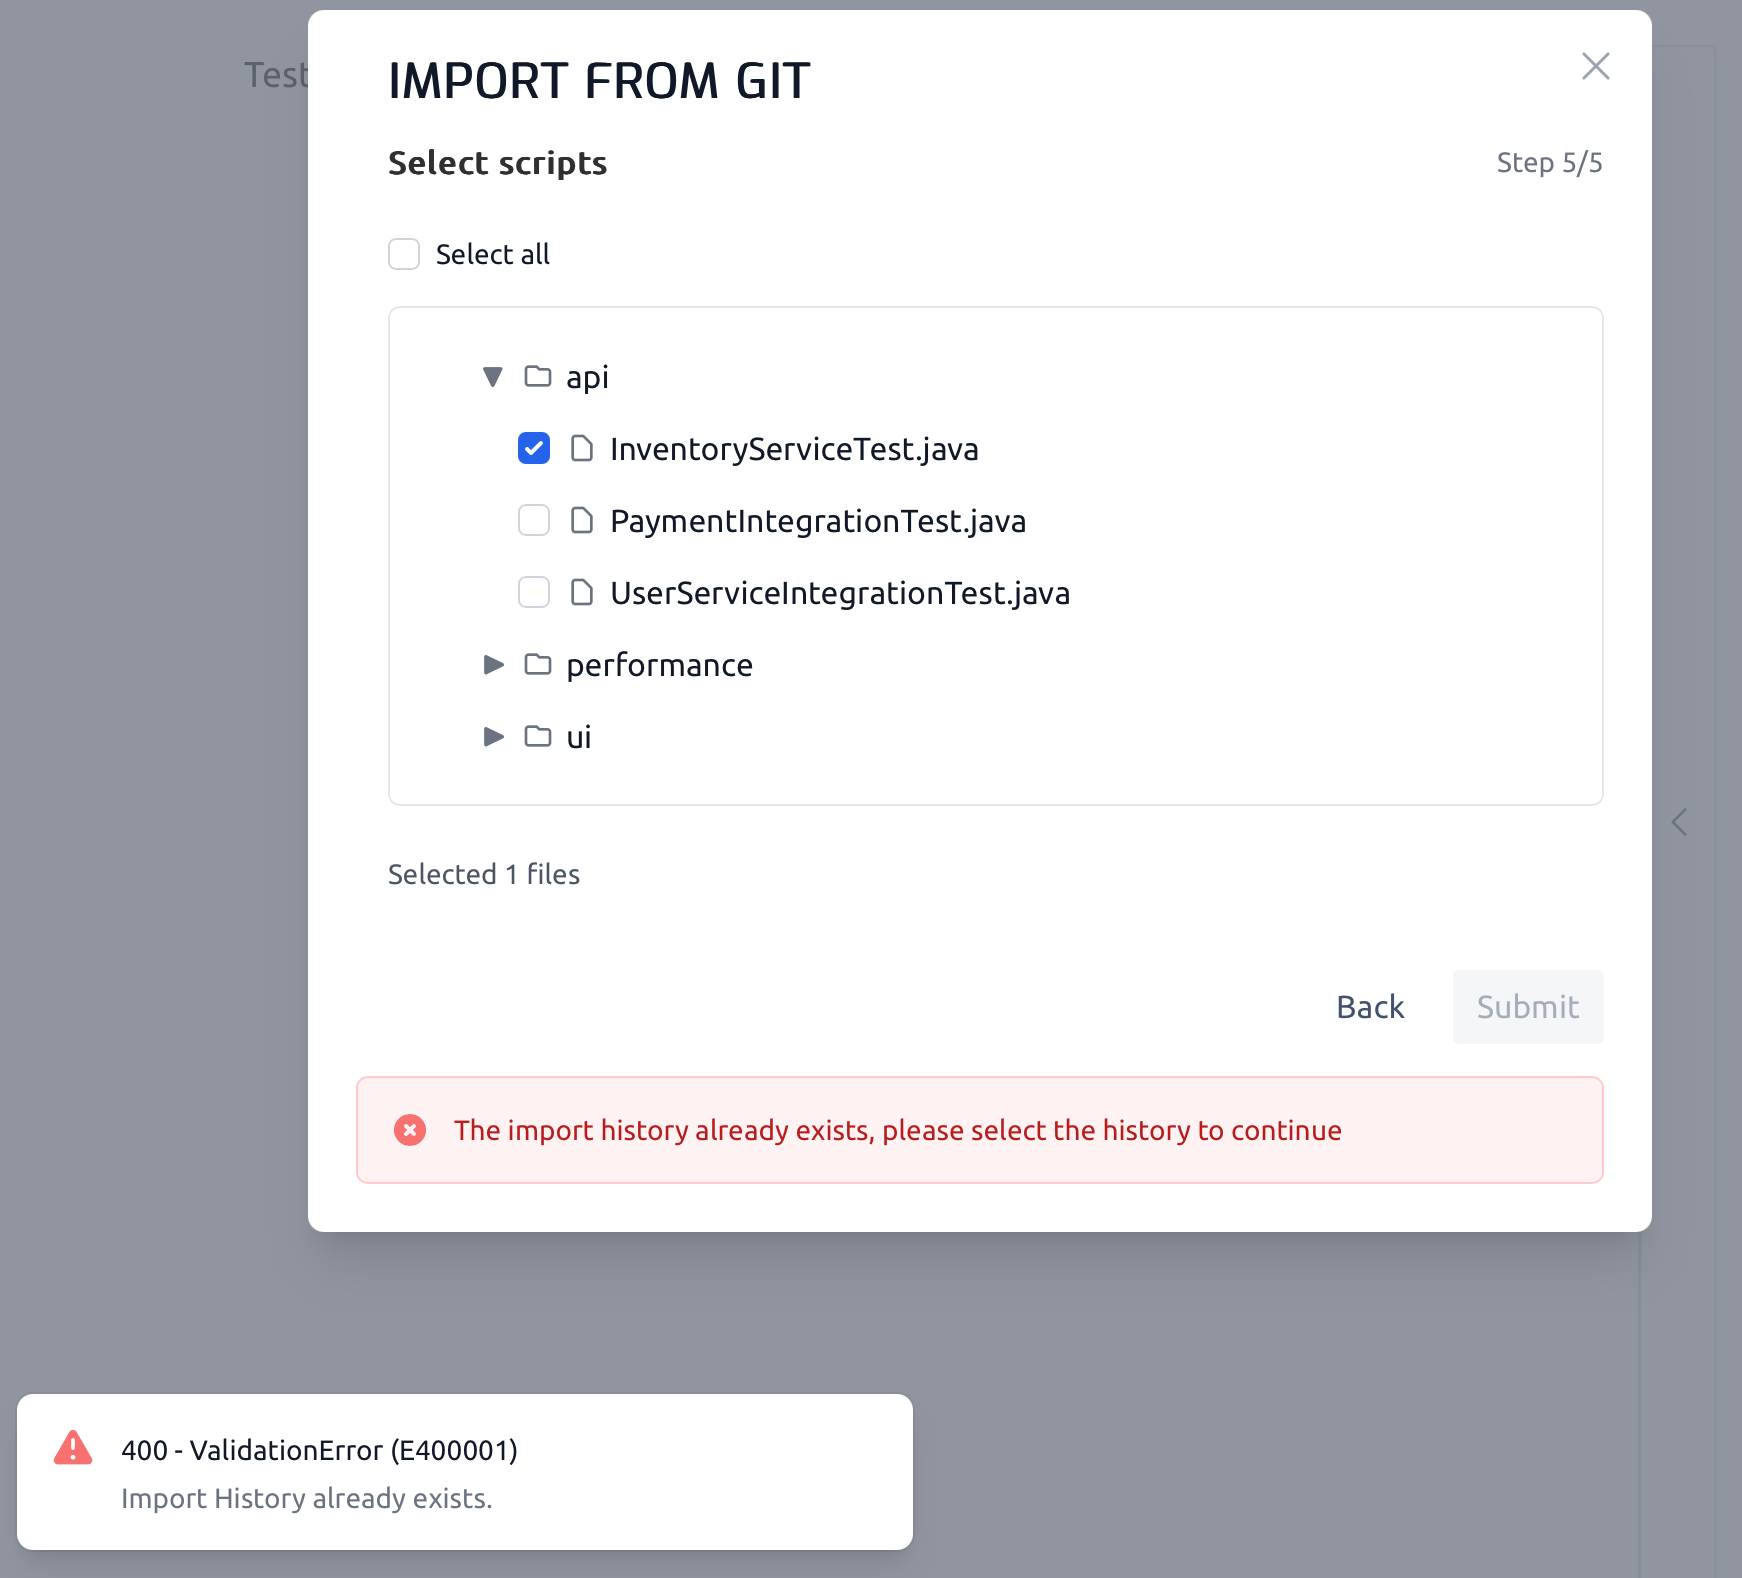
💡 You are attempting to import the same repository & branch & commit again.
If you want to update the existing import, go to Import History instead, see section #3.2.
If you need a fresh import, choose a different branch or/and commit or/and root directory, see section #3.1.5.
![]() Why don’t I see some test cases in the import wizard?
Why don’t I see some test cases in the import wizard?
💡 Check if the files were renamed or moved in git. If not, check if a proper branch/commit/root directory was selected in this import, see section #3.1.5 or #3.2.2.
![]() Why do I see a warning about test files being deleted by Testany?
Why do I see a warning about test files being deleted by Testany?
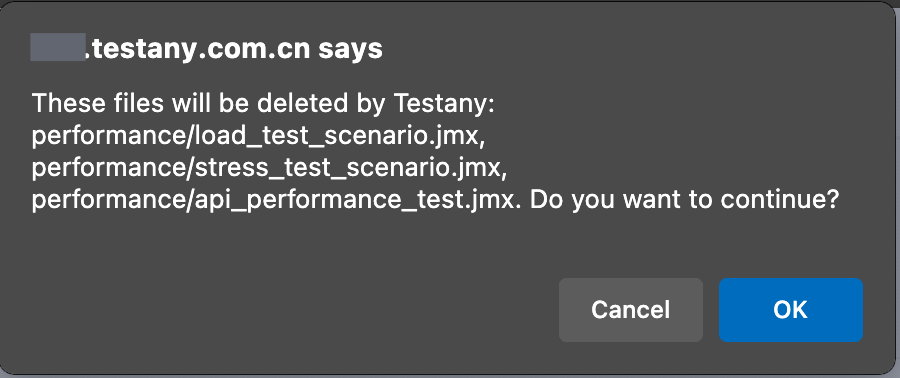
💡 The possible causes are test scripts were removed, renamed, or had their paths changed in git, or you have on purpose unselect a file while editing an import history, see #3.2.3.
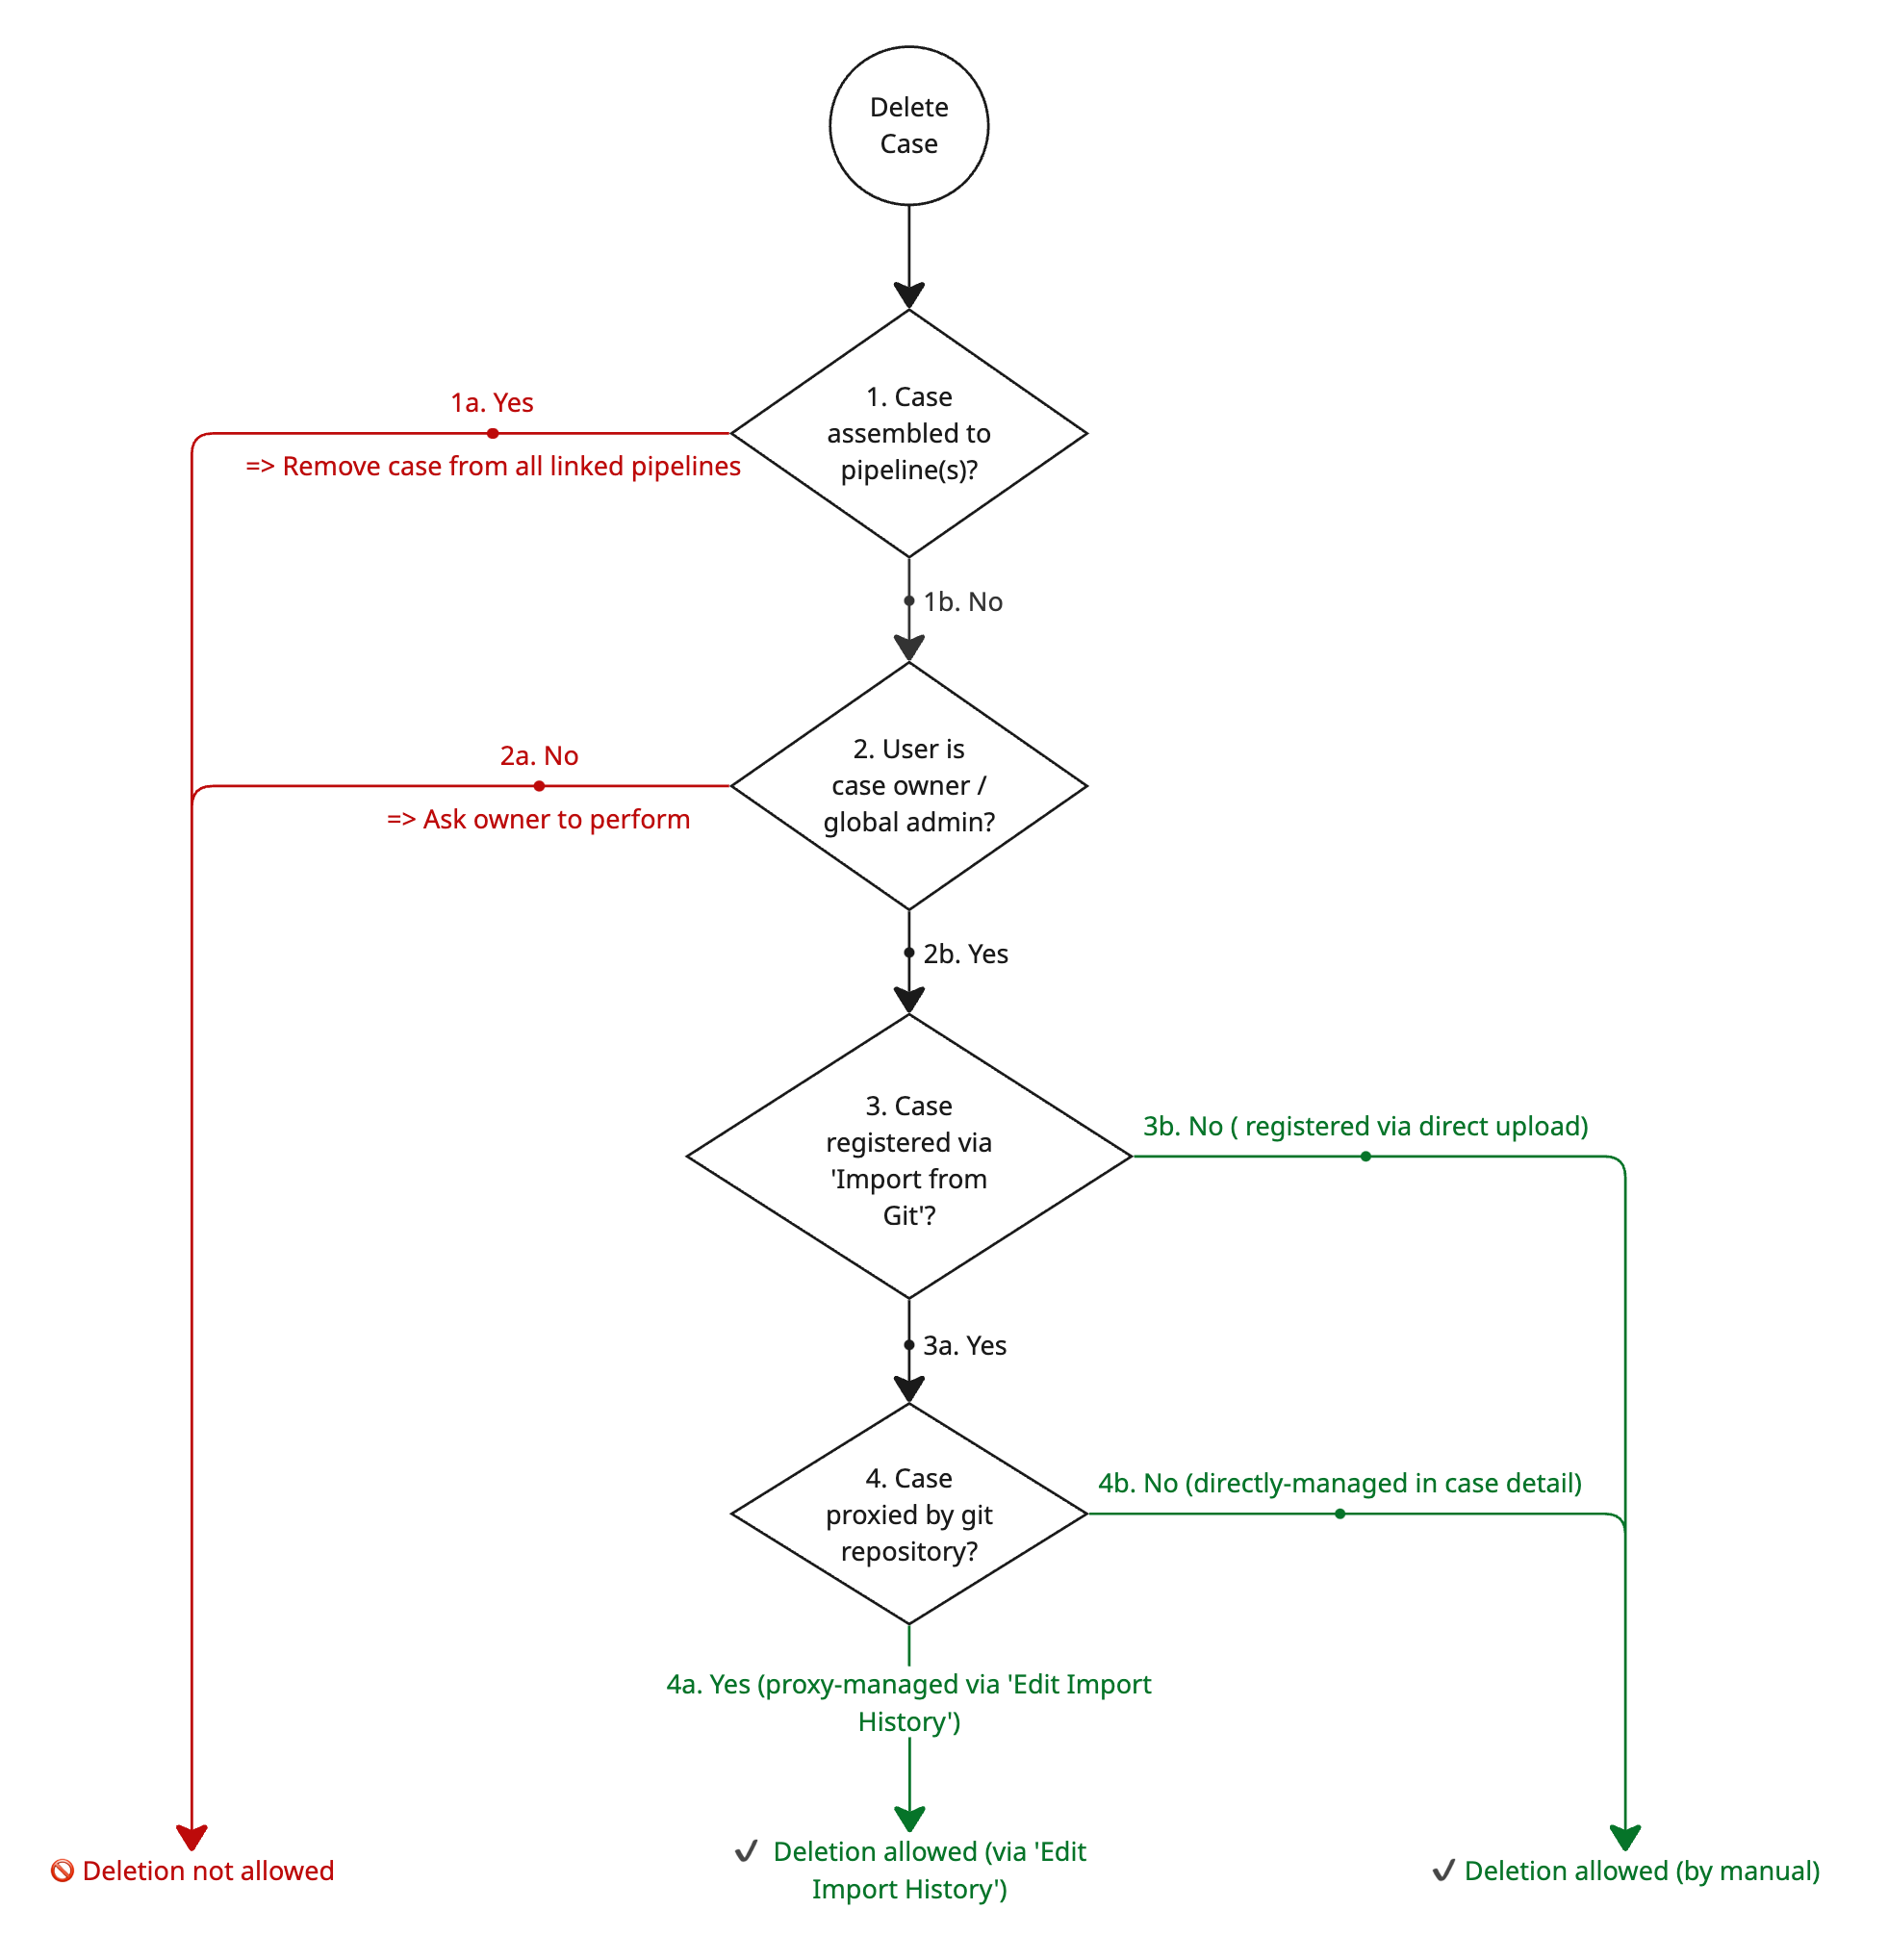
![]() Why can’t I delete certain test cases?
Why can’t I delete certain test cases?
💡 You can delete a direct-upload case owned by you or a case proxy-managed by repository and imported by you (see below ✔️ scenarios).
![]() Why does
Why does version of my imported test case changed after import history is modified?
💡 The version value is always updated in every import process, see key notes of section #3.2.4.
![]() How do I track which repository and commit a test case came from?
How do I track which repository and commit a test case came from?
💡 Go to case detail and hover on the source or simply click the icon to open the source file, see #3.1.9.
