
Import from Git V1 (Credential-based Sync Link)
1. Overview
This page covers Import from Git V1, the credential-based Sync Link flow. V1 uses Testany Secrets Service to manage Git repository credentials and creates a persistent relationship between Git files and Testany test cases.
Import from Git V1 and Import from Git V2 are provided in parallel. If you want GitHub account authorization, repository-scope management, or Managed Import, start from Import from Git V1 vs V2.
Import from Git V1 is used to create Git-to-Test Case sync relationships in bulk and then register the selected scripts as Testany test cases. V1 does not store repository code inside Testany. At run time, execution still reads scripts directly from Git.
Key Benefits:
- Creates Git-to-test-case sync relationships in bulk, reducing manual effort
- Keeps registered test cases pointing to their corresponding Git scripts
- Supports both Bitbucket and GitHub repositories
2. Prerequisites
2.1 Create git repository credentials
To access git resources in a read-only mode, generate an access token and store it securely in:
- Azure Key Vault
- AWS Secrets Manager
👉 Reference:
- Create a Repository Access Token | Bitbucket Cloud ↗
- Creating a personal access token (classic) | GitHub ↗
Once the token is created, request your workspace admin to register the credential in Testany.
👉 Reference: Managing Test Credential
2.2 Organize directory structure in git
A well-organized Git directory structure enhances the efficiency of test case management.
Key considerations:
-
Maintain a consistent directory structure, and keep test scripts in a structured, predictable directory format.
-
Understand the impact of directory changes on test cases that are already linked through sync relationships:
- If script files are deleted, renamed, or restructured, they will be automatically removed from import history and unlinked from Testany.
- Additionally, the corresponding registered test cases in Testany will be automatically deleted or unlinked (see section #3.2).
📝 Recommendation: To avoid unnecessary deletions and re-linking work, plan the directory structure before the first setup. If changes become necessary later, update the Import History carefully to minimize disruption to Testany test cases.
2.3 Identify the branch, version, and maintenance owner
Before entering the V1 wizard, decide:
- Branch: Choose a stable branch for reliable test execution.
- Version: The sync relationship can follow the latest commit or be pinned to a specific commit ID.
- Import History Owner: Decide who maintains this
Import History. Each repository should have a designated owner who is responsible for keeping the sync relationship and test case registration settings correct over time.
3. Steps-by-steps Guide
3.1 Create a New Sync Relationship Record
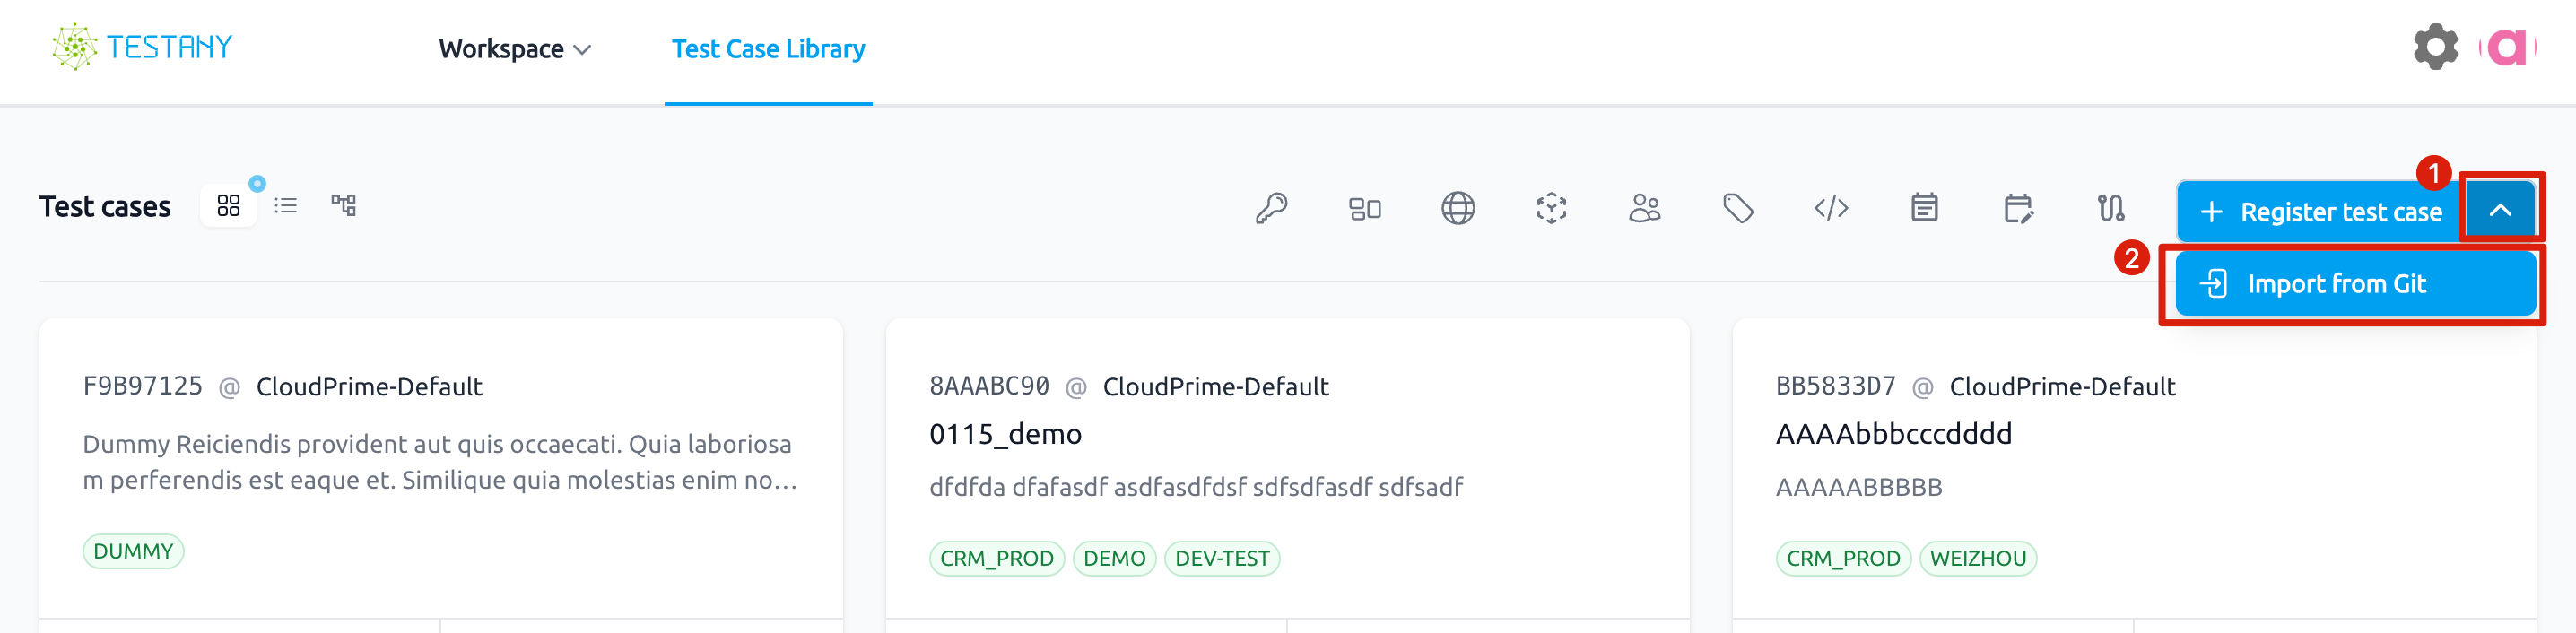
3.1.1 Access 'Import from Git' UI
- Navigate to 'Test Case Library'.
- Click the '↓' arrow next to 'Register test case'.
- Select 'Import from Git'.
3.1.2 Create a new sync relationship
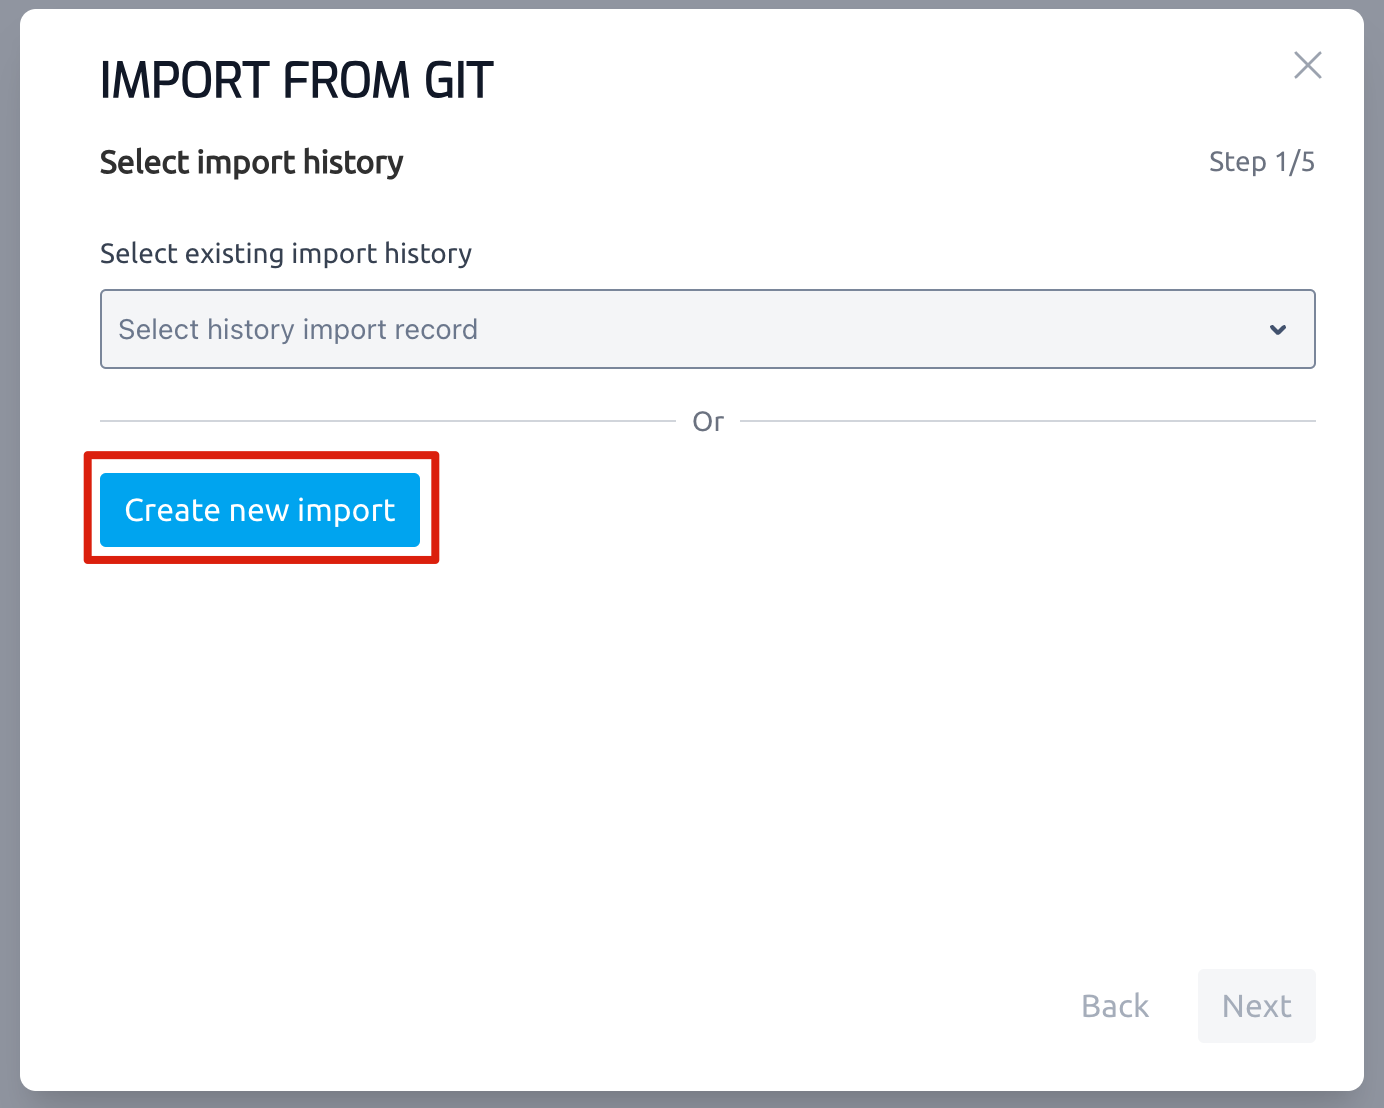
In step 1/5 of the wizard, click Create new import to start a new sync relationship record.
3.1.3 Select a runtime
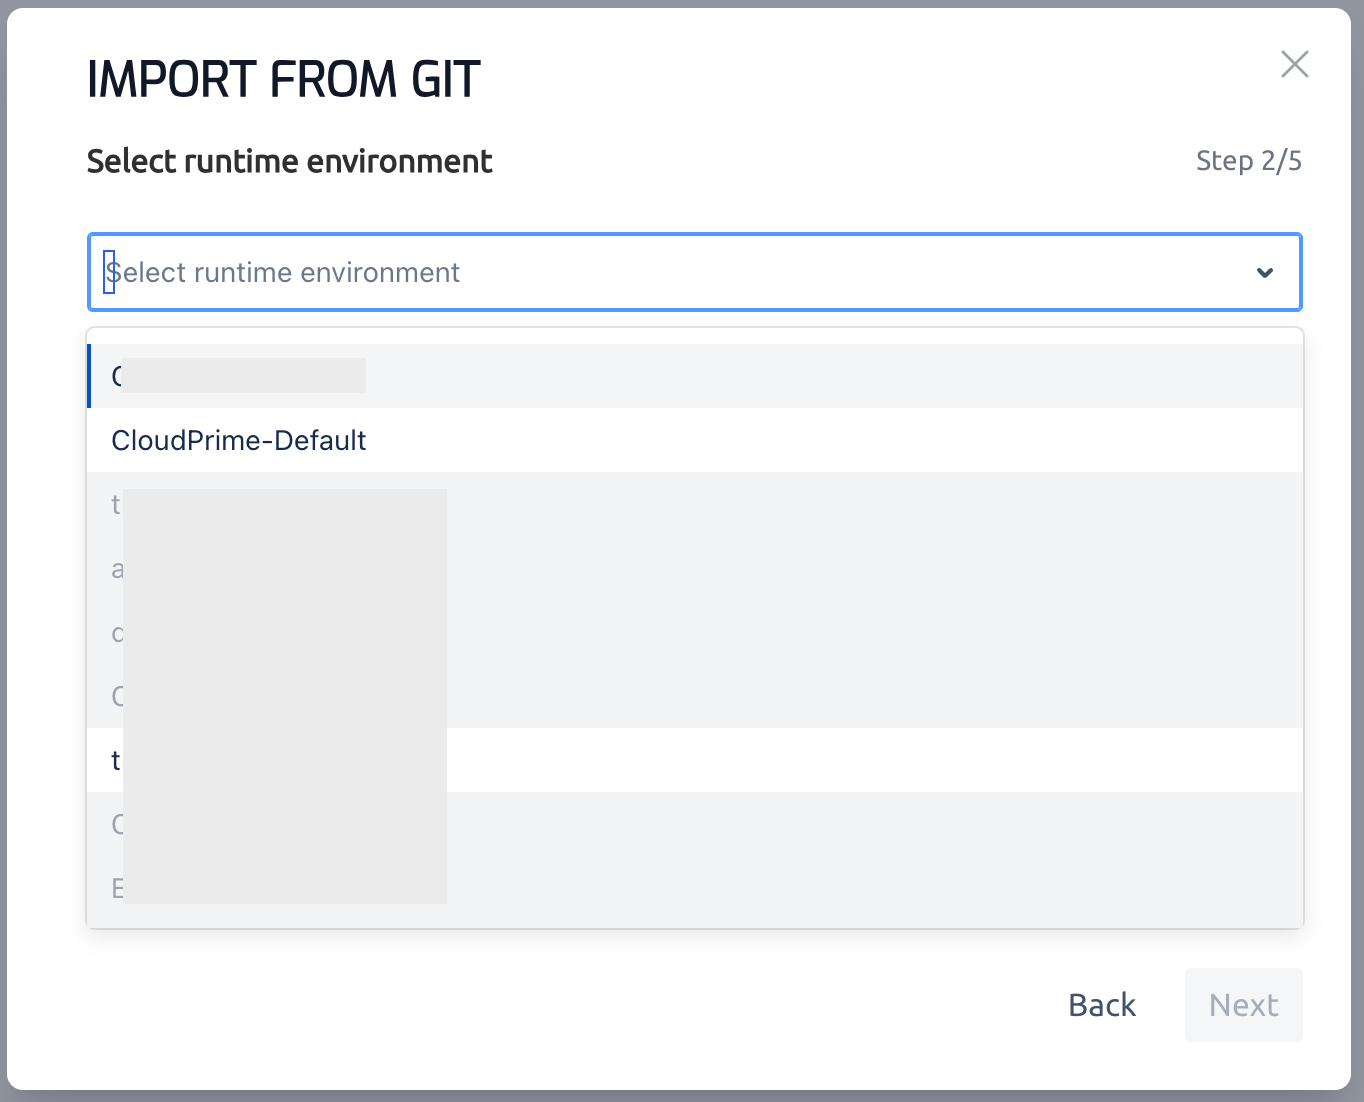
In step 2/5 of the wizard, expand the runtime dropdown list, select a runtime, and click Next. If a runtime is non-operational, it is greyed out.
3.1.4 Add repository information
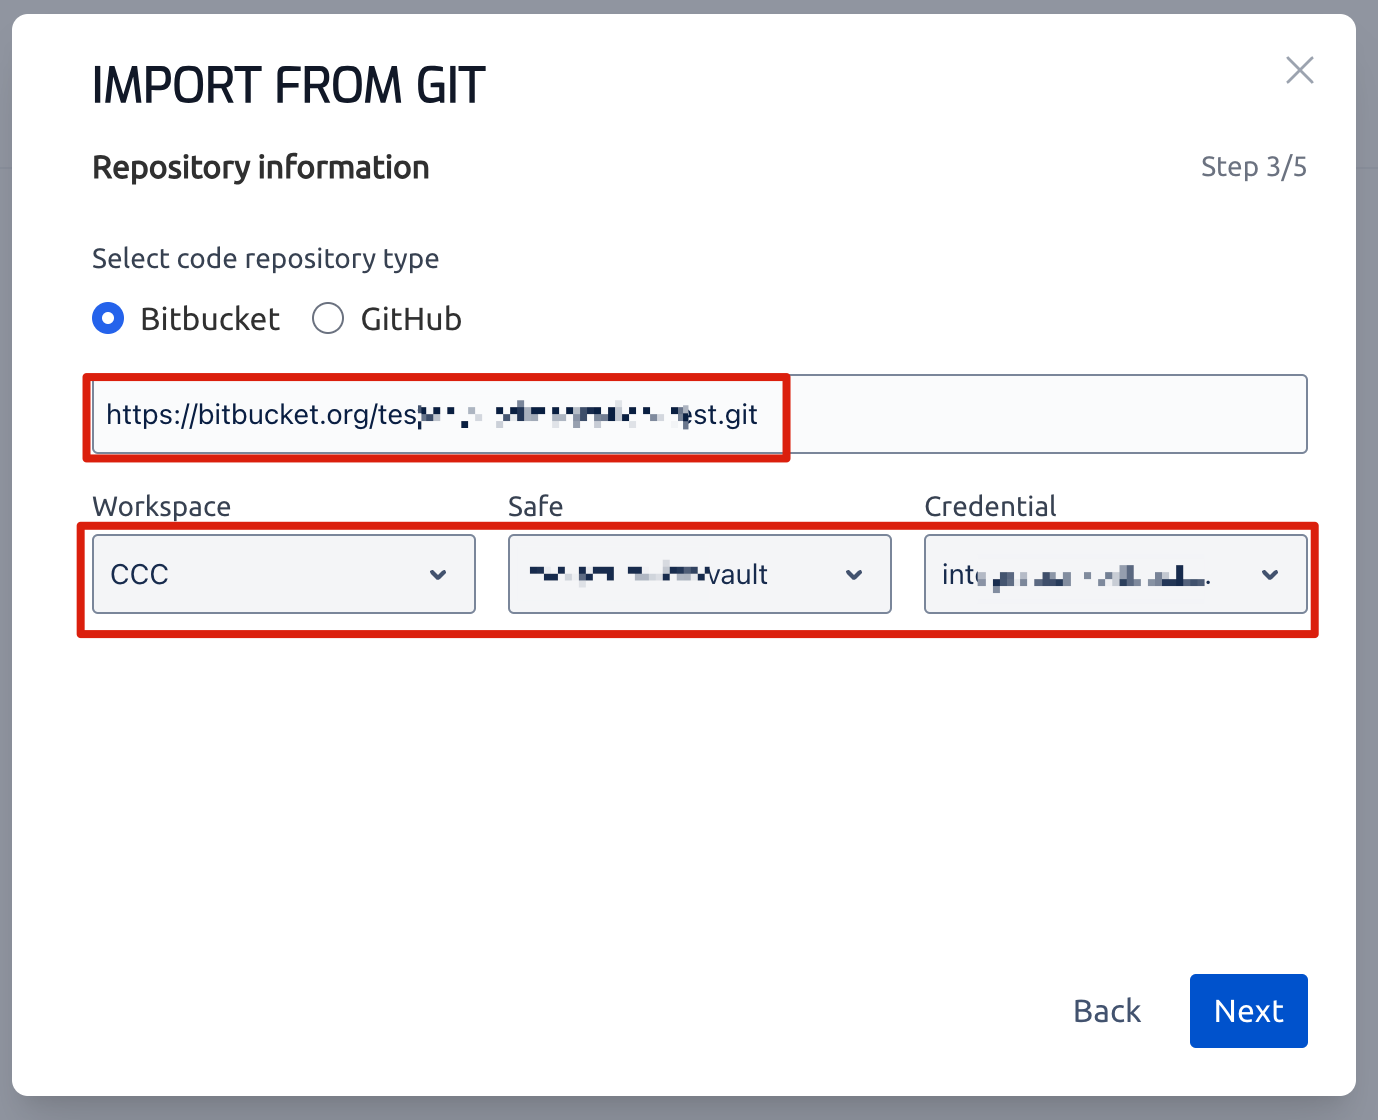
In step 3/5 of the wizard, fill in the following details and click Next:
- Repository type: Bitbucket or GitHub
- Repository URL:
https://bitbucket.org/workspace/repo.gitorhttps://github.com/username/repo.git - Access Credential: Select the pre-configured credential (see section #2.1)
3.1.5 Select branch, version, and sync scope
In step 4/5 of the wizard, provide the following information and click Next.
-
Branch: Choose a branch with stable test case files.
-
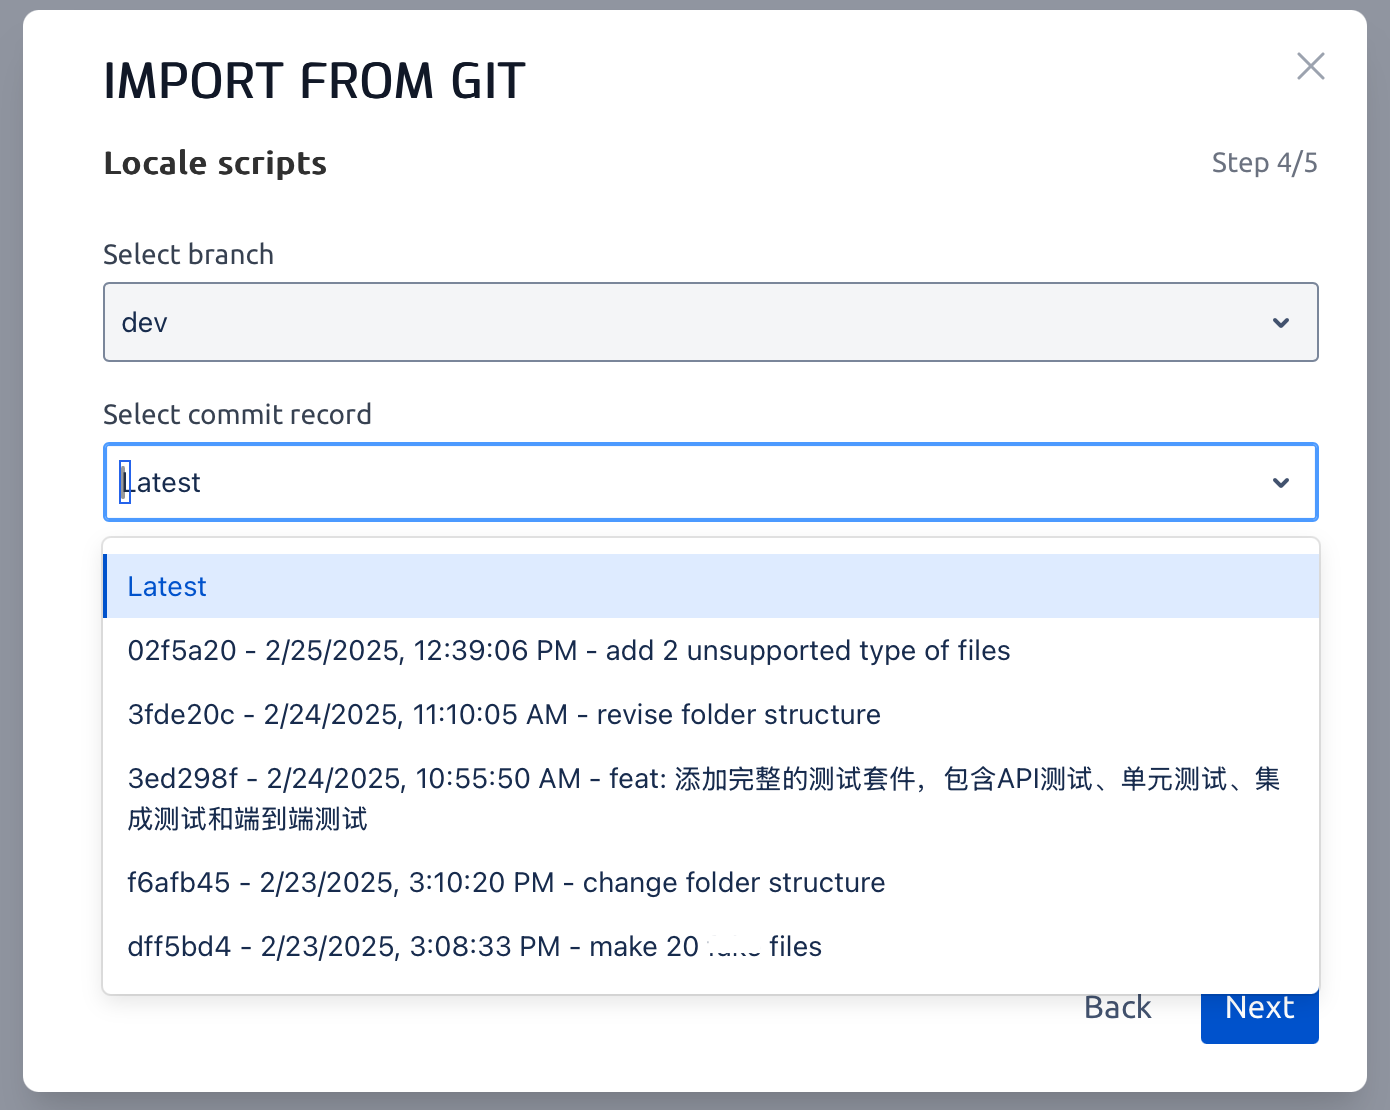
Commit:
- Latest commit: This sync relationship follows the latest version of script files on the selected branch.
- A specific commit: This sync relationship is pinned to the script files from the selected commit.
-
Root directory:
- To include the entire repository in the sync scope, DO NOT select any directory.
- If you select a specific directory, only scripts inside that directory and its subdirectories will be included in the sync scope.
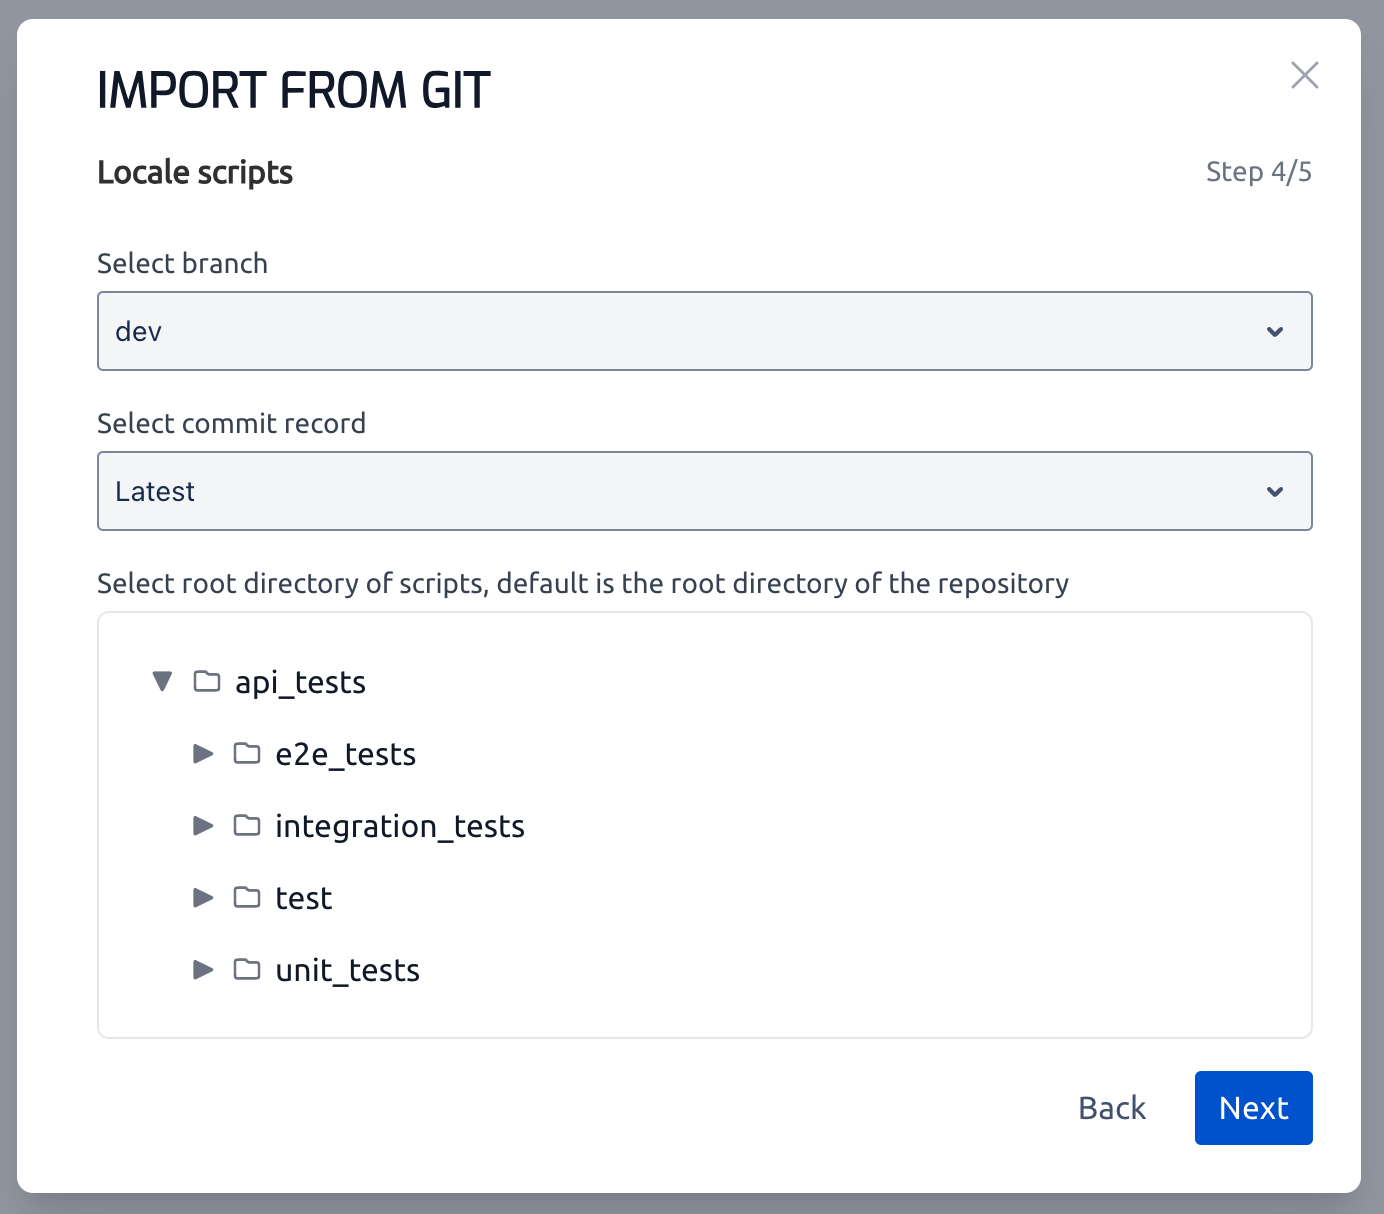
If you accidentally select a directory but intended to include the entire repository in the sync scope, you cannot undo the selection within the same session. You must restart the flow.
3.1.6 Choose the scripts to link
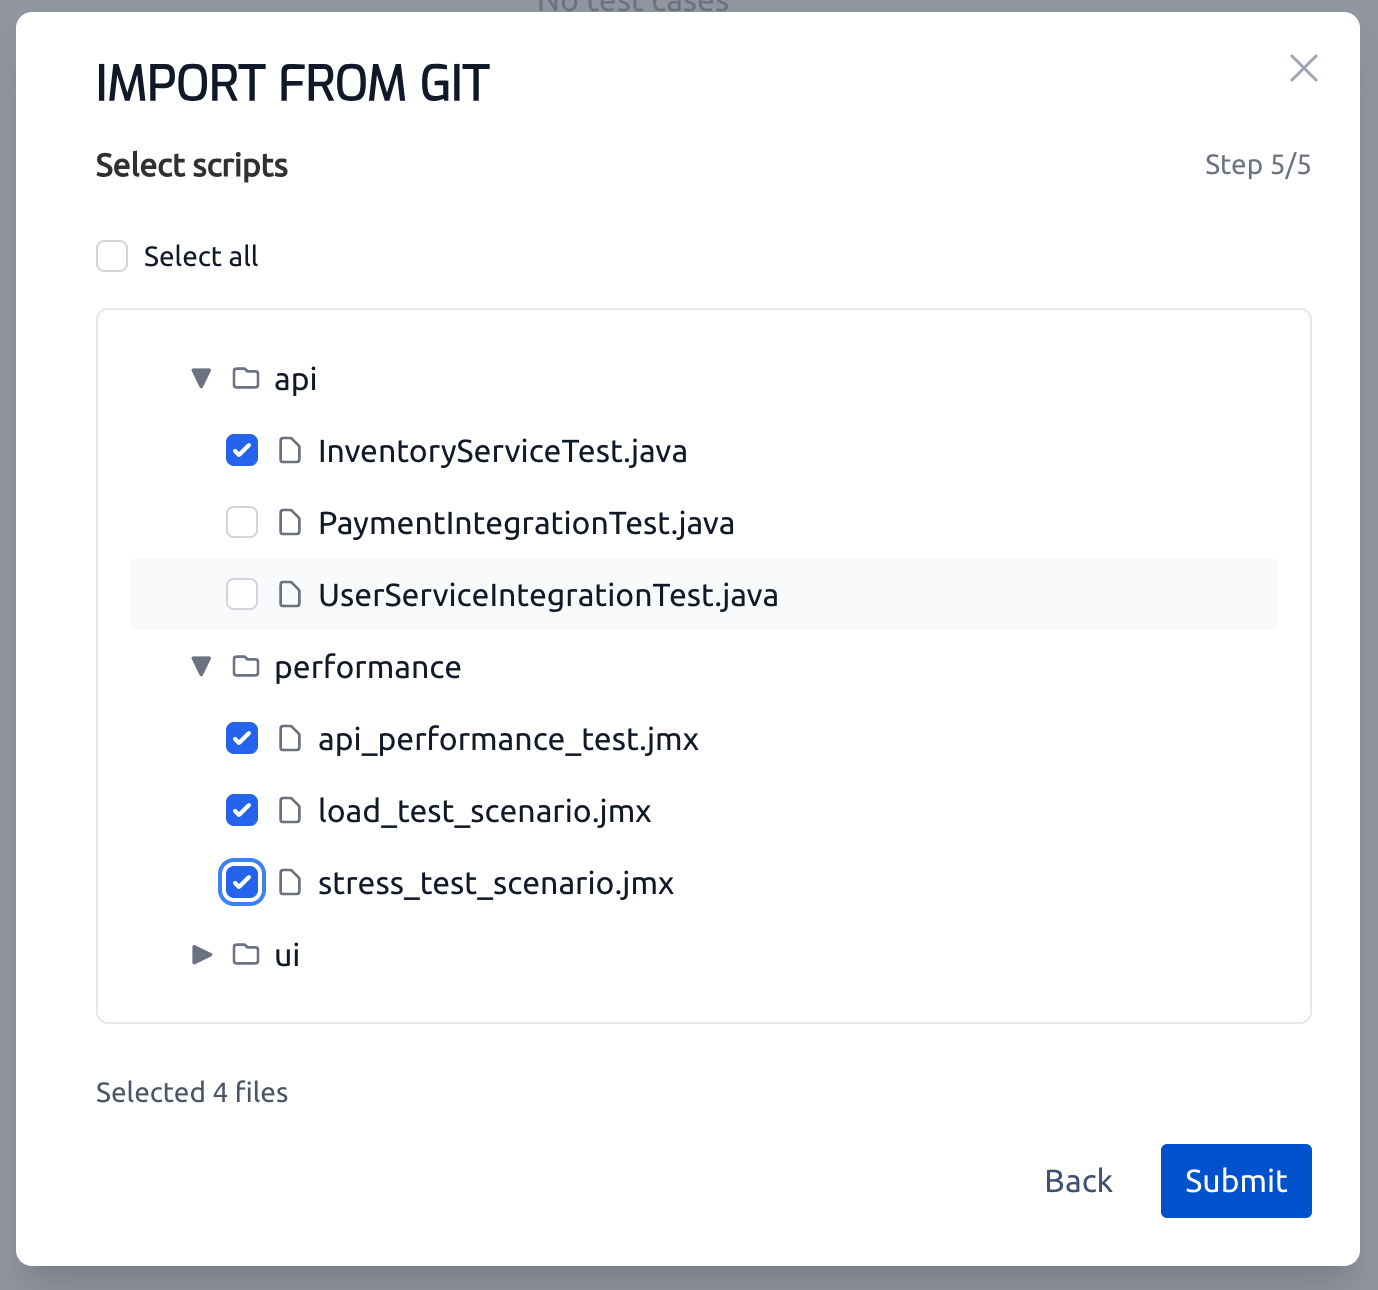
In step 5/5 of the wizard, choose the scripts that should be linked and registered as test cases, then click Submit.
- Select all: Selects all supported script files (*.py, *.json, *.jmx)
- Select specific files: Pick test script files from the directory
- The chosen file will act as the primary execution script. If your test case includes multiple files, only select the main execution file; there is no need to select all supporting files.
- Each selected file will be linked to Git and registered as a Testany test case.
- The total number of selected scripts will be displayed in the bottom left corner of the wizard.
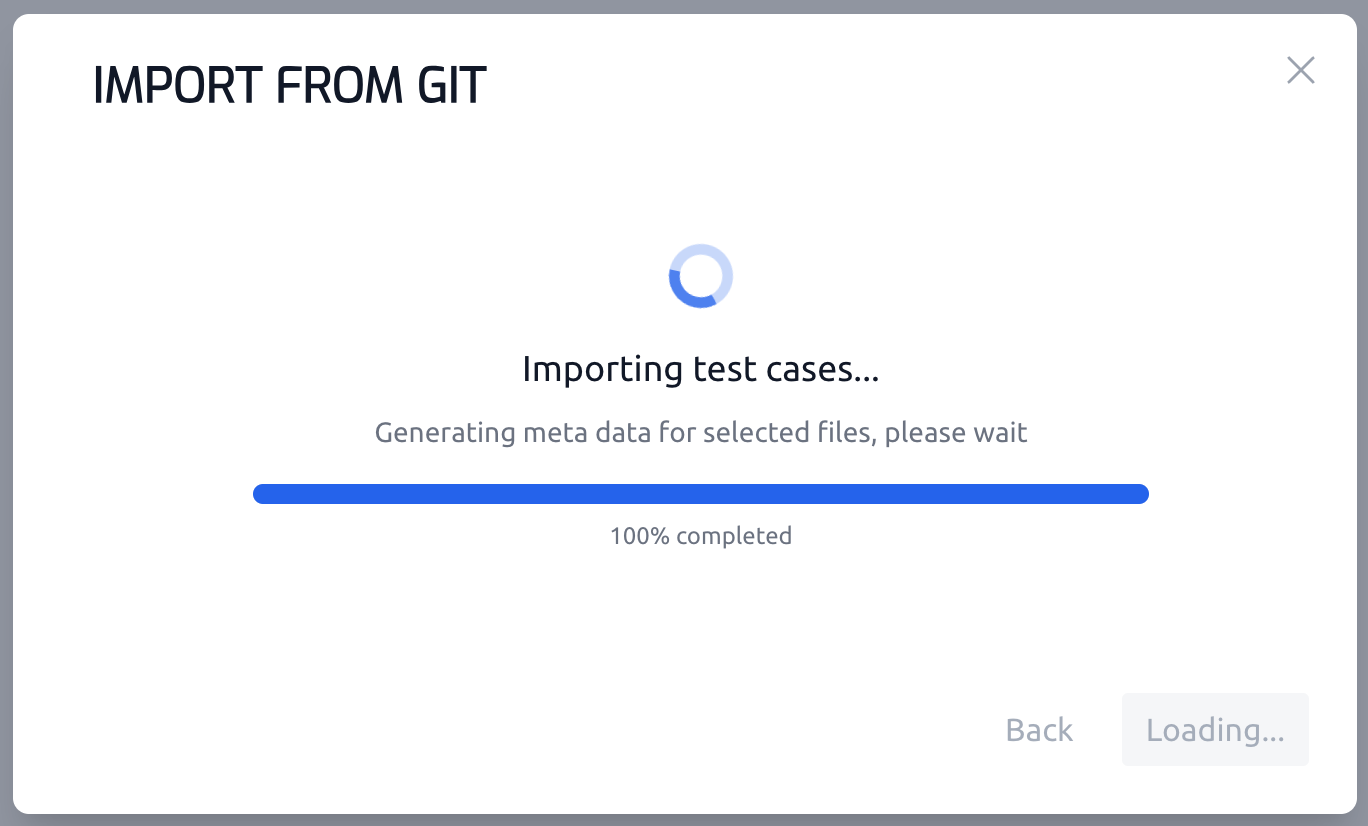
After submission, Testany creates an Import History record to store this sync relationship configuration. You can reopen and modify it later (see section #3.2.2).
Testany then analyzes the selected scripts and prepares the pending test cases. This can take some time, especially when many scripts are selected.
3.1.7 Validate the pending test cases
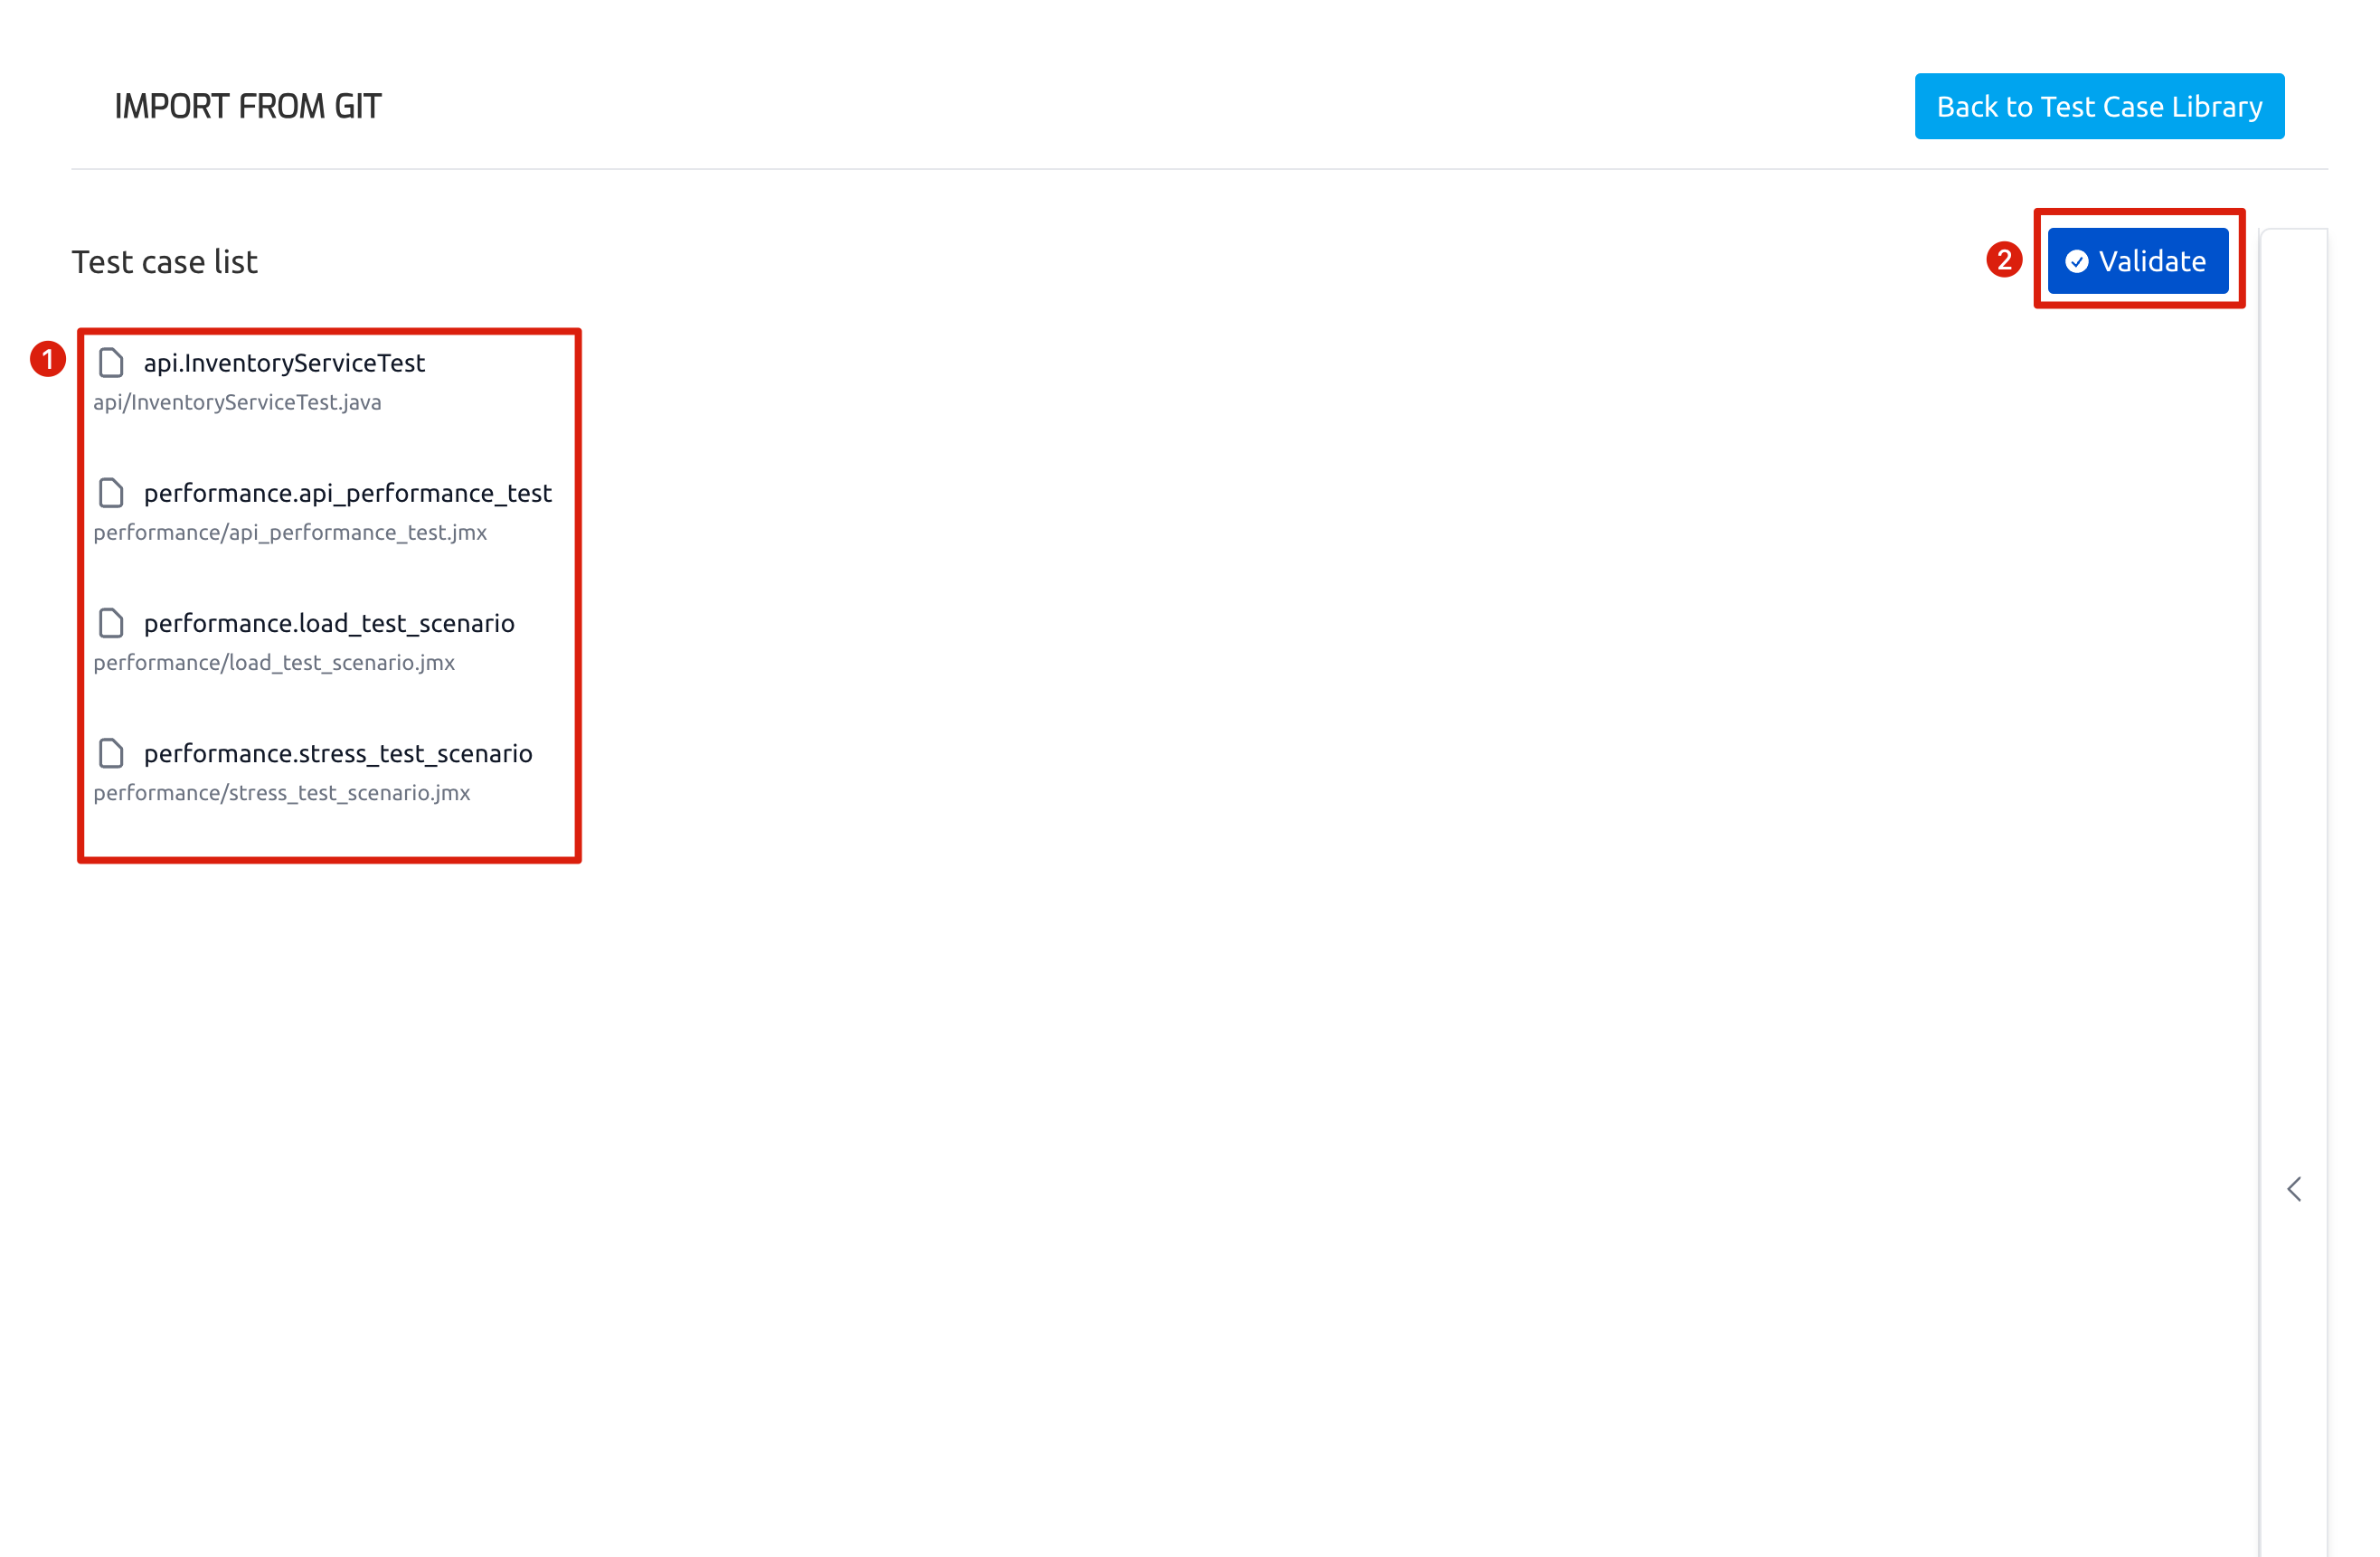
After the sync relationship is created, review case details on the Validation page before bulk registration.
3.1.7.1 Review case details (optional)
On the Validation page, clicking a test case in the Test case list panel expands the Test case details panel. If you want to adjust field values, edit them one by one here or use bulk edit later after registration (refer to Bulk Manage Test Cases).
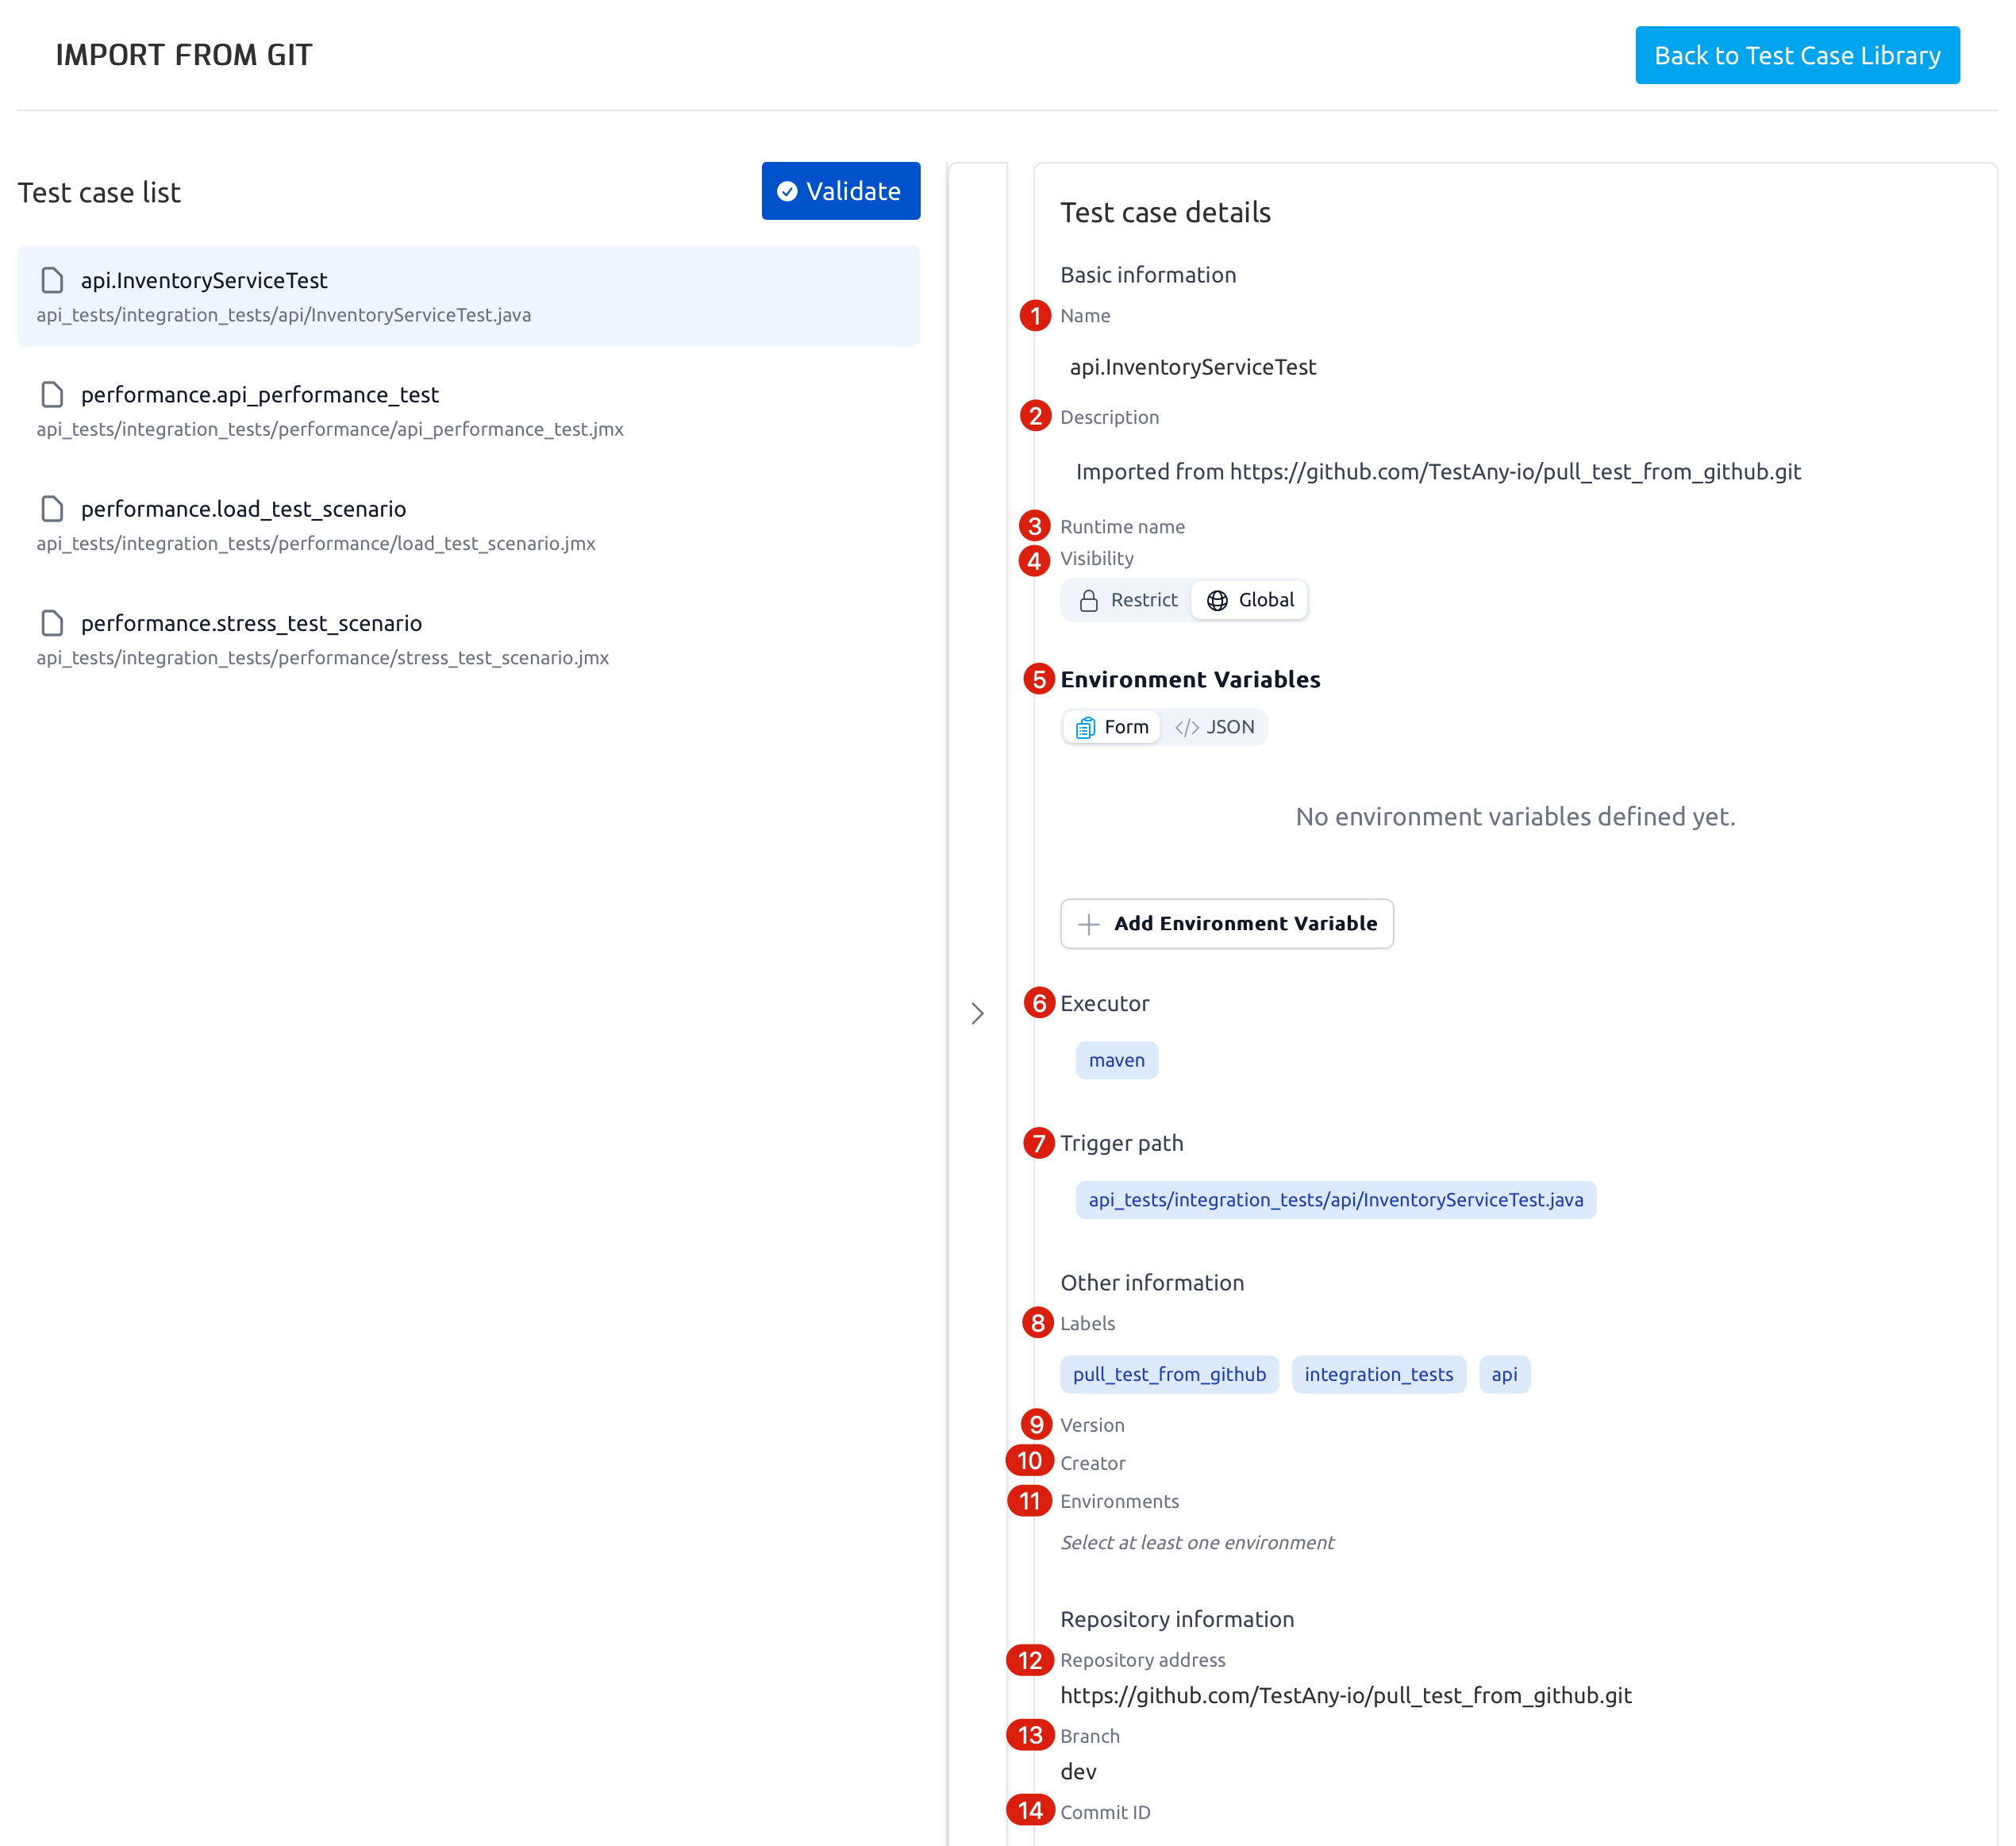
| Case Field | Default Value | Editable | |
|---|---|---|---|
| 1 | Name | {parent_directory_name}.{script_name} | Yes |
| 2 | Description | "Import from {git_url}" | Yes |
| 3 | Runtime name | Runtime selected during setup | No |
| 4 | Visibility | Global visible | Yes |
| 5 | Environment Variables | - | Yes |
| 6 | Executor | Based on file type: - pyres (*.py) - postman (*.json) - jmeter (*.jmx) | Yes |
| 7 | Trigger command / trigger path | Based on executor: - trigger_command for pyres/python: "python {path_relative_to_the_selected_root_directory}" - trigger_path for postman/jmeter: {path_relative_to_the_selected_root_directory} | Yes |
| 8 | Labels | Parent directory names in the relative path to the selected root directory are assigned as labels | Yes |
| 9 | Version | 1. Latest commit: the latest tag within the selected branch (if tags exist); otherwise, empty 2. A specific commit: the tag of the selected commit; otherwise, empty | No |
| 10 | Creator | The Testany user who created this sync relationship and completed registration | No |
| 11 | Environments | - | Yes |
| 12 | Repository address | Git repository URL | No |
| 13 | Branch | Selected branch | No |
| 14 | Commit ID | 1. Latest commit: empty 2. A specific commit: {commit_id} | No |
executor is a backend-strict string. Supported values: postman, playwright, python, pyres, jmeter.
3.1.7.2 Validate (mandatory)
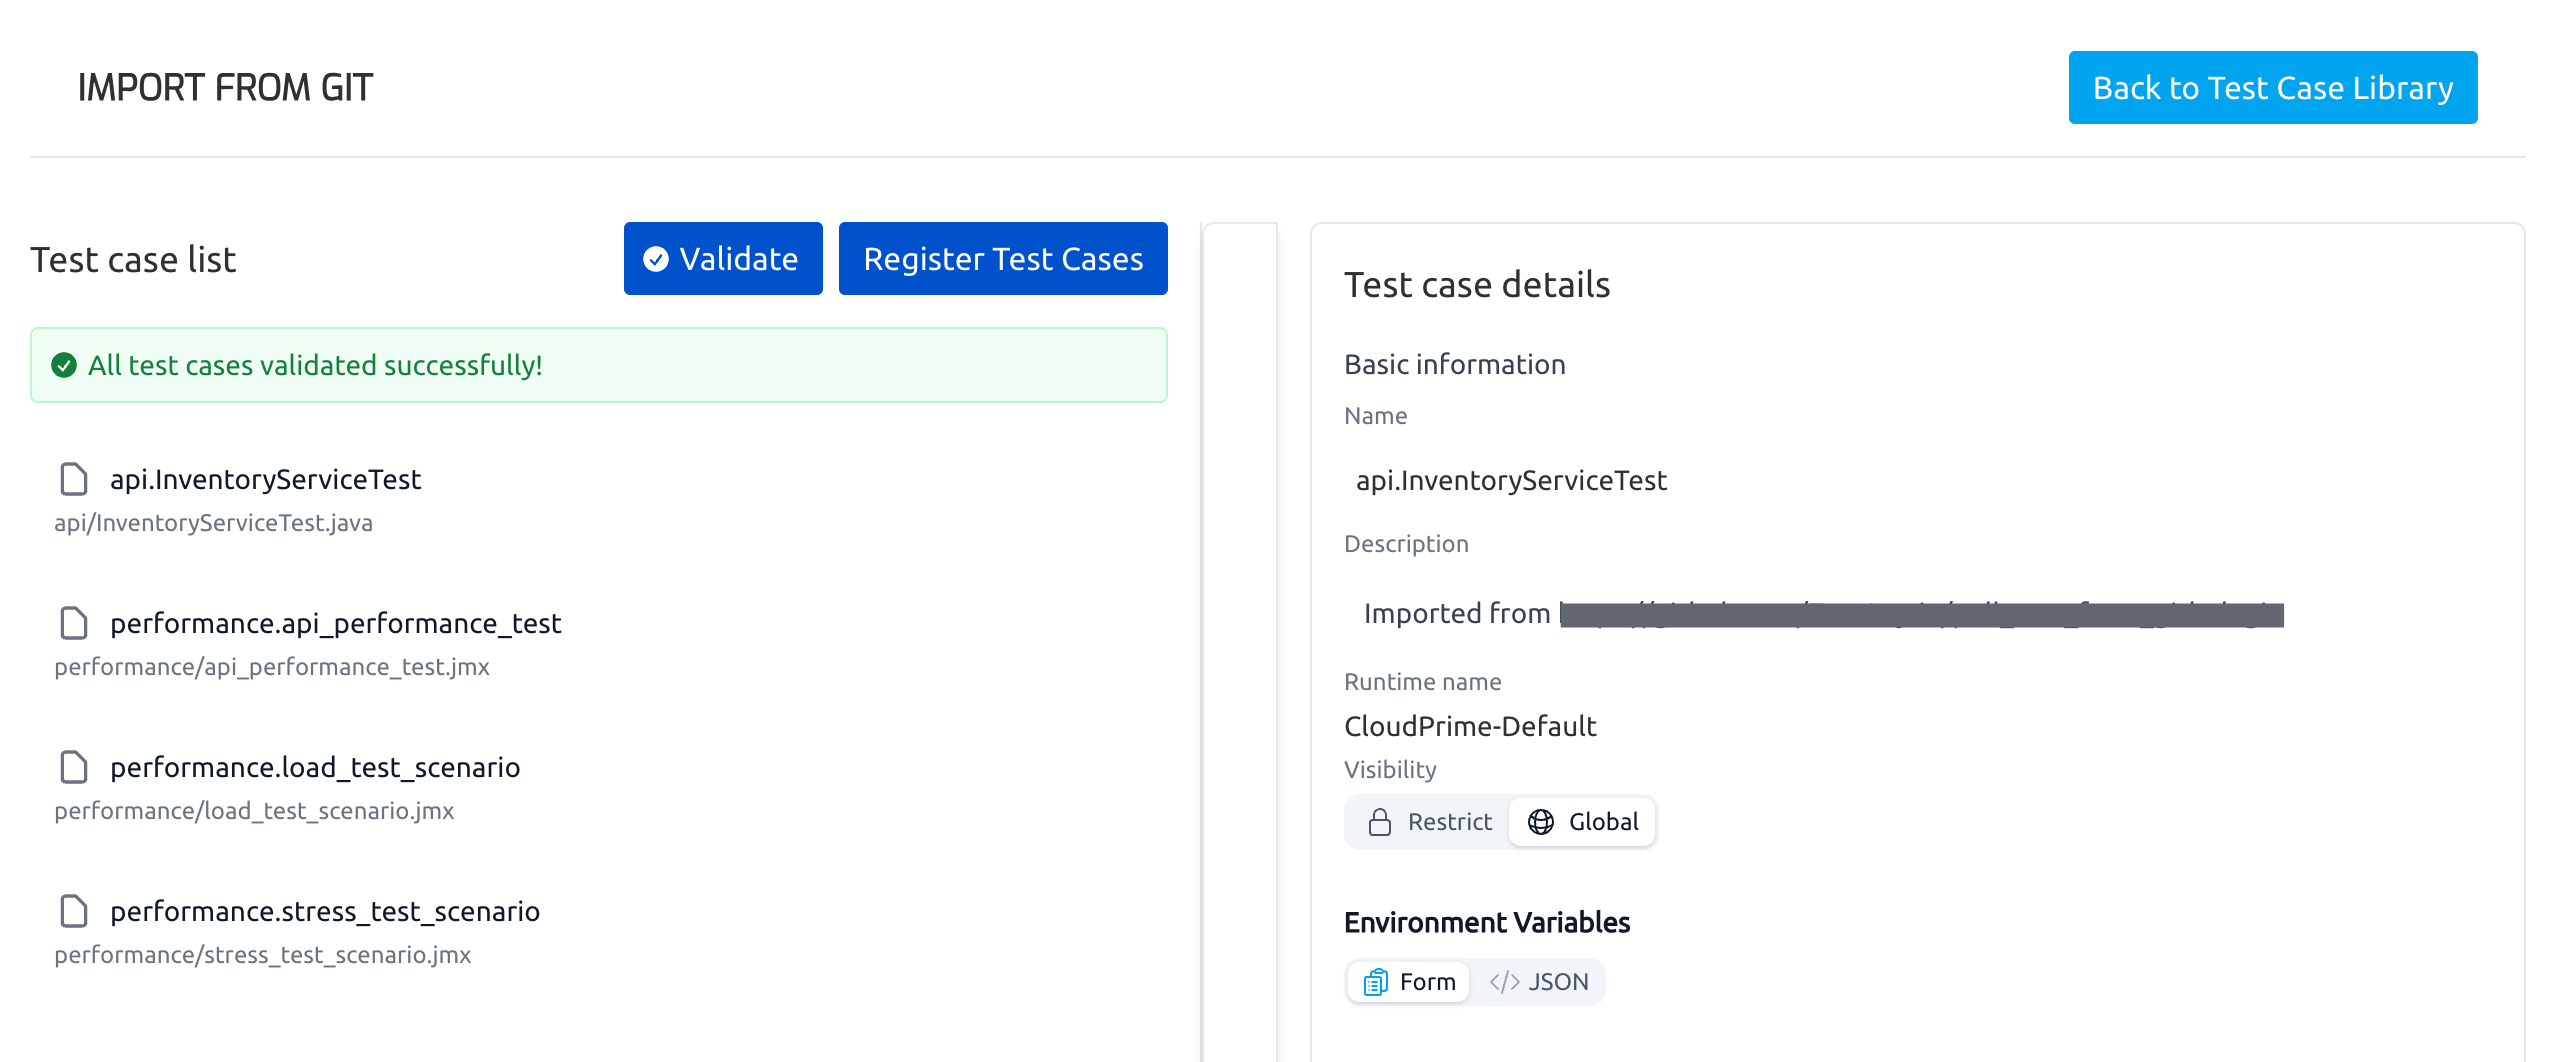
Before proceeding with bulk registration, all pending test cases must pass validation by Testany.
Click 'Validate' button before bulk registration. If the validation is successful, a message will appear: "All test cases validated successfully!".
3.1.8. Bulk register test cases
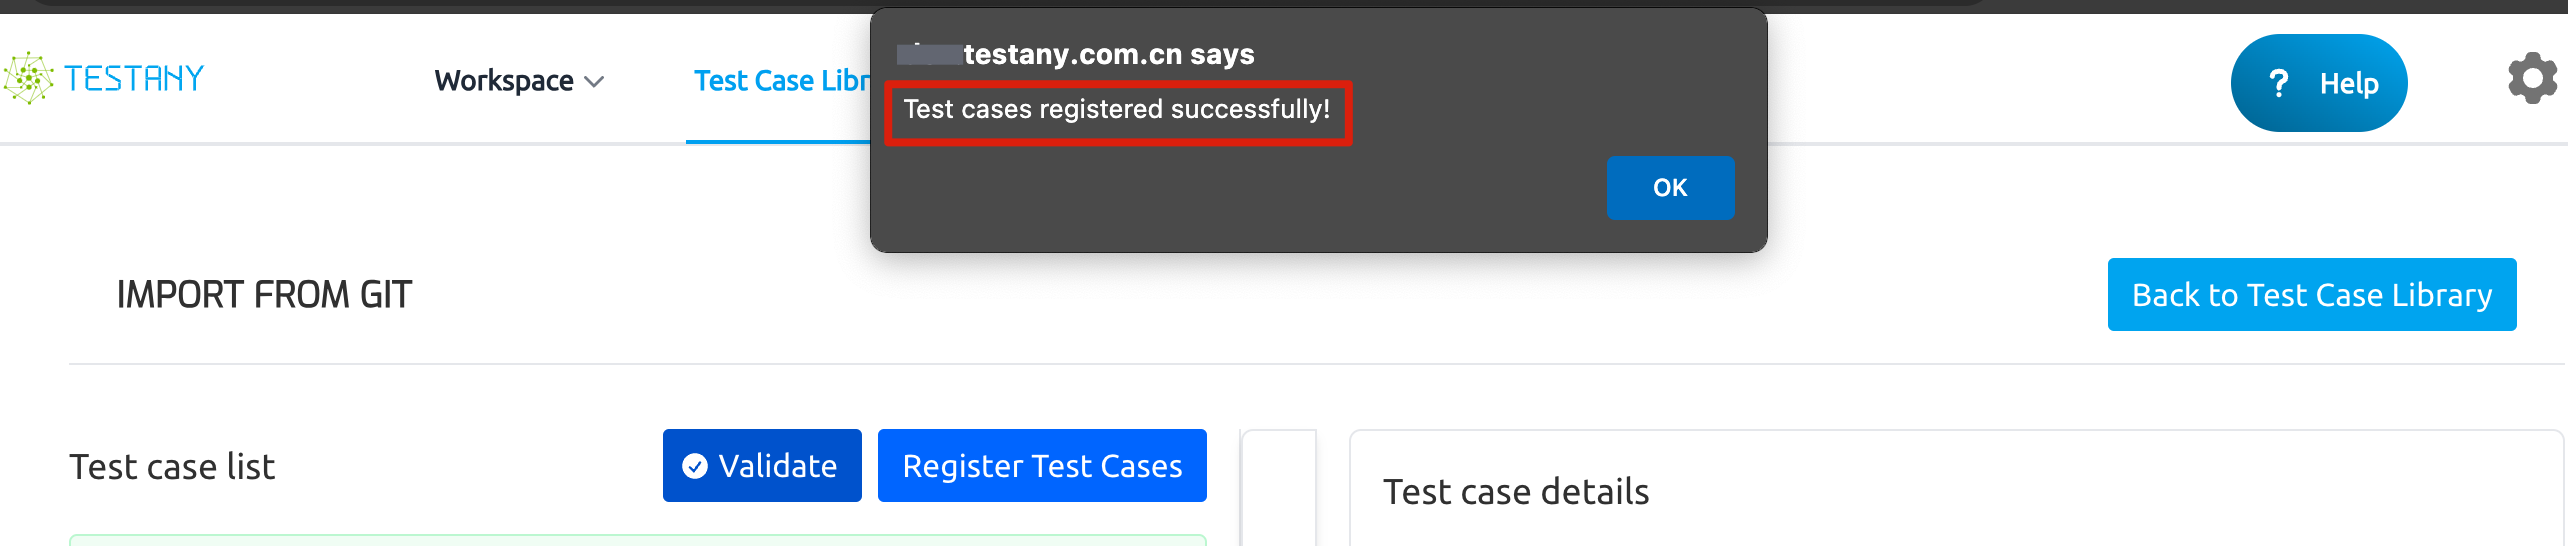
Click Register Test Cases to complete registration. A confirmation message appears once the test cases are successfully registered.
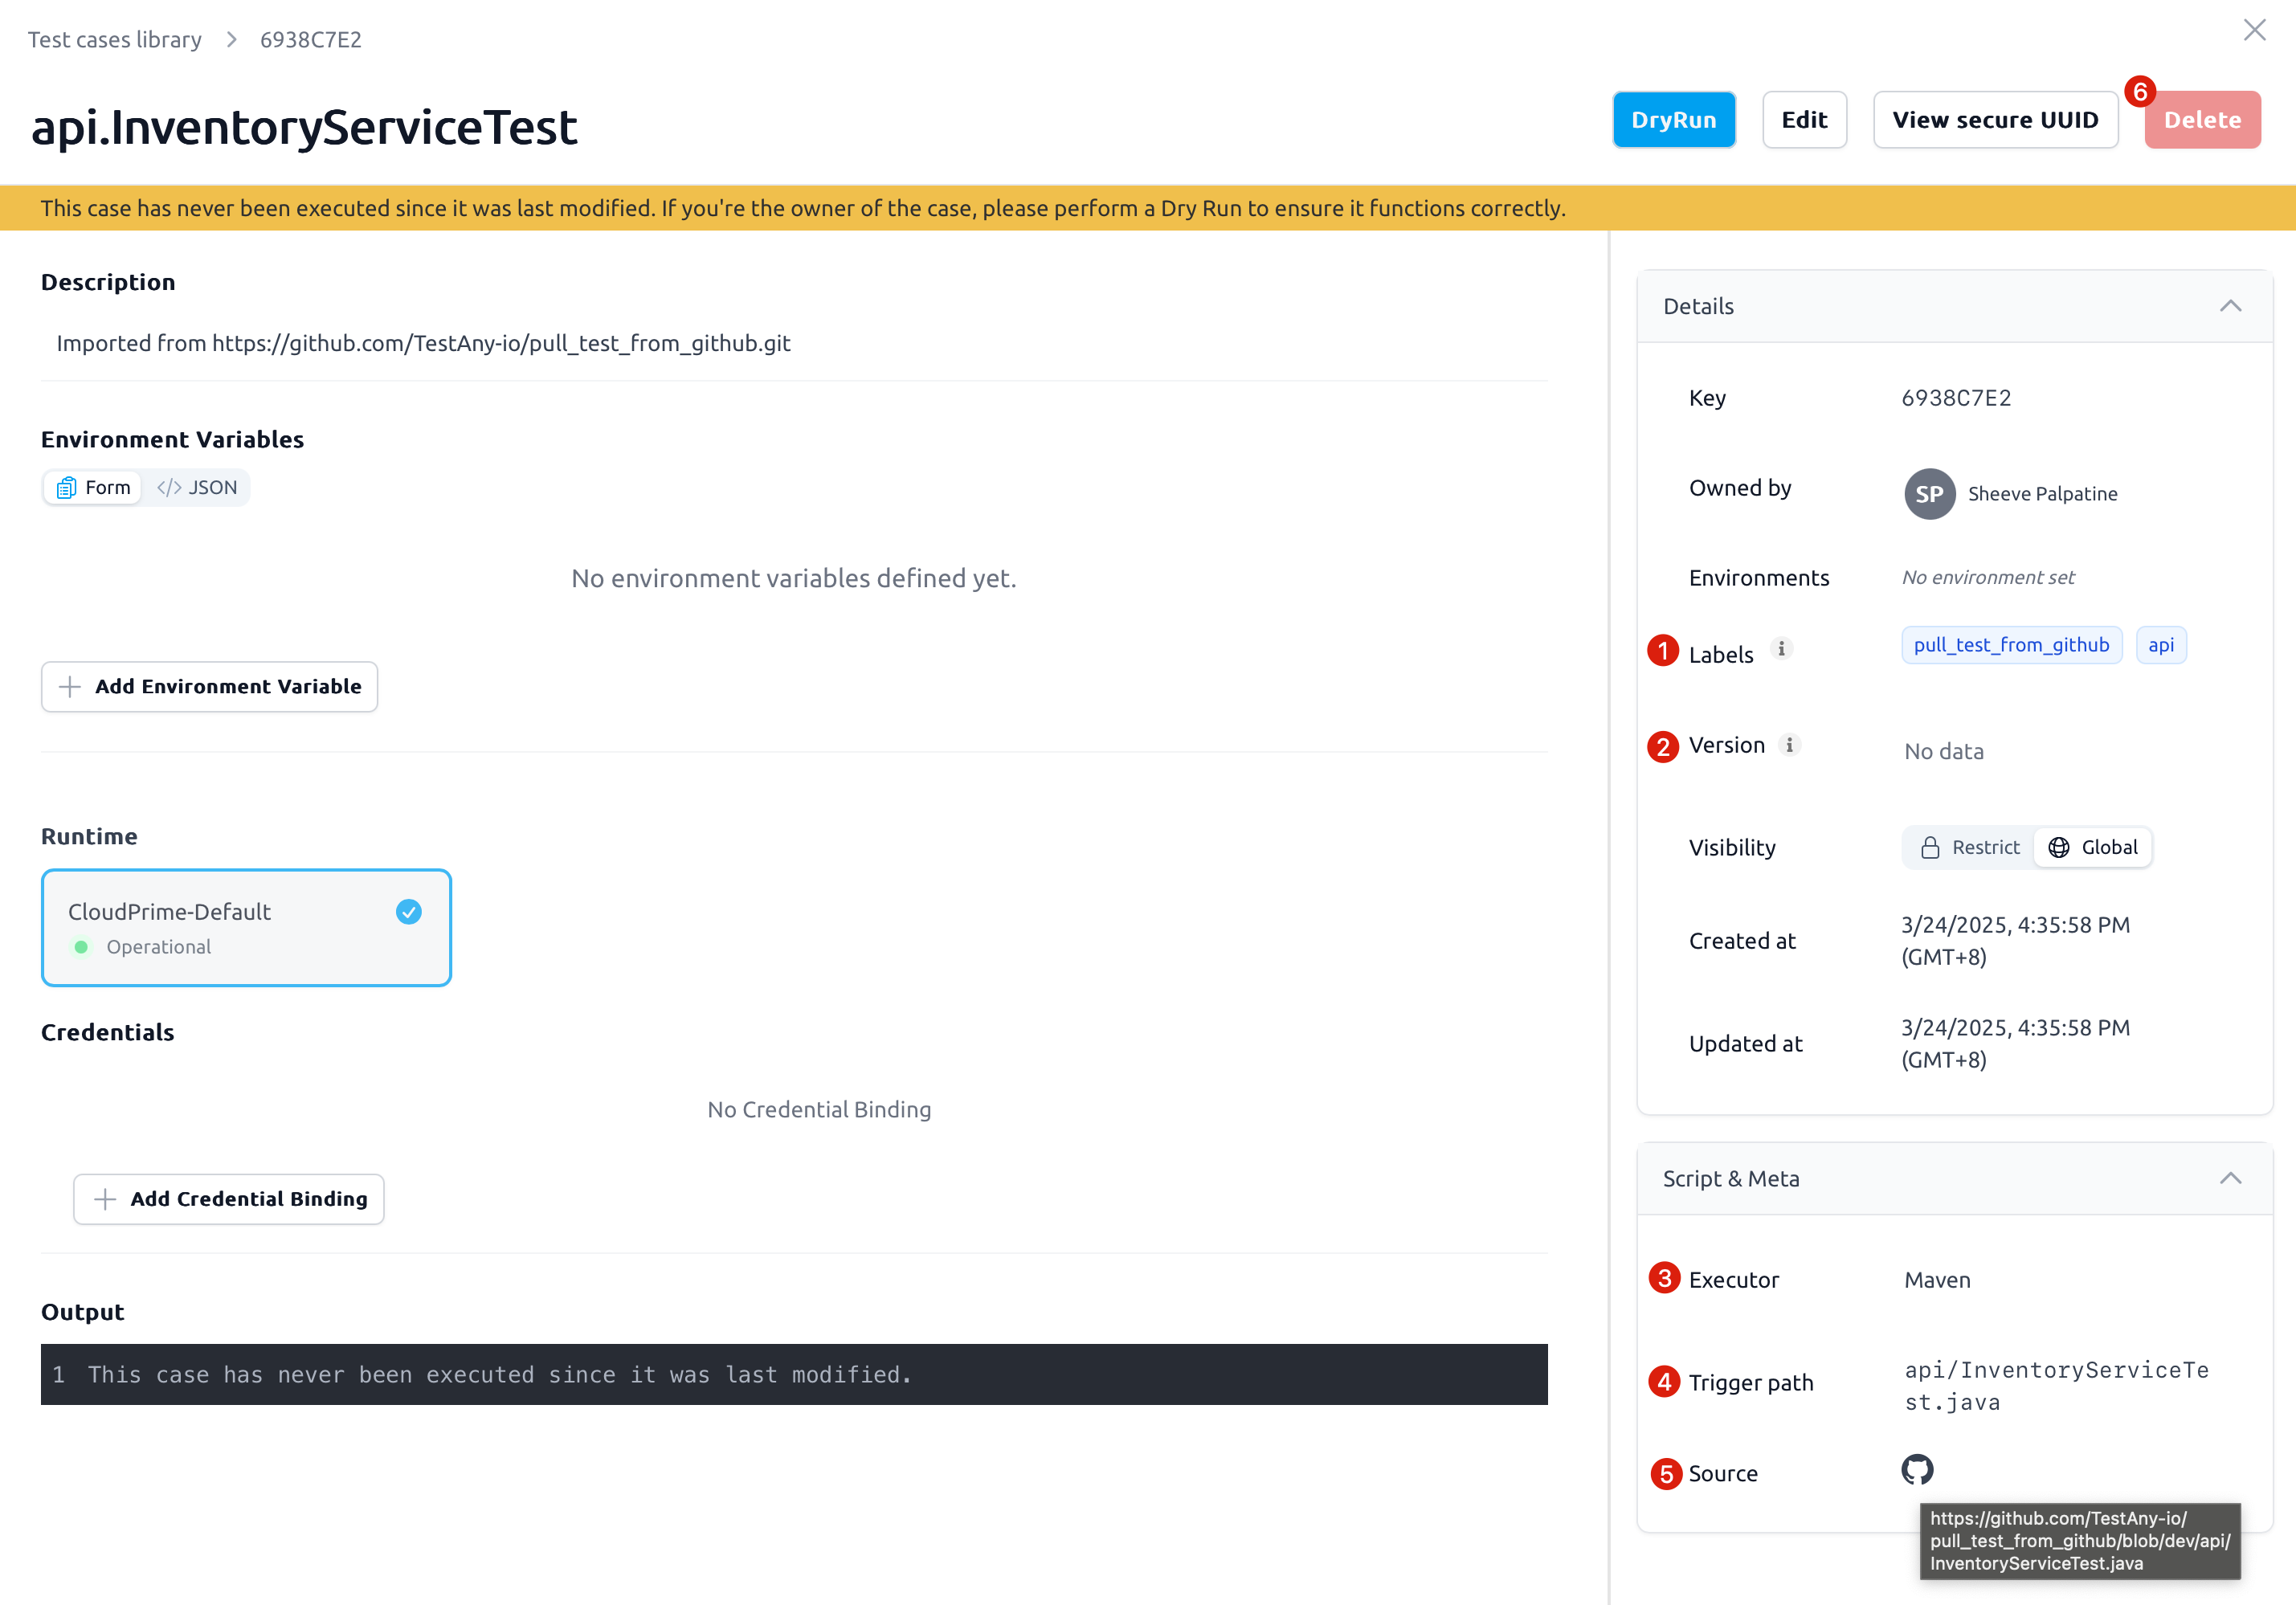
3.1.9 View test cases linked through the sync relationship
You can perform a combination search by labels = {repository_name} & created_from = {registration_date} & owner = {user_id}.

You can also find the git information mentioned in section #3.1.7.1 in case details.
- Labels
- Version
- Executor
- Trigger path / command
- Source: the full URL of the source file. Clicking the icon will open the source file in a new tab.
- Delete button is disabled, you may refer to section #3.2.3 or #3.3 to delete the case.
3.2 Update a Sync Relationship Record (Import History)
3.2.1 Access 'Import from Git' UI
- Navigate to 'Test Case Library'
- Click the '↓' arrow next to 'Register test case'
- Select 'Import from Git'
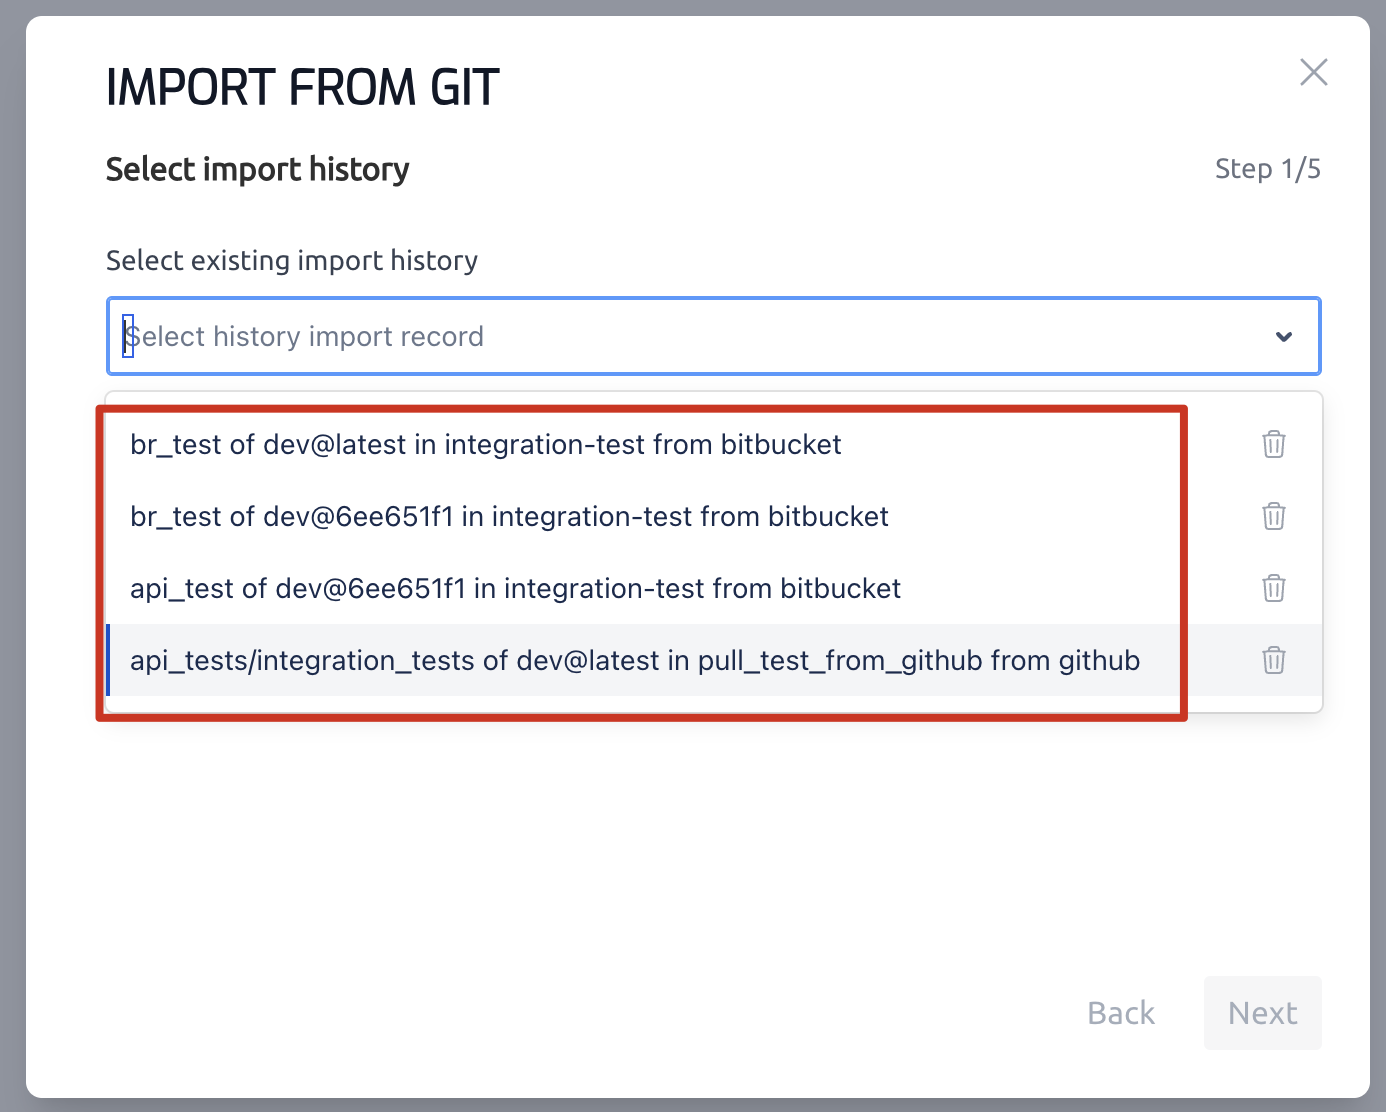
3.2.2 Select a sync relationship record (::term[Import History])
- In step 1/5 of the wizard, expand the
Import Historydropdown. - Select the sync relationship record you want to maintain.
✔️ Tip: the naming convention of Import History is "{selected_root_directory} of {branch}@{commit_id} in {repository_name} from {repository_type}"
3.2.3 Modify sync scope and file selection
In step 5/5 of the wizard, files that are already part of the sync relationship are pre-selected. Modify the selection as needed, then click Submit.
Key notes:
- If a previously linked file has been renamed or moved, it will no longer appear in the wizard. After you submit, the original sync relationship becomes invalid, and the registered test case will be deleted or unlinked (see section #3.3.2).
- If a previously linked file is manually unselected, it is removed from this
Import History. After submission, the corresponding test case will be deleted or unlinked (see section #3.3.2). - For
Import Historywithlatest commit, files that did not exist last time, including newly added, renamed, or restored files, appear in the wizard but remain unselected by default. They join the sync relationship only if you explicitly select them. - For
Import Historywitha specific commit, files that do not exist at the selected commit, including newly added, renamed, or restored files, do not appear in the wizard.
3.2.4 Validate the updated test cases
After submission, review case details on the Validation page and click Validate to proceed. If you want to tweak any field values, edit them one by one here or use bulk edit later after registration (refer to Bulk Manage Test Cases).
| Case Field | Default Value | Editable |
|---|---|---|
| Name | Latest value | Yes |
| Description | Latest value | Yes |
| Runtime name | Latest value | No |
| Visibility | Latest value | Yes |
| Environment Variables | Latest value | Yes |
| Executor | Latest value | Yes |
| Trigger path | Latest value | Yes |
| Labels | Latest value | Yes |
| Version | 1. Latest commit: version = the latest tag within the selected branch (if tags exist); otherwise, empty 2. A specific commit: version = the tag of the selected commit; otherwise, empty | Yes |
| Creator | Latest value | No |
| Environments | Latest value | Yes |
| Repository address | Latest value | No |
| Branch | Latest value | No |
| Commit ID | Latest value | No |
Key notes:
For files that remain in the sync relationship:
- All case details, except for
version, are pre-loaded with their latest values and will not be overridden unless explicitly modified them in this step. - The
versionvalue is always updated whenever theImport Historyis updated.
3.2.5. Submit the update and bulk register test cases
Click Register Test Cases to submit the sync relationship update. A confirmation message appears once the test cases are successfully registered.
3.3 Delete a Sync Relationship Record (Import History)
3.3.1 Access 'Import from Git' UI
- Navigate to 'Test Case Library'
- Click the "↓" arrow next to 'Register test case'
- Select 'Import from Git'
3.3.2 Select and delete a sync relationship record (::term[Import History])
Before deleting a sync relationship record, carefully evaluate its impact on the registered test cases linked through it.
Impact of deletion:
- Test cases not assembled into any pipeline → Permanently deleted from Testany.
- Test cases assembled to pipeline(s) → Will remain in Testany but will be unlinked from the Git repository. You can remove these test cases from the associated test pipelines before proceeding with this operation, or manually delete them after removing this sync relationship record.
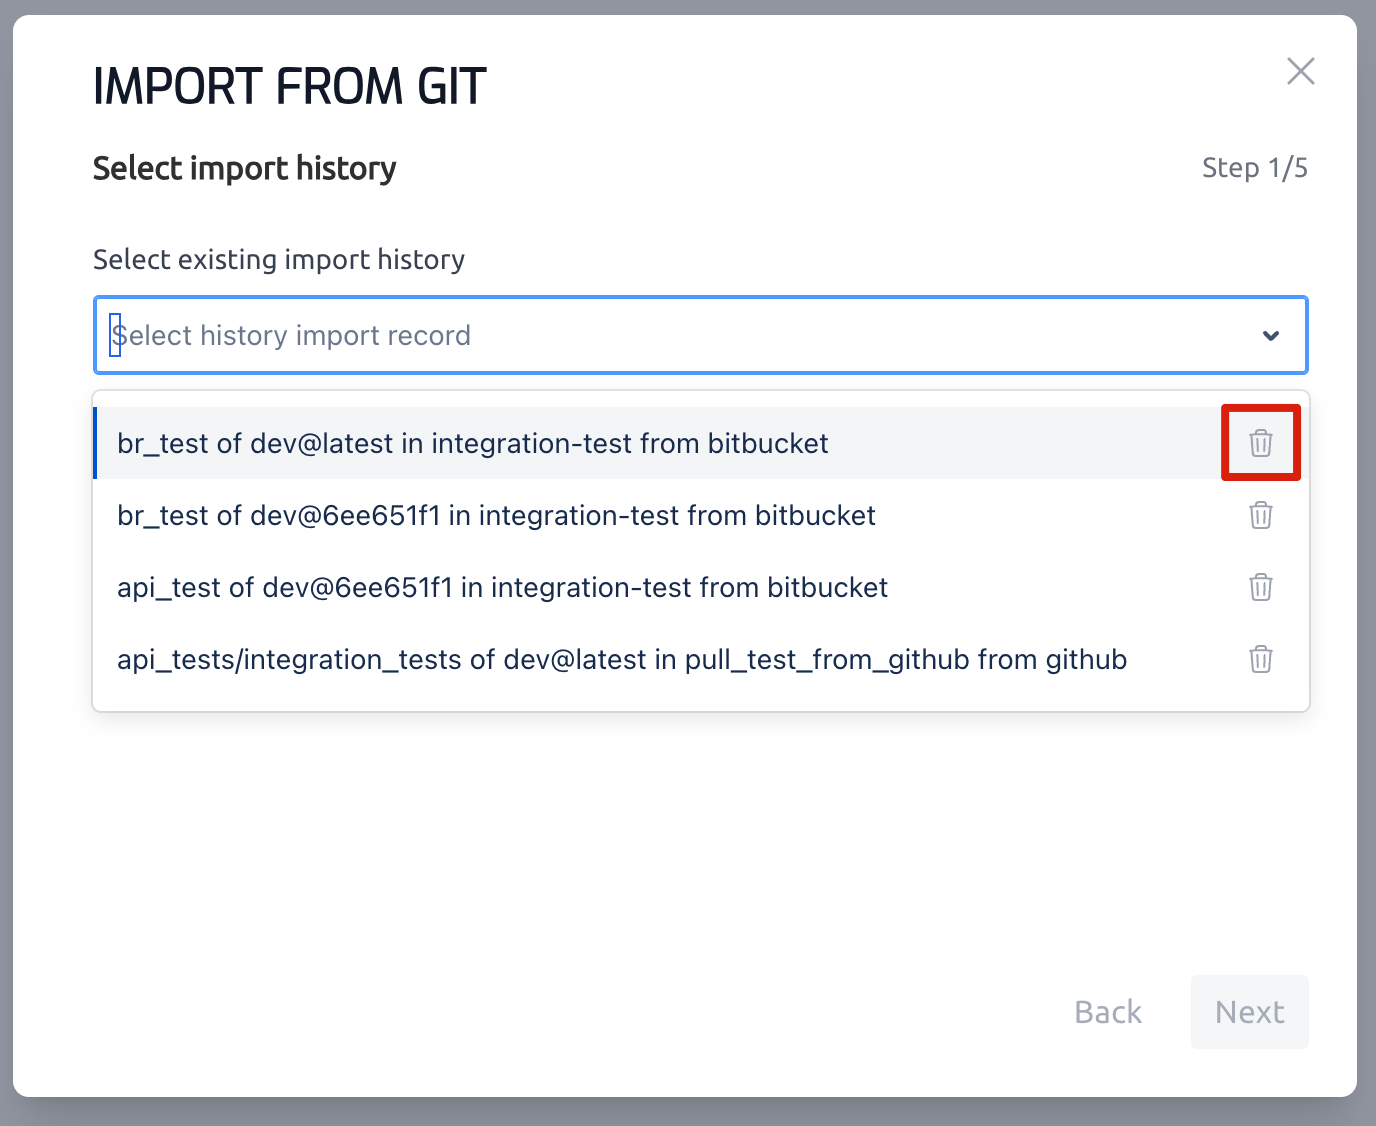
- In step 1/5 of the wizard, expand the
Import Historydropdown. - Select the sync relationship record you want to delete and click its delete button :trash: next to it (
 No confirmation message is shown before deletion. Make sure the action is intentional.)
5. Frequently Asked Questions (FAQ)
❓ Why do I see a "Failed to fetch branches, please check the repository address and access token" error in step 3/5 while creating a new sync relationship record?
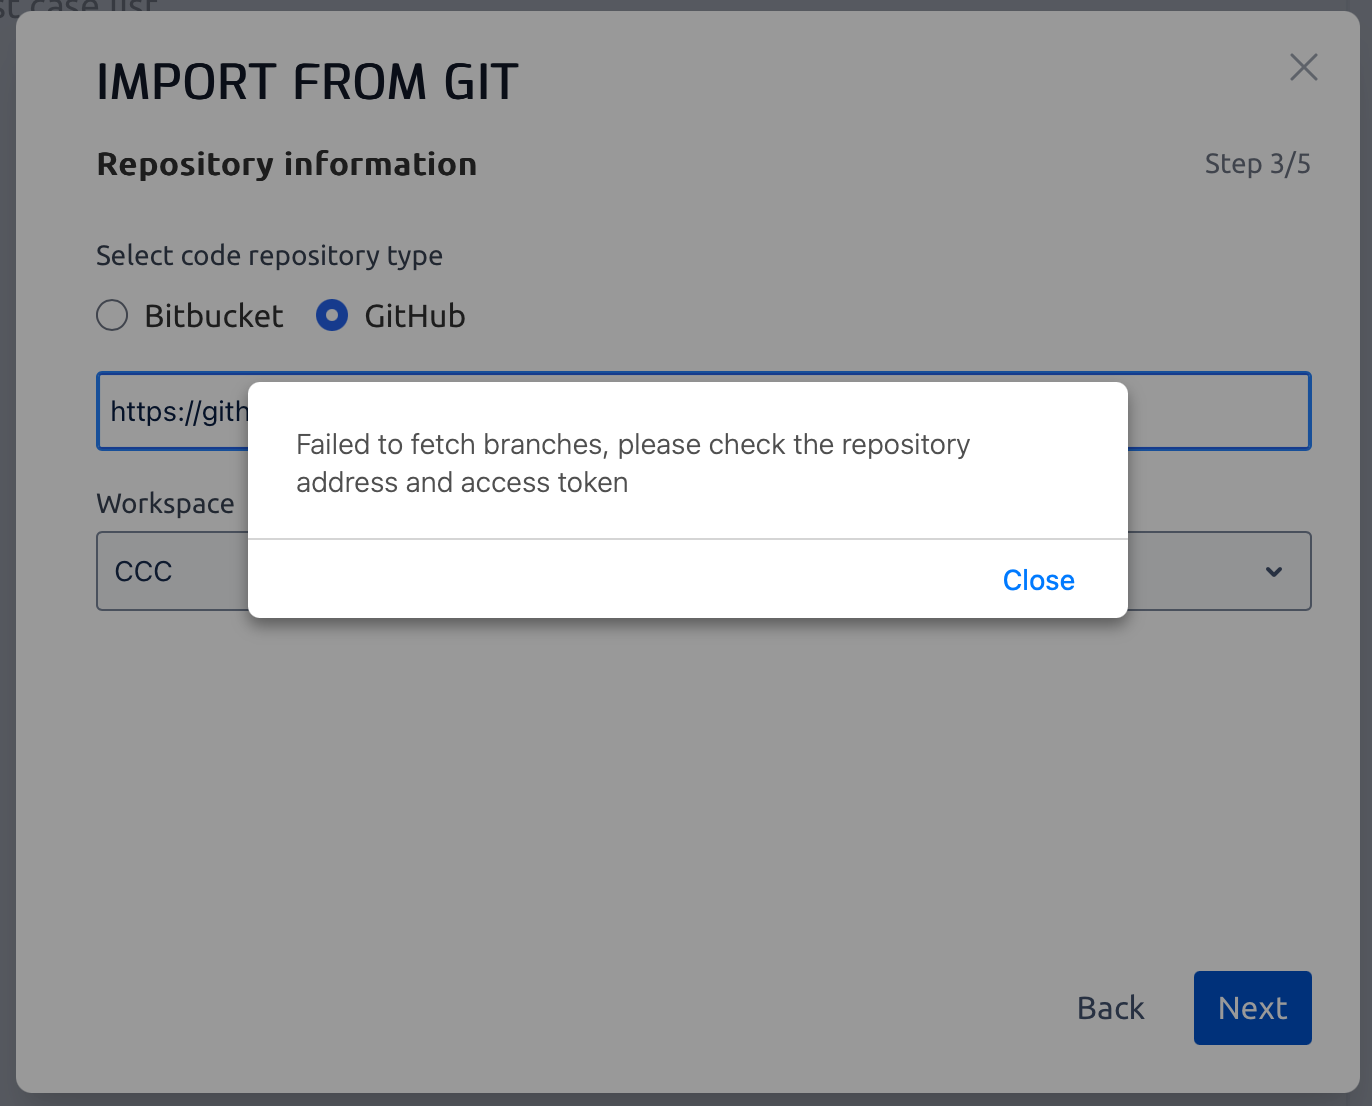
💡 Ensure the git URL is accessible and its credential is selected, see section #3.1.4.
❓ Why am I seeing a "The import history already exists, please select the history to continue" error while creating a new sync relationship record?
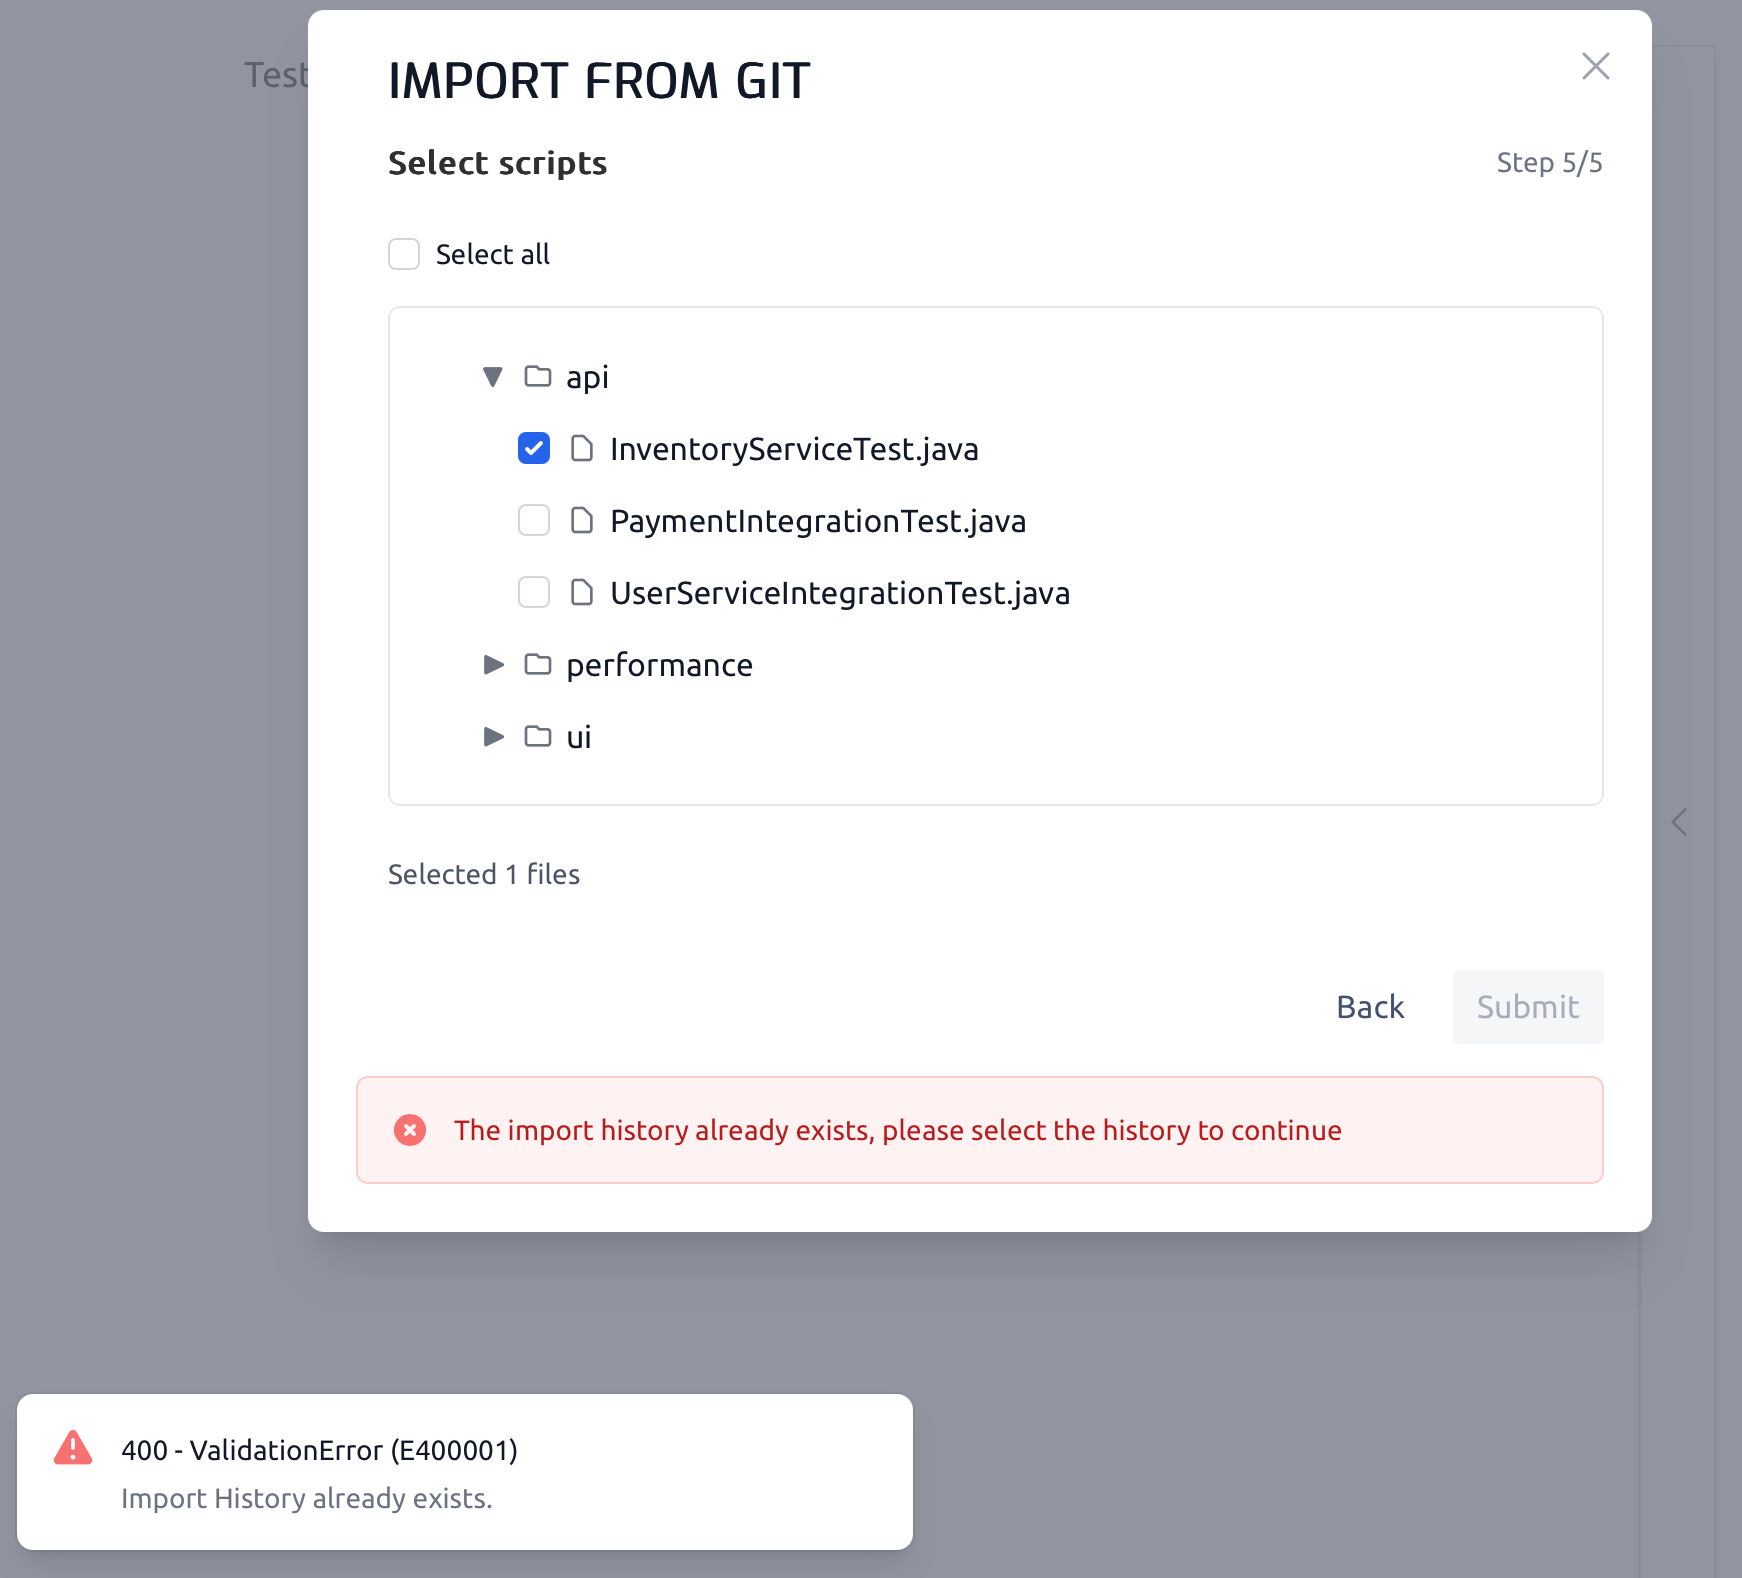
💡 You are attempting to create the same sync relationship record again, which means the same repository, branch, commit, and root directory combination.
- If you want to update the existing sync relationship, go to
Import Historyinstead, see section #3.2. - If you need a new sync relationship, choose a different branch, commit, or root directory, see section #3.1.5.
❓ Why don't I see some test cases in the V1 wizard?
💡 Check whether the files were renamed or moved in Git. If not, verify that the correct branch, commit, and root directory were selected for this sync relationship, see section #3.1.5 or #3.2.2.
❓ Why do I see a warning about test files being deleted by Testany?
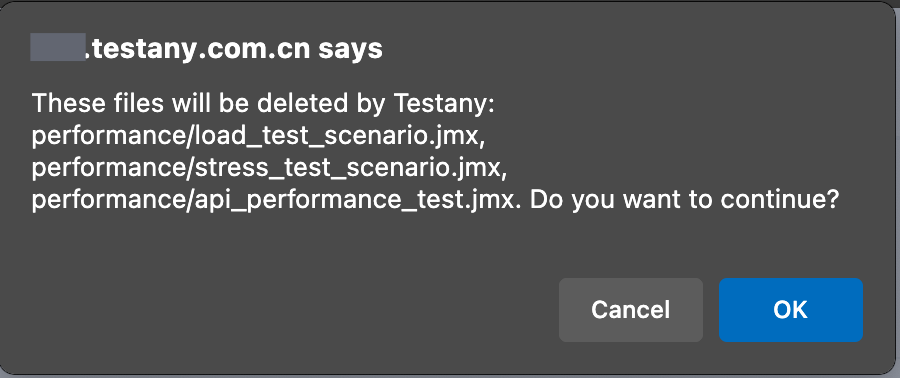
💡 Possible causes include test scripts being removed, renamed, or moved in Git, or a file being manually unselected while editing Import History, see #3.2.3.
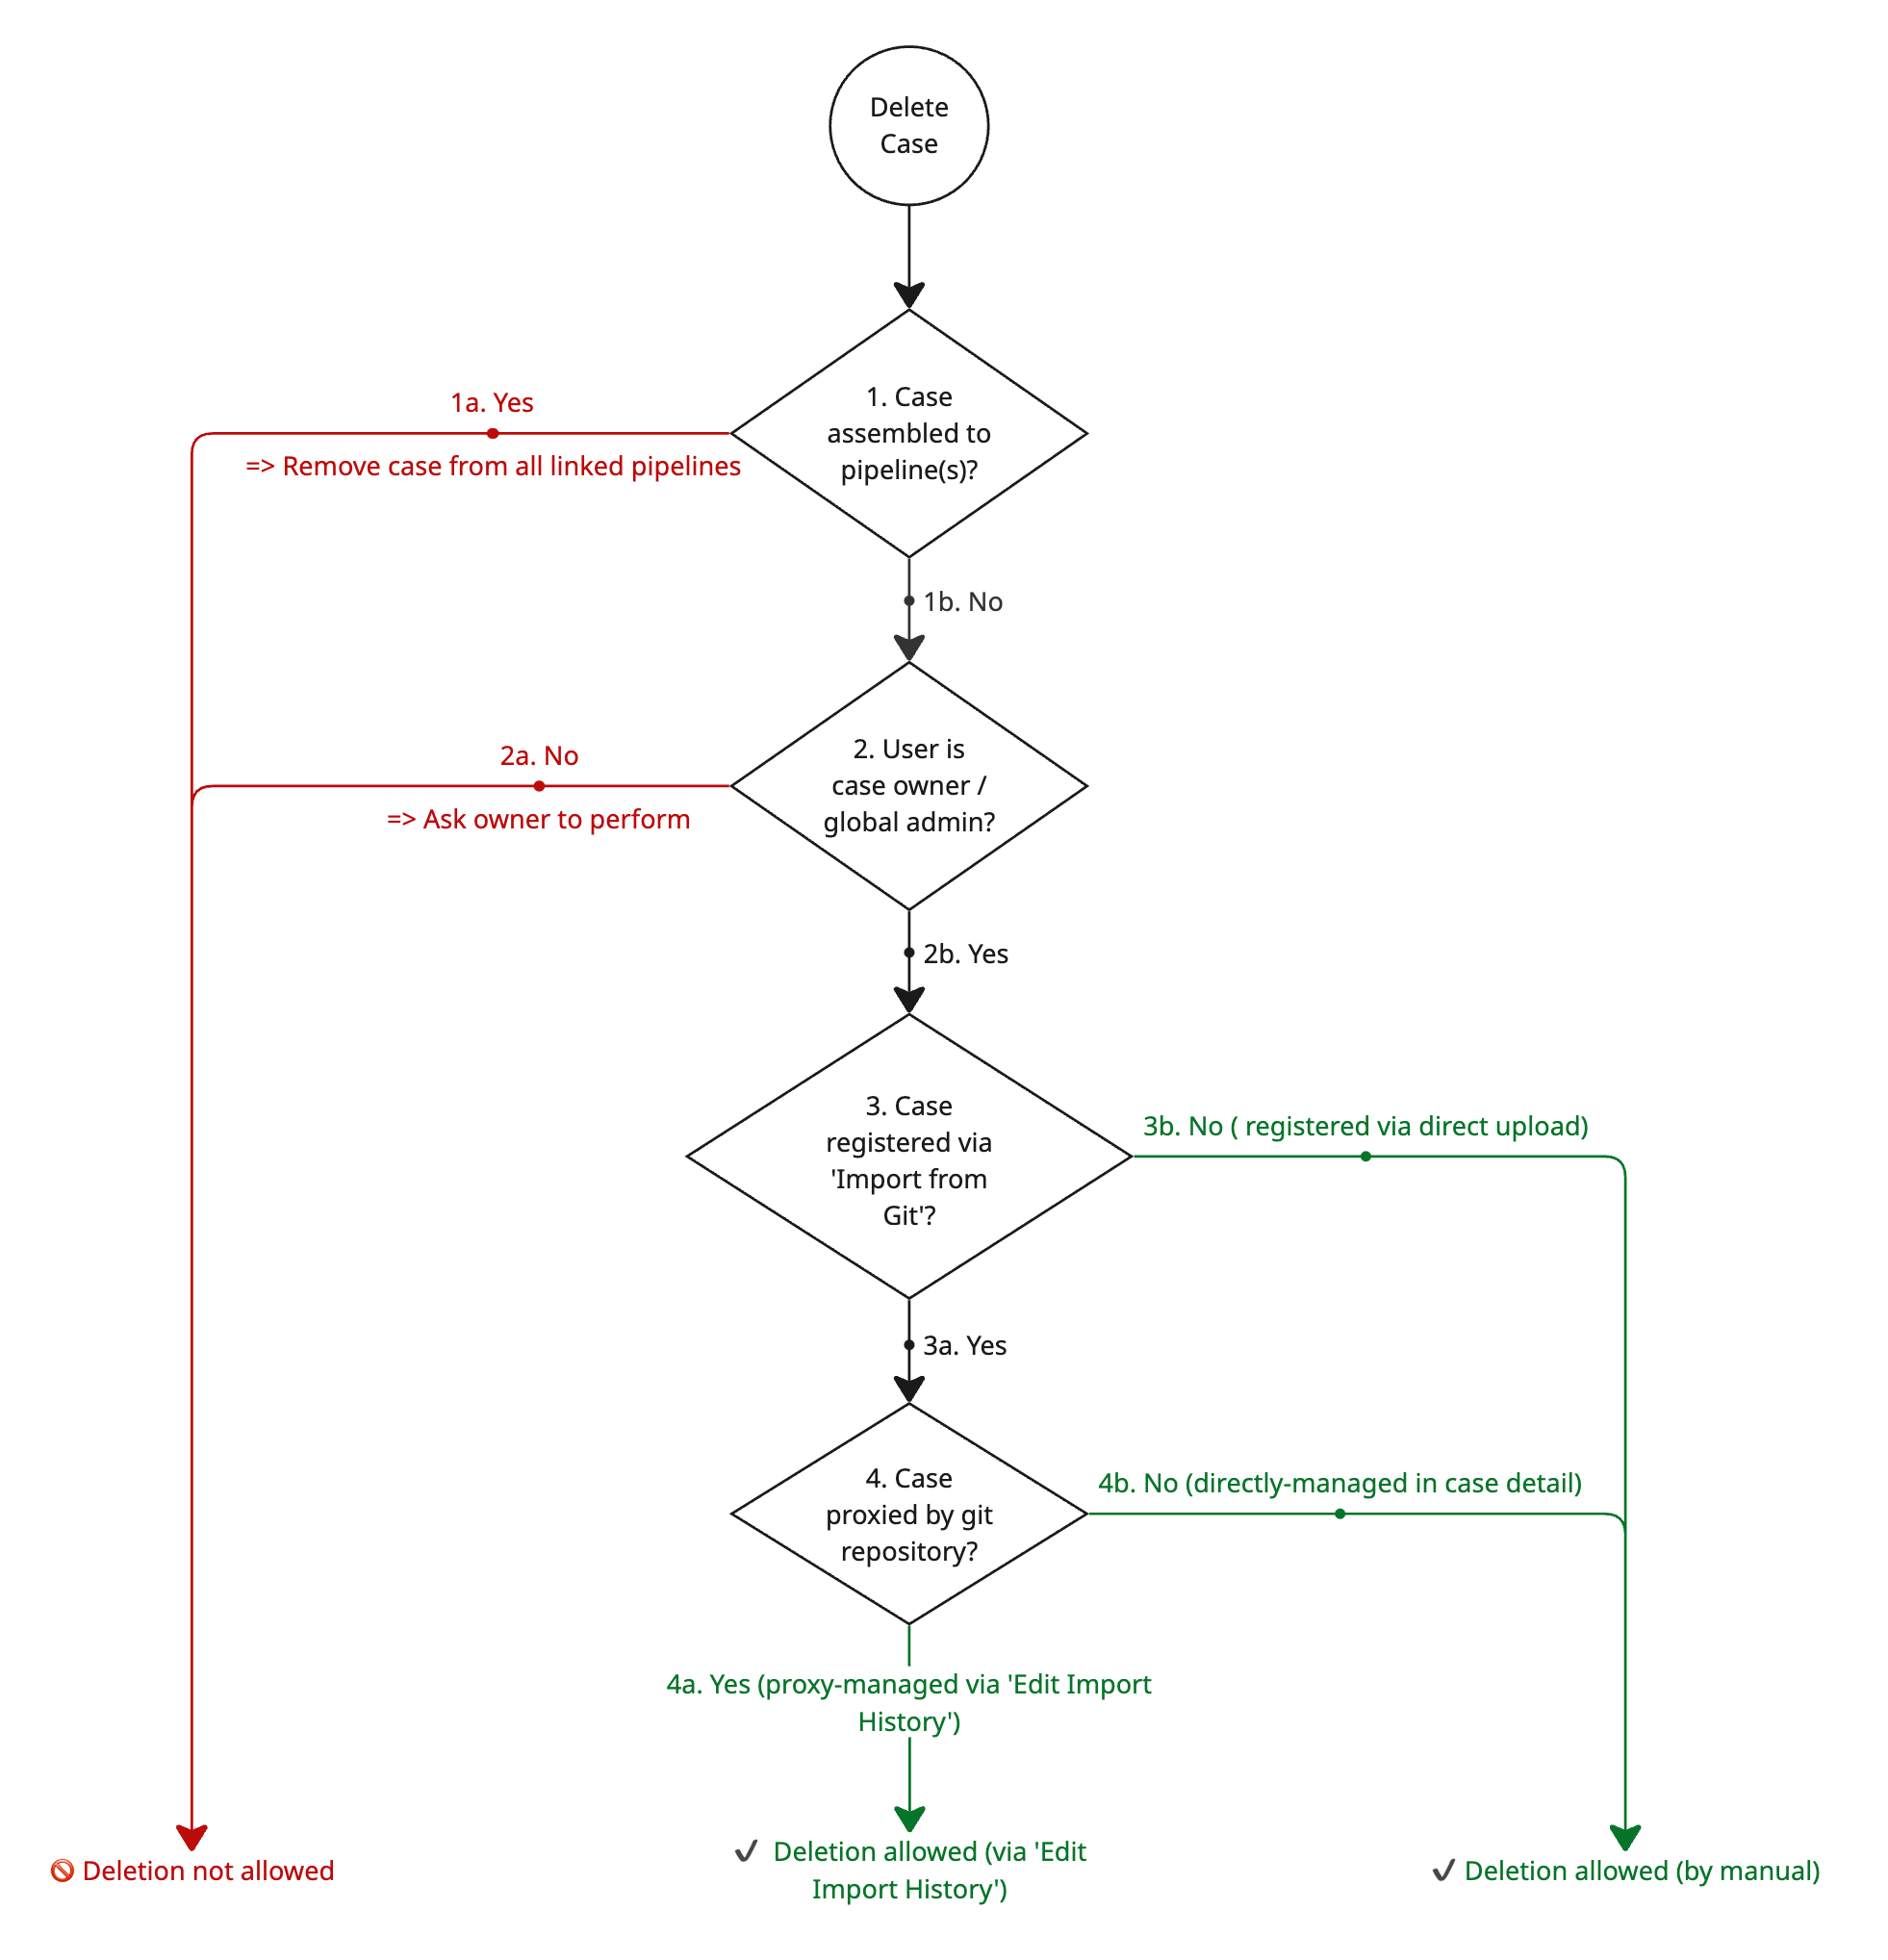
❓ Why can't I delete certain test cases?
💡 You can delete a direct-upload case owned by you or a case created through a Git sync relationship that you own (see below ✔️ scenarios).
❓ Why did version change after Import History was updated?
💡 The version value is always updated whenever Import History is updated, see the key notes in section #3.2.4.
❓ Does V1 import repository code into Testany?
💡 No. V1 creates a credential-based Sync Link. Testany stores the sync relationship, test case metadata, and Import History, but execution still reads scripts directly from Git. If you need a platform-managed code copy, use V2 Managed Import.
❓ How do I track which repository and commit a test case came from?
💡 Go to case detail and hover on the source or simply click the icon to open the source file, see #3.1.9.
×
Still have questions?
Our team is here to help. Get in touch and we'll get back to you as soon as possible.