
Trusted Runtime Deployment Guide
📌 Who Should Read This Guide?
This guide is for enterprise customers who need to deploy Trusted Runtime in their own managed cloud infrastructure.
✅ You NEED this guide if:
- Your test targets are behind a corporate firewall or VPN
- You have compliance requirements (data residency, on-premises)
- You need custom test environments in your own cloud
❌ You DO NOT need this guide if you're using Testany managed runtime.
→ Skip to: Quick Start Guide | Create Your First Test
Not sure? Contact us ↗
Overview
This document describes how to deploy the Testany Trusted Runtime on cloud infrastructure.
Download Deployment Package
Before starting deployment, please download the deployment package:
Download AWS Deployment Package
The deployment script automatically completes the following tasks:
- Deploy cloud infrastructure (VPC, Kubernetes cluster, database, cache, object storage)
- Configure kubectl to connect to the cluster
- Render and deploy Helm Charts
- Register with the Testany SaaS platform
- Configure Ingress and TLS certificates
Estimated deployment time: 30-45 minutes (excluding DNS configuration wait time)
Prerequisites
Tool Dependencies
Before starting deployment, ensure the following tools are installed and available:
Core Tools (Required)
| Tool | Minimum Version | Description | Verification Command |
|---|---|---|---|
| AWS CLI | 2.x | AWS resource management | aws --version |
| Terraform | 1.5+ | Infrastructure as Code | terraform --version |
| kubectl | 1.28+ | Kubernetes cluster management | kubectl version --client |
| Helm | 3.x | Kubernetes package manager | helm version |
| jq | 1.6+ | JSON data processing | jq --version |
| gomplate | 3.x | Template rendering tool (macOS) | gomplate --version |
| gotemplate | - | Template rendering tool (Linux) | gotemplate --version |
Deployment Script Dependencies (Required)
| Tool | Minimum Version | Description | Verification Command |
|---|---|---|---|
| grpcurl | 1.8+ | gRPC CLI client for Bootstrap registration | grpcurl --version |
| openssl | 1.1+ | Certificate and key generation | openssl version |
| kapp | 0.50+ | Carvel tool for Kubernetes resource deployment | kapp --version |
Cloud Platform Permissions - AWS
Ensure AWS credentials are configured with the following permissions:
- VPC: Create/manage VPC, subnets, route tables, NAT Gateway, Internet Gateway
- EKS: Create/manage EKS clusters, node groups
- RDS: Create/manage RDS instances
- ElastiCache: Create/manage ElastiCache clusters
- S3: Create/manage S3 buckets
- IAM: Create IAM roles and policies required for EKS
- EC2: Create security groups, manage EC2 resources
Testany Provided Credentials
Before deployment, contact the Testany support team to obtain the following information:
| Credential | Description | Example |
|---|---|---|
| ECR Registry URL | Container image registry address | 123456789012.dkr.ecr.us-west-2.amazonaws.com/testany |
| Access Key ID | Secrets Manager access key | AKIAXXXXXXXXXXXXXXXXXX |
| Secret Access Key | Secrets Manager secret key | xxxxxxxxxxxxxxxxxxxxxxxxxxxxxxxxxxxxxxxx |
| Secrets Region | Secrets Manager region | cn-north-1 (China) / us-west-2 (Global) |
| Secrets Name | Secret name | testany/customers/YOUR_ACCOUNT_ID/appsecrets |
| SaaS Endpoint | SaaS platform address | YOUR_SAAS_ENDPOINT |
Configuration
Configure Terraform Variables
Bash# Enter the Terraform directory cd aws/terraform # Copy the example configuration file cp terraform.tfvars.example terraform.tfvars # Edit the configuration file vi terraform.tfvars
Required Configuration Items
HCL# AWS Region aws_region = "us-west-2" # Project name (used for all resource naming) project_name = "testany" # === Testany Provided Credentials (Required) === ecr_registry = "123456789012.dkr.ecr.us-west-2.amazonaws.com/testany" testany_secrets_region = "us-west-2" testany_secrets_name = "testany/customers/YOUR_CUSTOMER_ID/appsecrets" testany_saas_endpoint = "tr.testany.com"
Sensitive credentials (Access Key ID and Secret Access Key) should be set via environment variables, not written to the configuration file.
Installation
AWS
Step 1: Set AWS Profile (if needed)
Bashexport AWS_PROFILE=your-profile-name
Step 2: Set Testany Credential Environment Variables
Bashexport TF_VAR_testany_access_key_id="AKIAXXXXXXXXXXXXXXXXXX" export TF_VAR_testany_secret_access_key="xxxxxxxxxxxxxxxxxxxxxxxxxxxxxxxxxxxxxxxx"
Step 3: Execute Installation Script
Bashcd scripts bash install.sh
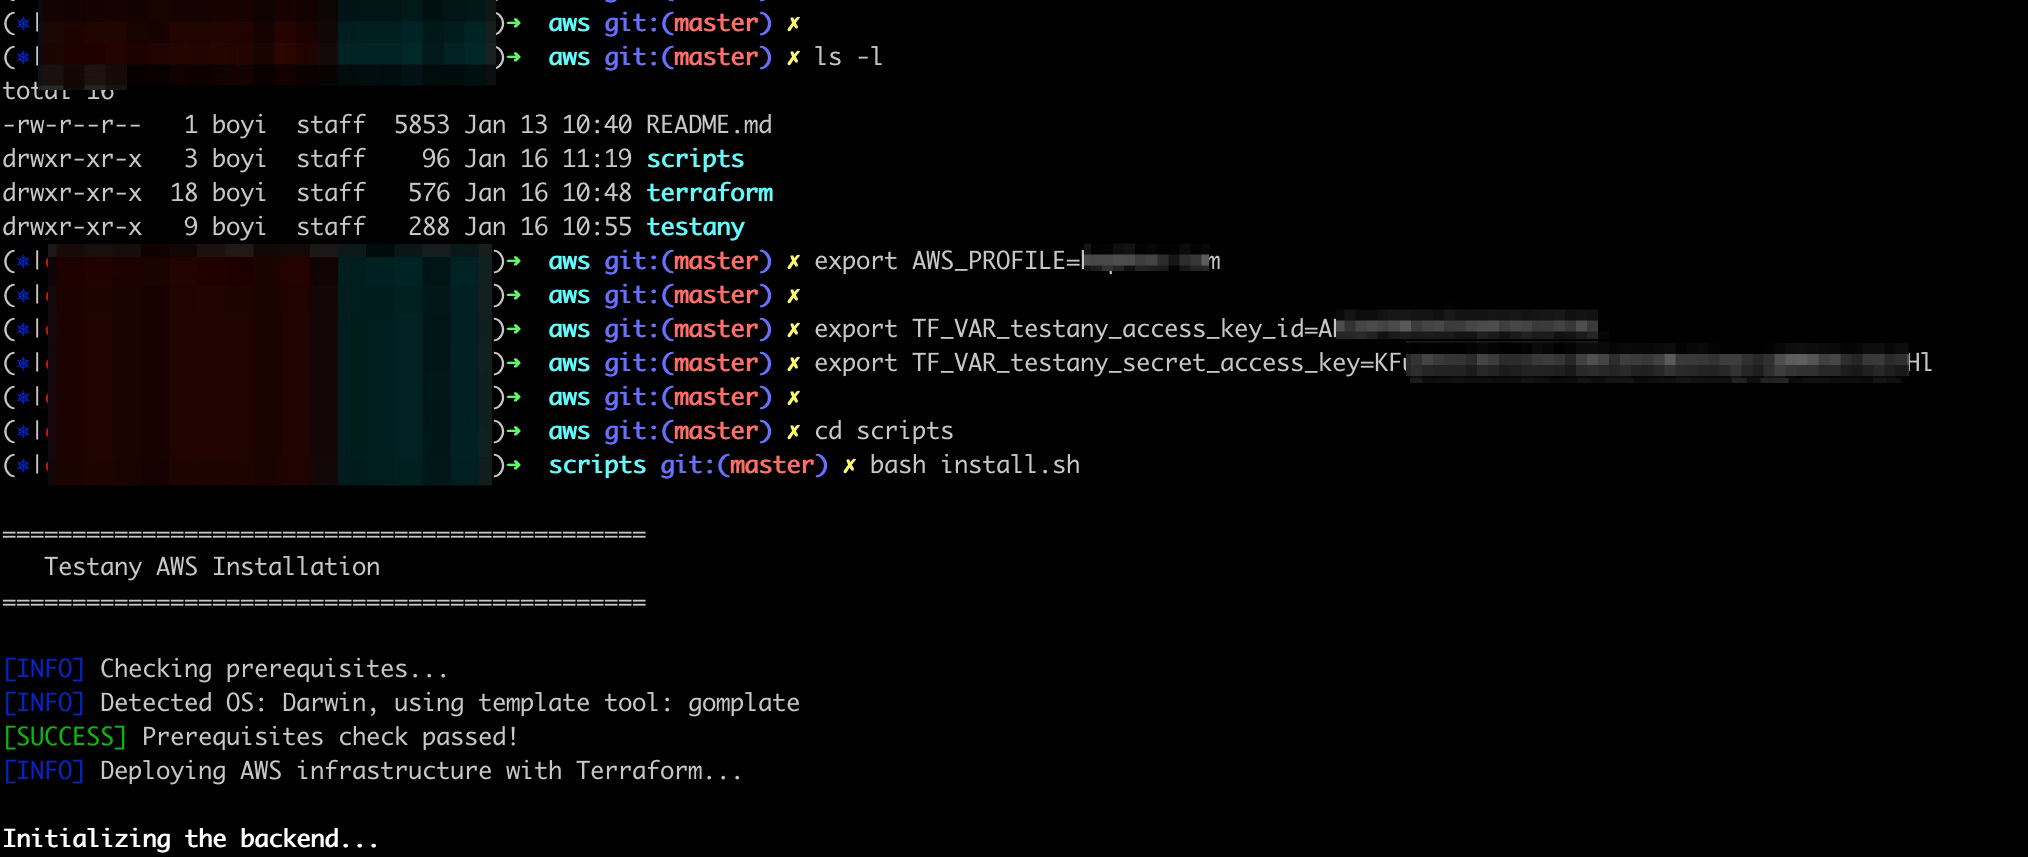
The script automatically executes the following steps:
- [Automatic] Check prerequisites
- [Automatic] Deploy AWS infrastructure (approximately 15-20 minutes)
- [Automatic] Configure kubectl
- [Automatic] Render Helm templates
- [Automatic] Deploy base components
- [User Action Required] Bootstrap registration
- [Automatic] Deploy application services
- [Automatic] Configure Ingress
- [Waiting for User] Create TLS certificates
Bootstrap Registration Process
When the script reaches the Bootstrap registration step, it will pause waiting for user confirmation.
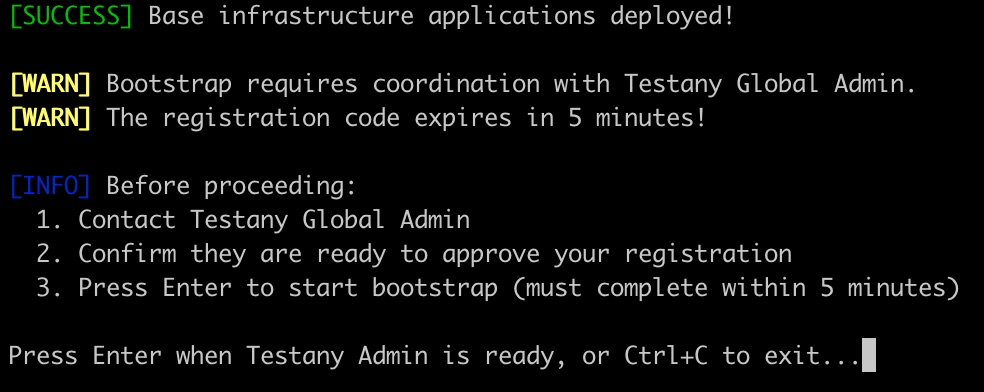
The registration code is valid for 5 minutes. Please ensure the Testany global administrator is ready before continuing.
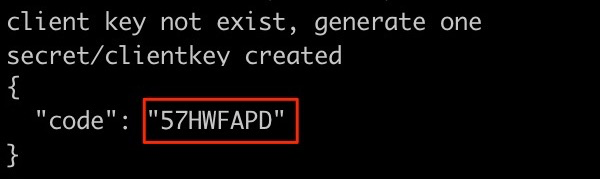
- Get Registration Code: After pressing Enter, the command line will display the registration code:
-
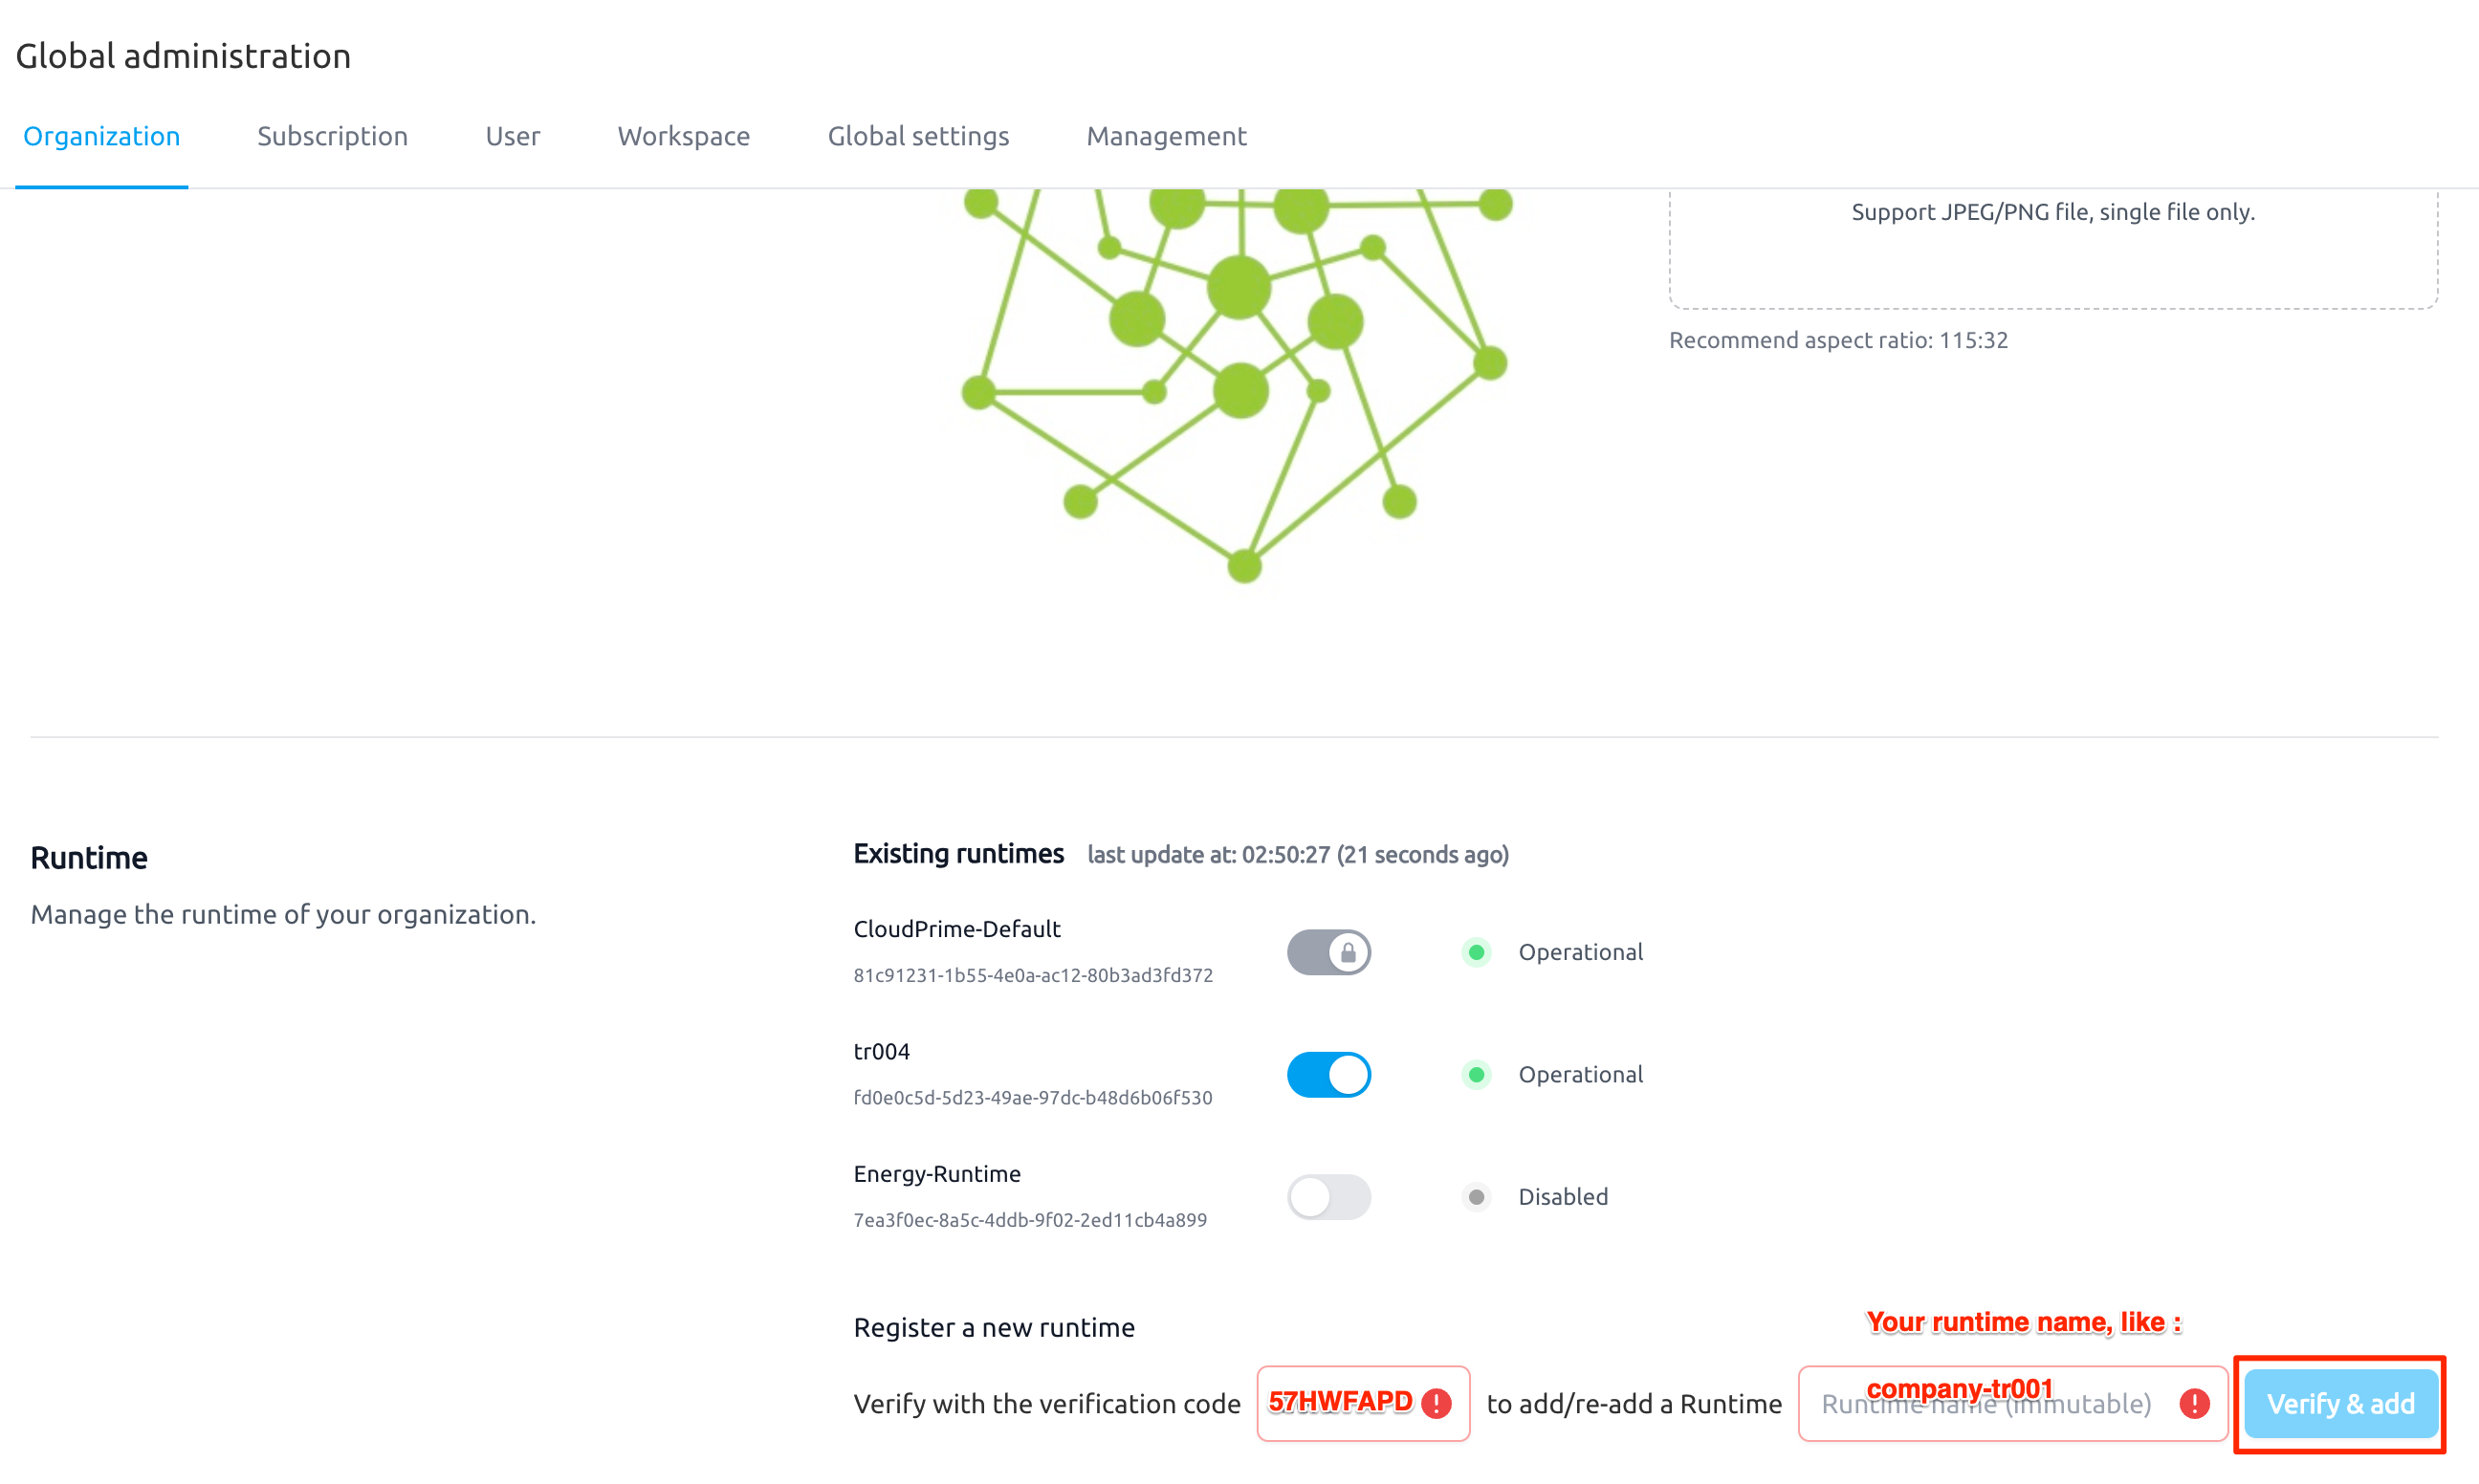
Log in to SaaS Management Platform: Log in to the Testany SaaS management interface using the global administrator account
-
Enter Registration Code: Find the Runtime registration entry in the SaaS management interface and enter the registration code displayed in the command line
-
Set Runtime Name: Set an easily identifiable name for this new Runtime instance
-
Complete Registration: After the administrator confirms on the SaaS platform, the command line script will automatically continue
If the registration code expires, you can run bash install.sh bootstrap again to get a new registration code.
DNS Configuration
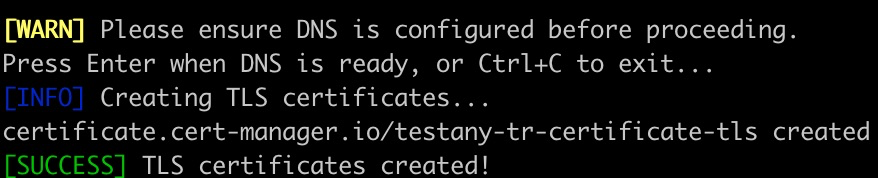
The script will pause at the certificate creation step, prompting you to configure DNS.

-
Get the Ingress Load Balancer address:
Bashkubectl get ingress -n testany-app -
Contact the Testany support team, provide the Load Balancer address, and complete DNS configuration
-
Verify DNS resolution:
Bashnslookup your-domain.testany.com -
After DNS configuration is complete, press Enter to continue the script and create TLS certificates
Installation Verification
After completing the installation, verify the deployment through the following steps.
AWS Secrets Data Preparation
-
Get the Secrets Manager service endpoint address:
Region Endpoint AWS Global Refer to AWS Documentation ↗ AWS China (Ningxia) secretsmanager.cn-northwest-1.amazonaws.com.cnAWS China (Beijing) secretsmanager.cn-north-1.amazonaws.com.cn -
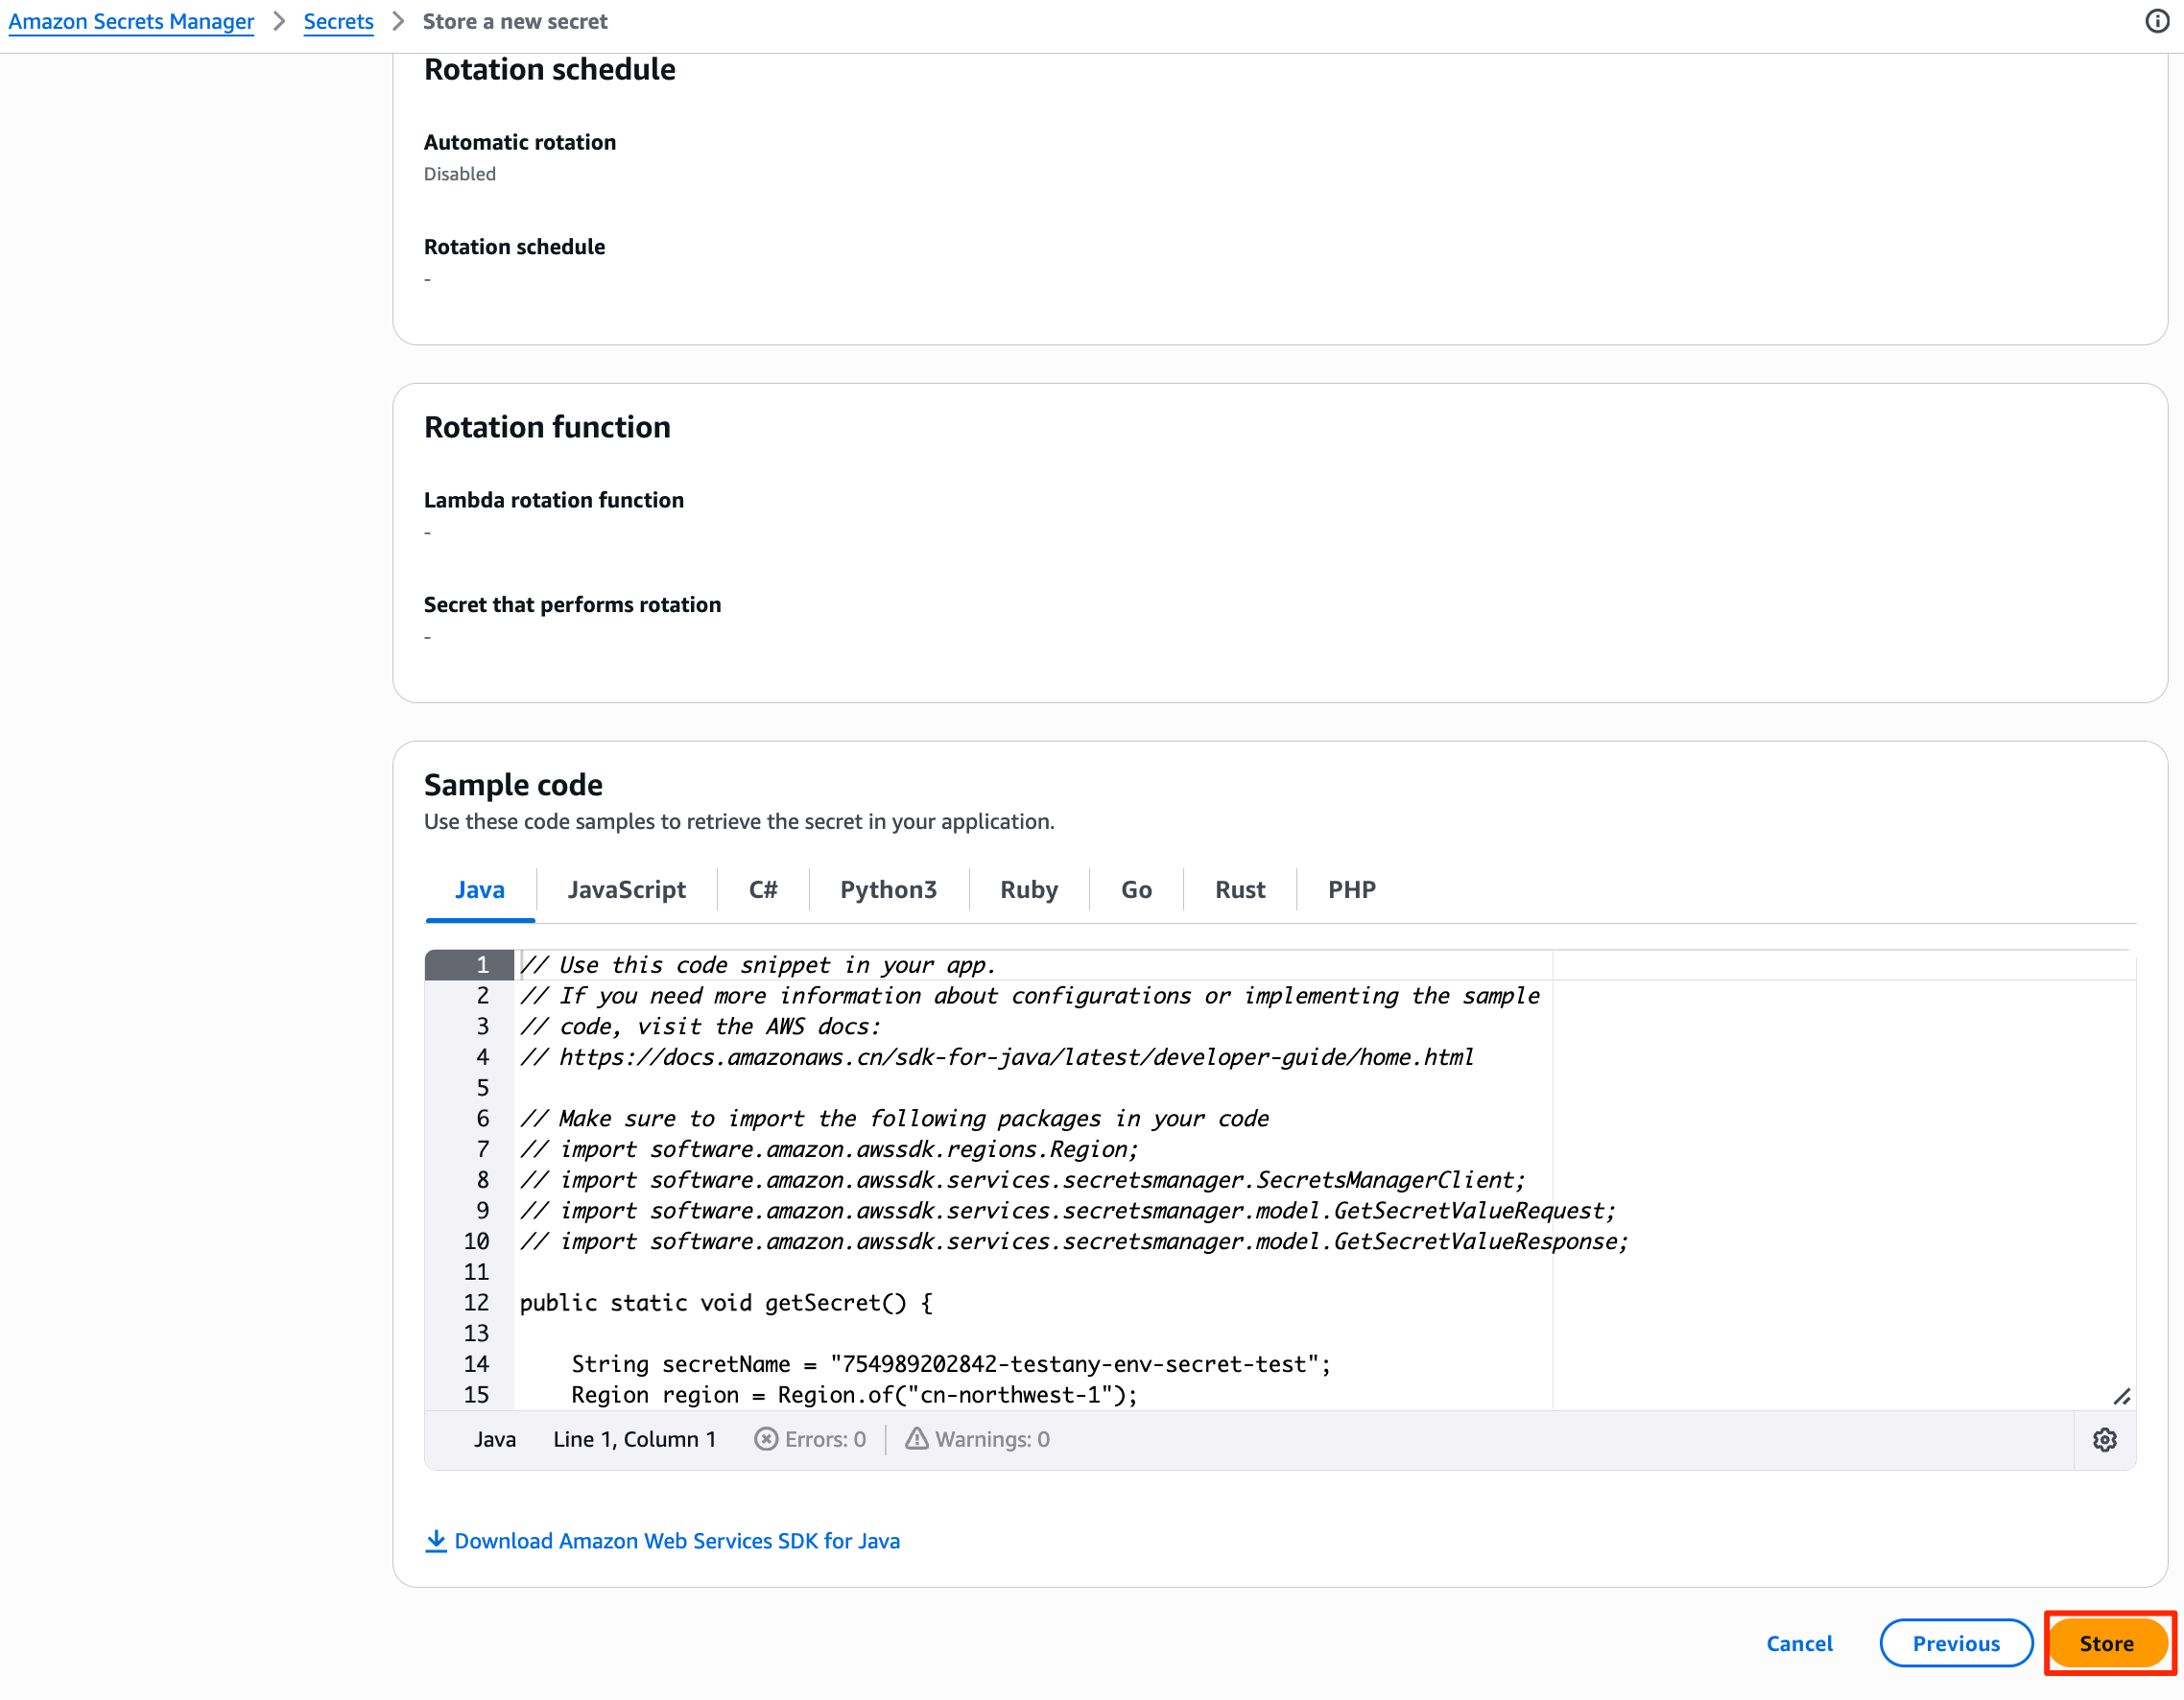
Create a Secret. In the Secrets Manager console, click "Store a new secret":

-
Select "Other type of secret", enter
123in Plaintext (can be any content), and click "Next":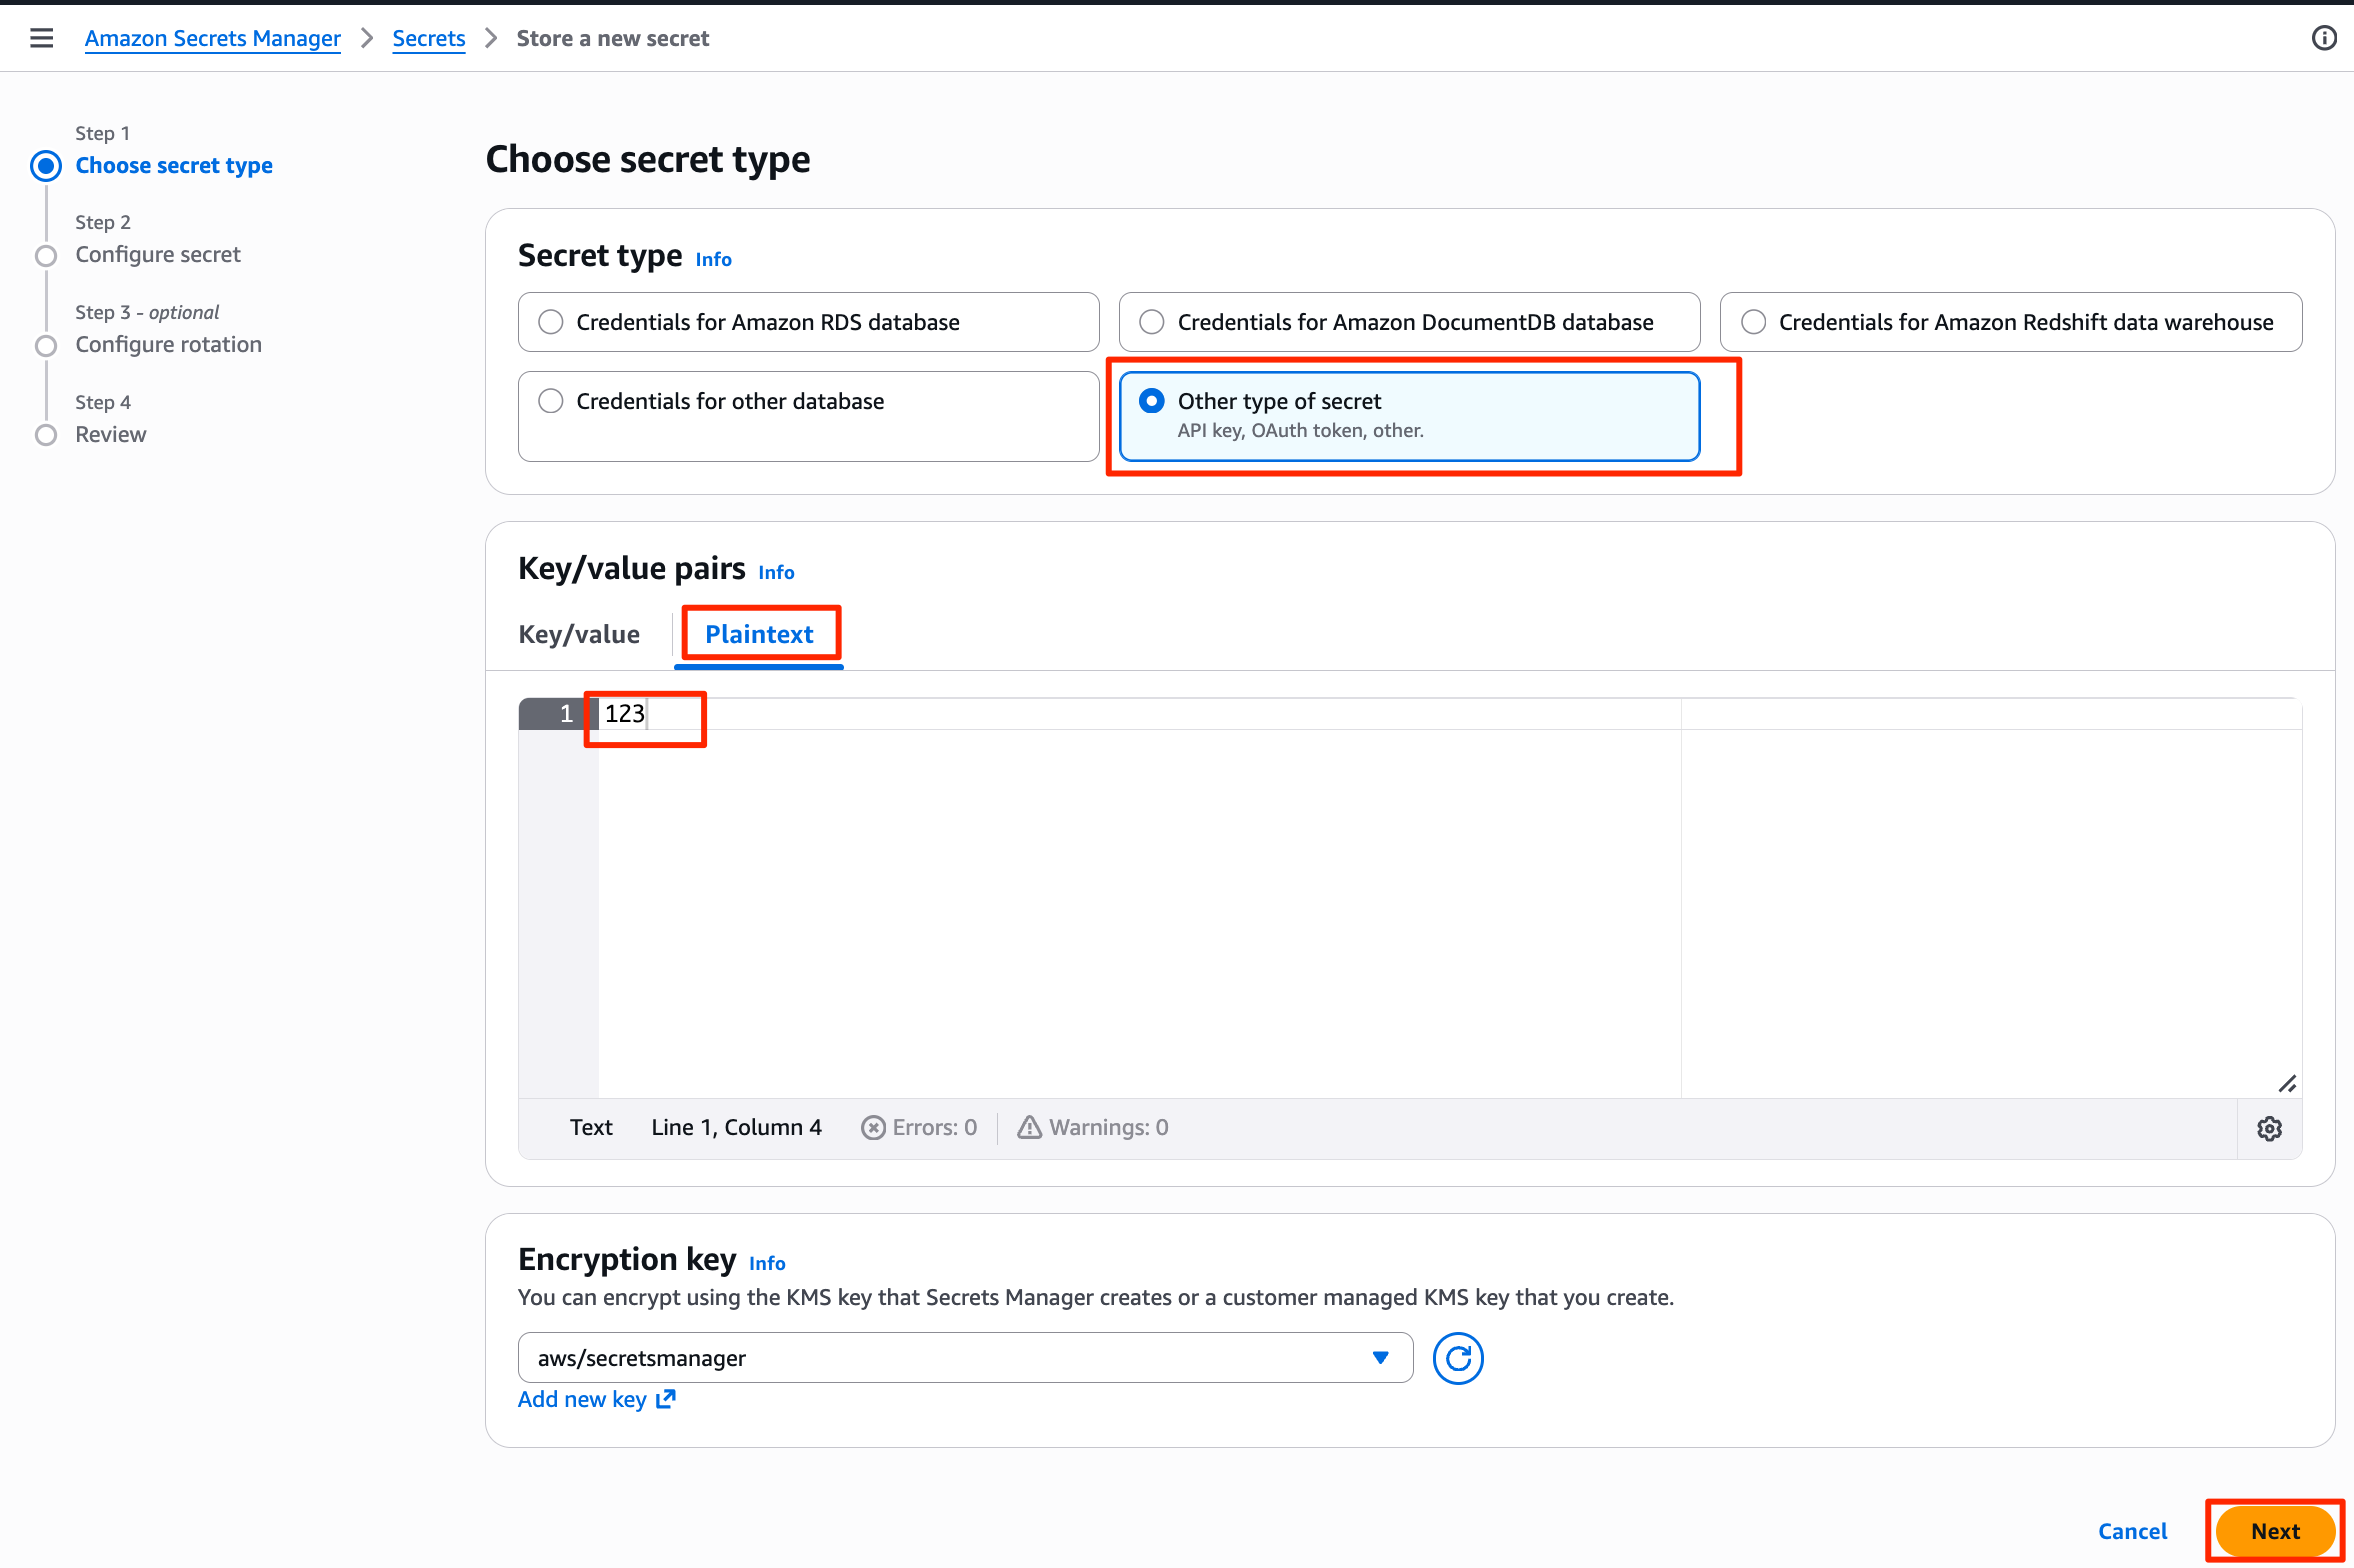
-
Enter
testany-env-secret-test-YOUR_ACCOUNT_IDin Secret name, and click "Next":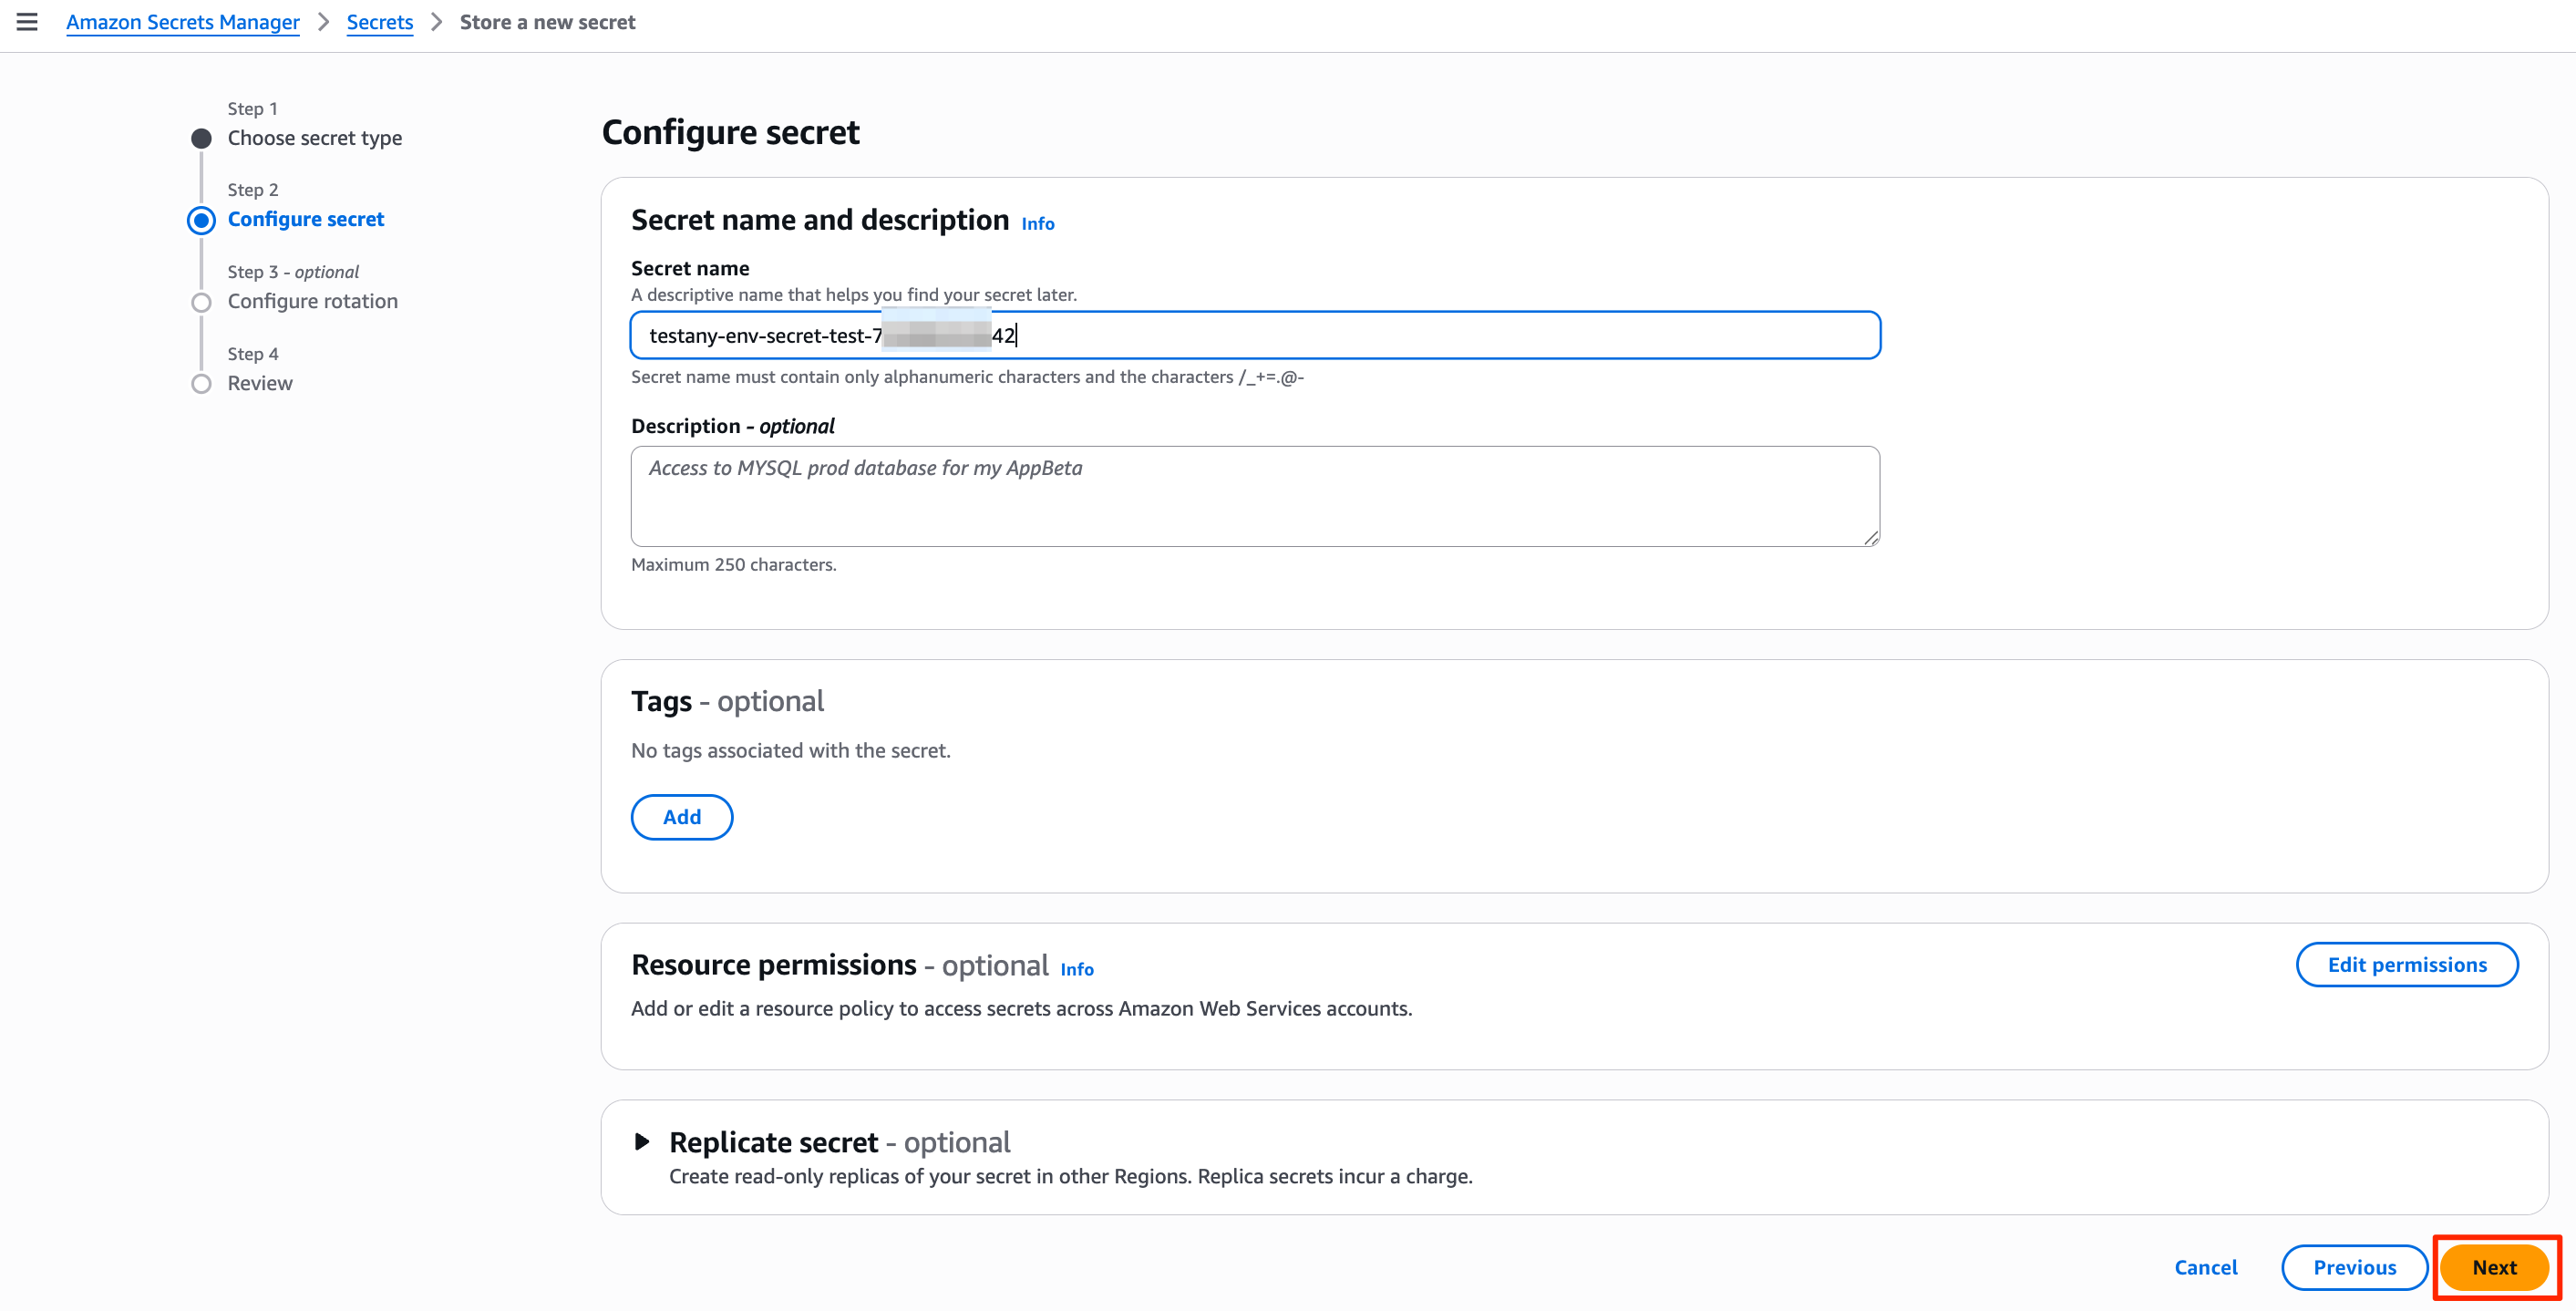
-
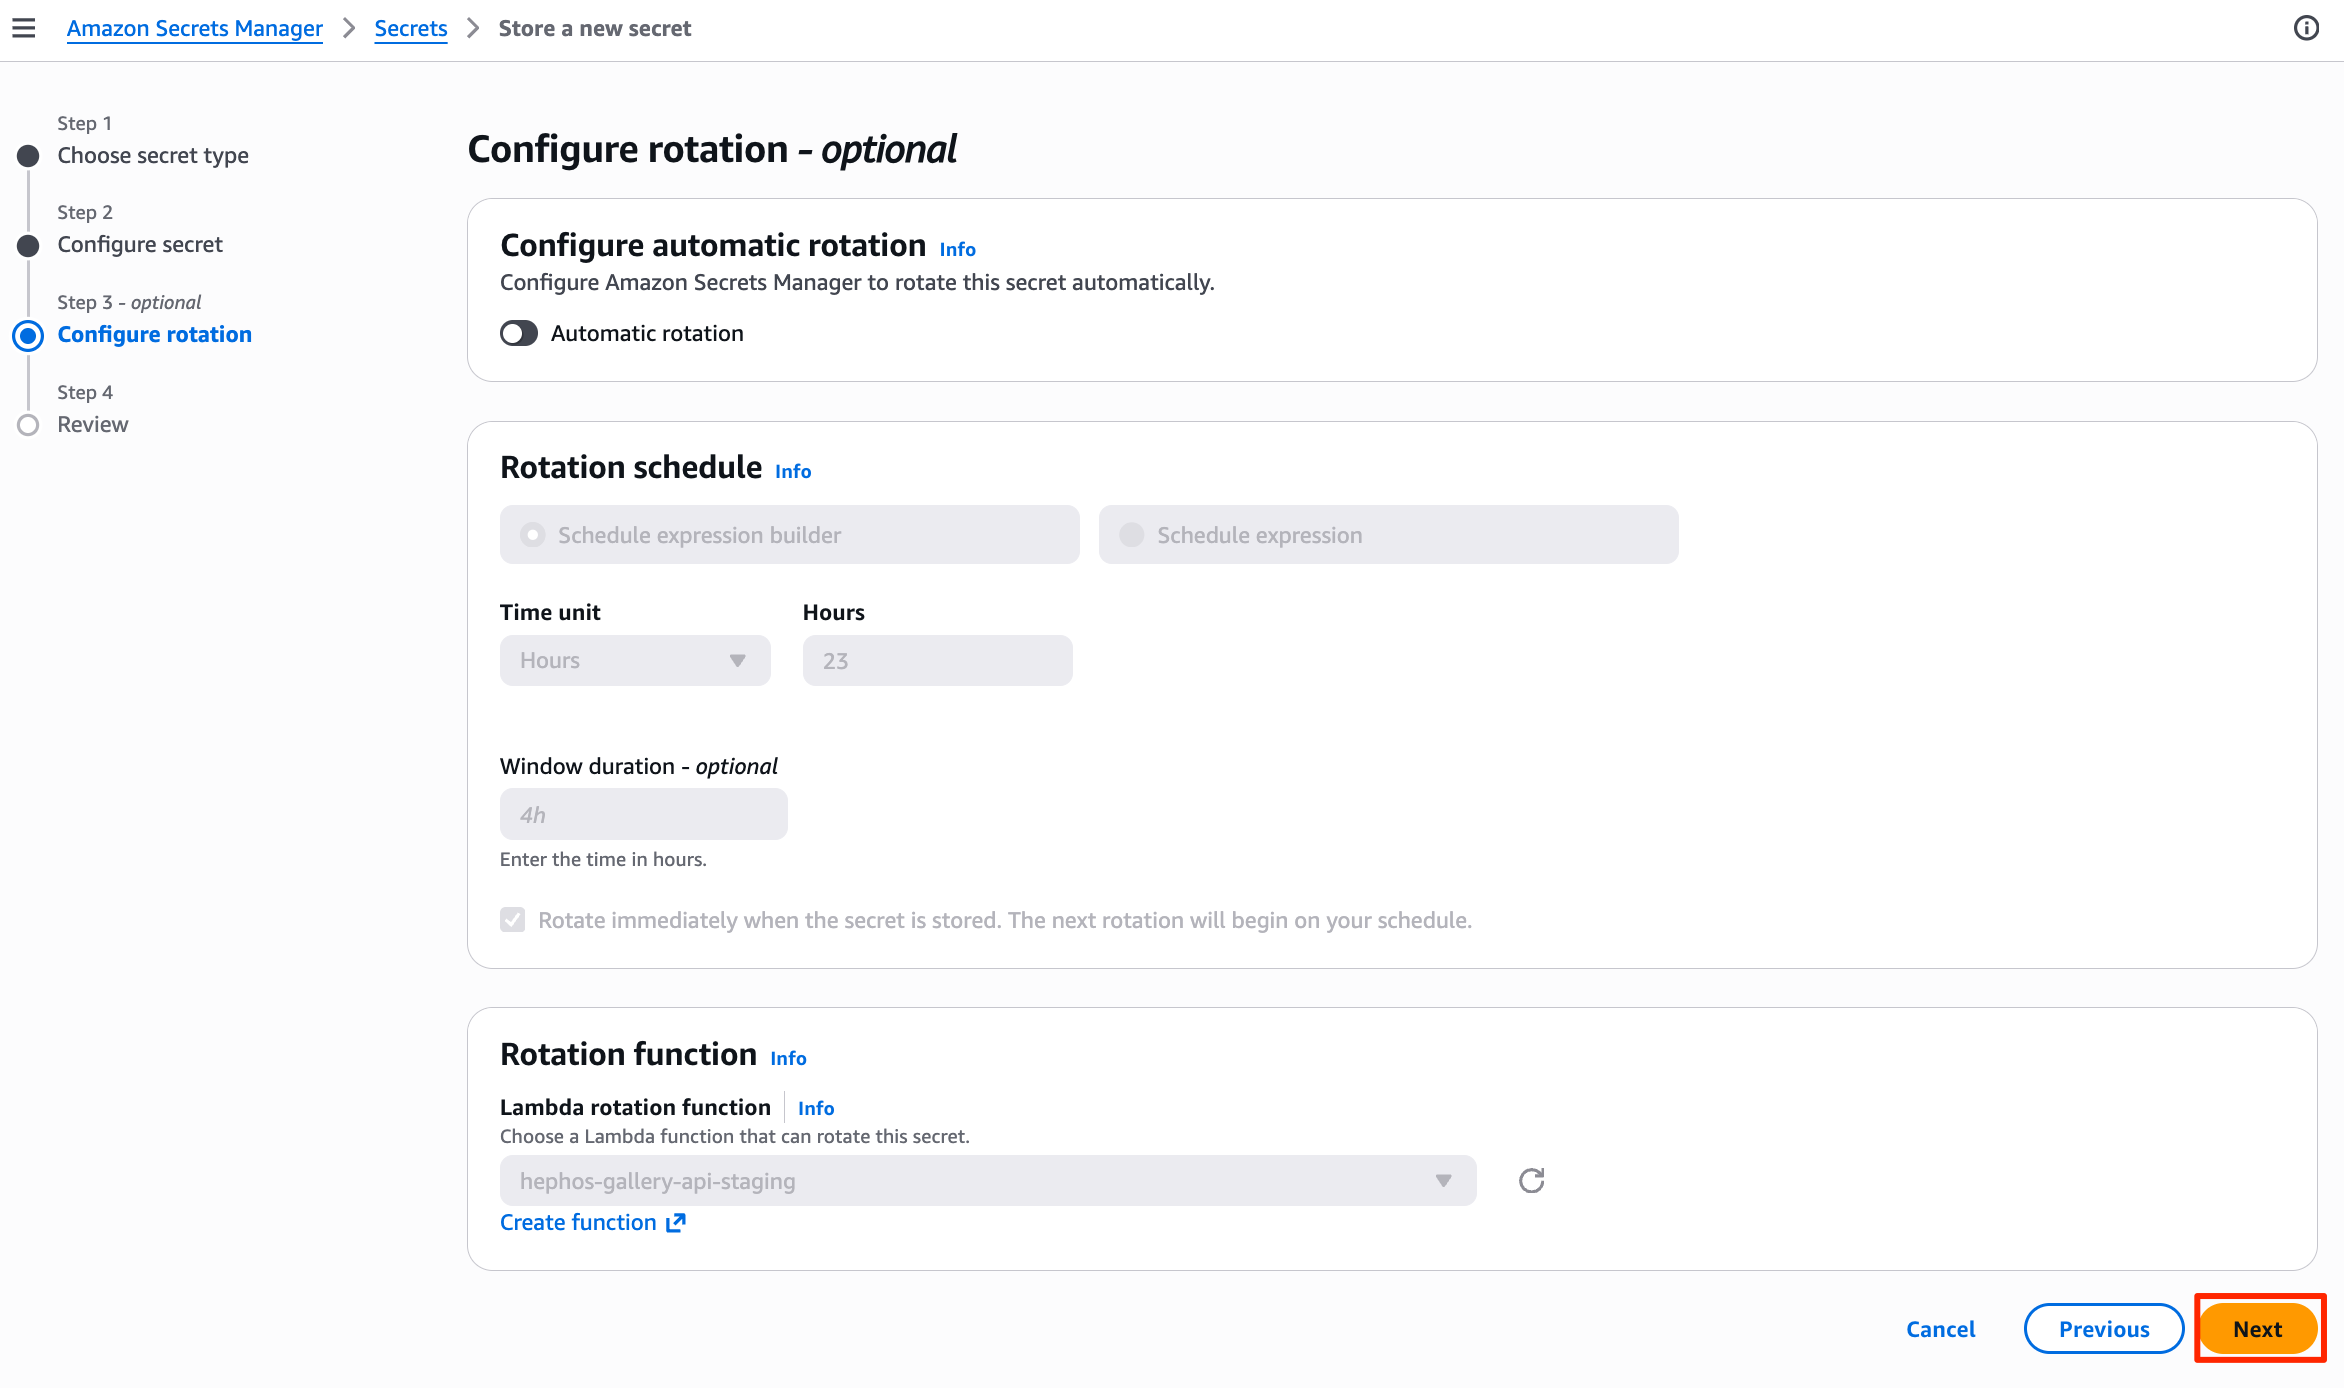
Keep the default configuration and click "Next":
-
Confirm the information and click "Store":
Method 1: UI Operations
Suitable for users who need to understand the configuration process in detail.
1. Create Credential Safe and Credential
This step requires Workspace Admin permissions. Please contact your team's Workspace Admin for assistance.
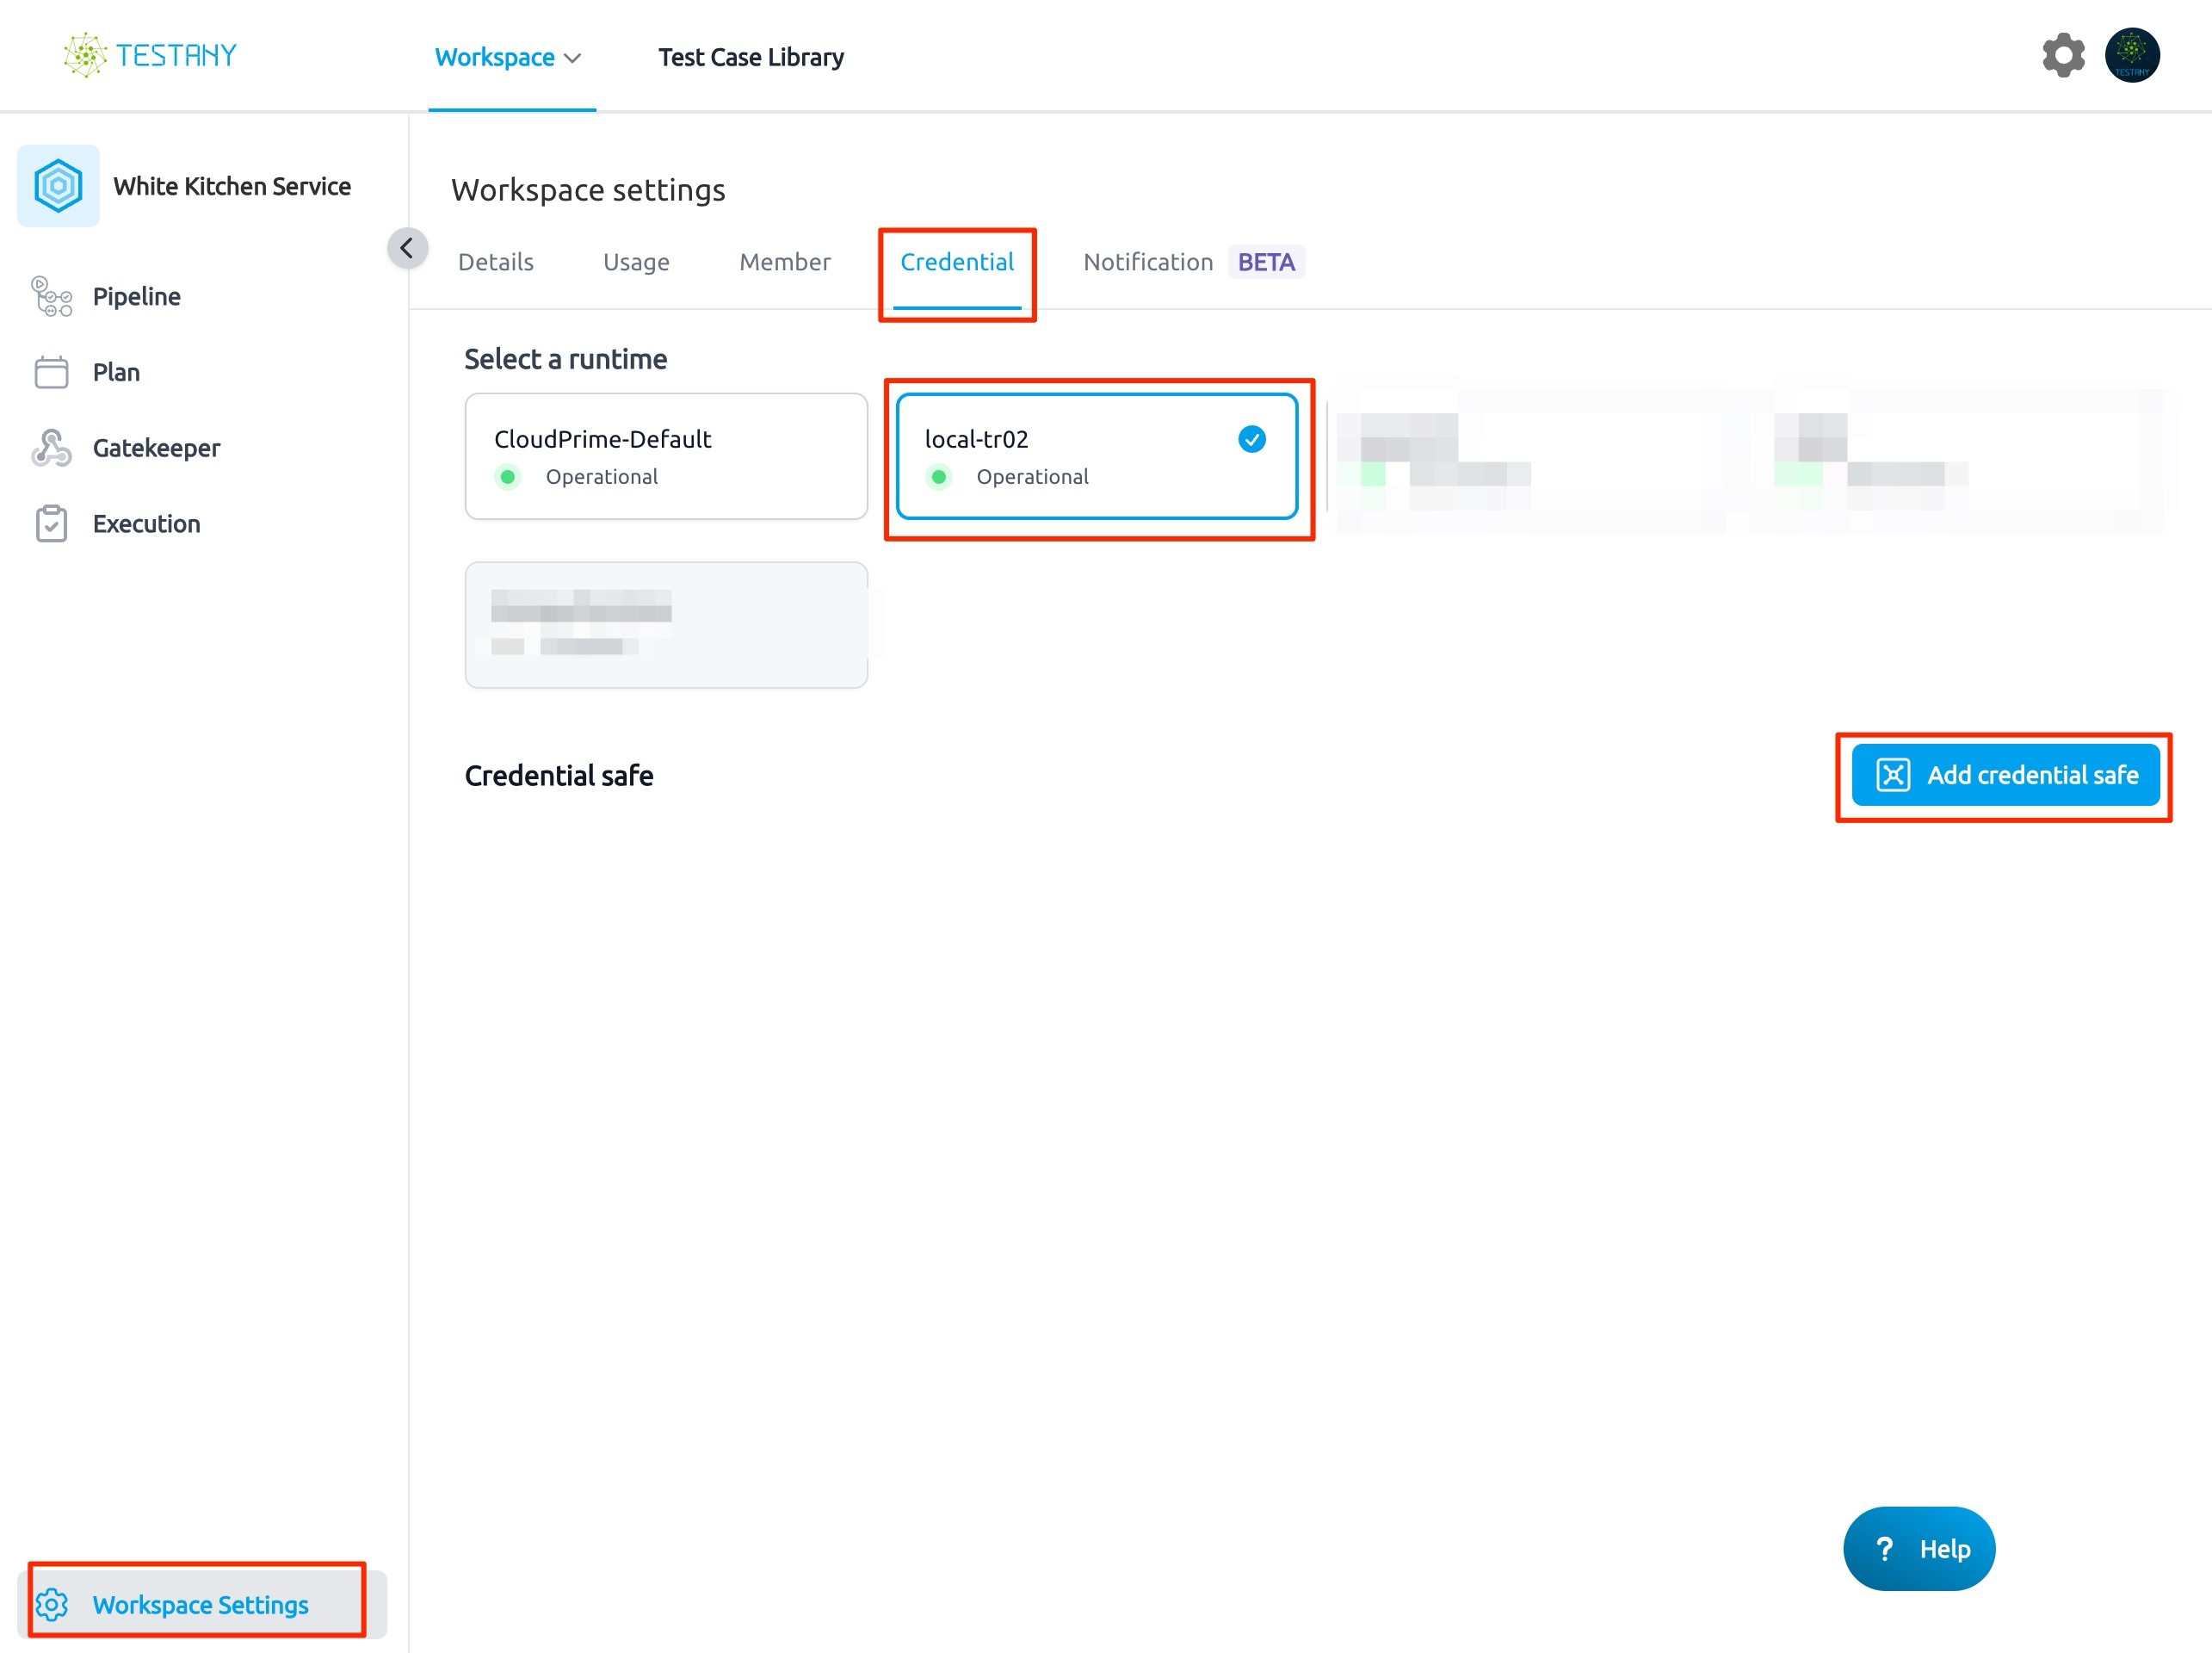
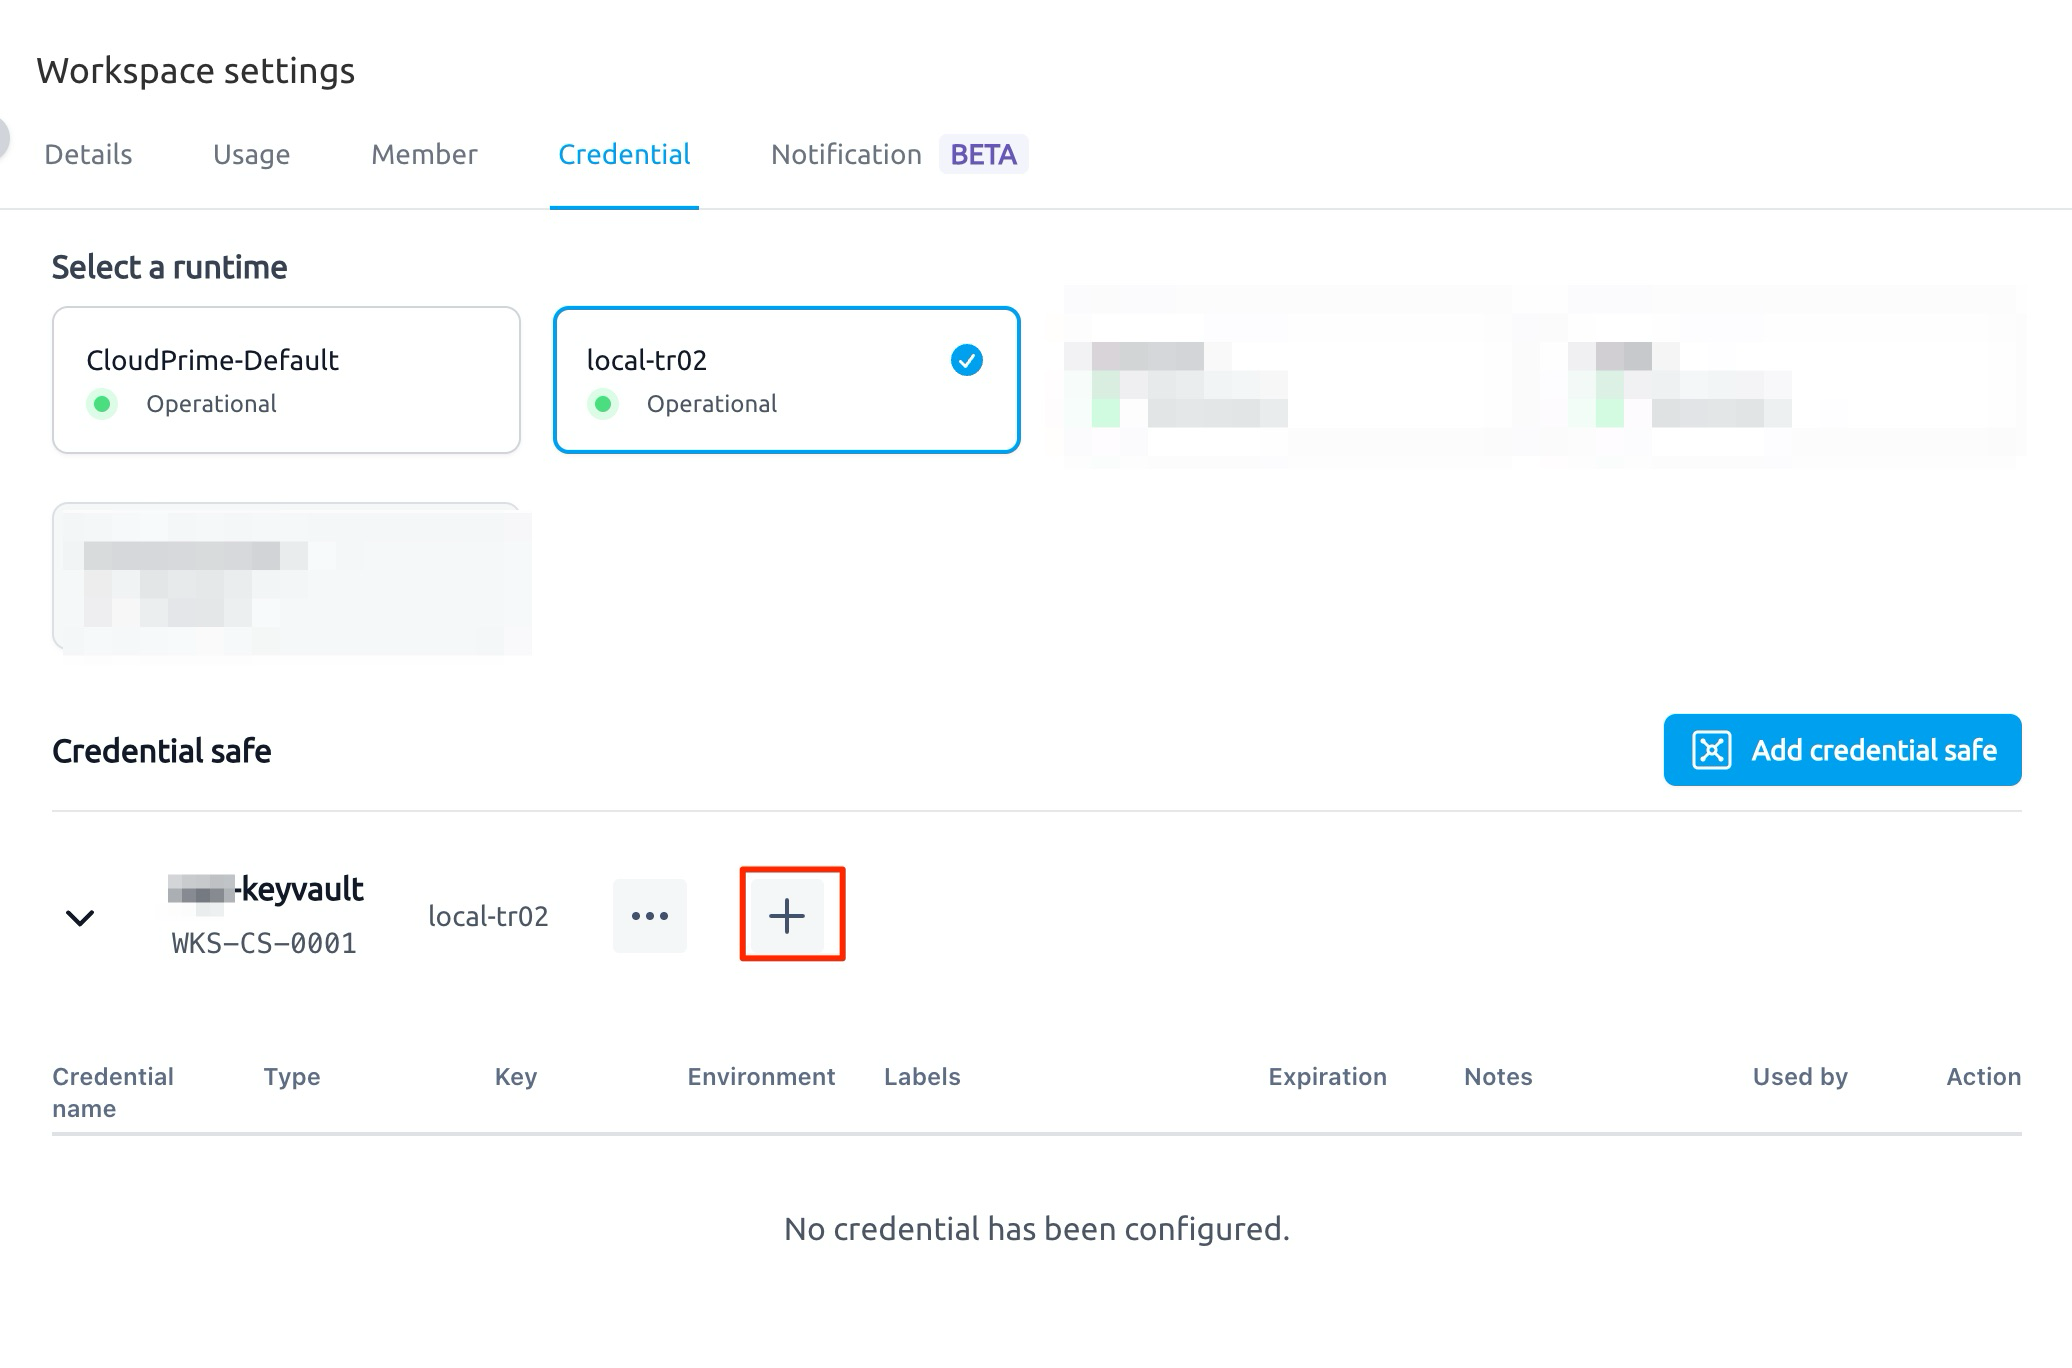
- Access the Workspace Settings page, click "Workspace Settings" in the bottom left corner, click the "Credential" tab in the right panel, select the newly registered Runtime, and click the "Add credential safe" button:
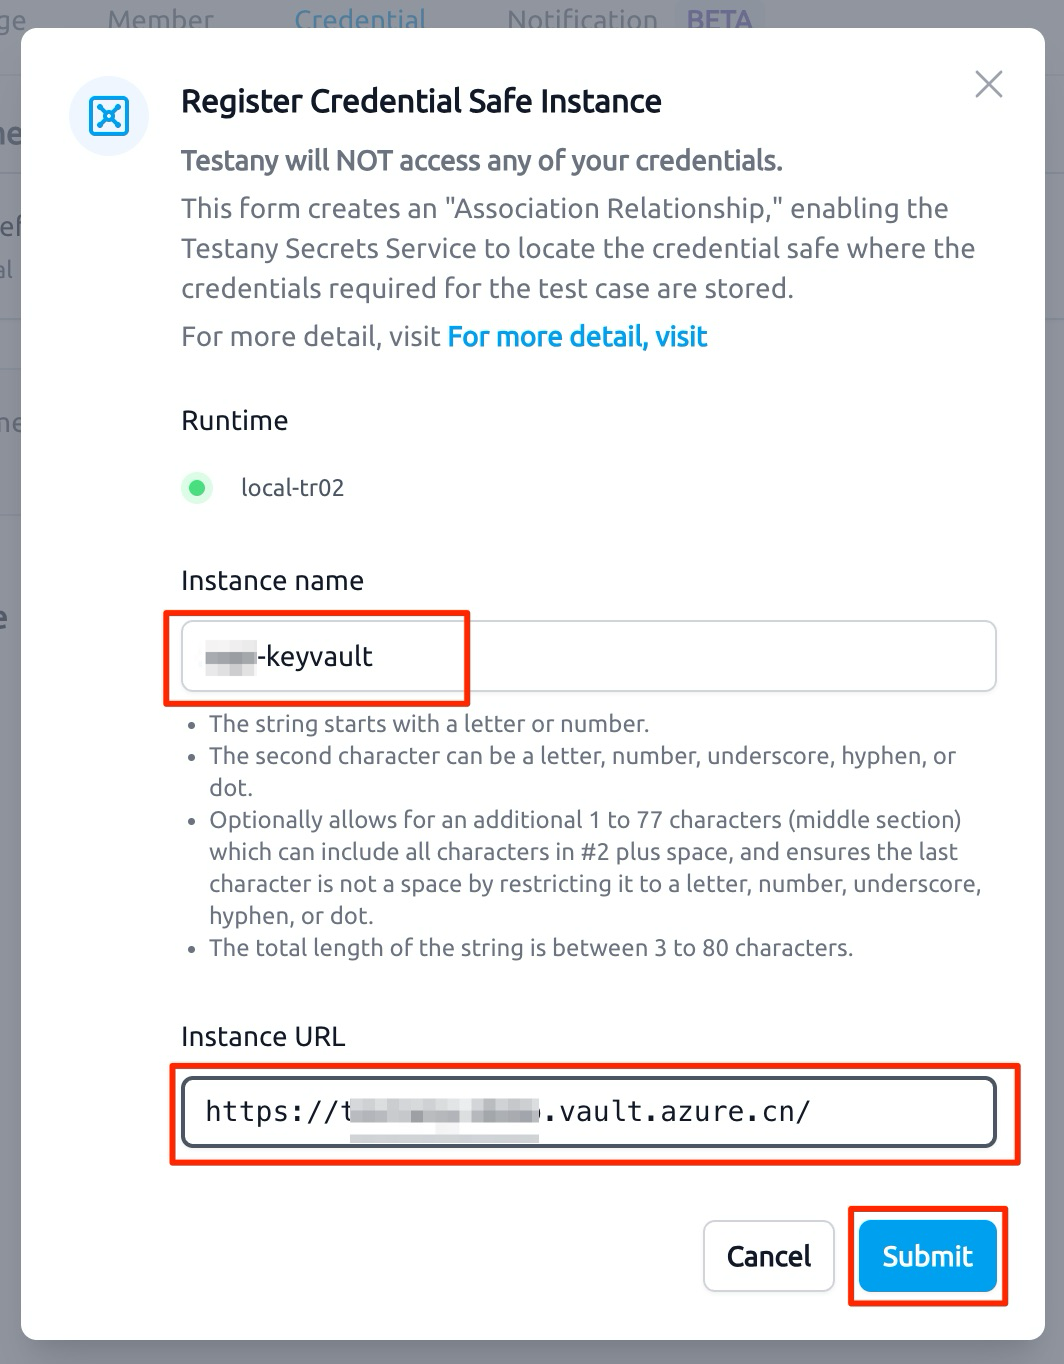
- Fill in Credential Safe information:
- Instance name: Set a name
- Instance URL: Secrets management access address (based on your cloud deployment, enter Key Vault access address or AWS Secrets Manager access address)
- After creation, expand the Credential Safe:
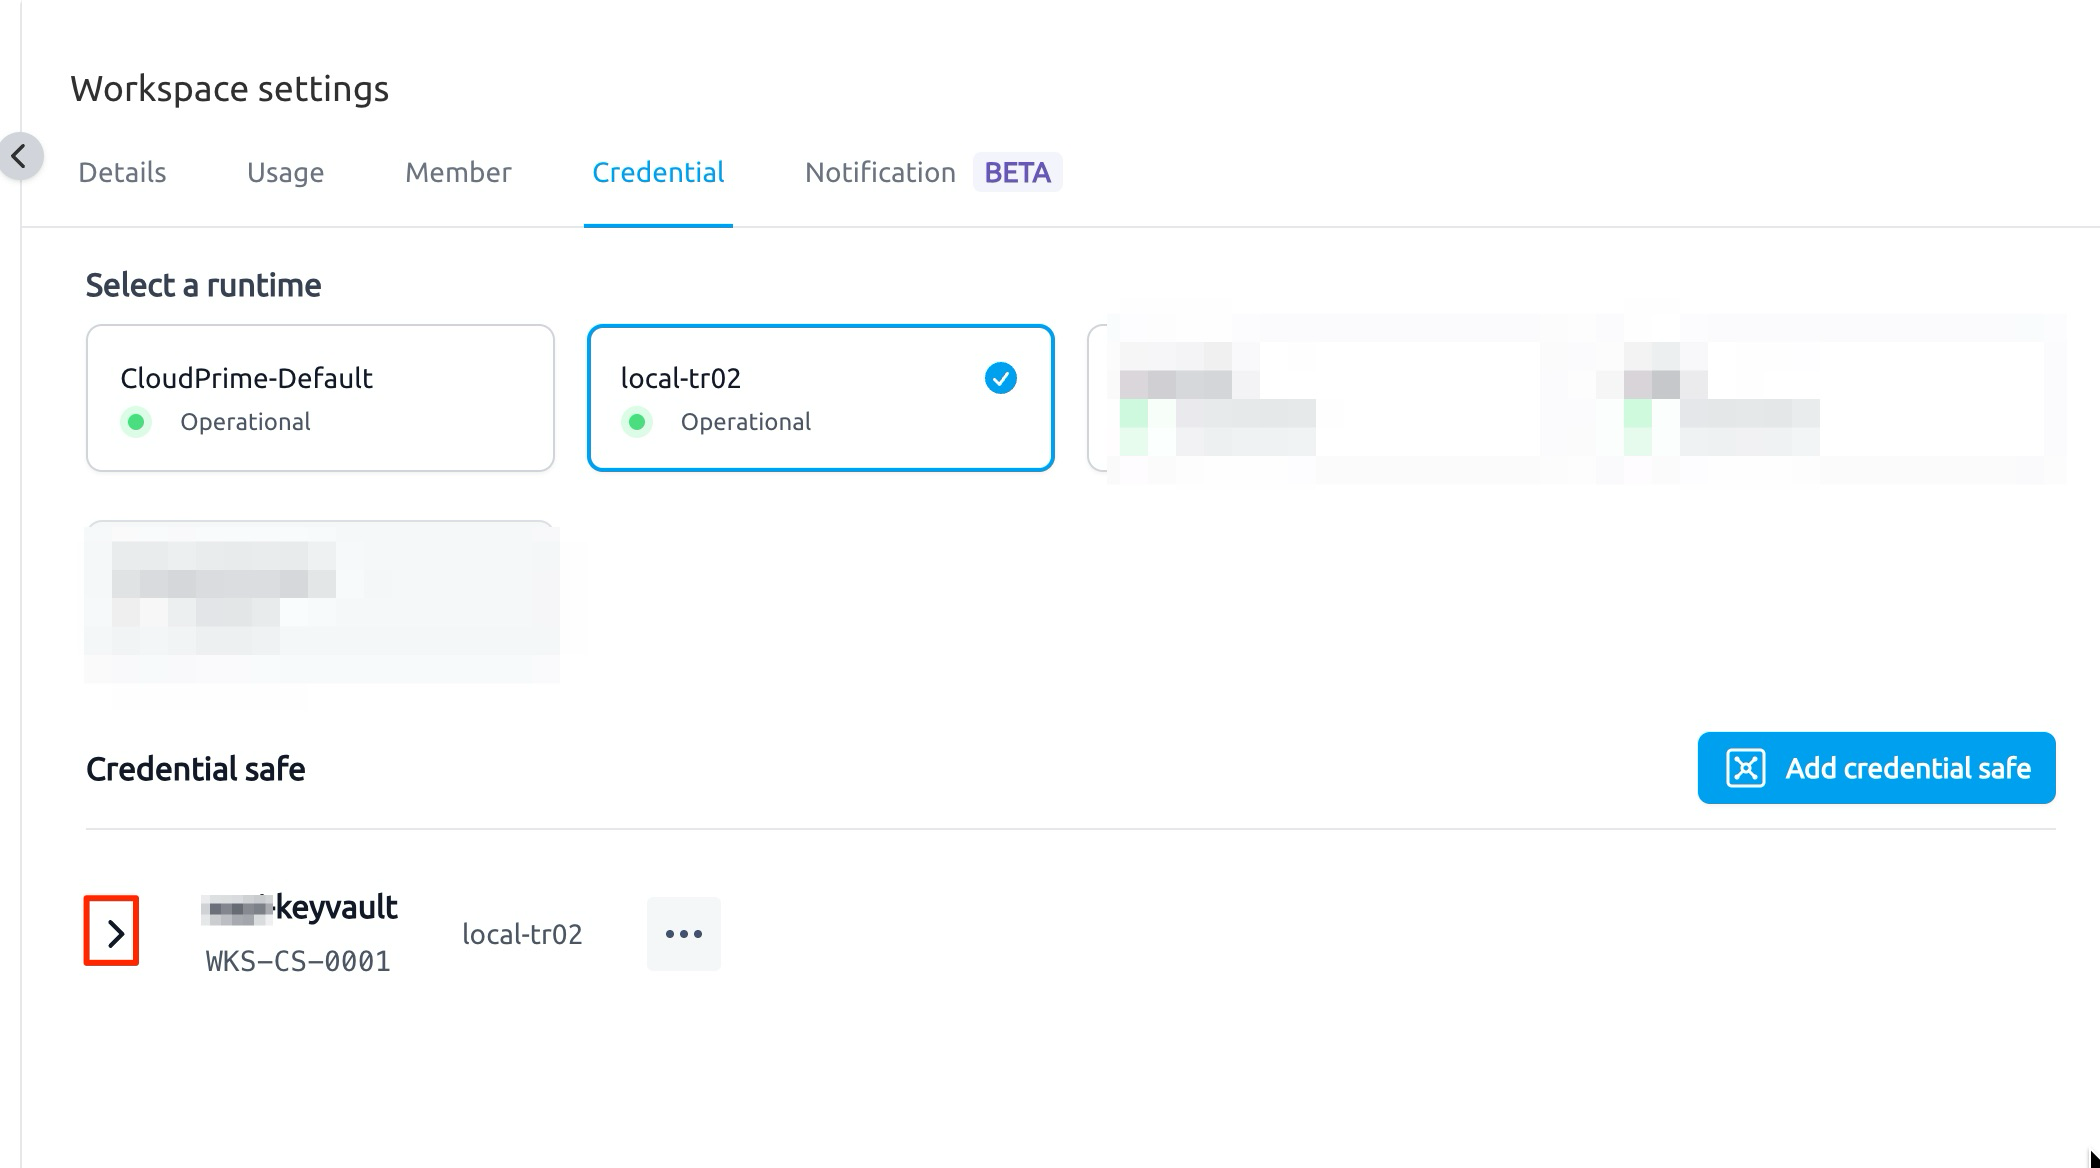
- Click "+" to add a Credential (if you don't see "+" after expanding, refresh the page):
- Fill in Credential information:
- Credential name: Set a name
- Type: Select the corresponding type
- Key: The secret name in Secrets management (e.g.,
testany-env-secret-test)

- After saving, record the following information (needed when configuring Cases later):
- Credential Safe Key (e.g.,
WKS-CS-0001) - Credential Key (e.g.,
testany-env-secret-test)
- Credential Safe Key (e.g.,

2. Create Cases
Case 1: Test Environment Variable Passing
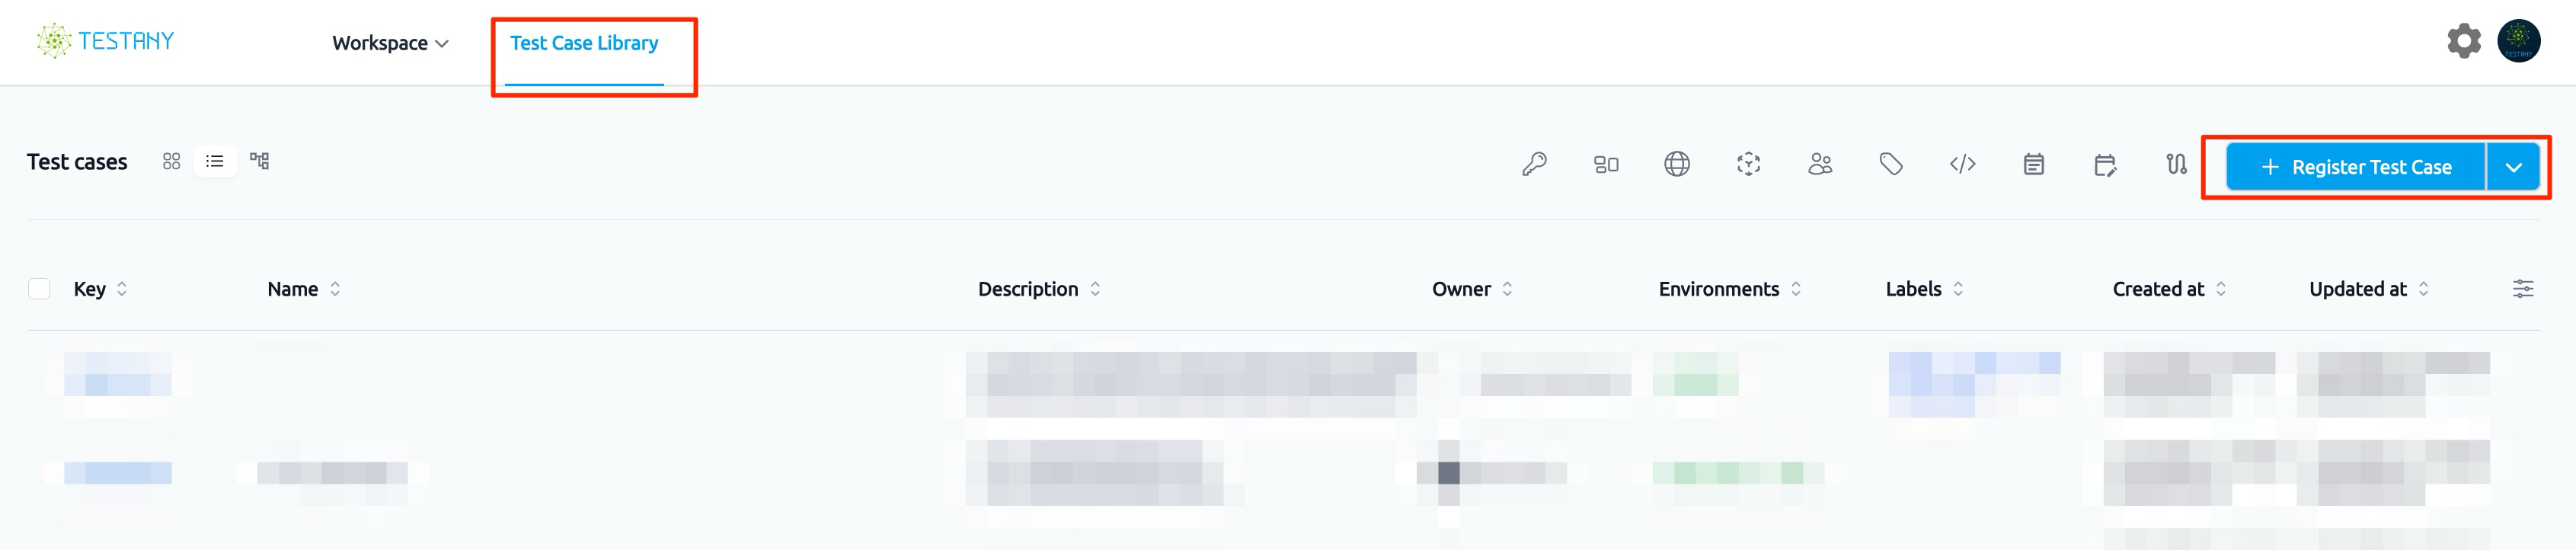
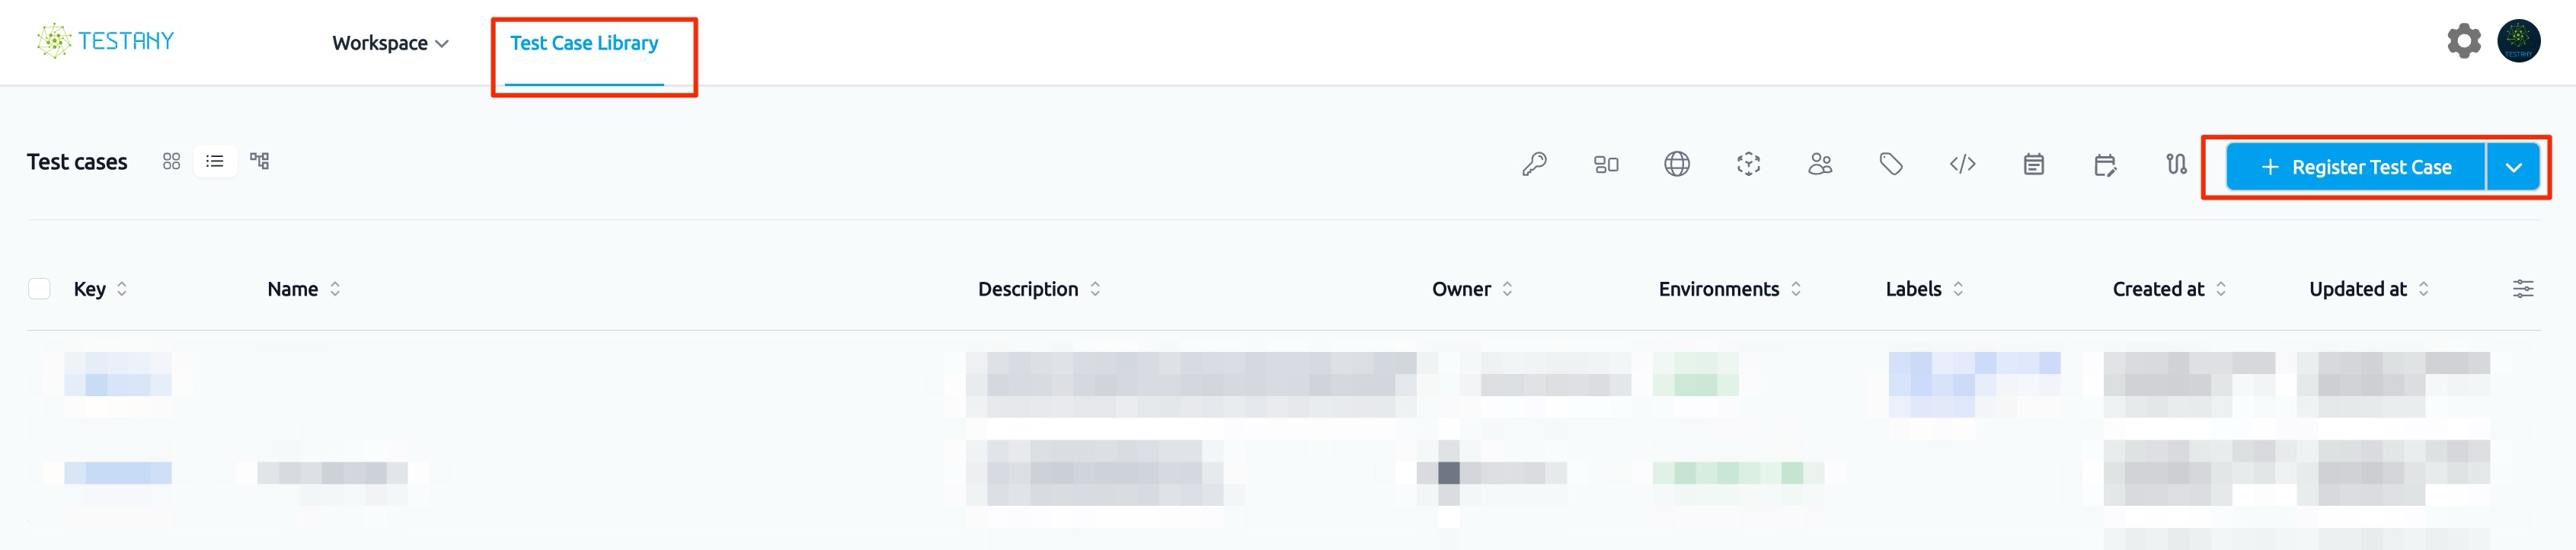
- Log in to Testany, select "Test Case Library", and click "Register Test Case":
-
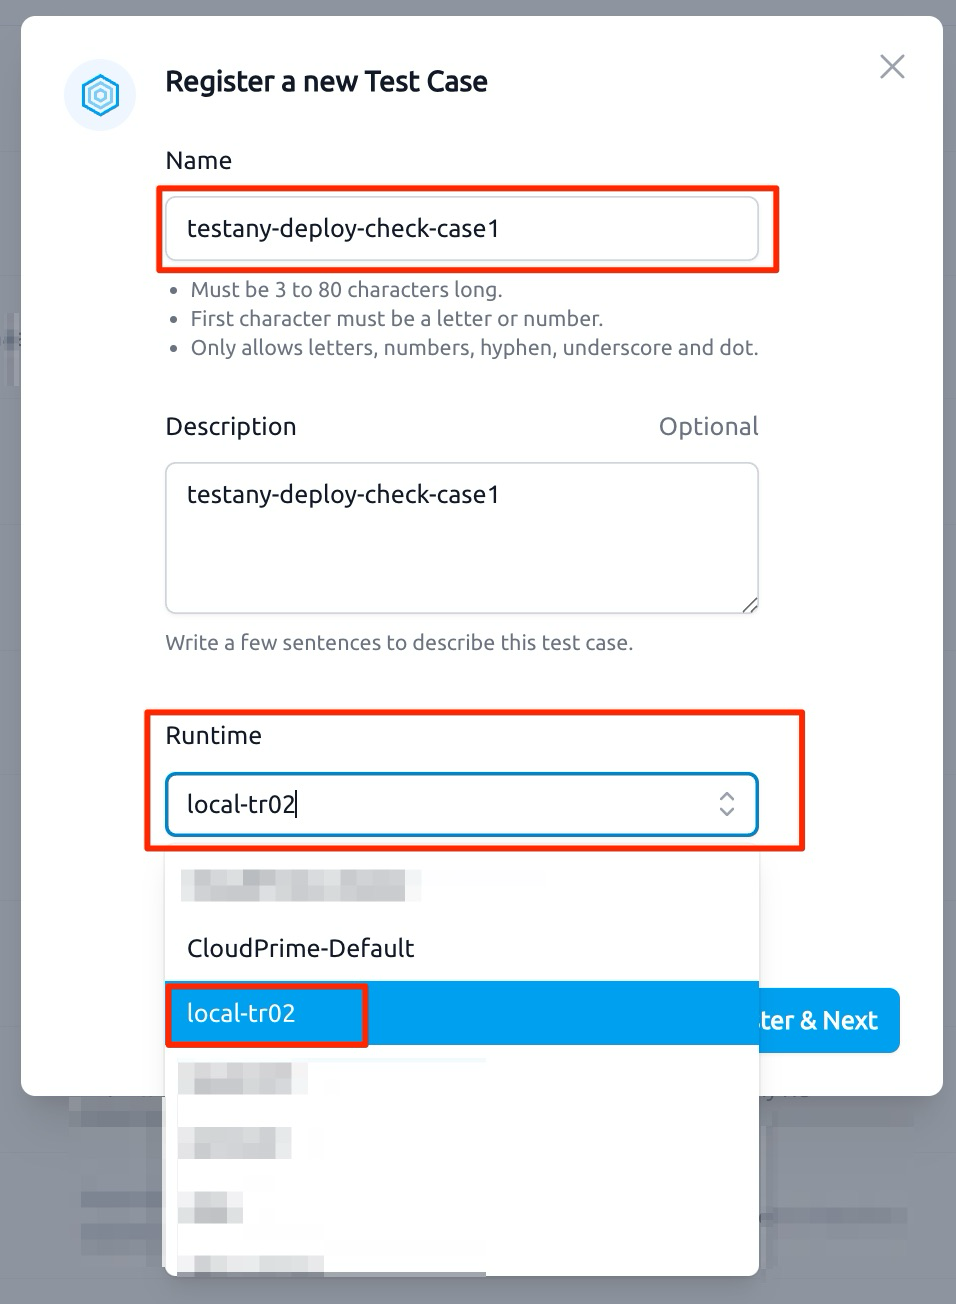
Enter Case information:
- Name:
testany-deploy-check-case1 - Runtime: Select the newly registered Runtime
Click "Register & Next":
- Name:
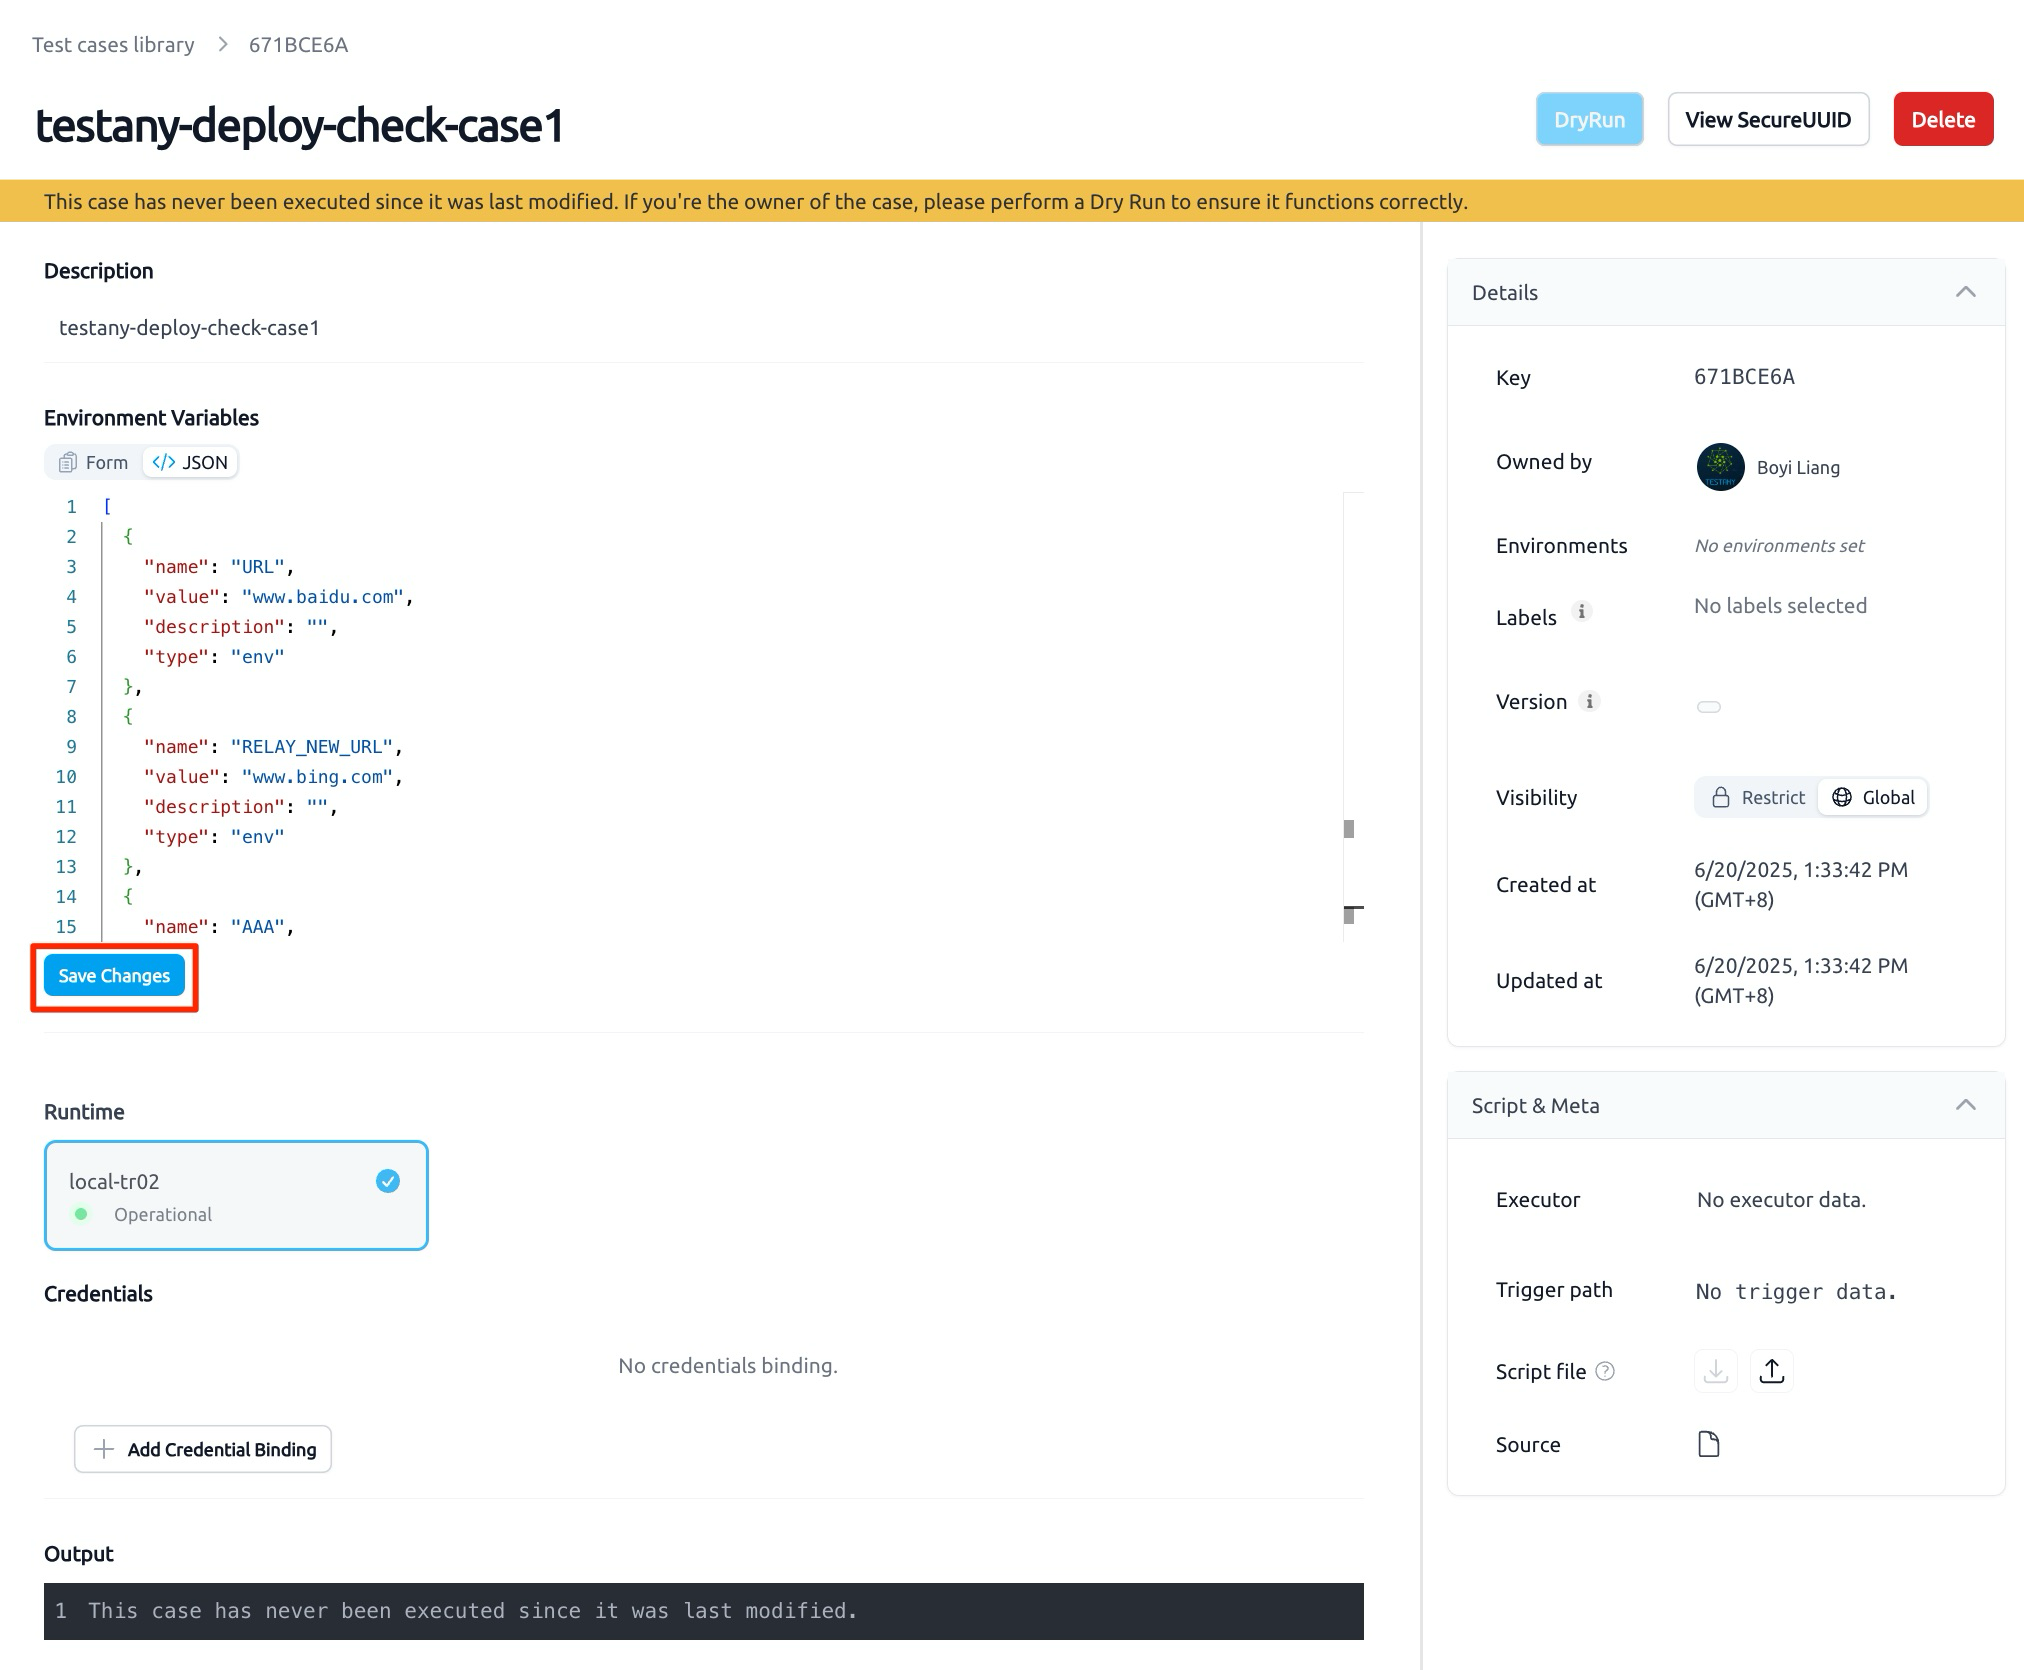
- On the redirected page, click the "JSON" tab:
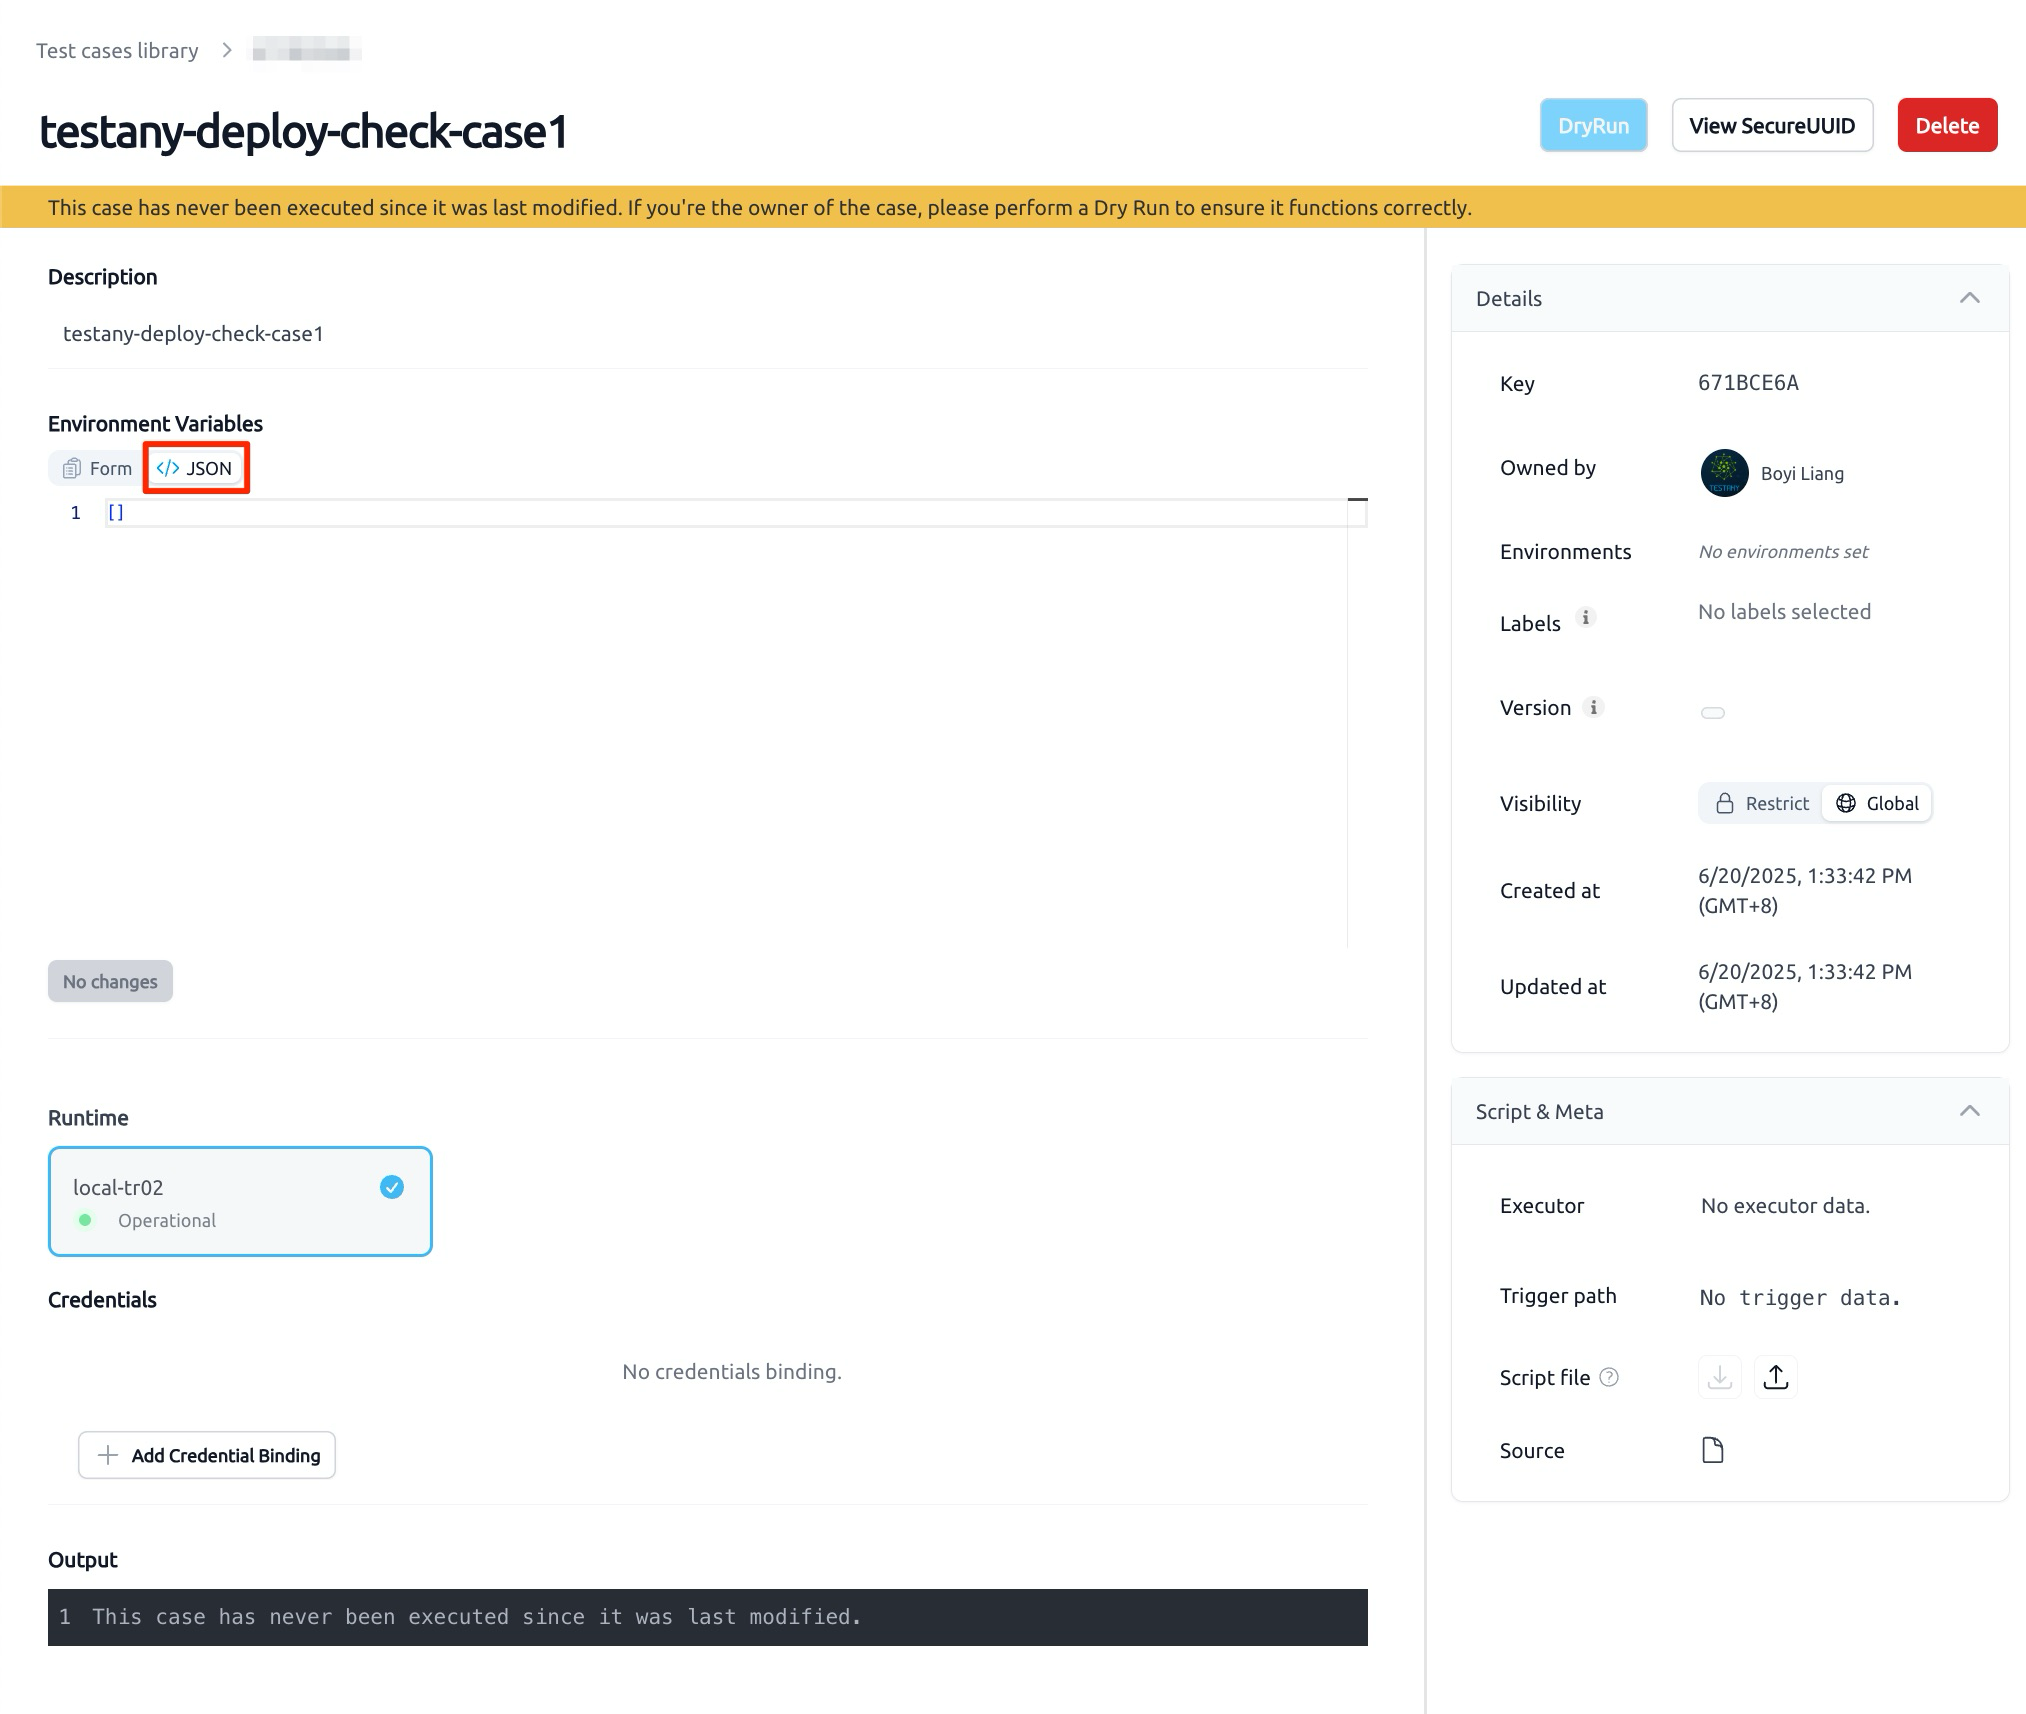
- Paste the environment variable configuration into the editor and click "Save Changes":
JSON[ {"name": "URL", "value": "www.baidu.com", "type": "env"}, {"name": "RELAY_NEW_URL", "value": "www.bing.com", "type": "env"}, {"name": "AAA", "value": "-", "type": "output"}, {"name": "NEW_URL", "value": "-", "type": "output"} ]
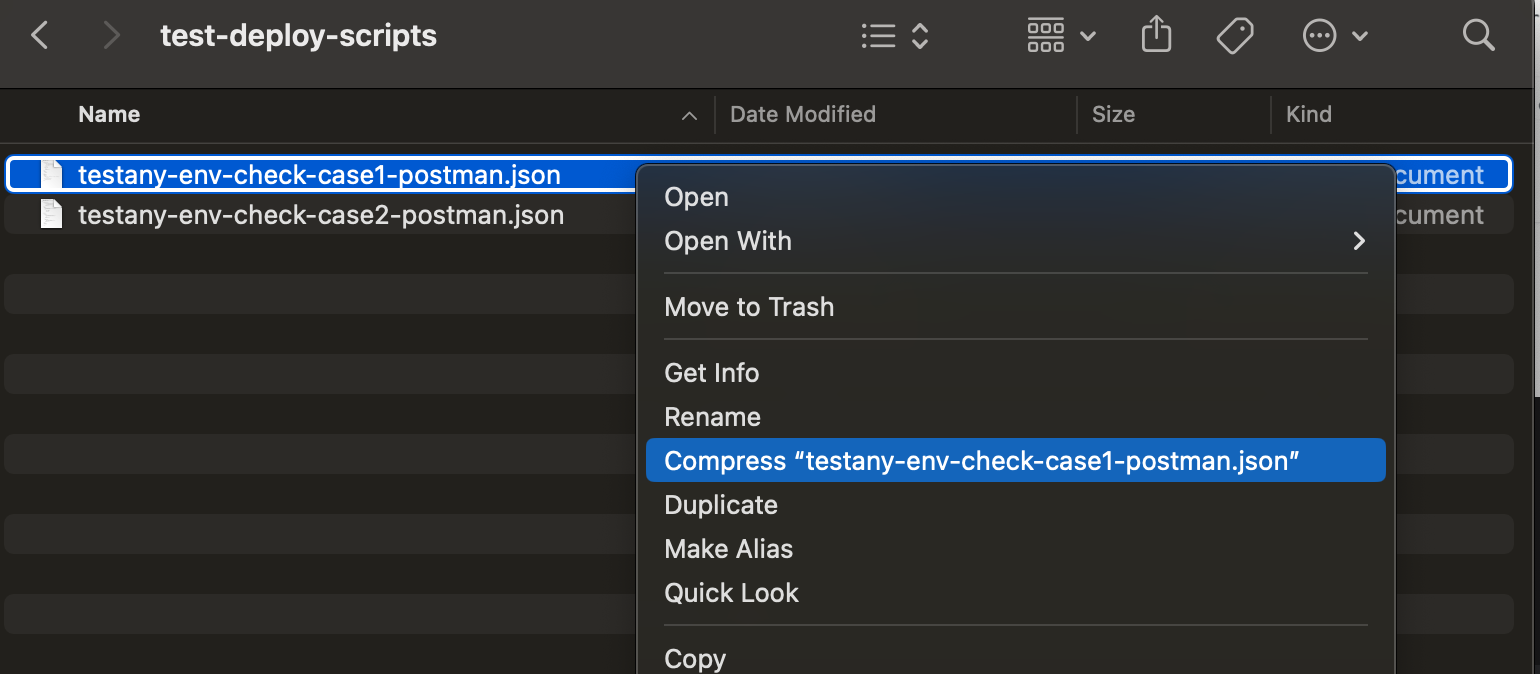
- Prepare code file, compress
testany-env-check-case1-postman.jsonto a zip file:
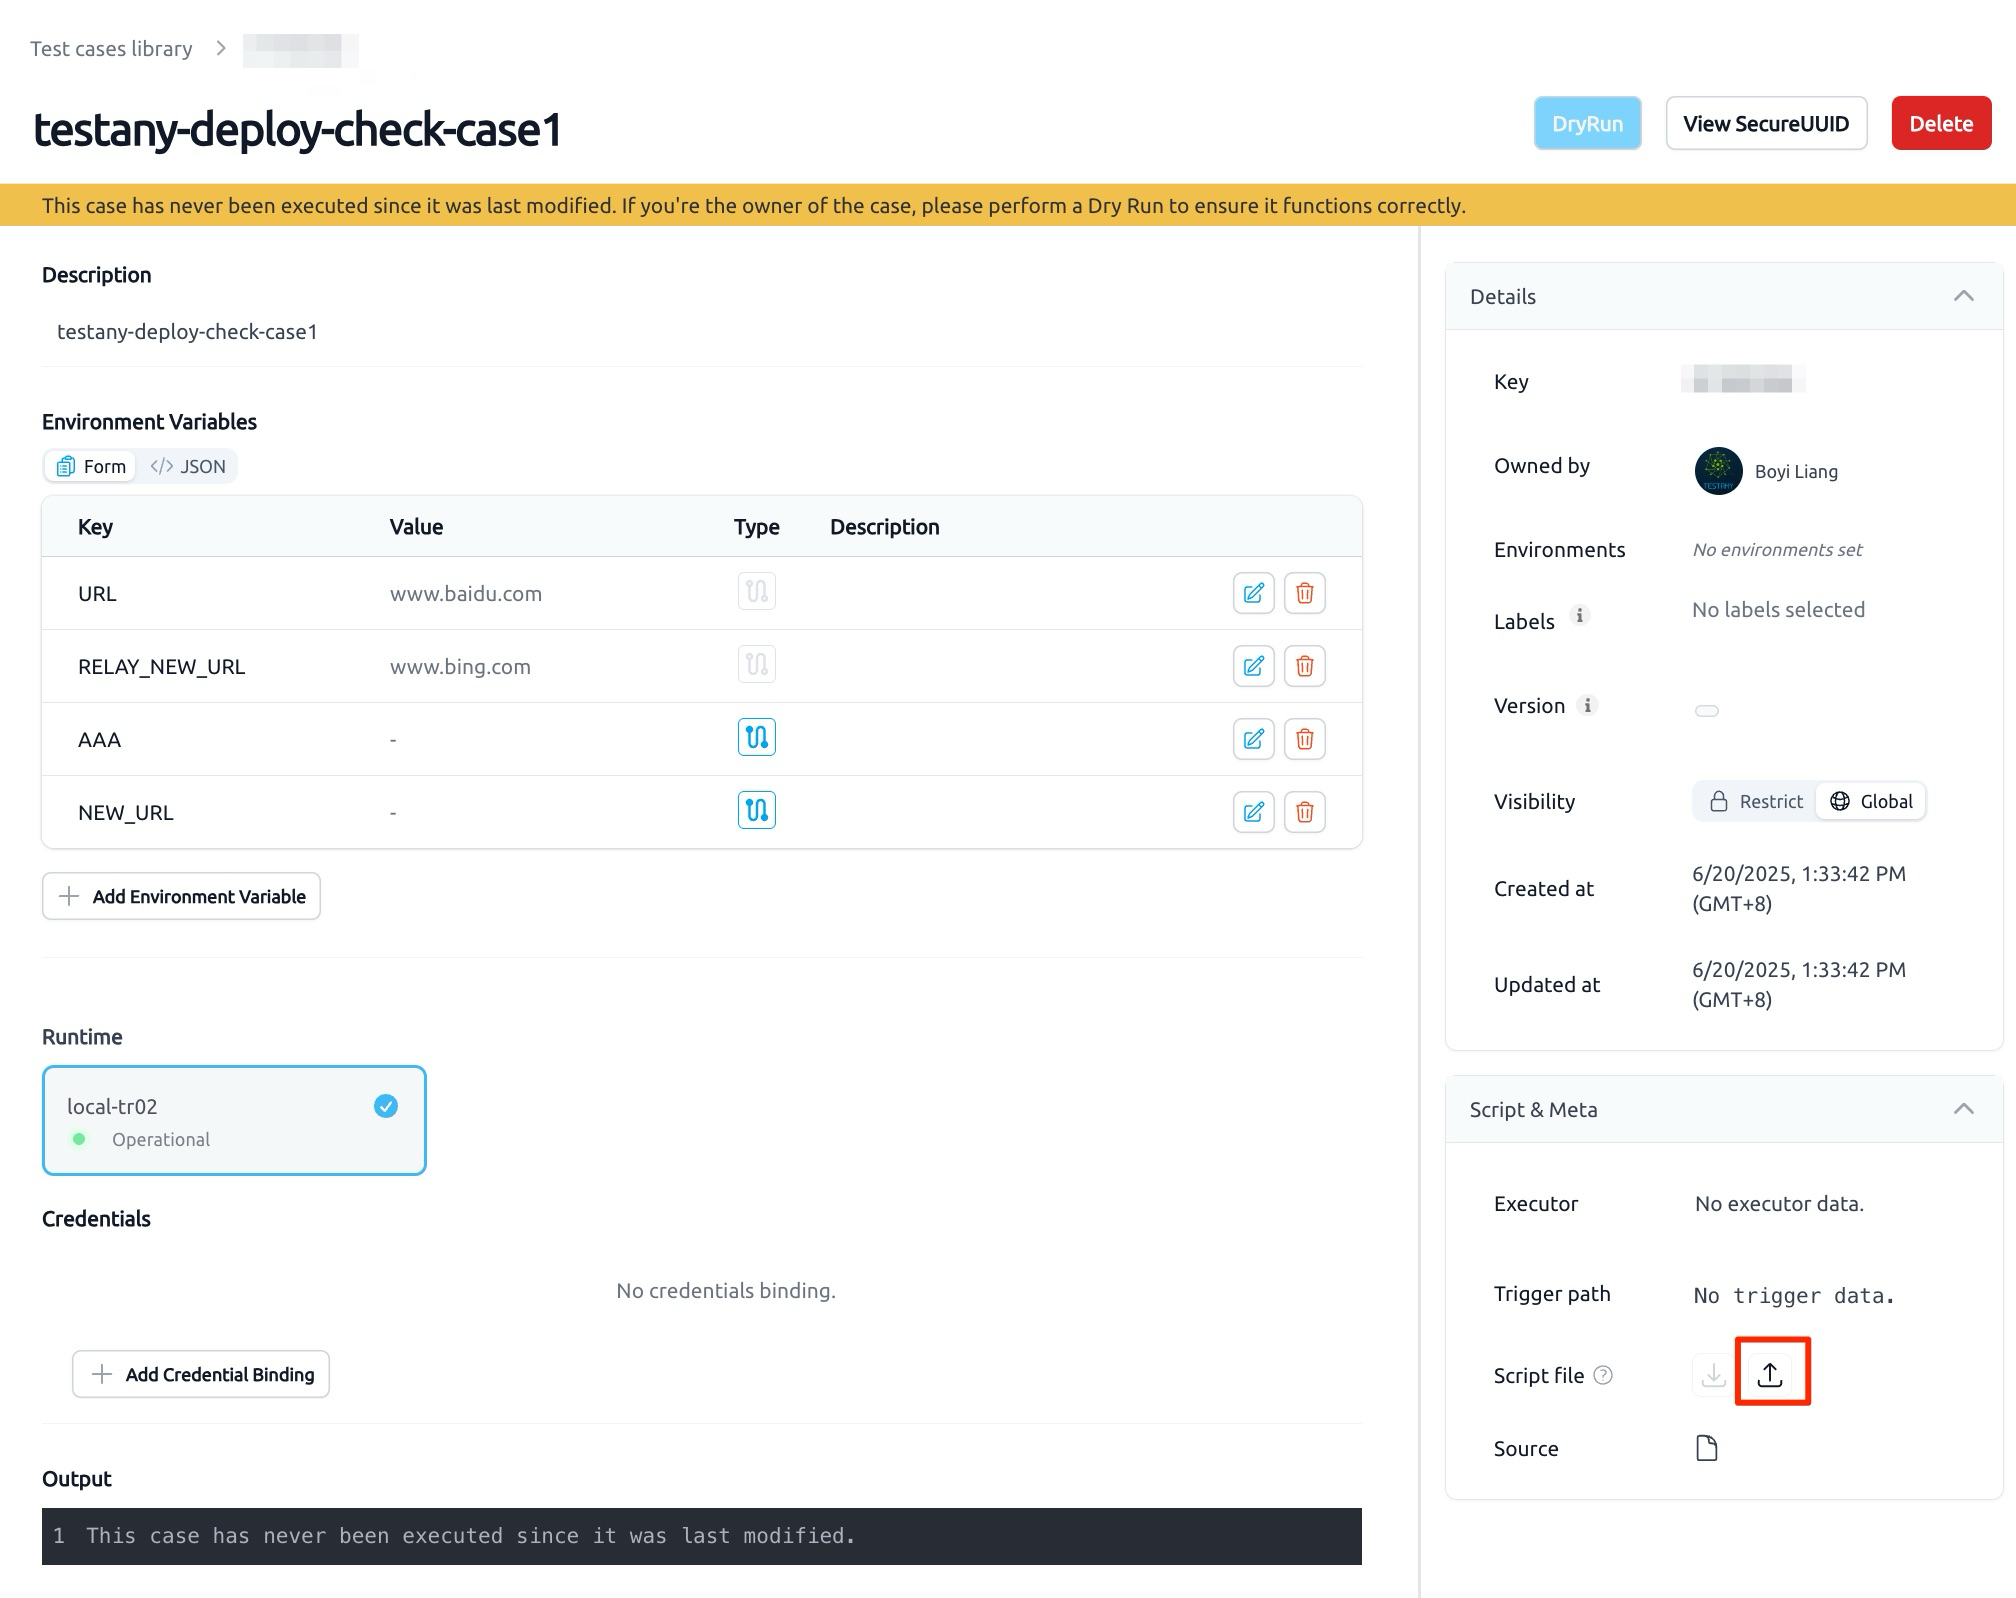
- Click the "Upload" icon to upload code:
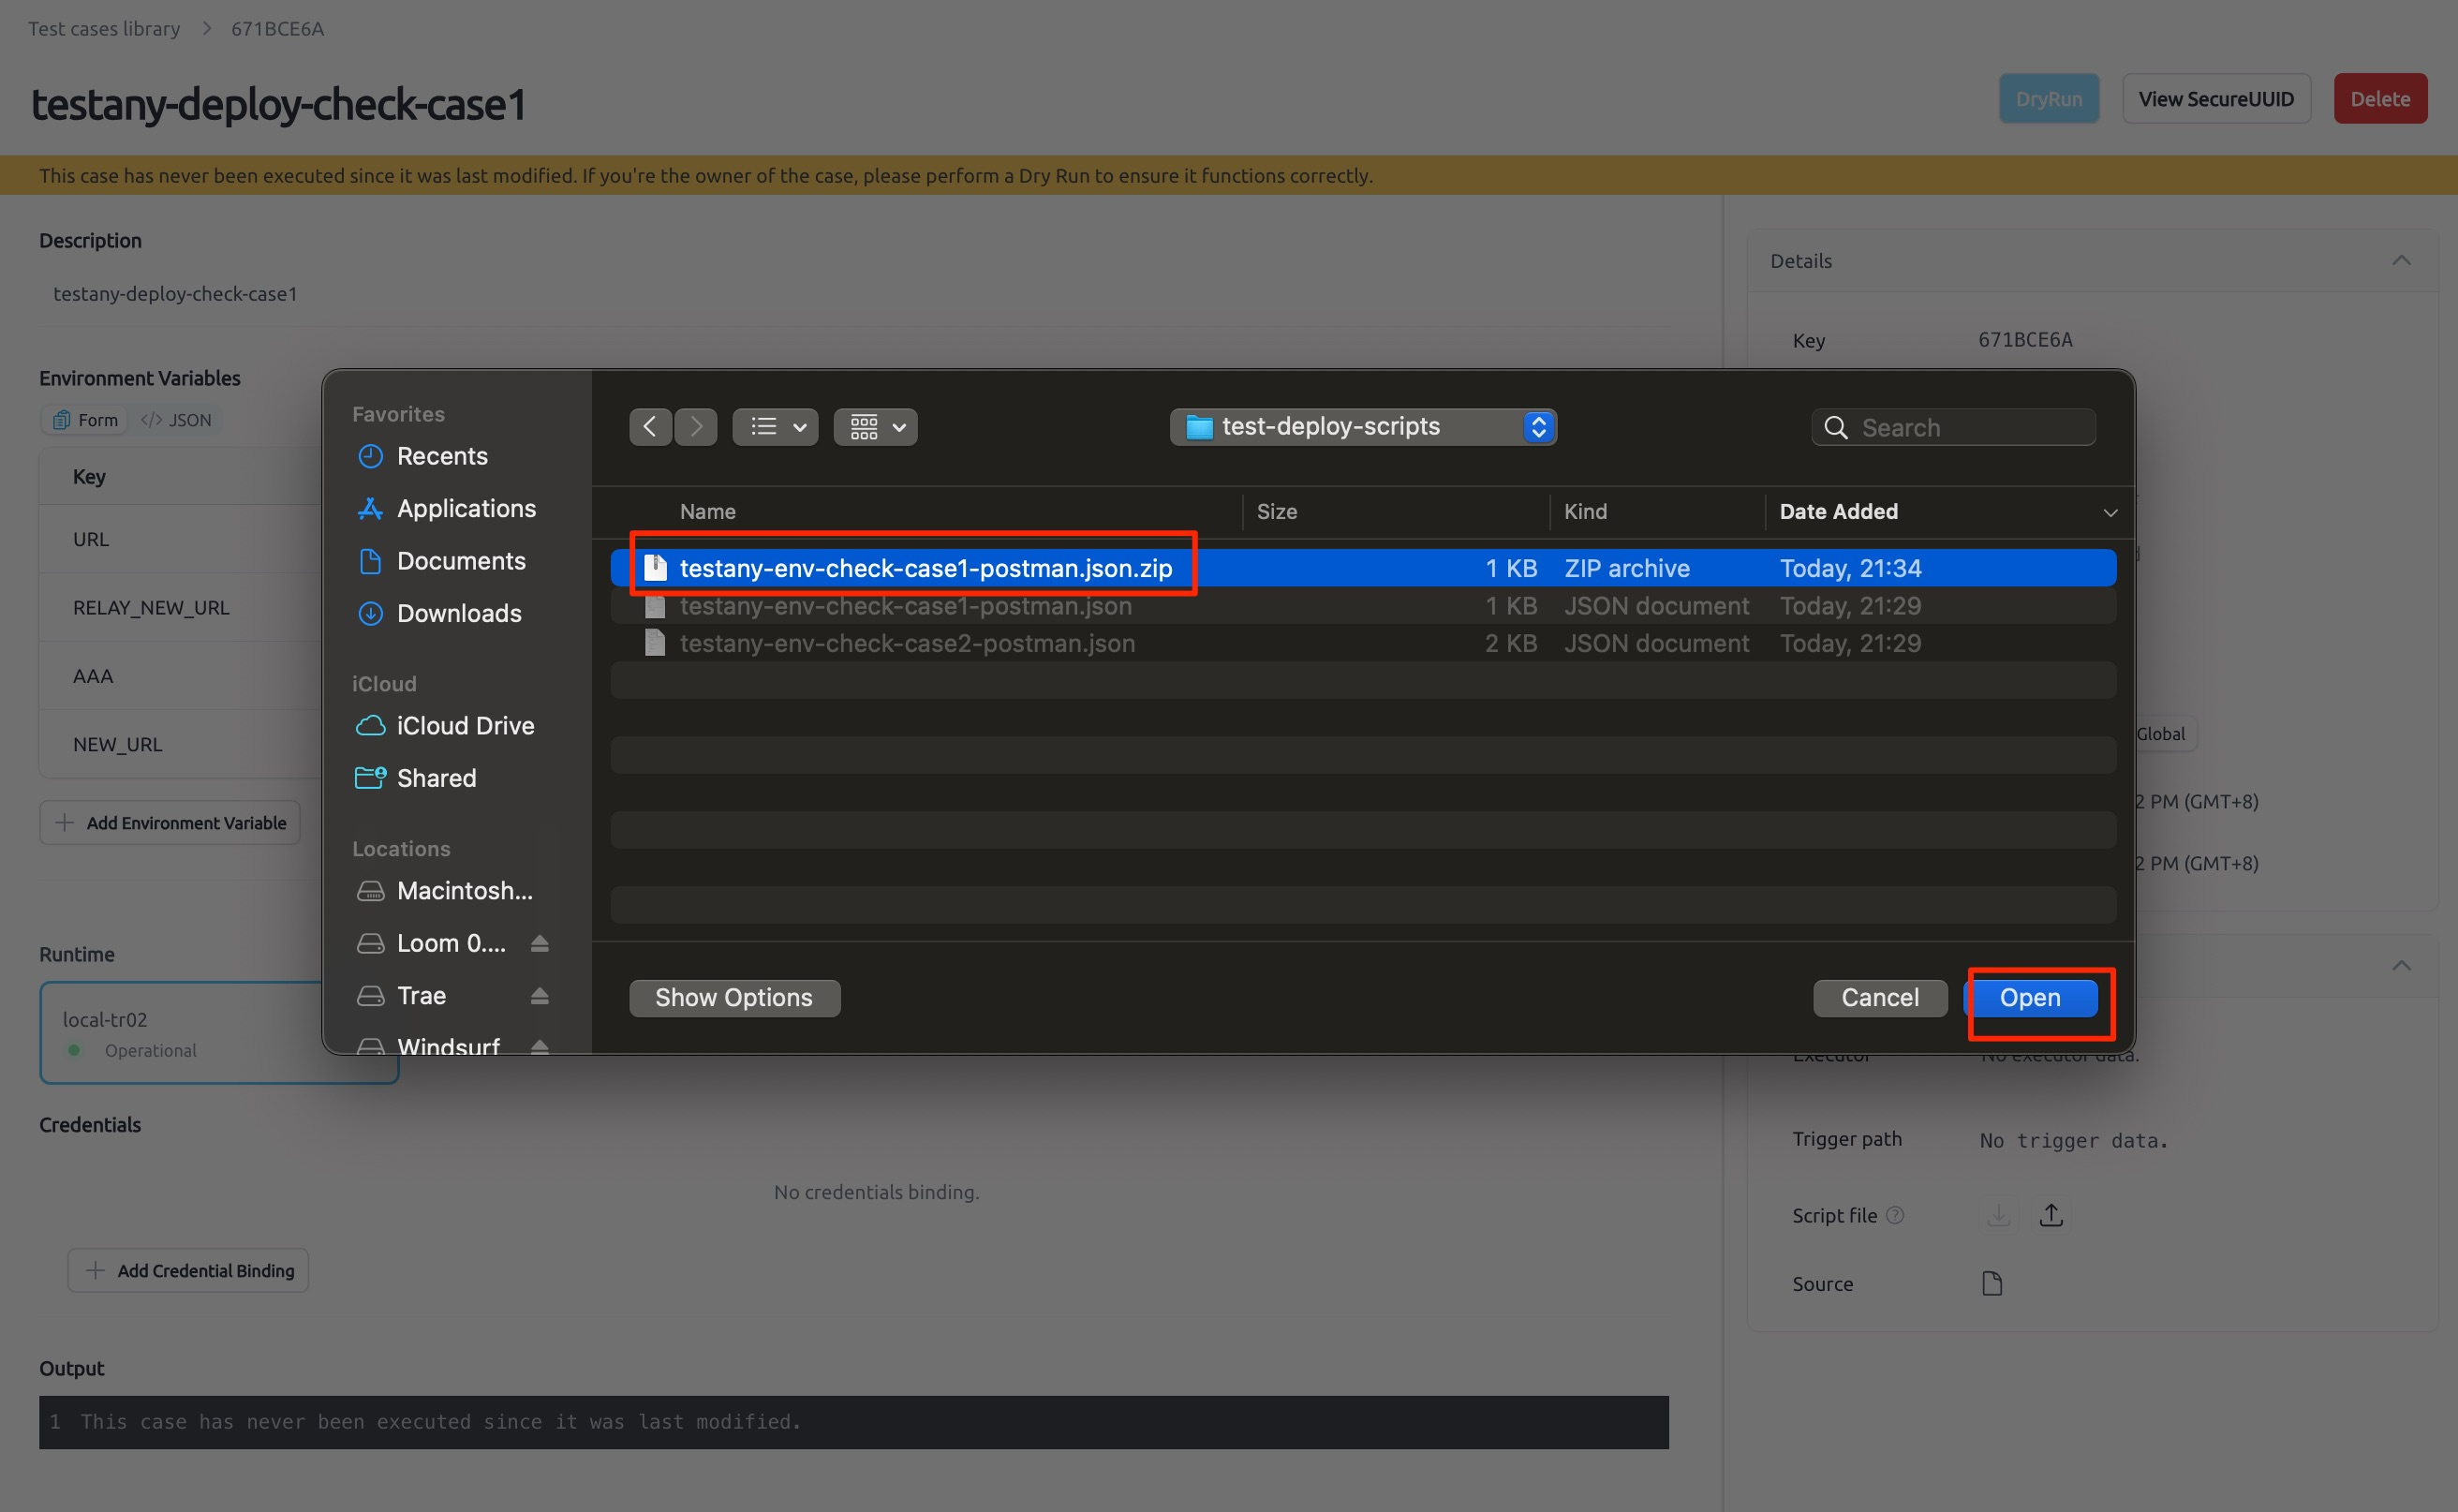
- Select the zip file to complete upload:
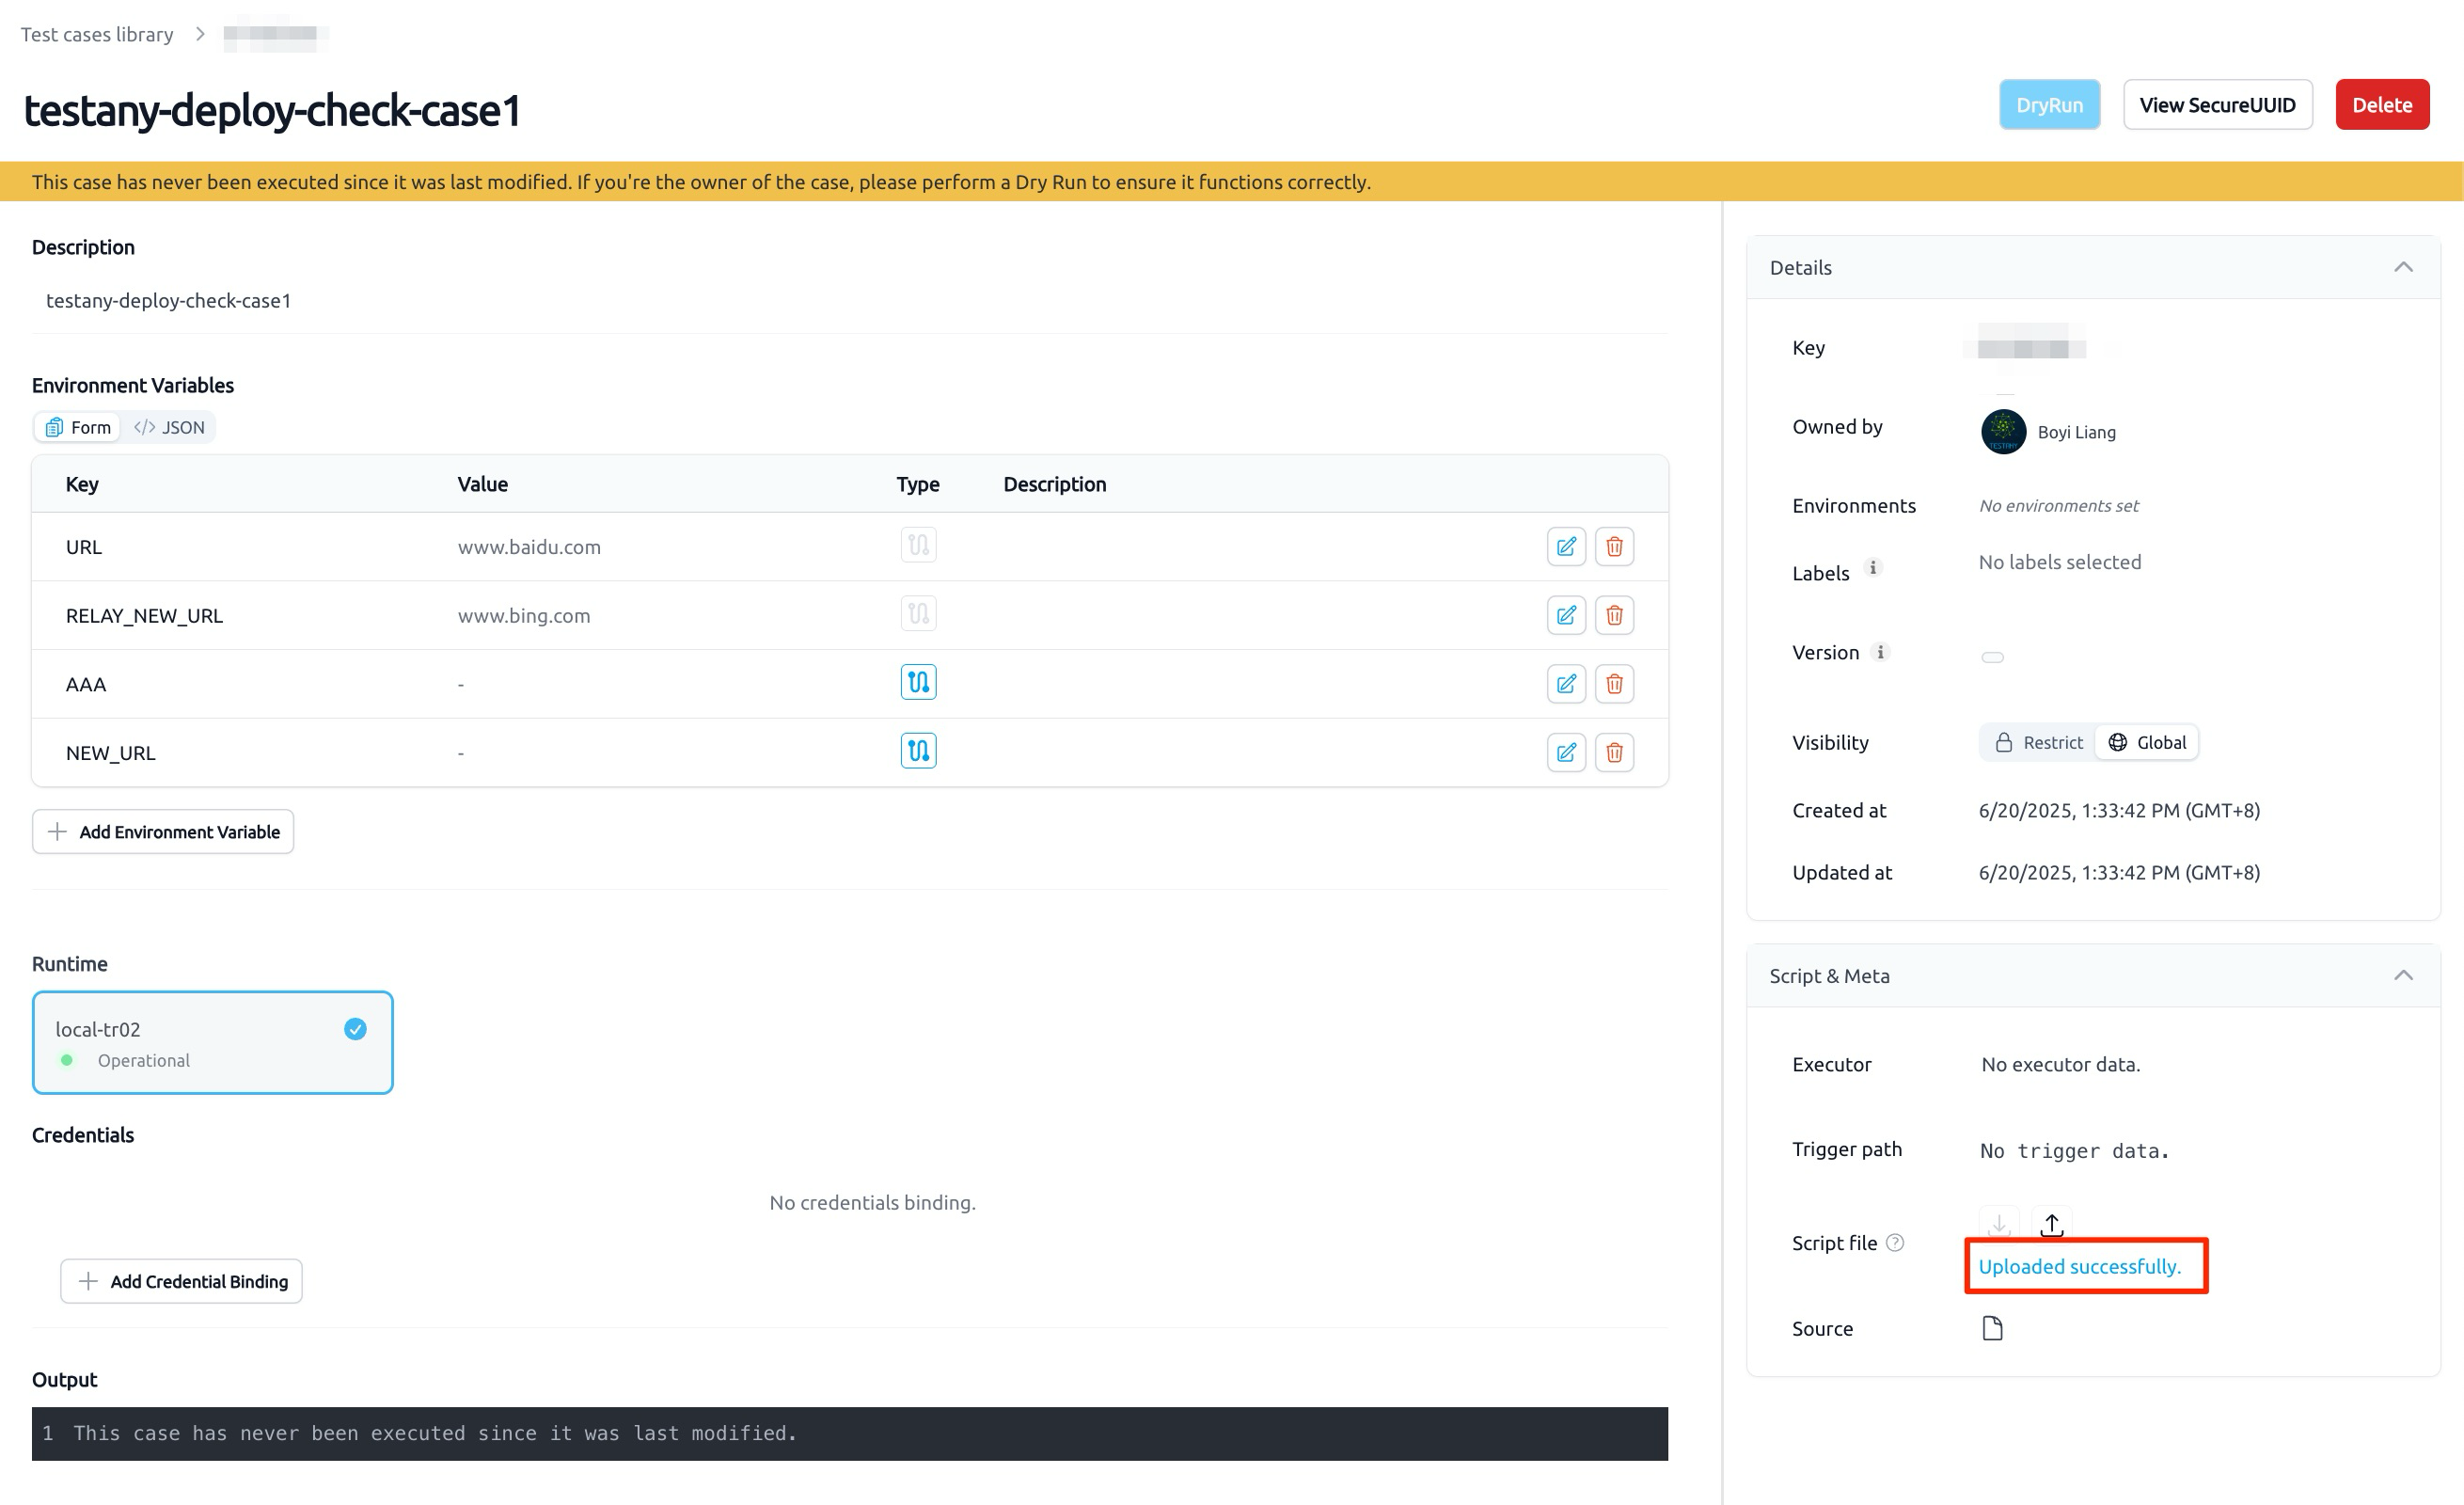
- Wait for upload to complete:
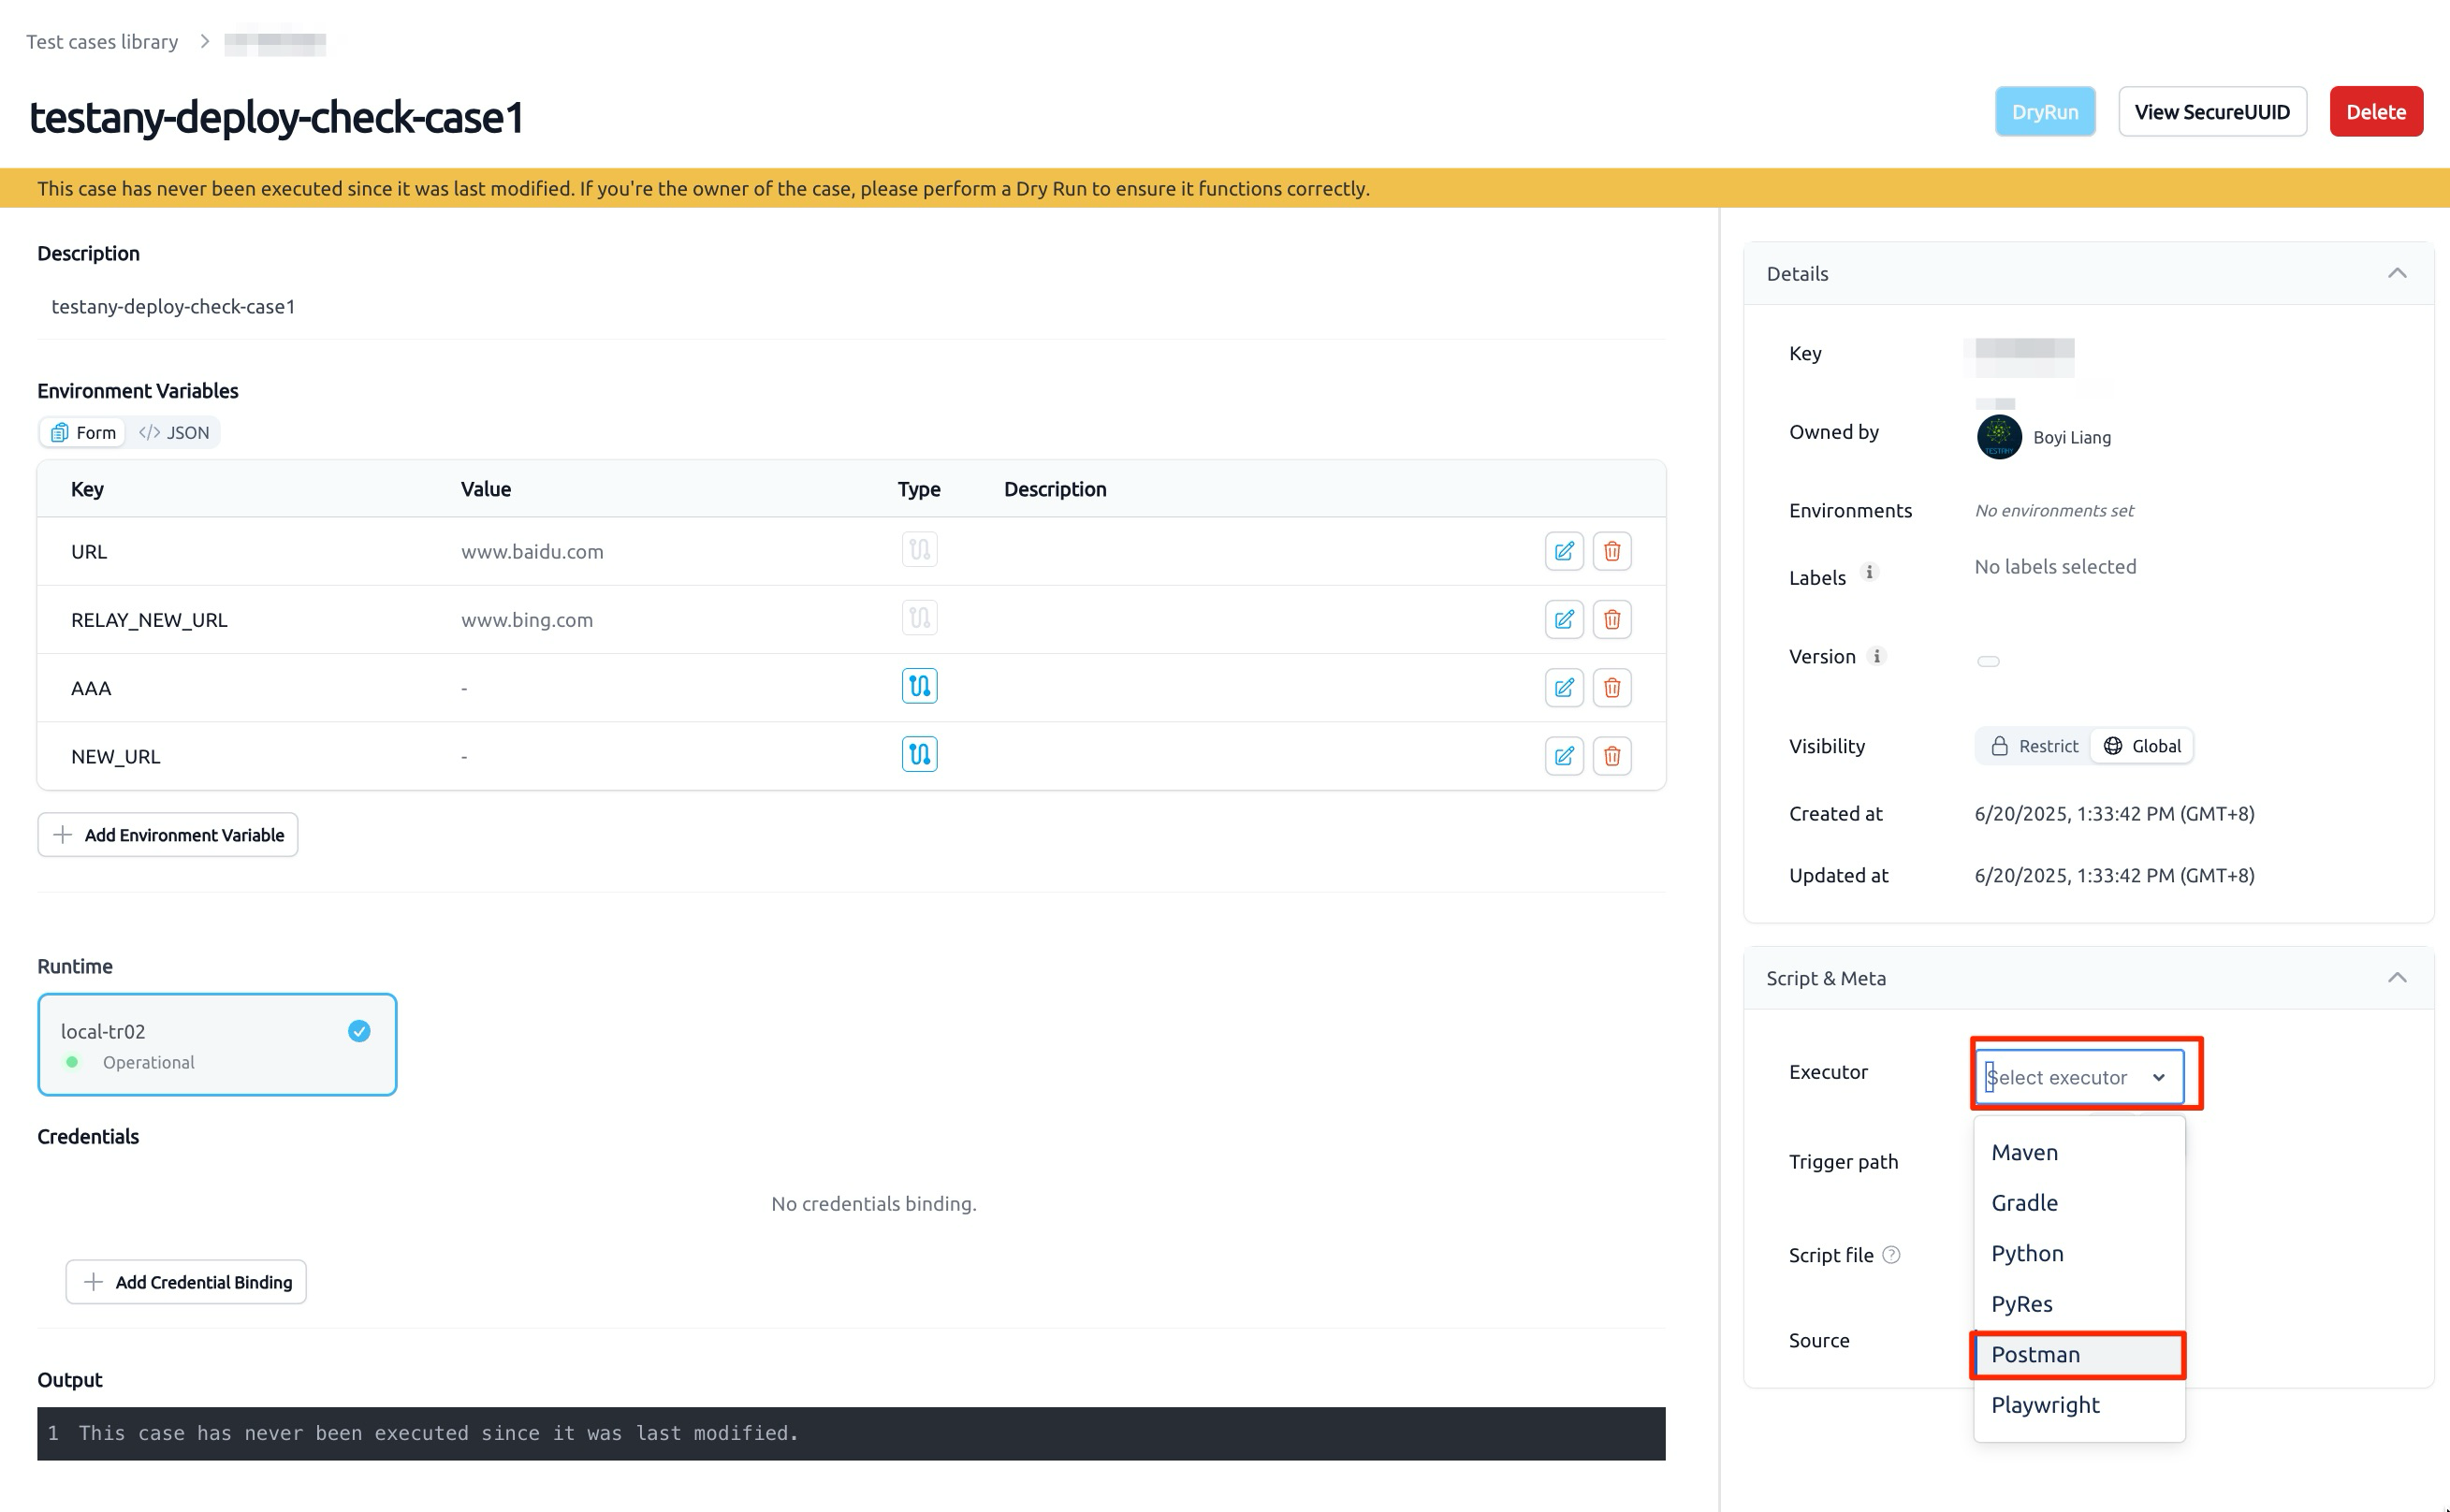
- Select Executor as
postman:
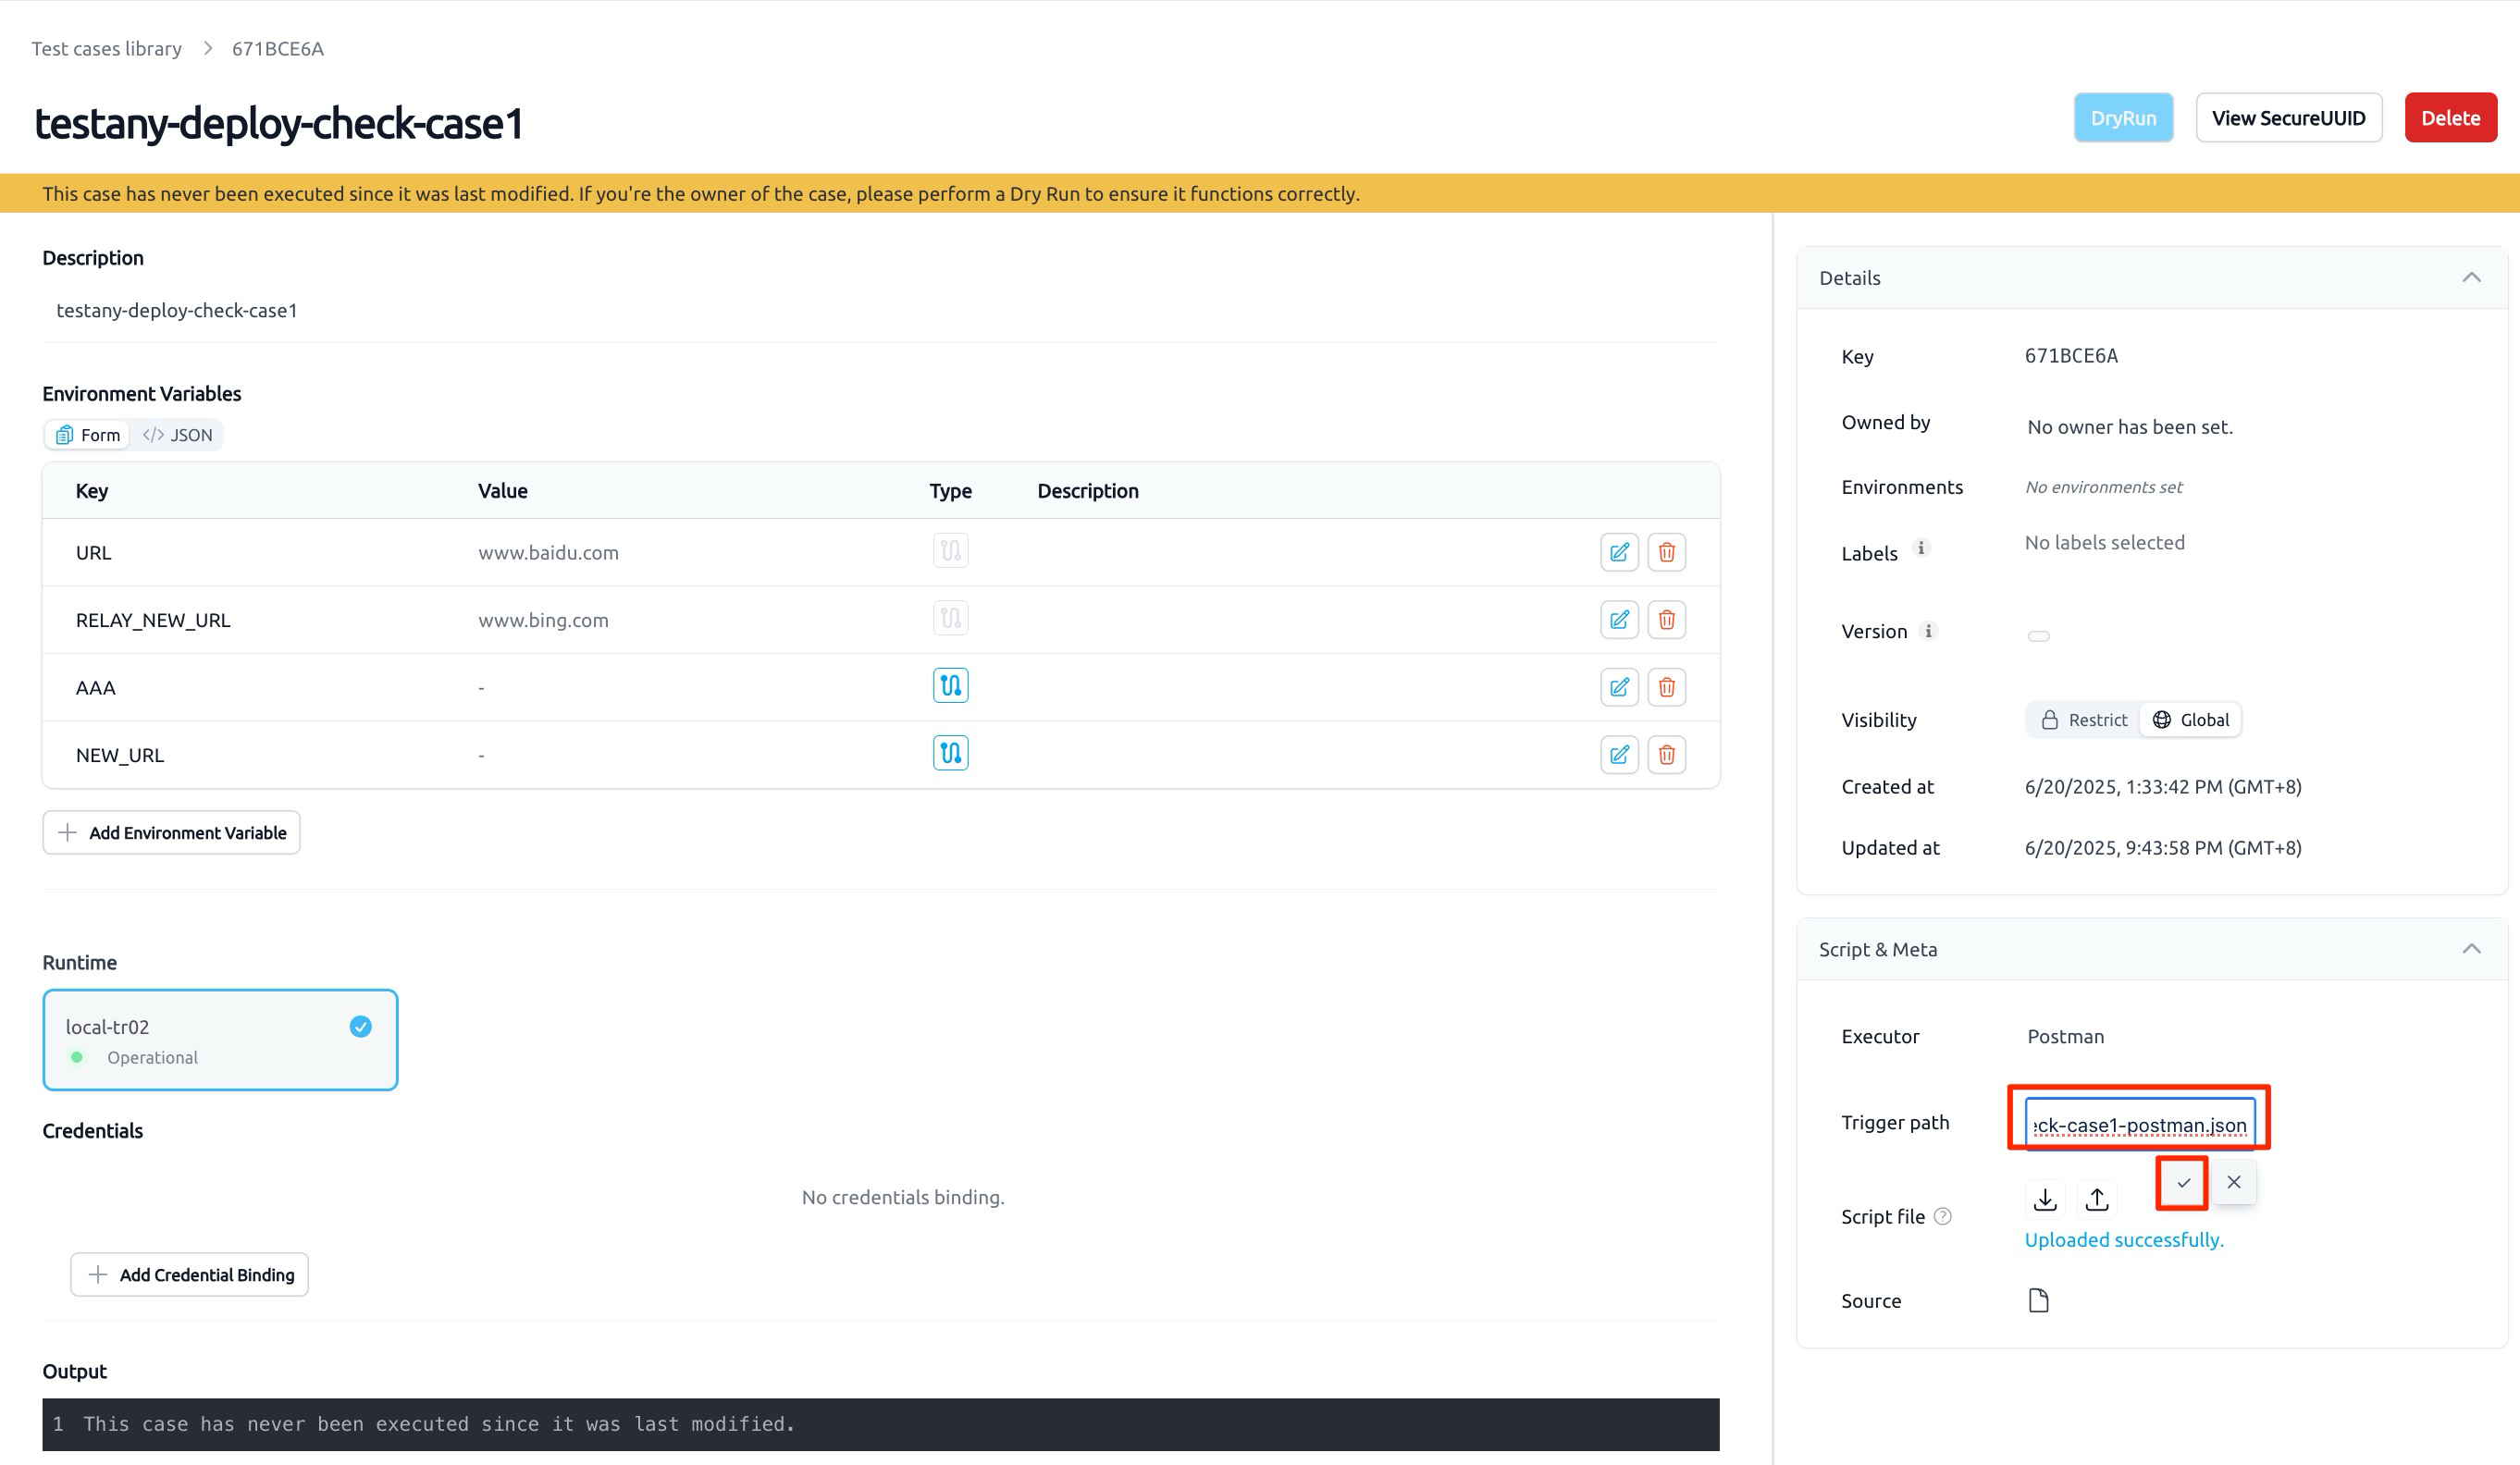
- Set Trigger path to
testany-env-check-case1-postman.json:
Case 2: Test Secrets Retrieval
- Register a new Case, click "Register Test Case":
- Enter Case information:
- Name:
testany-deploy-check-case2 - Runtime: Select the newly registered Runtime
- Name:
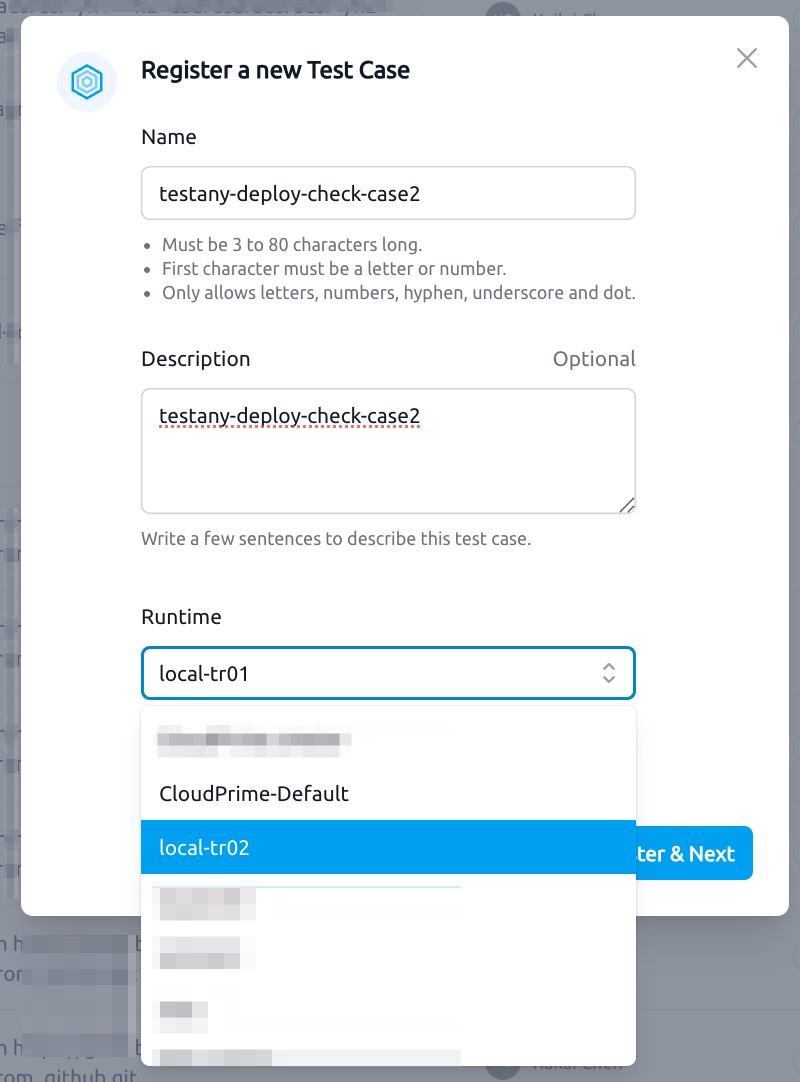
- On the redirected page, click the "JSON" tab:
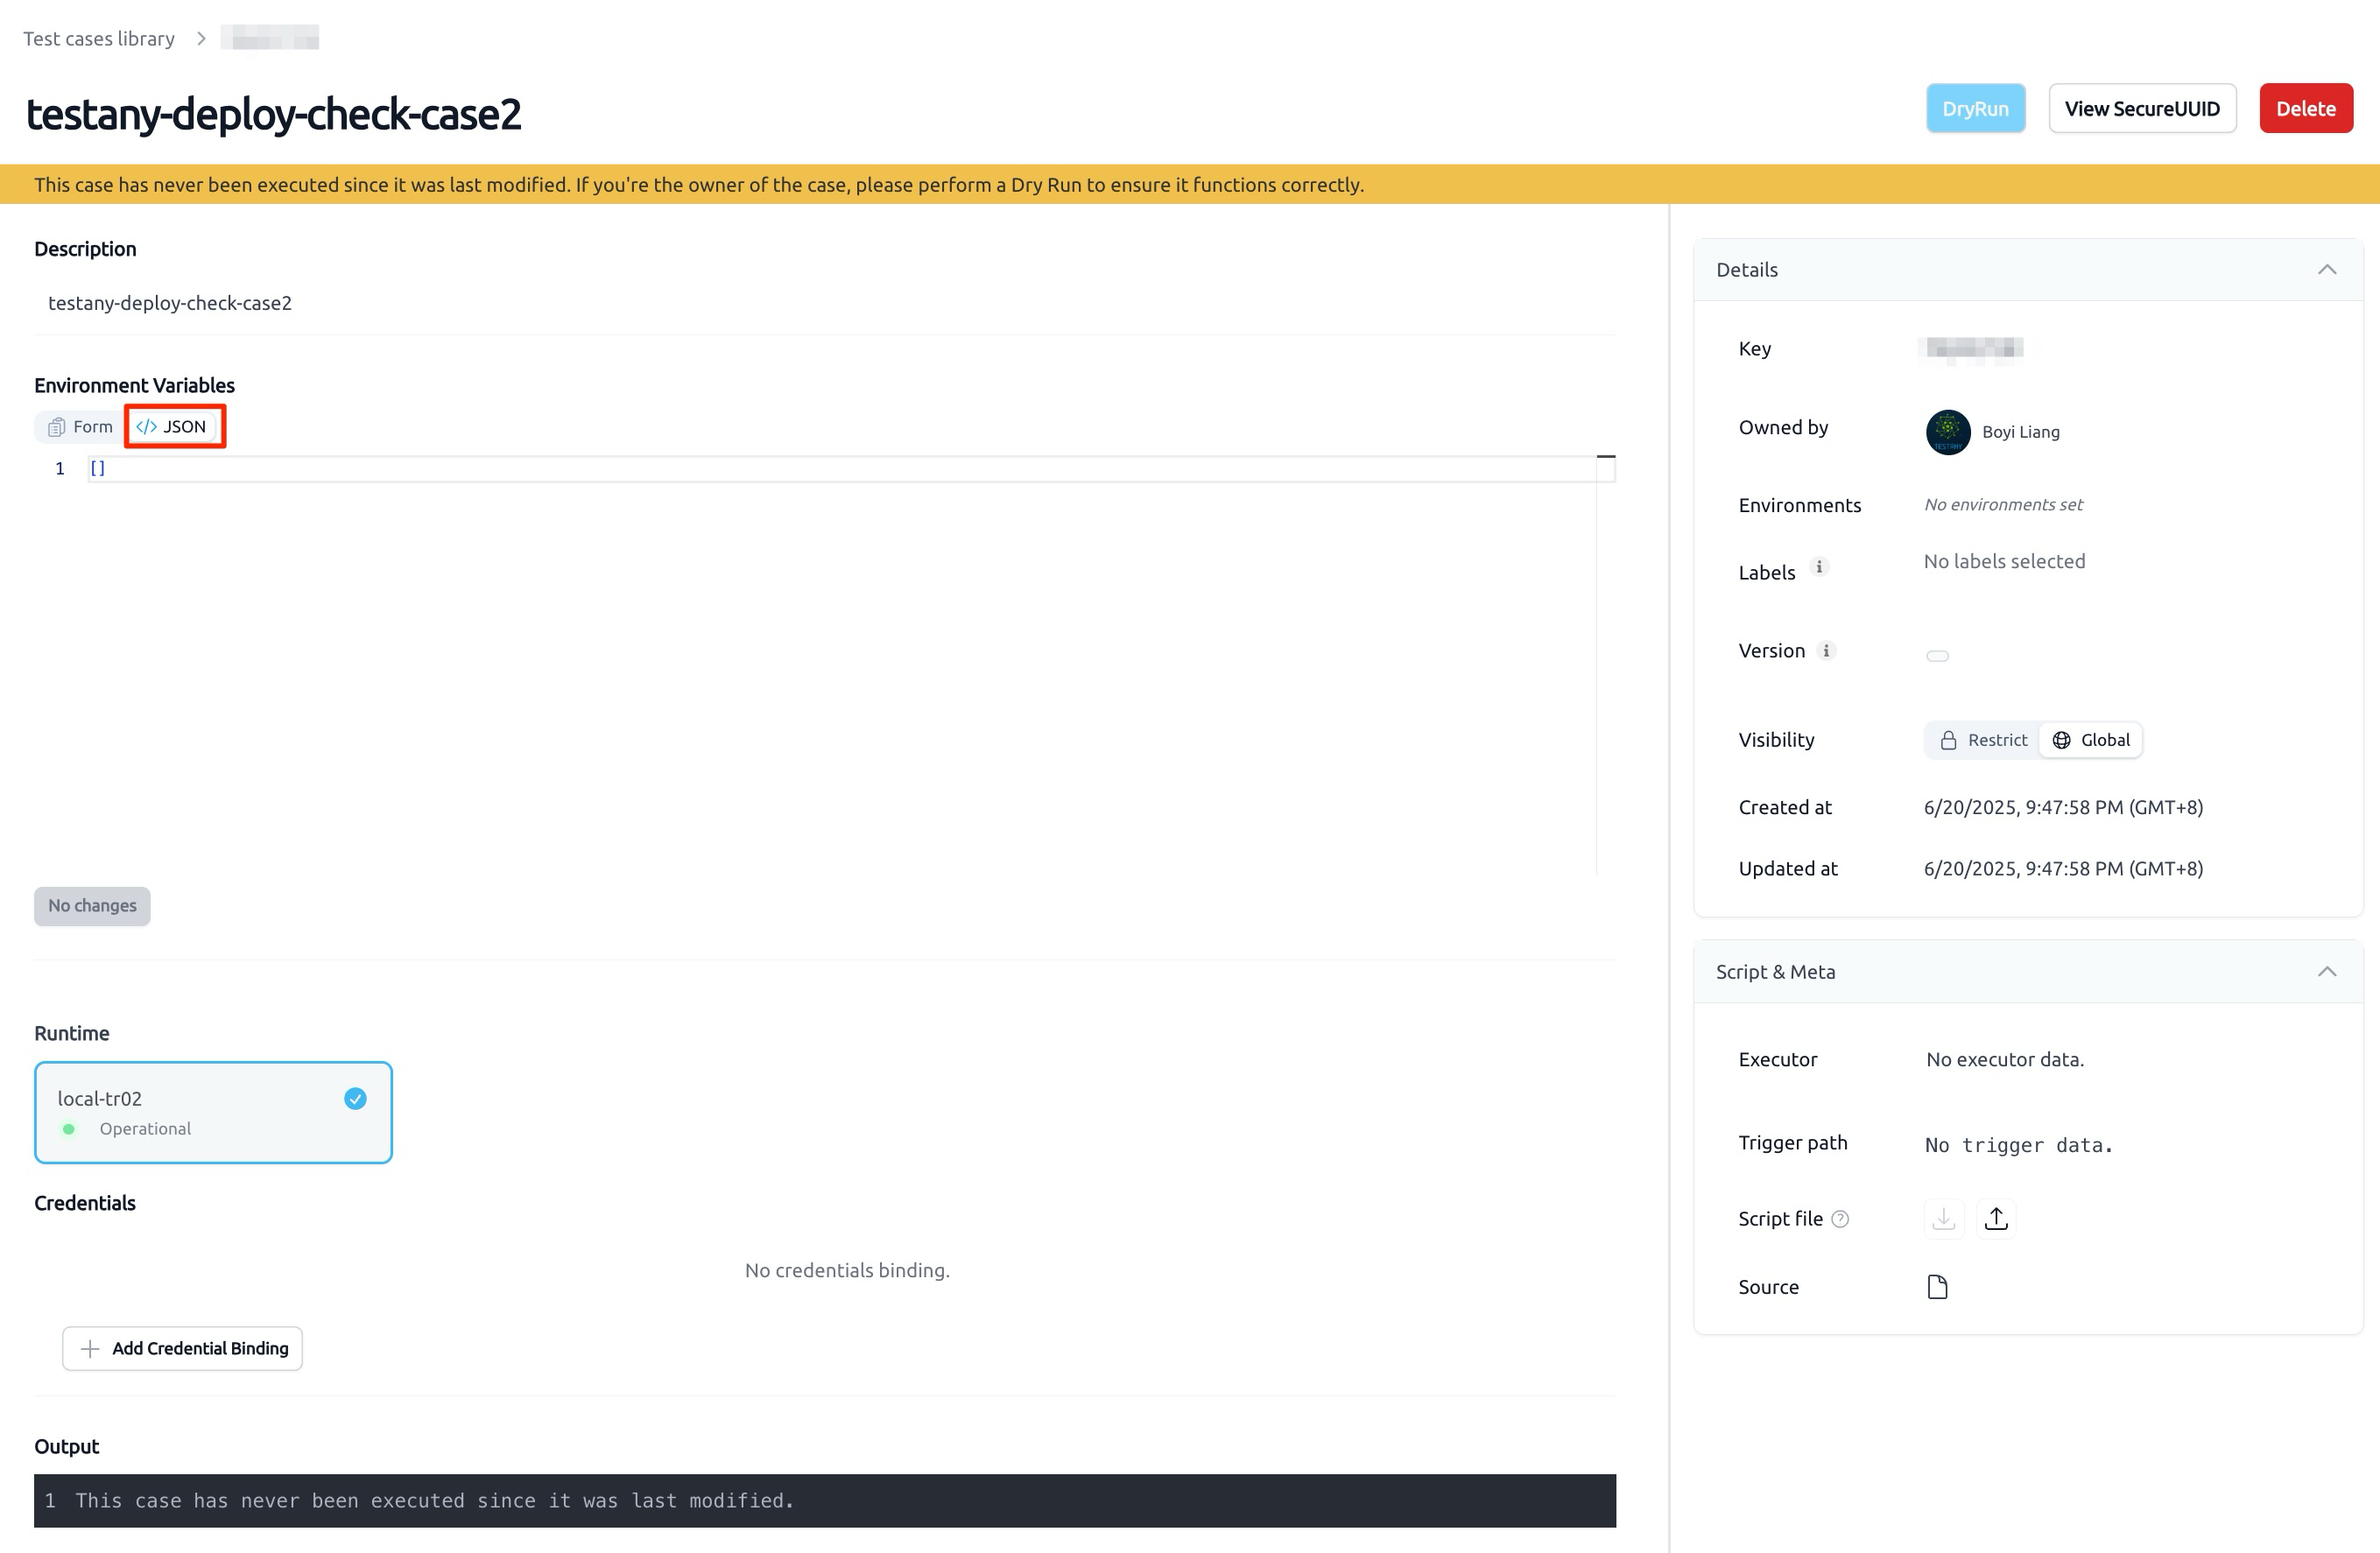
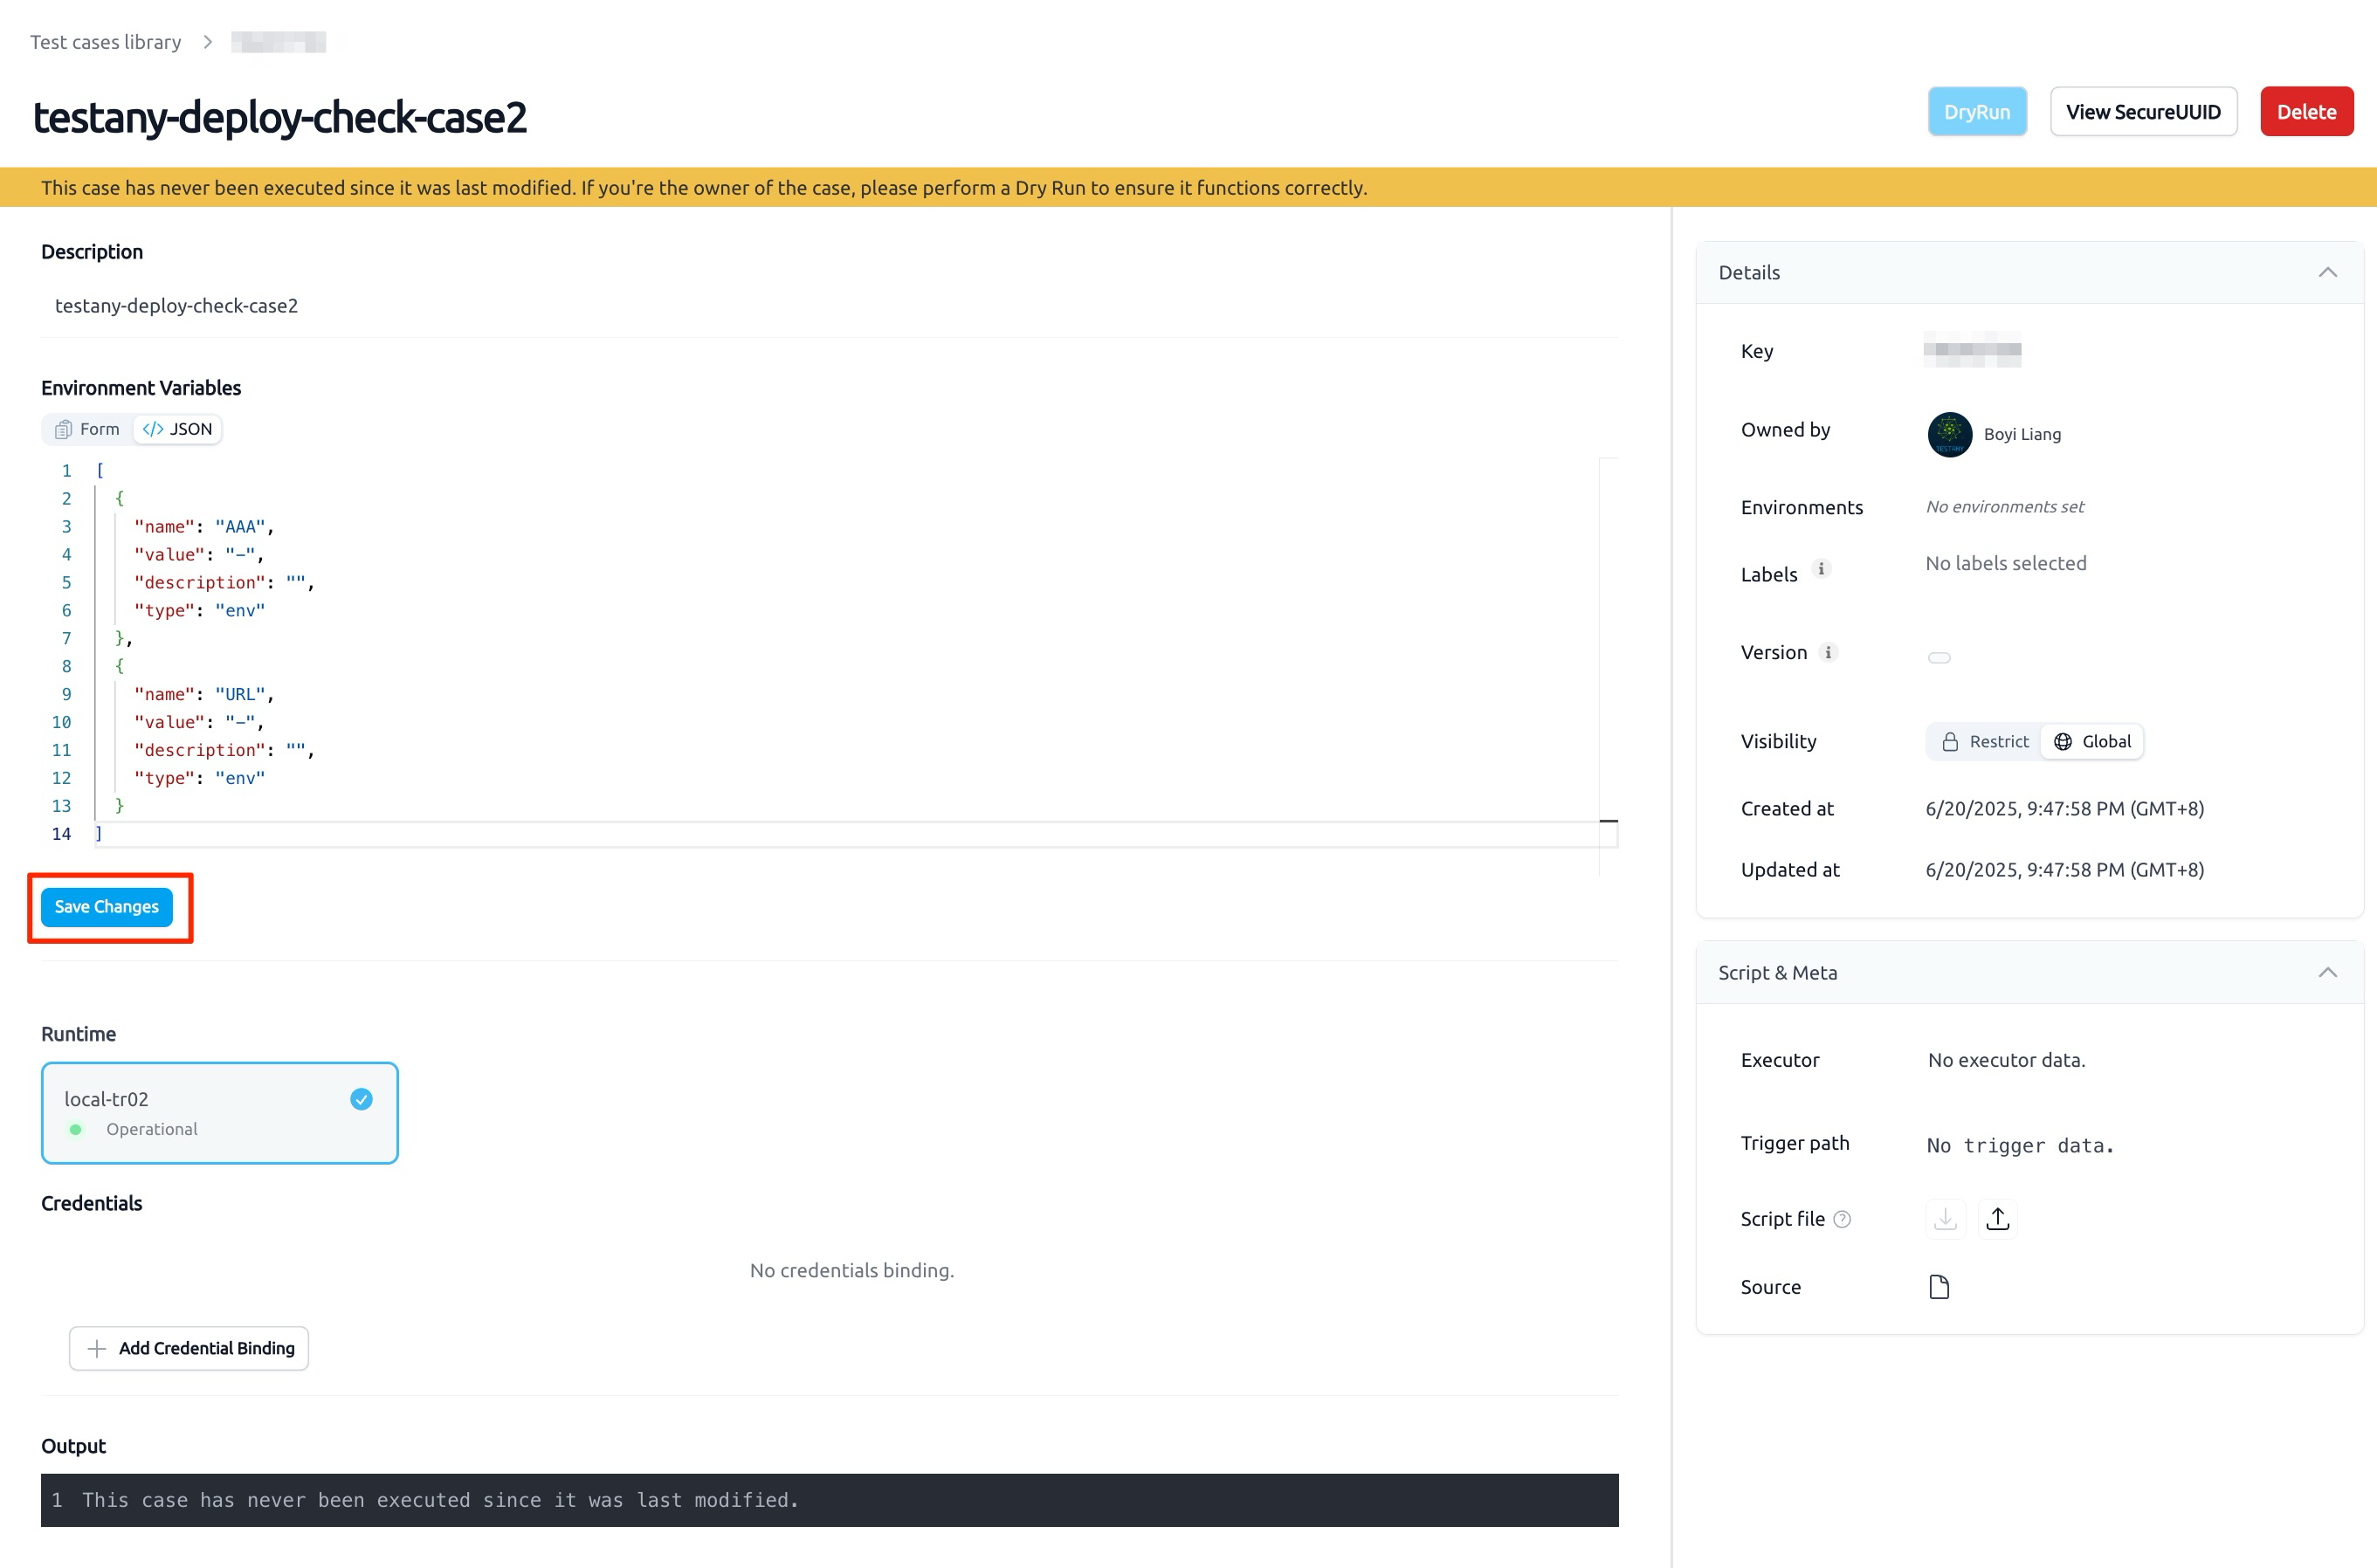
- Paste the environment variable configuration into the editor:
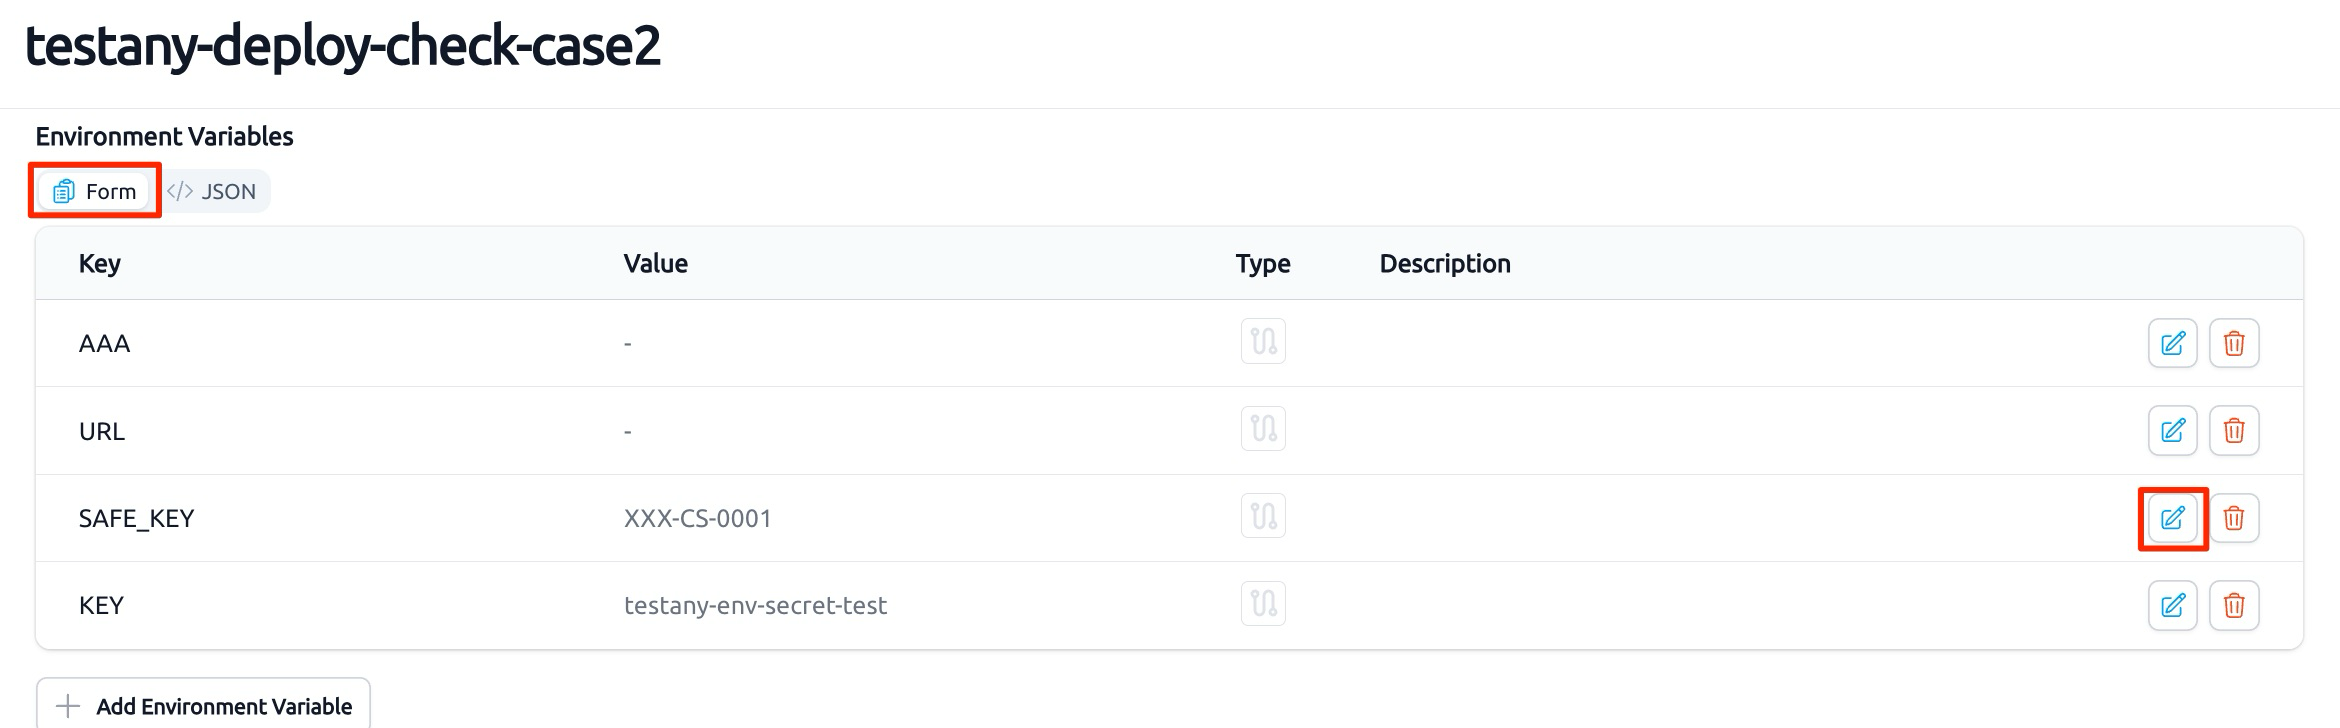
JSON[ {"name": "AAA", "value": "-", "type": "env"}, {"name": "URL", "value": "-", "type": "env"}, {"name": "SAFE_KEY", "value": "WKS-CS-0001", "type": "env"}, {"name": "KEY", "value": "testany-env-secret-test", "type": "env"} ]
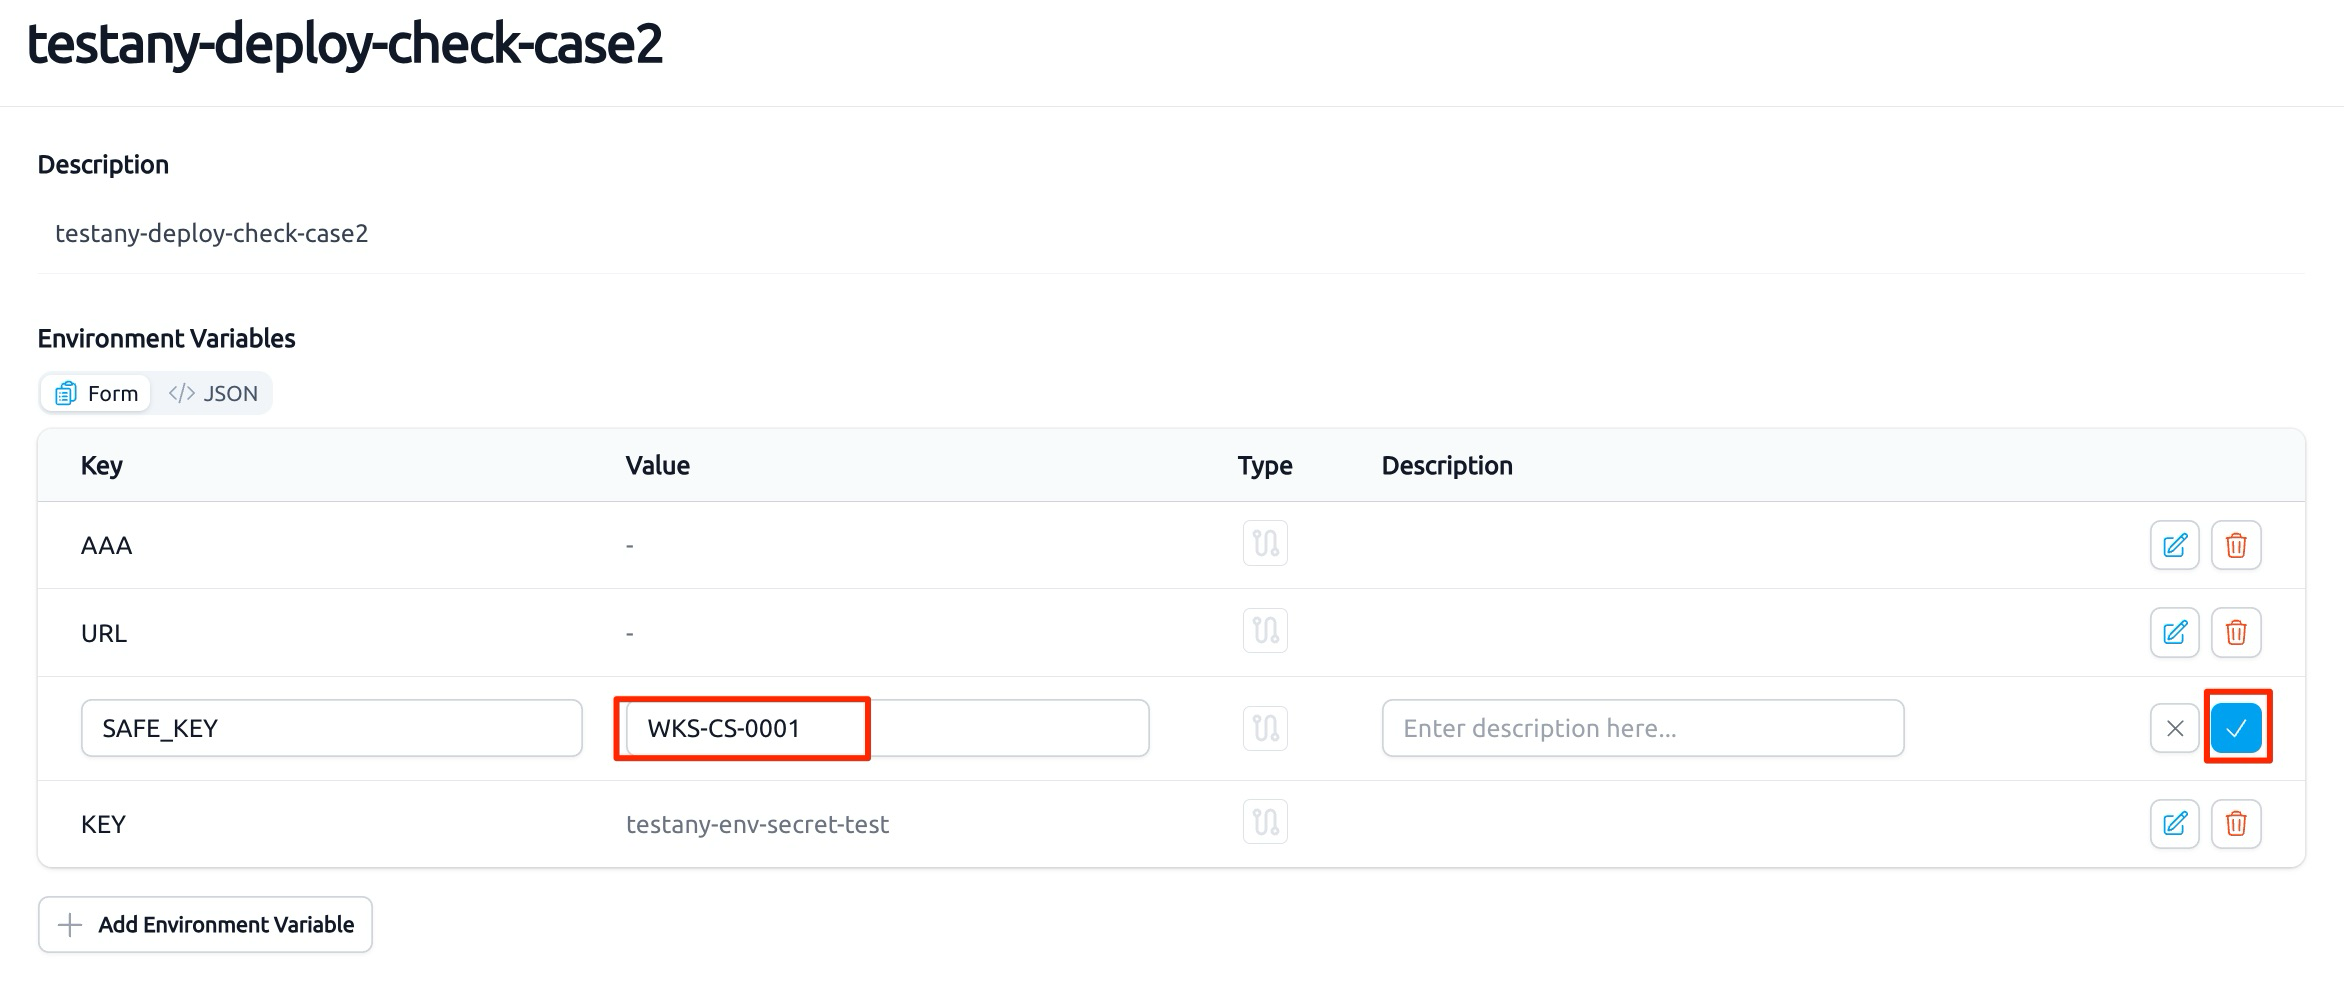
- Switch to Form view and modify the "SAFE_KEY" value to the actual Credential Safe Key:
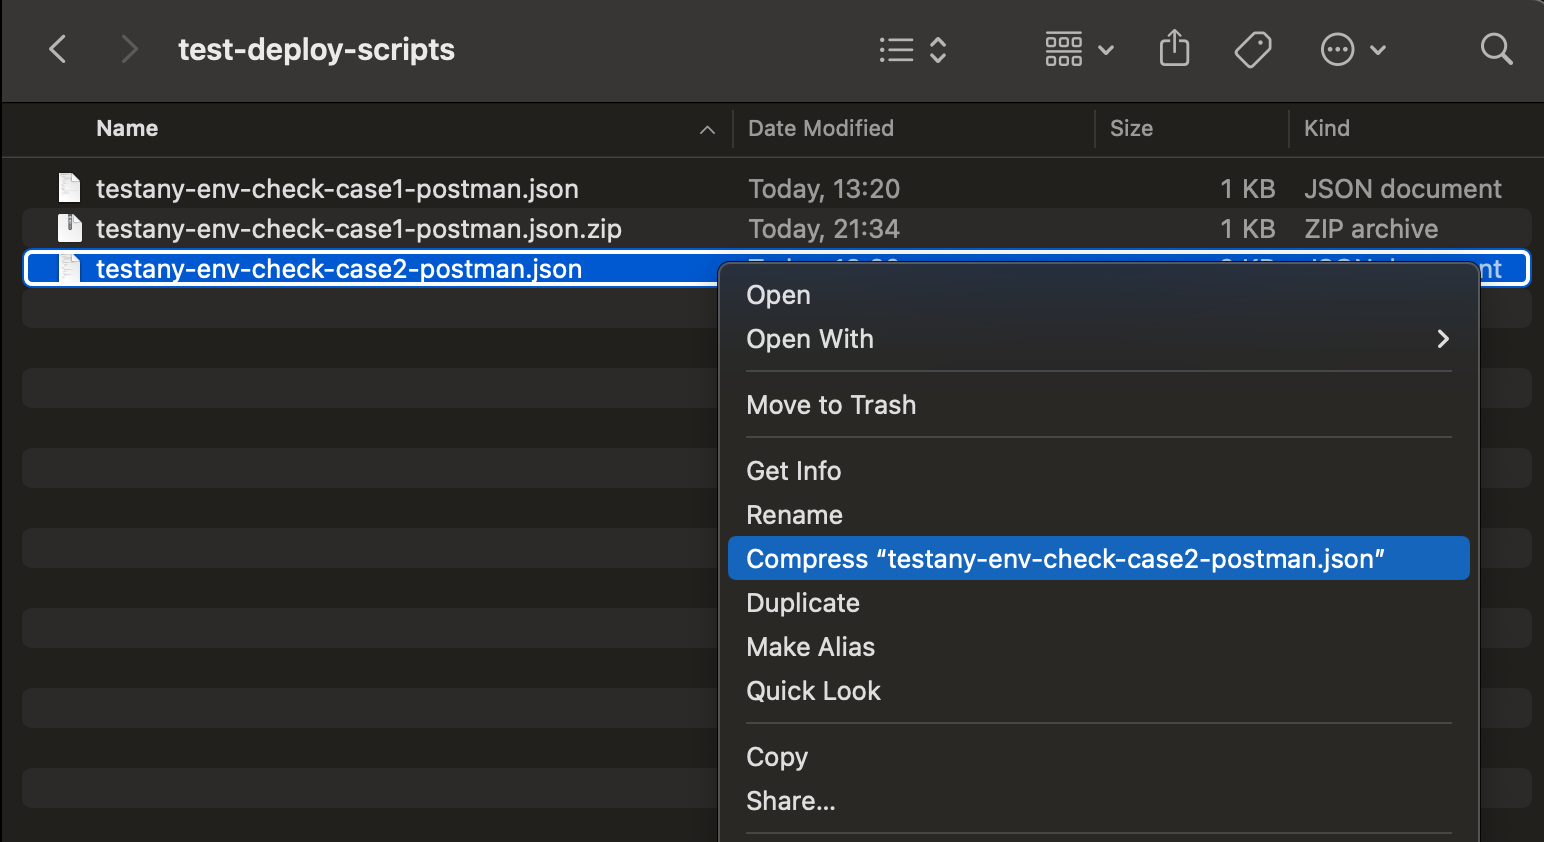
- Prepare code file, compress
testany-env-check-case2-postman.jsonto a zip file:
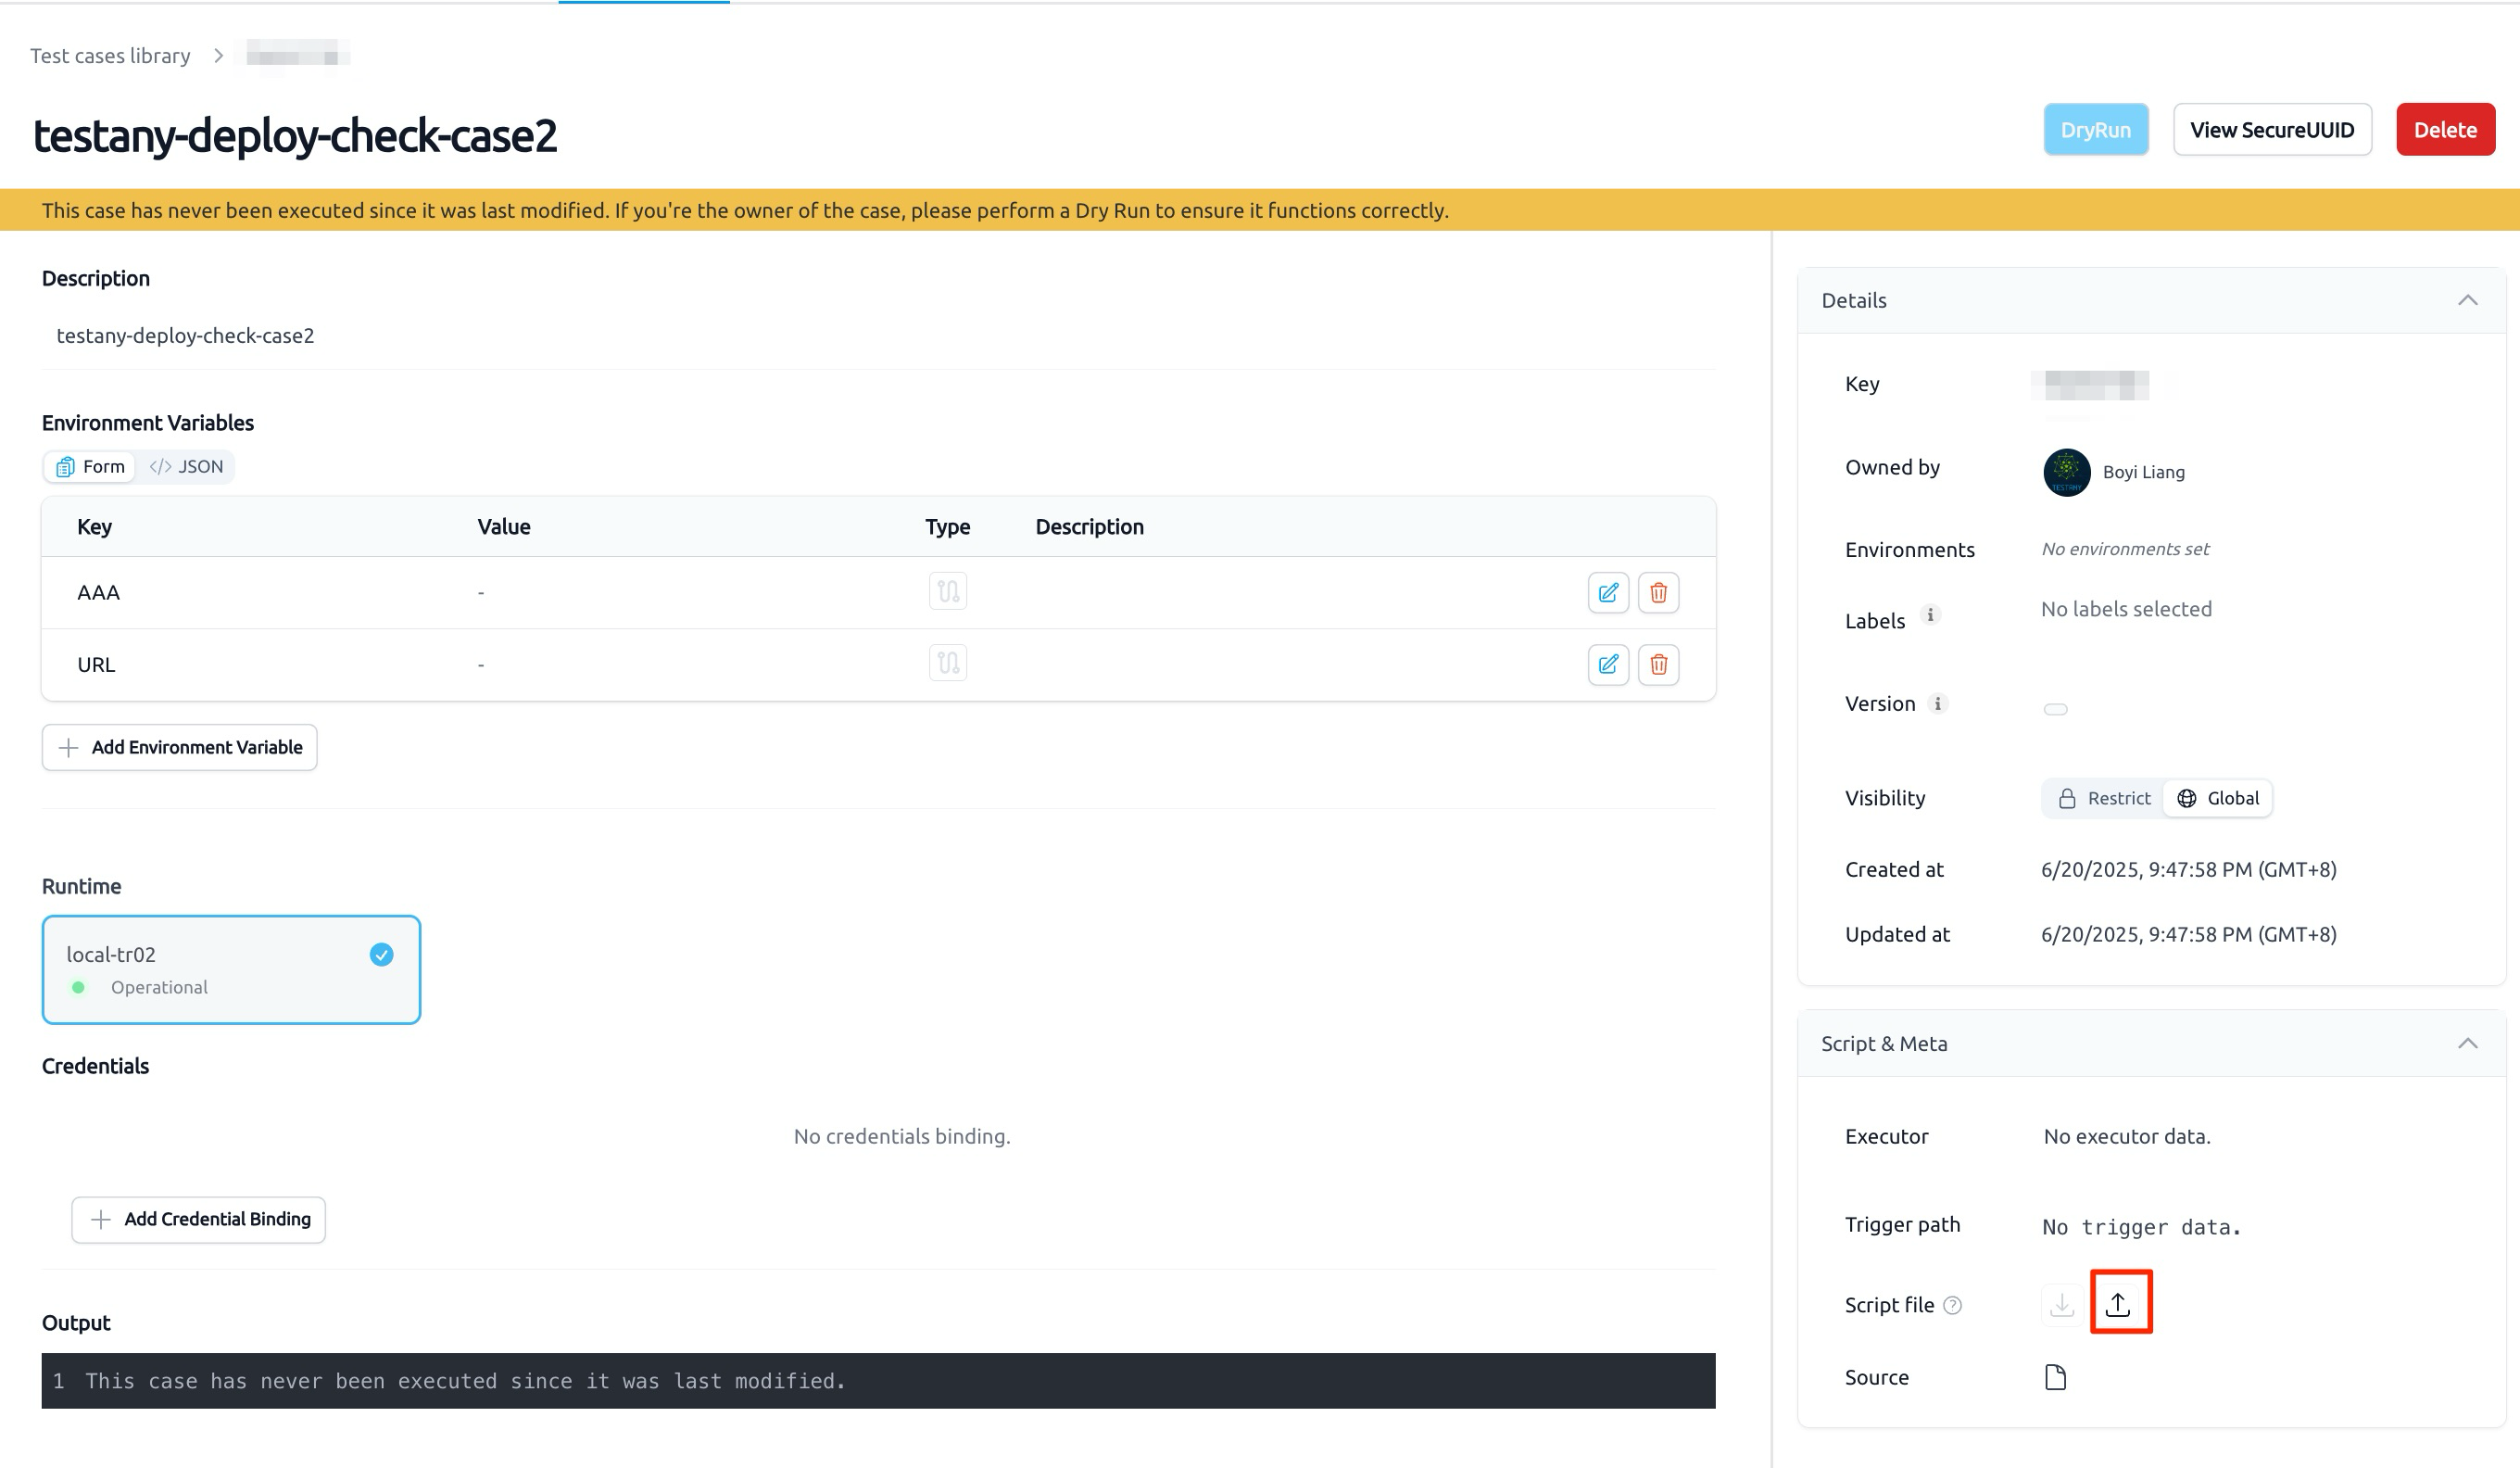
- Click the "Upload" icon to upload code:
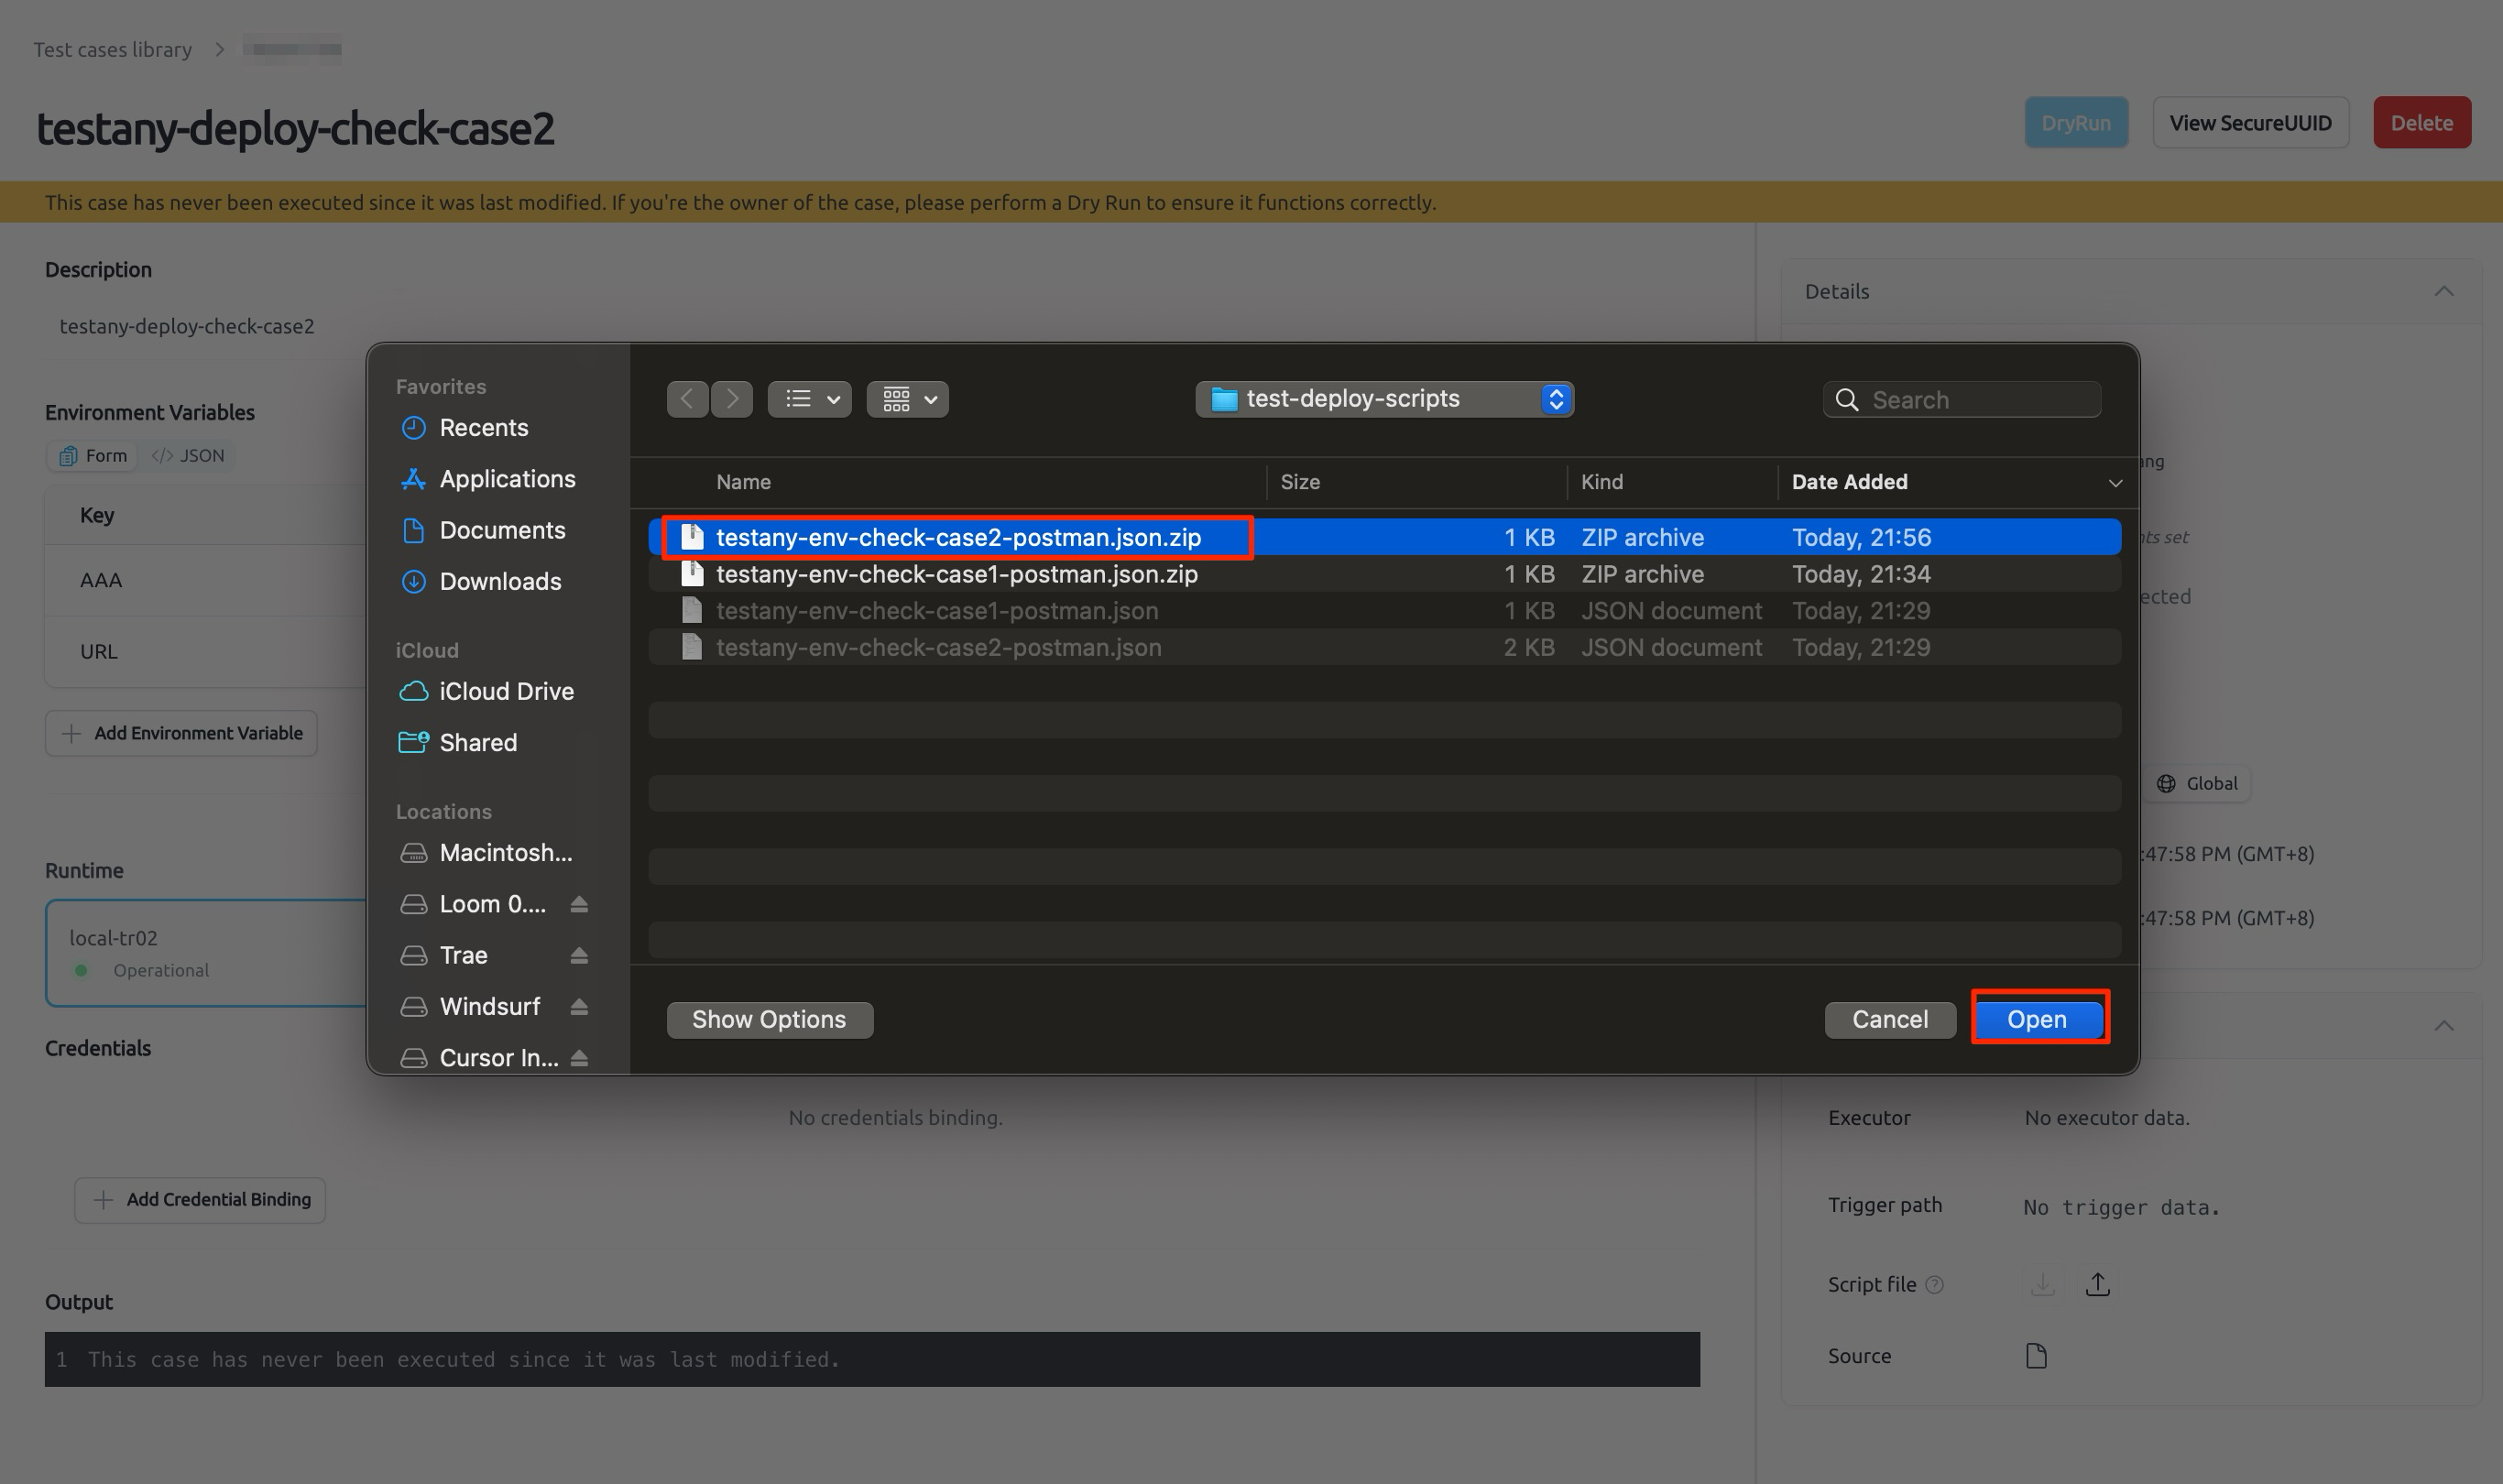
- Select the zip file to complete upload:
- Wait for upload to complete:
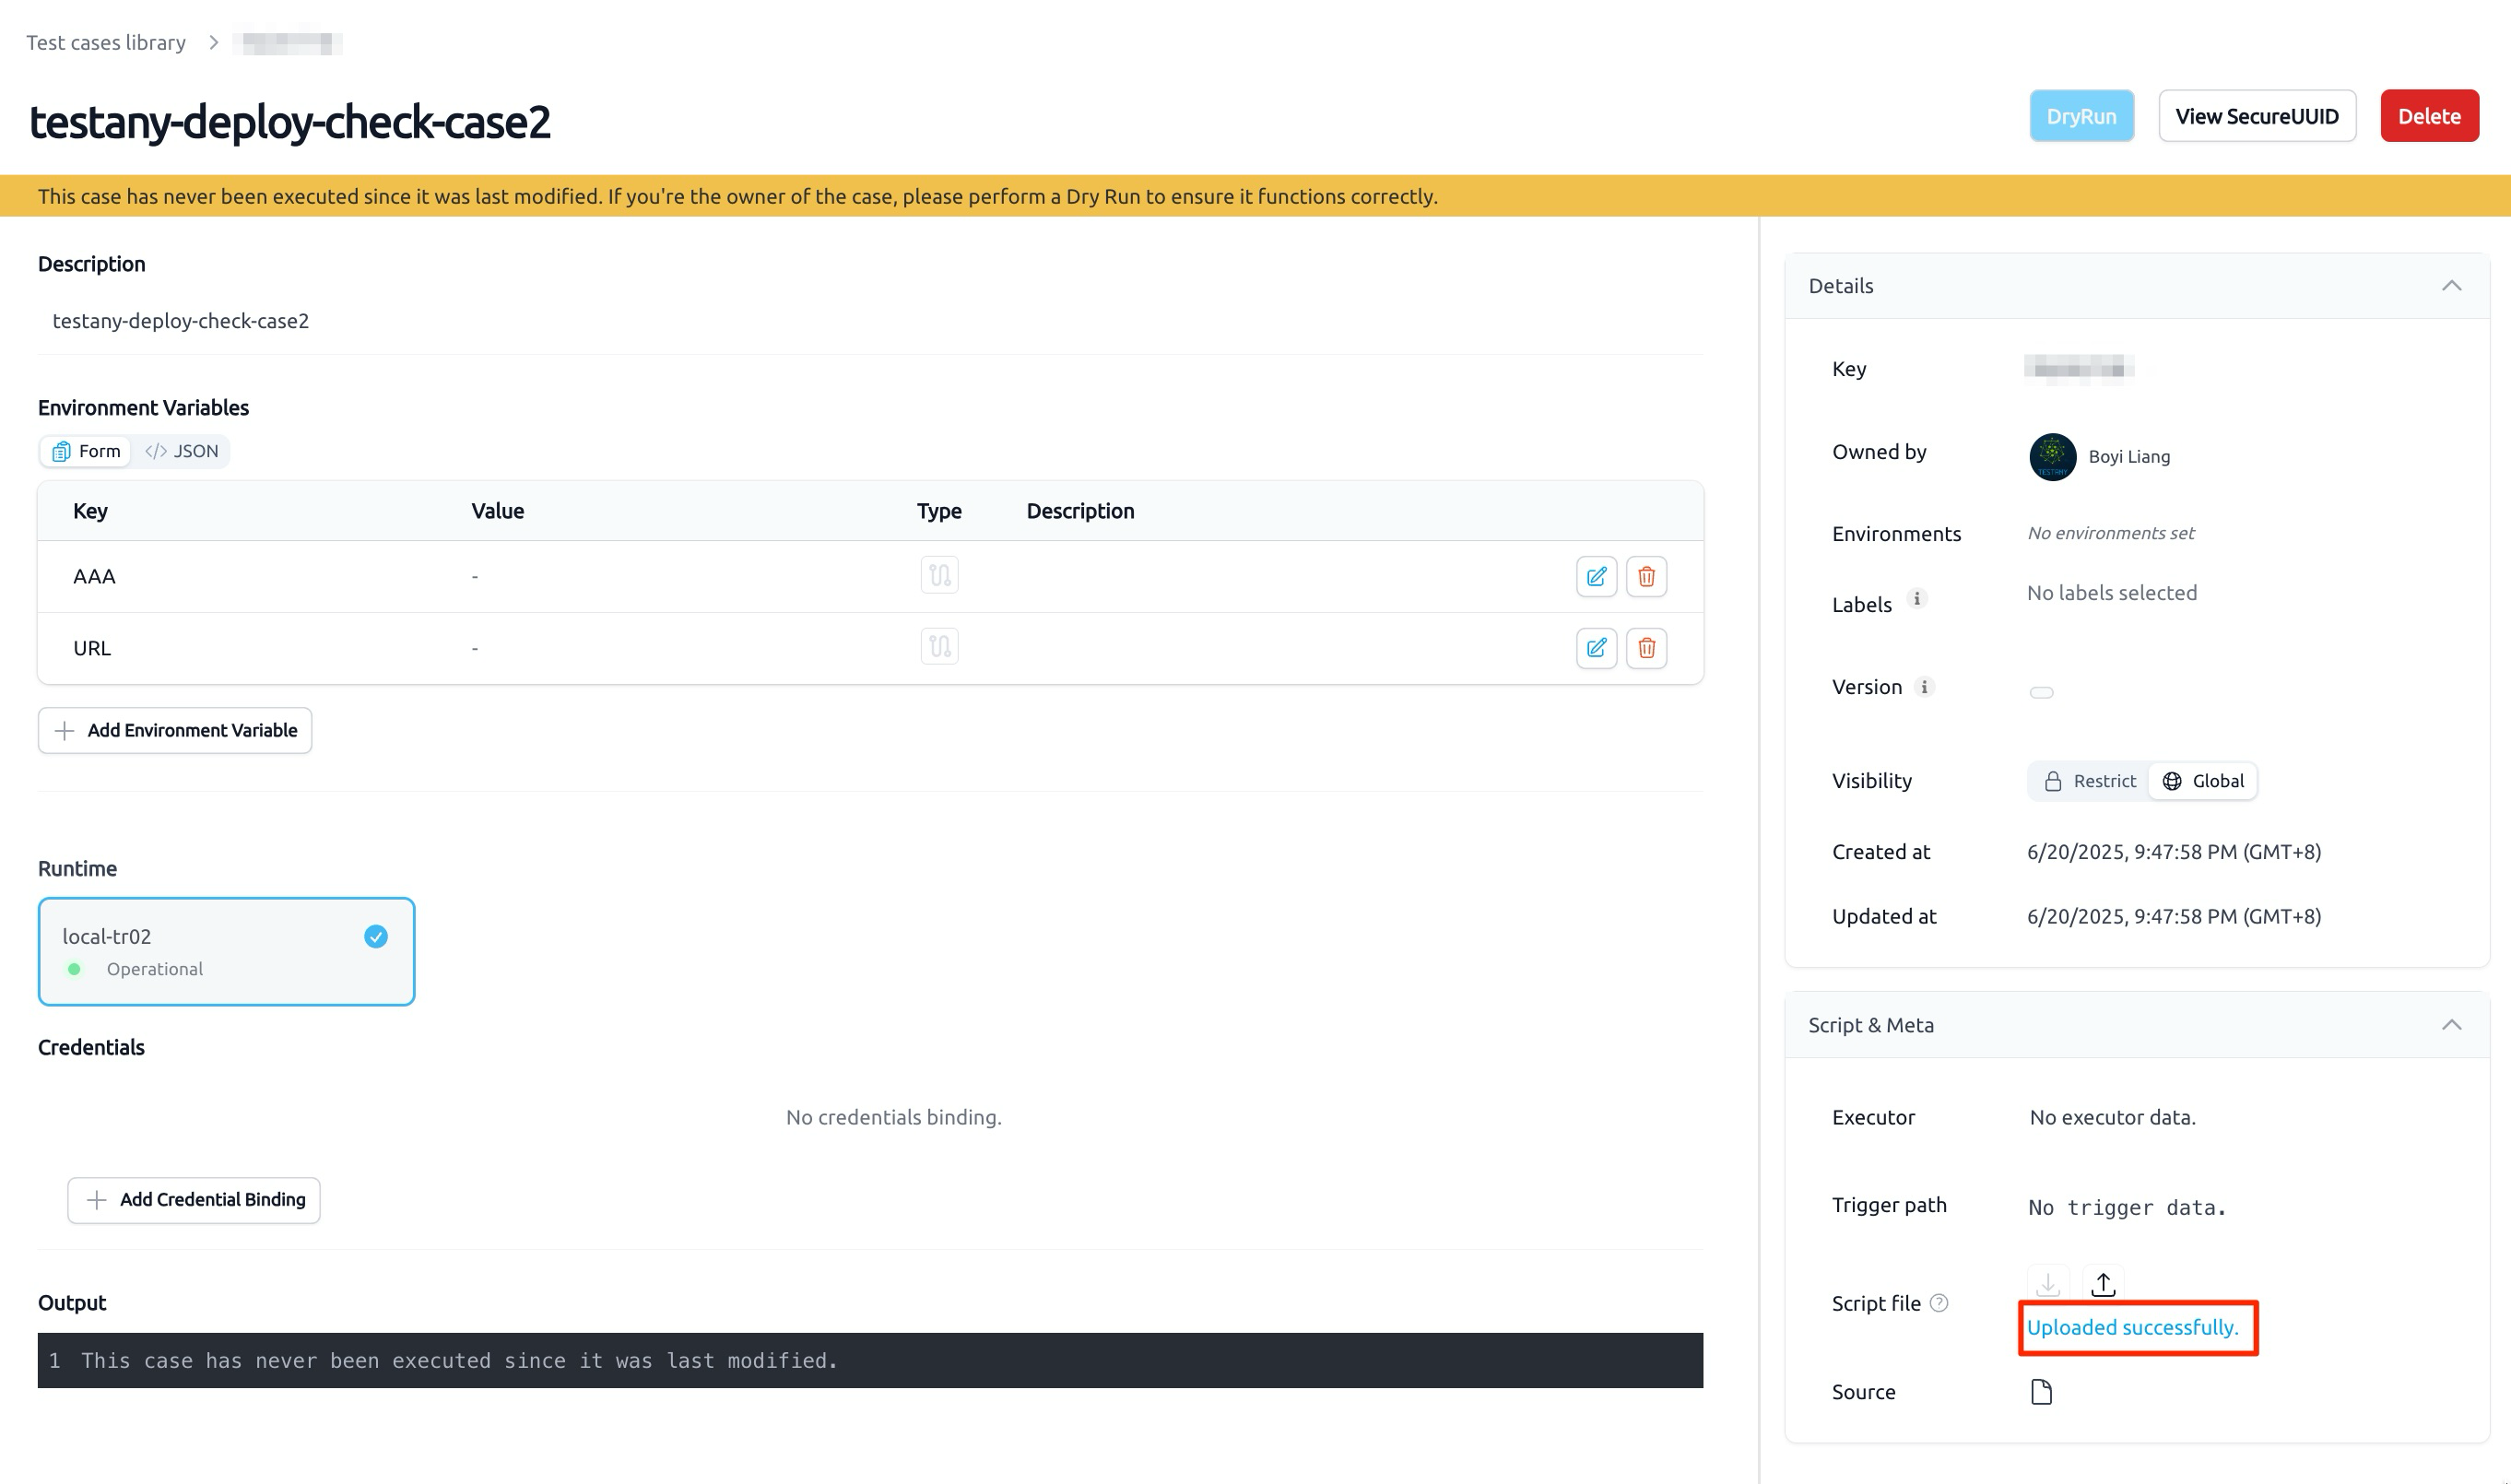
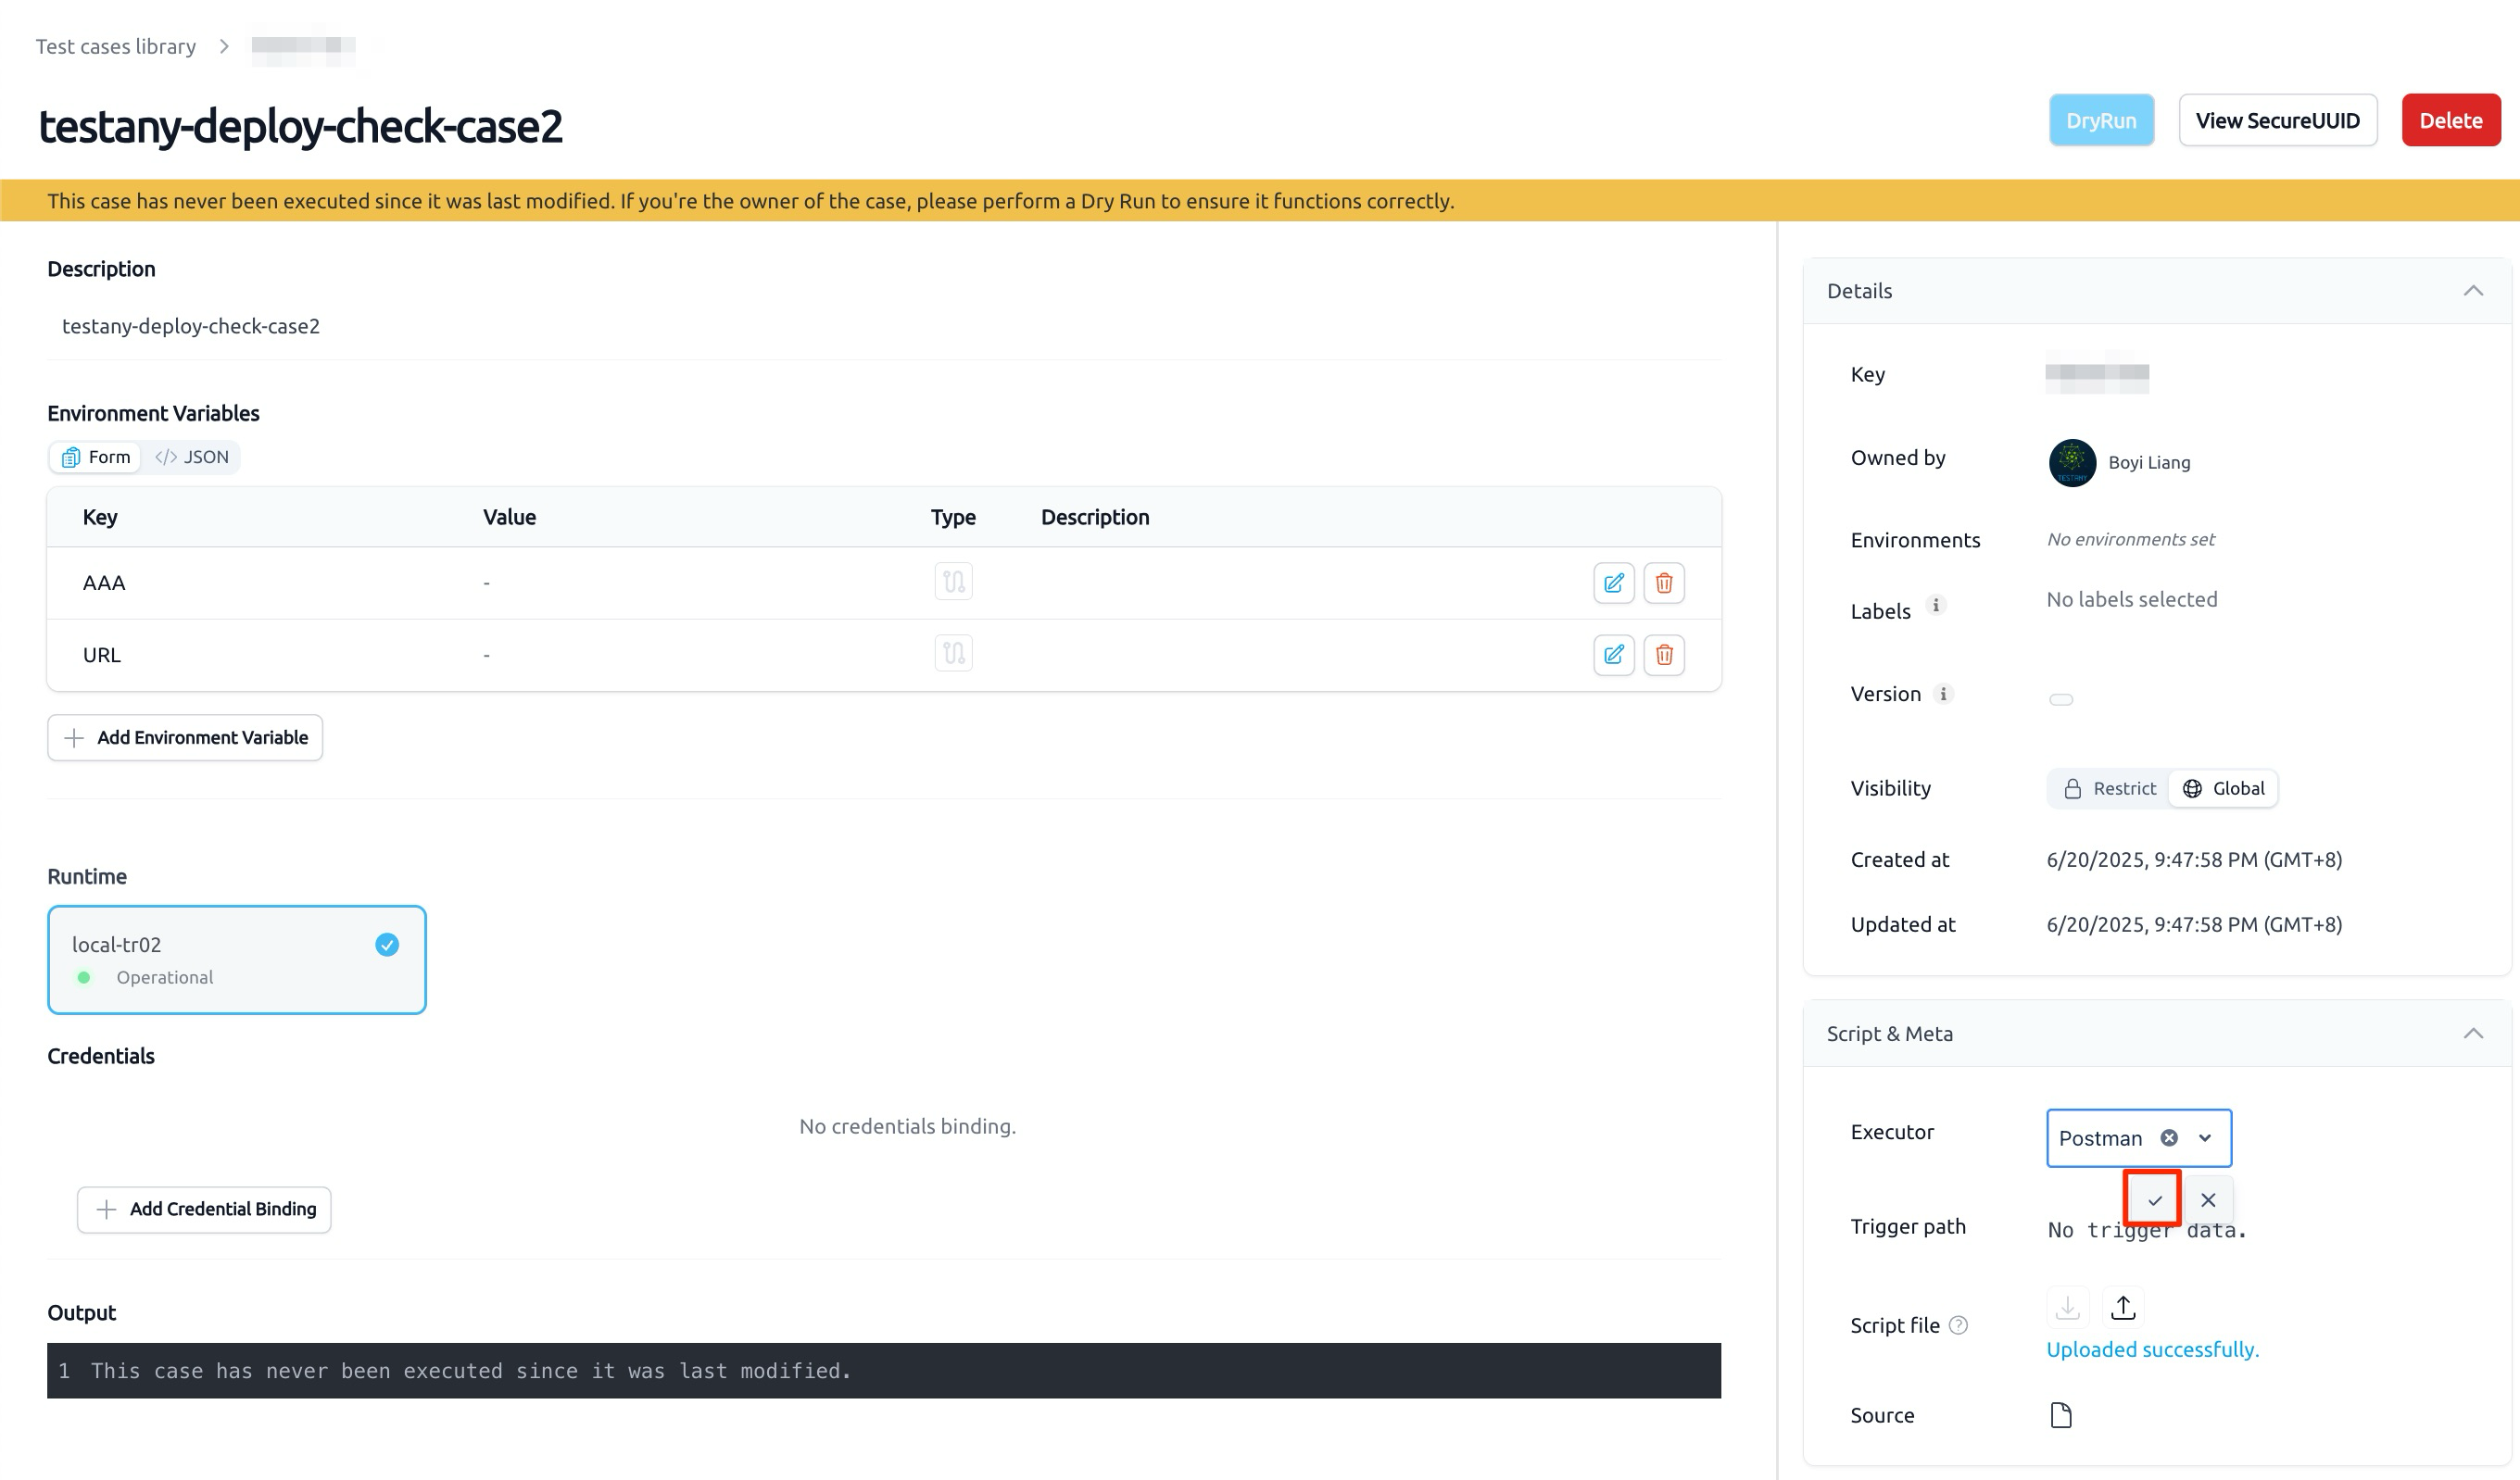
- Select Executor as
postman:
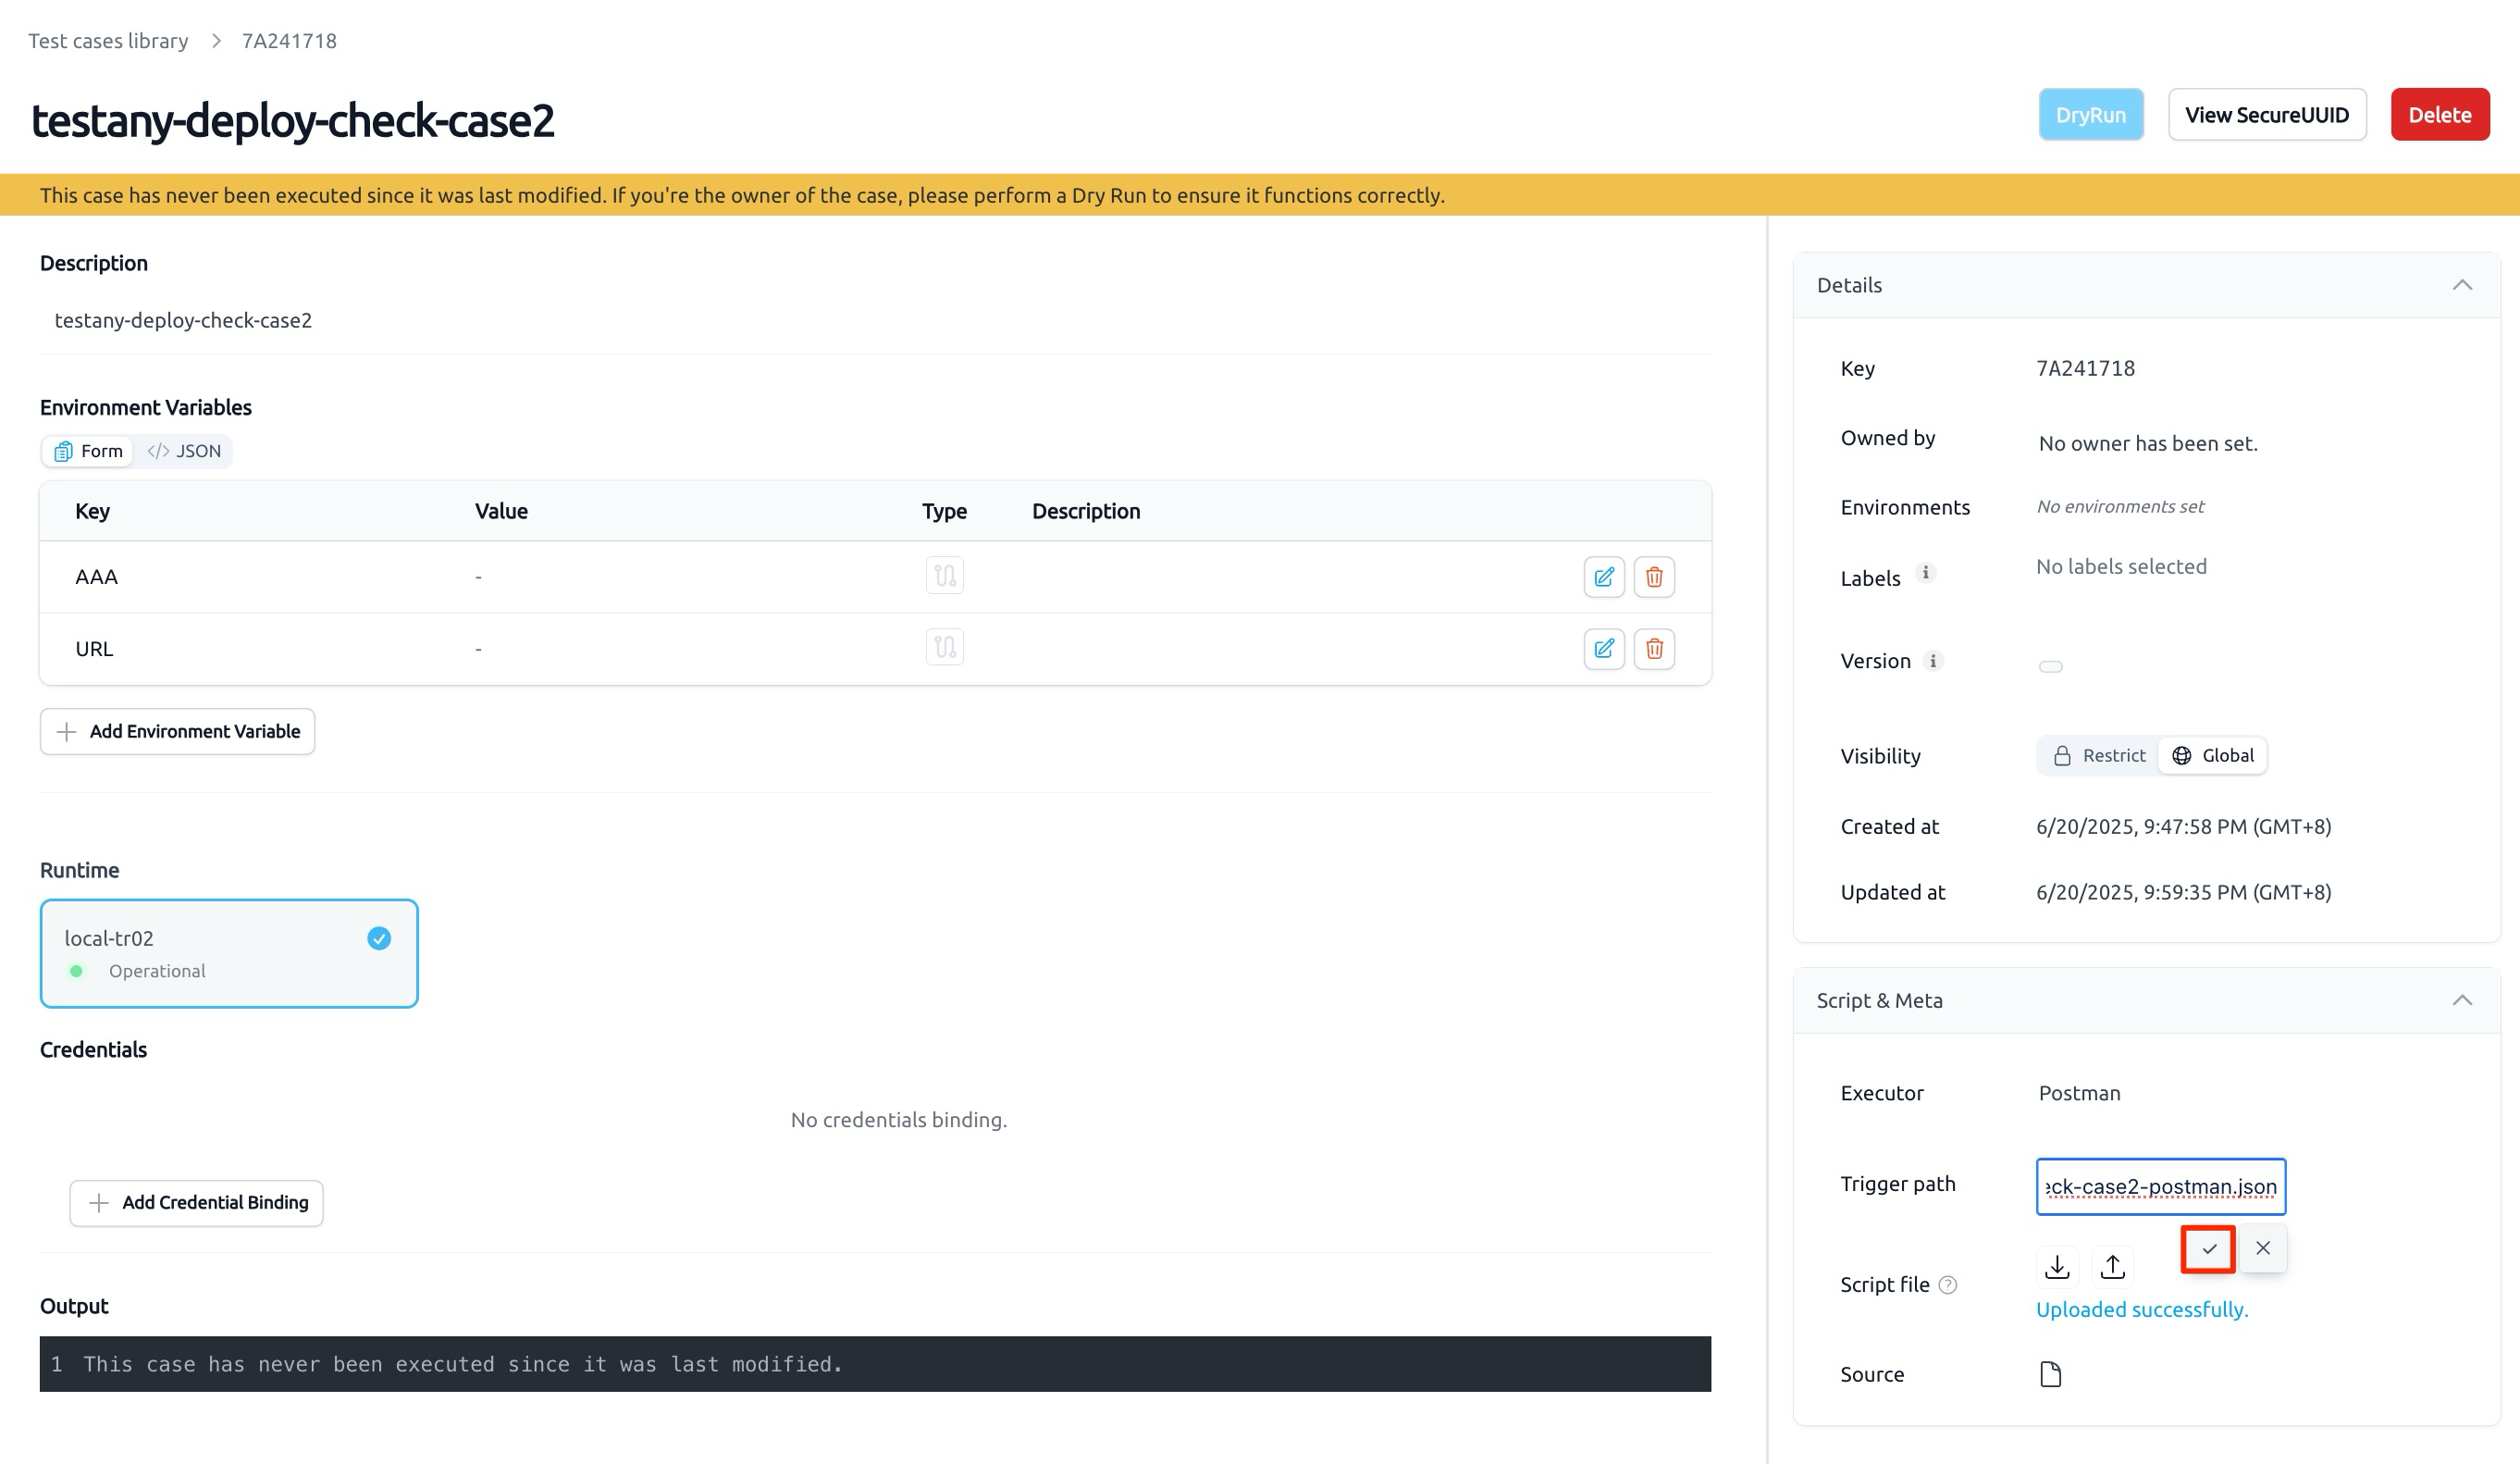
- Set Trigger path to
testany-env-check-case2-postman.json:
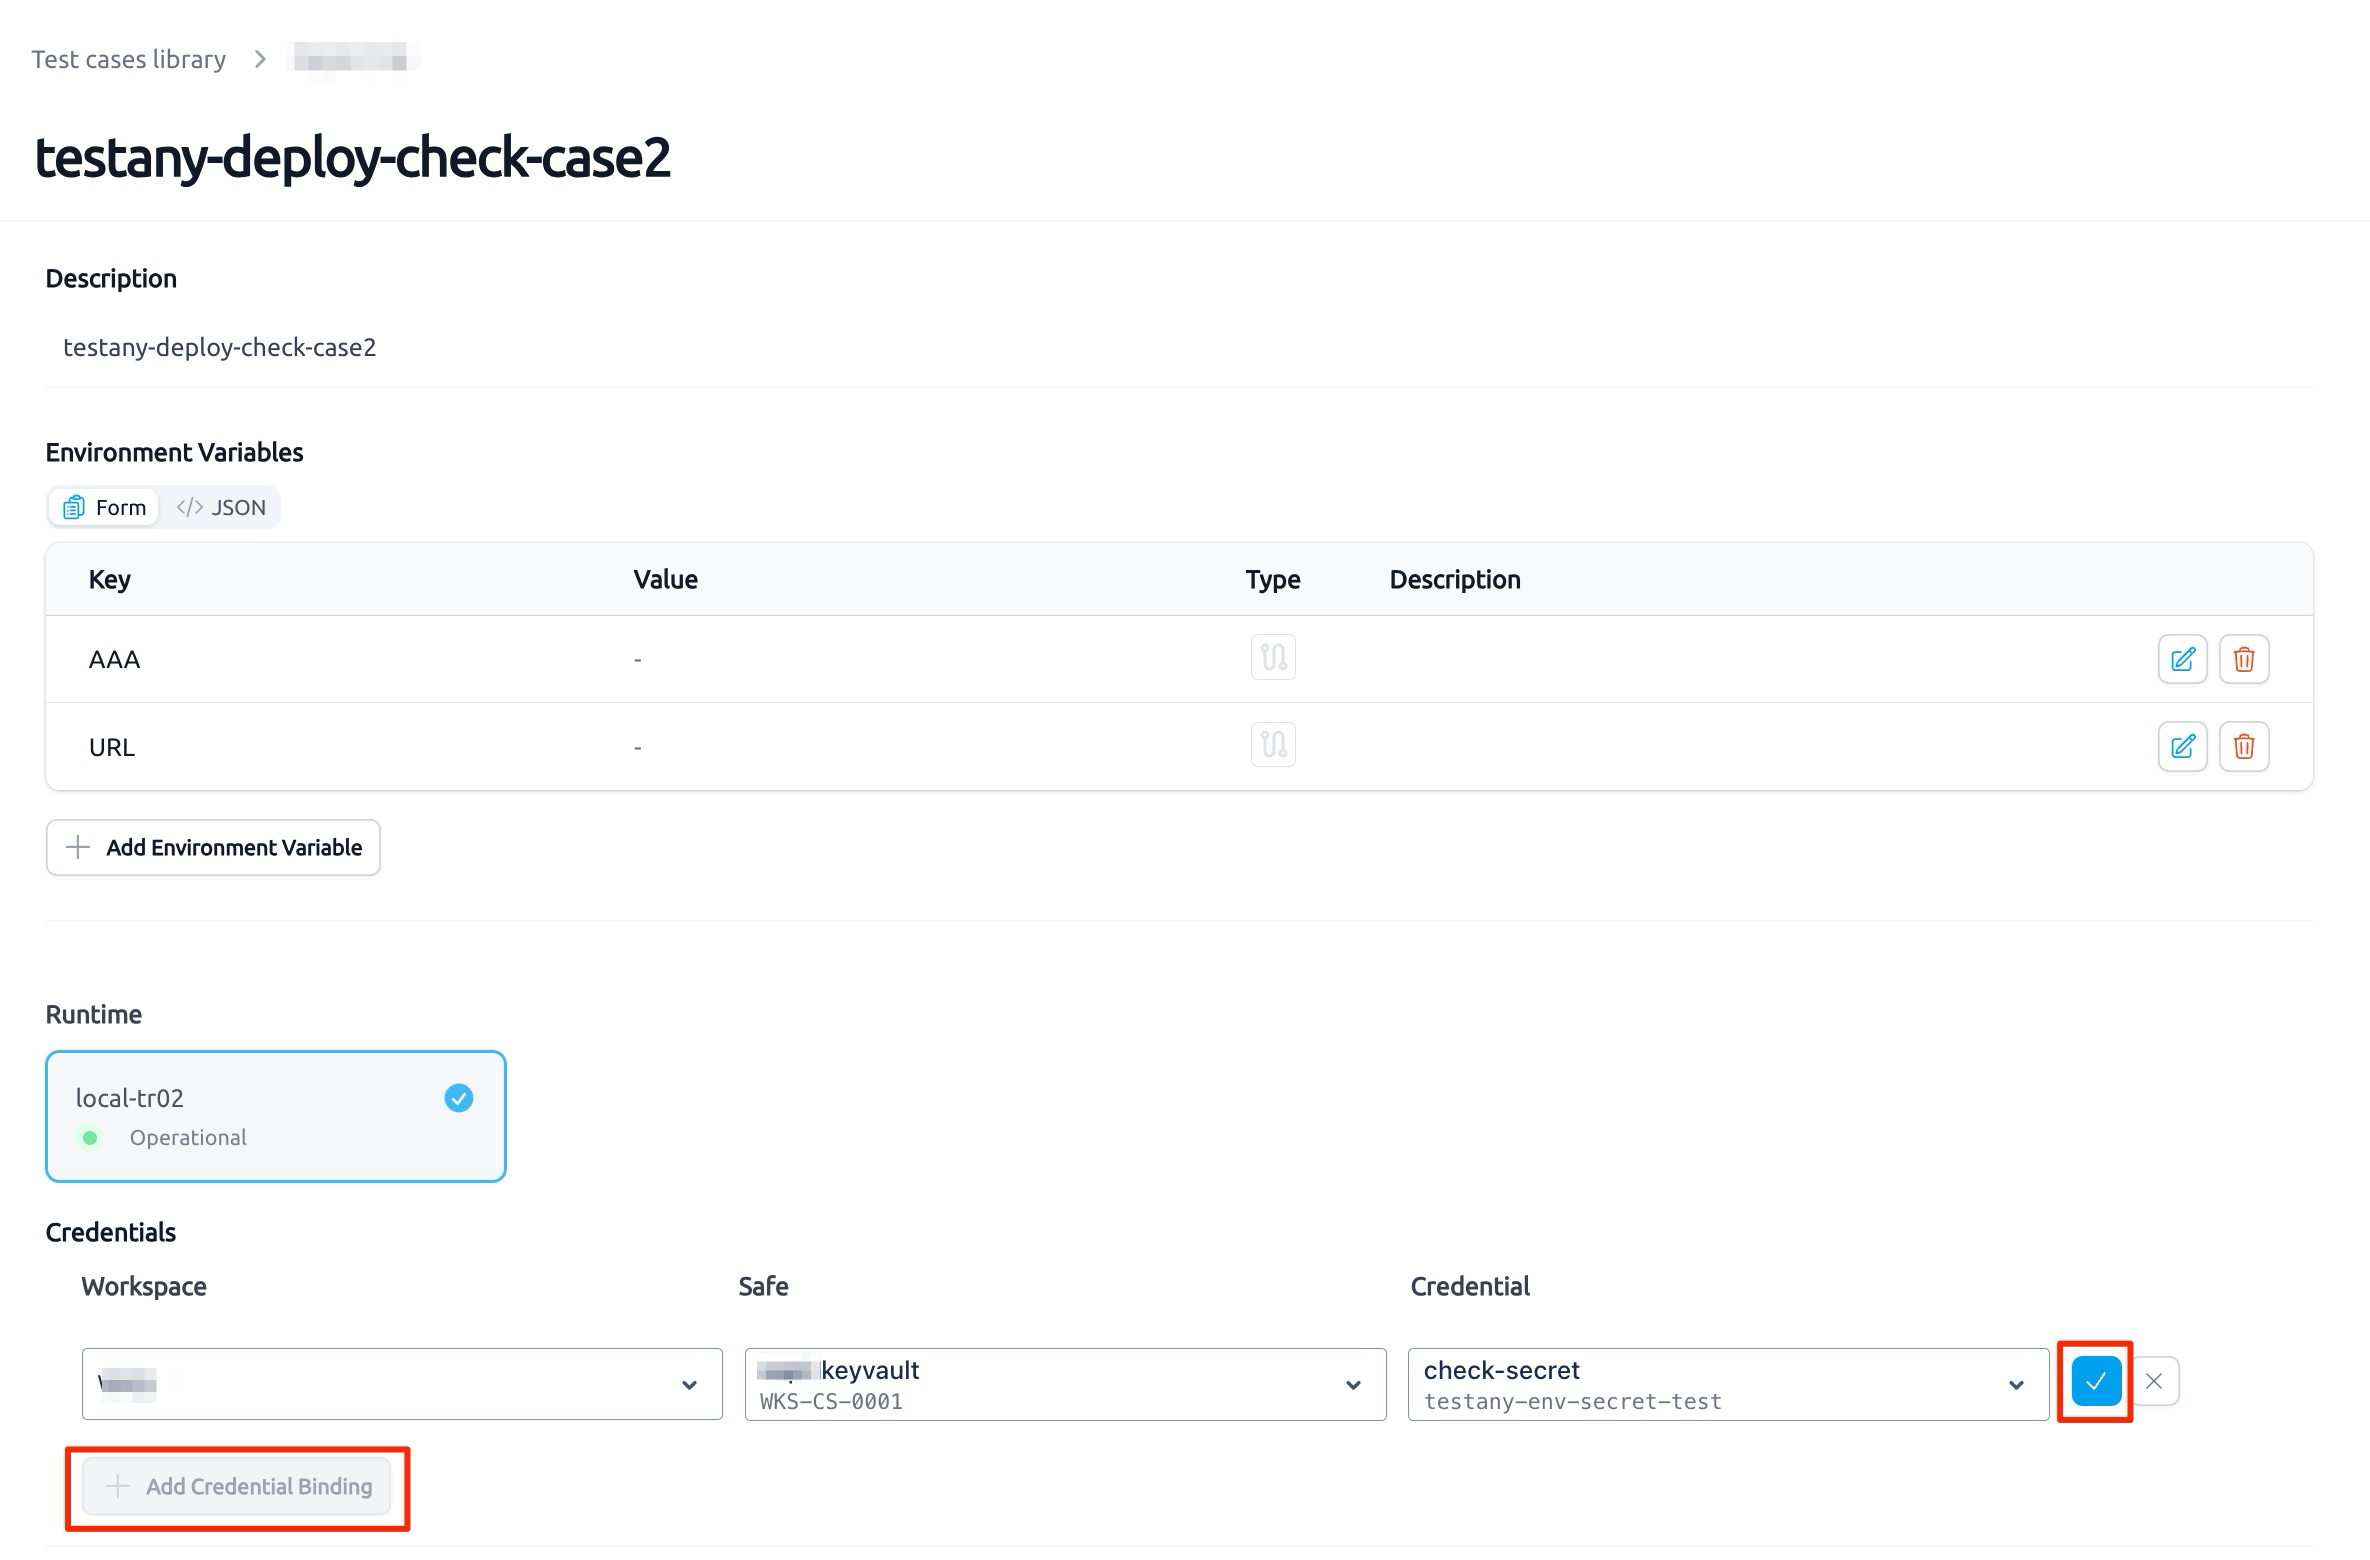
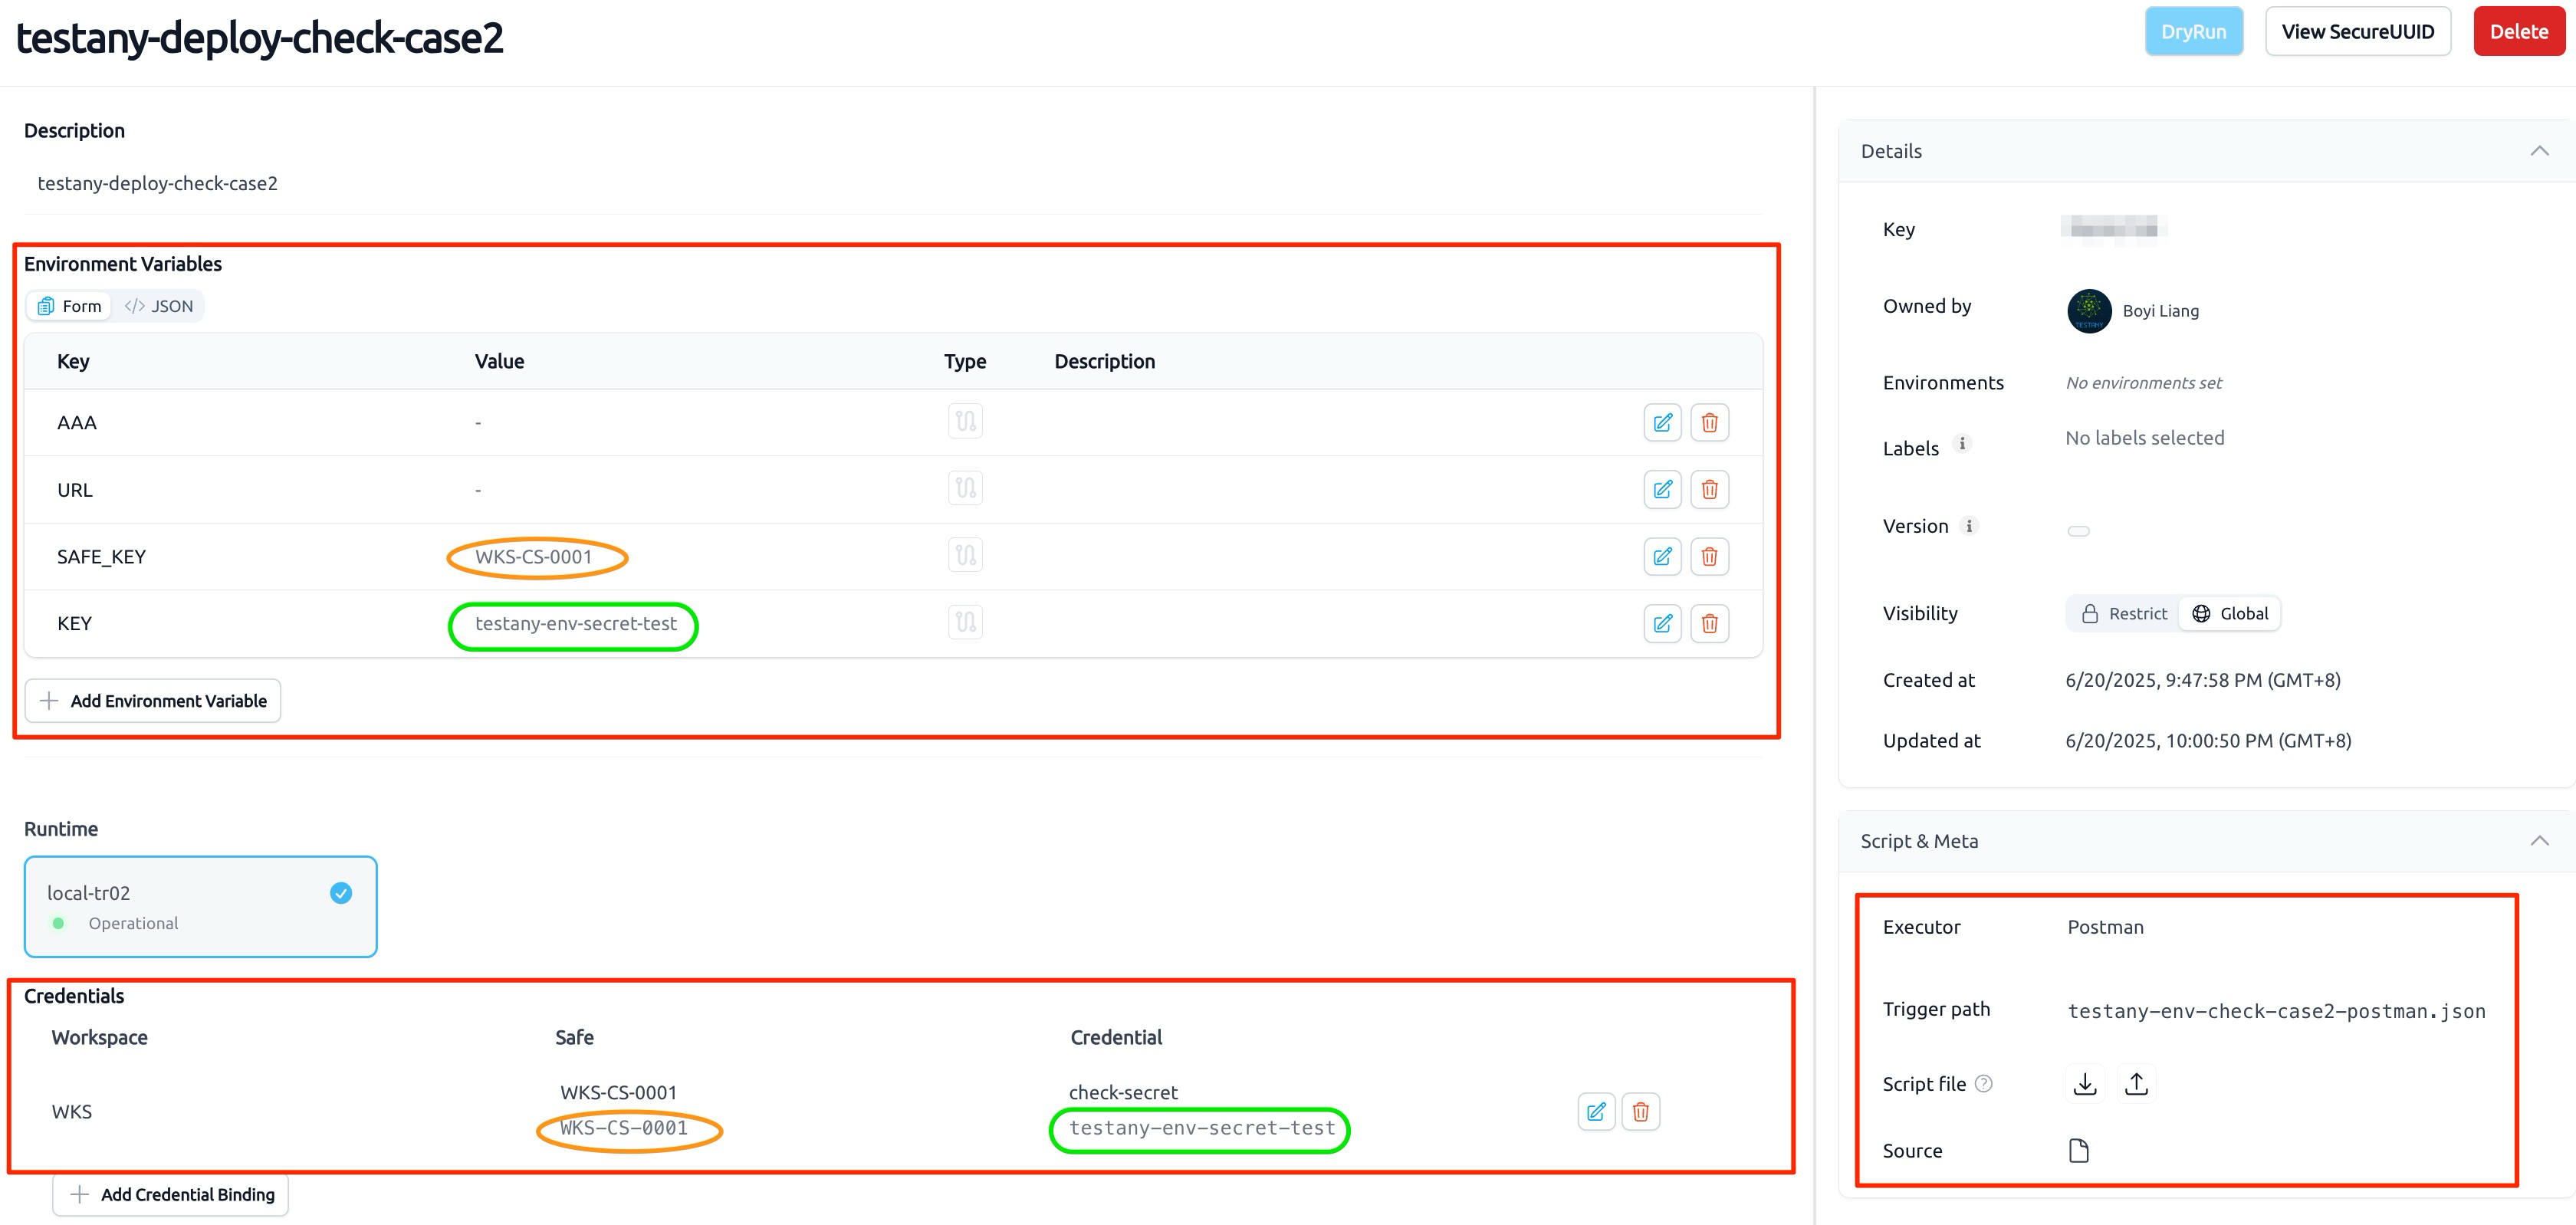
- Configure the credential reference: add a
Secretrow under the case Environment variables, then select the createdCredential SafeandCredential:
- Case 2 creation complete, check details to confirm configuration:
3. Create Pipeline
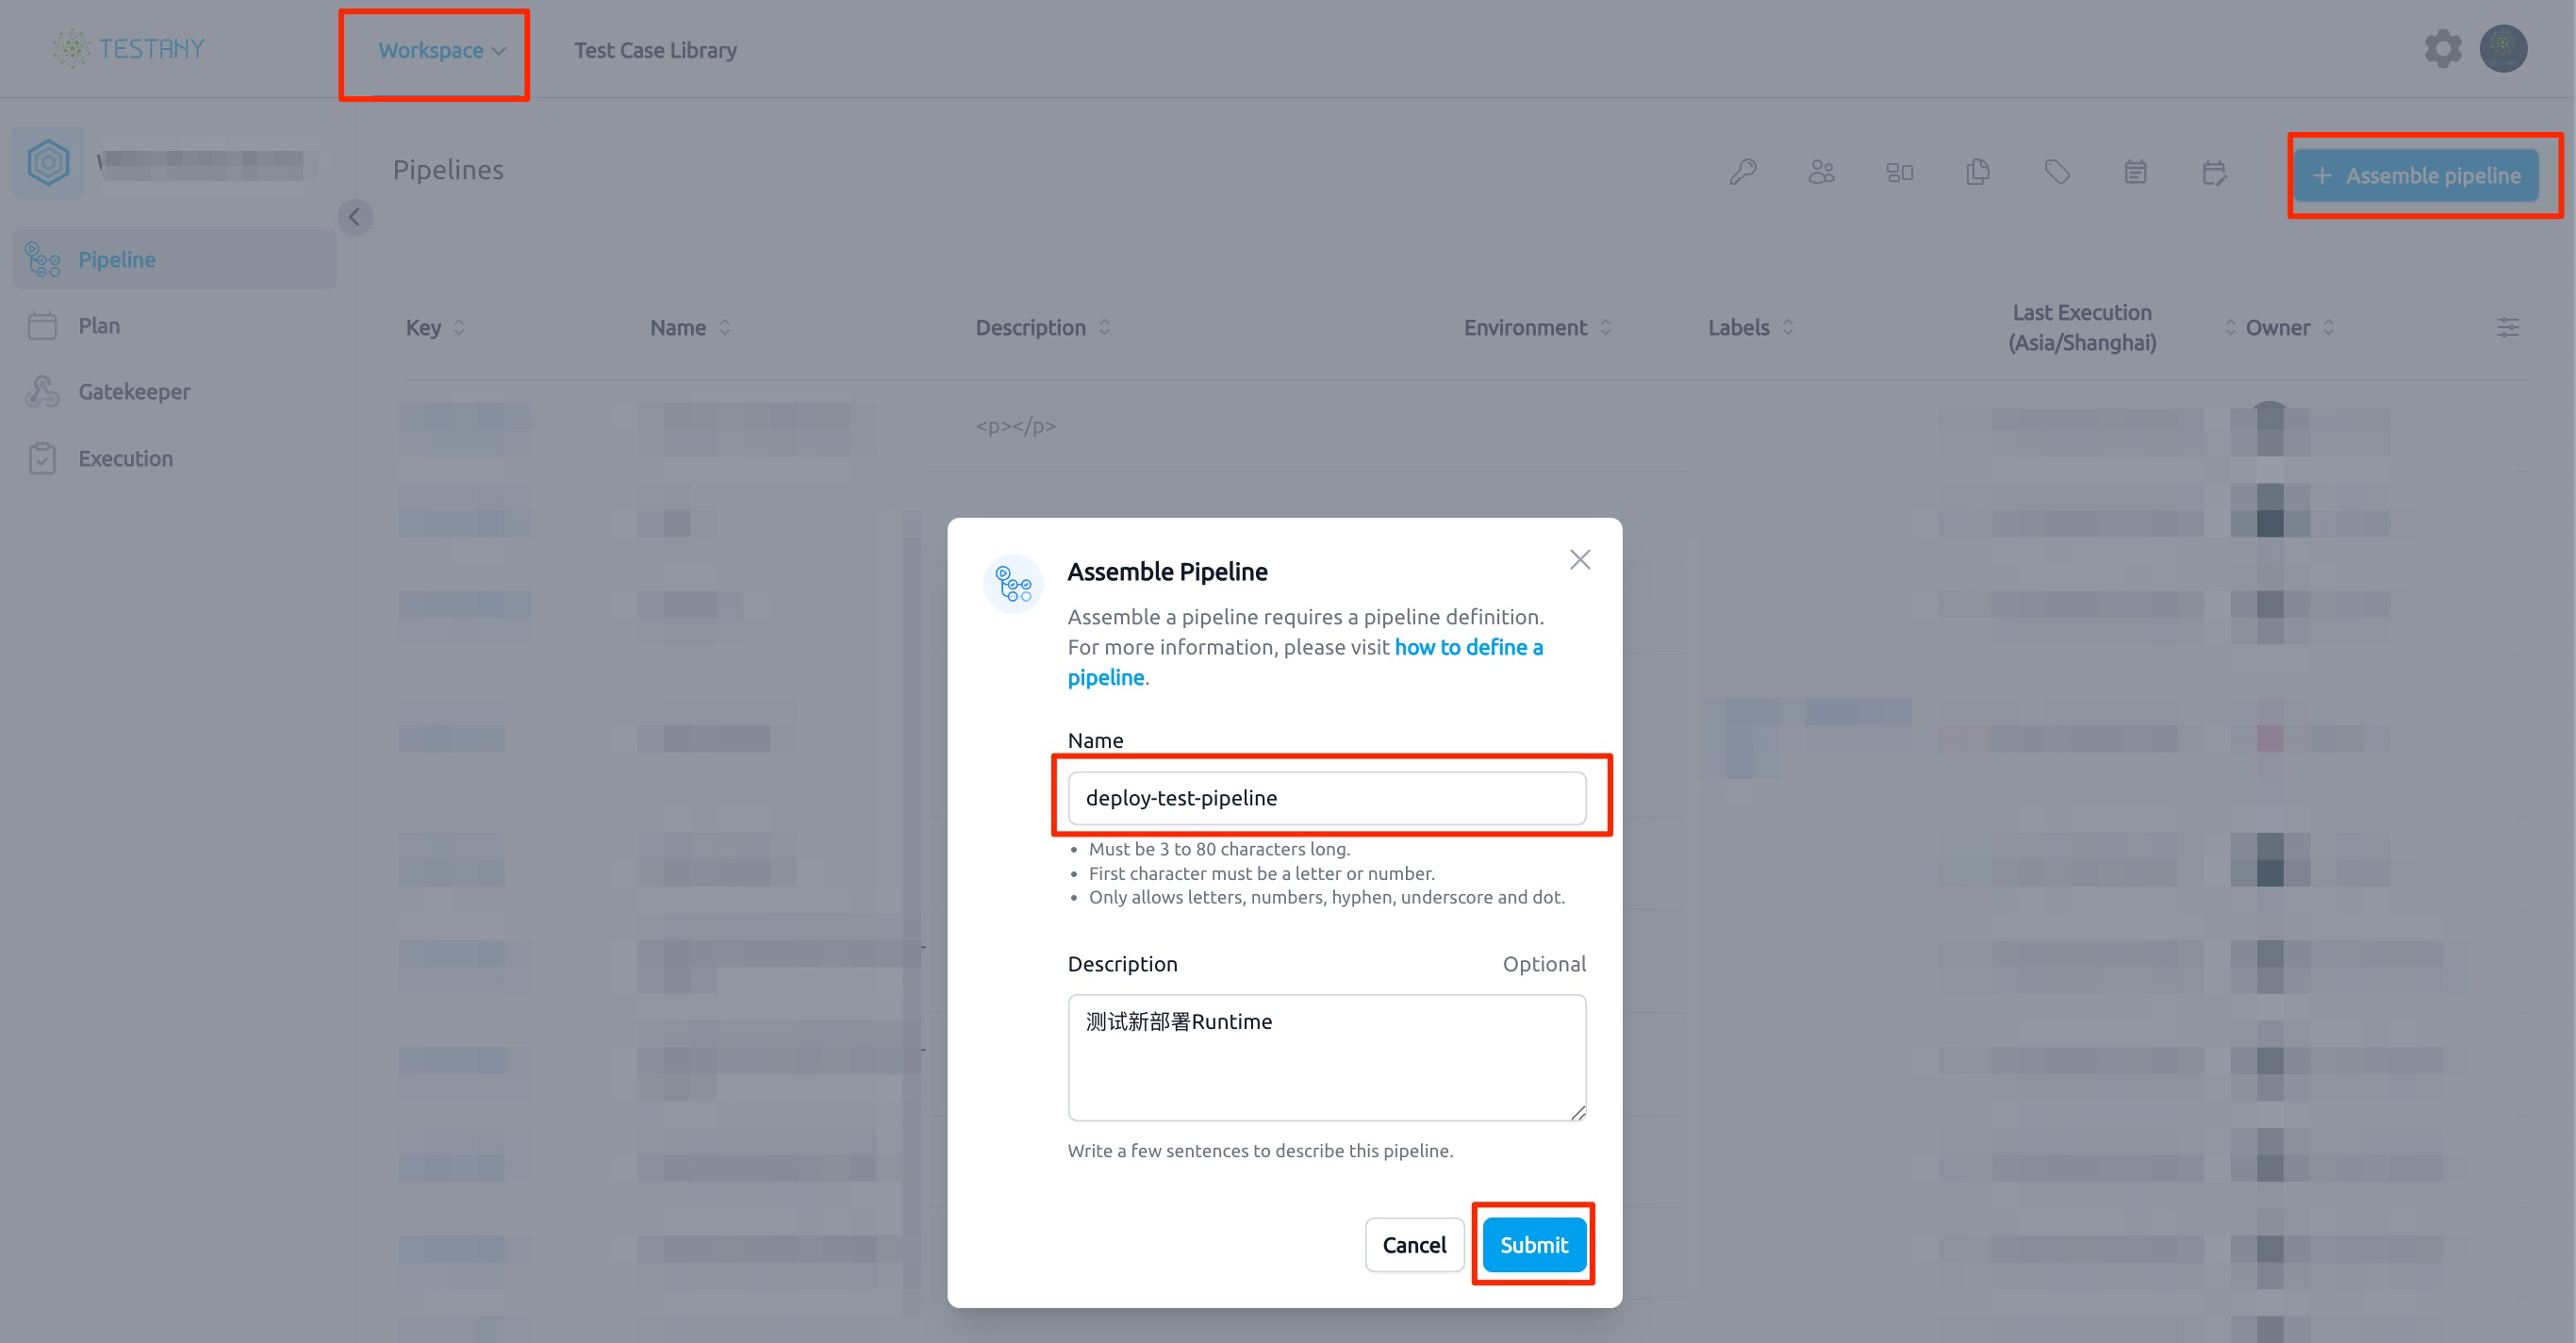
- Switch to the Workspace page, click "+ Assemble pipeline", and enter Pipeline information:
- Name:
deploy-test-pipeline - Description:
Test newly deployed Runtime
- Name:
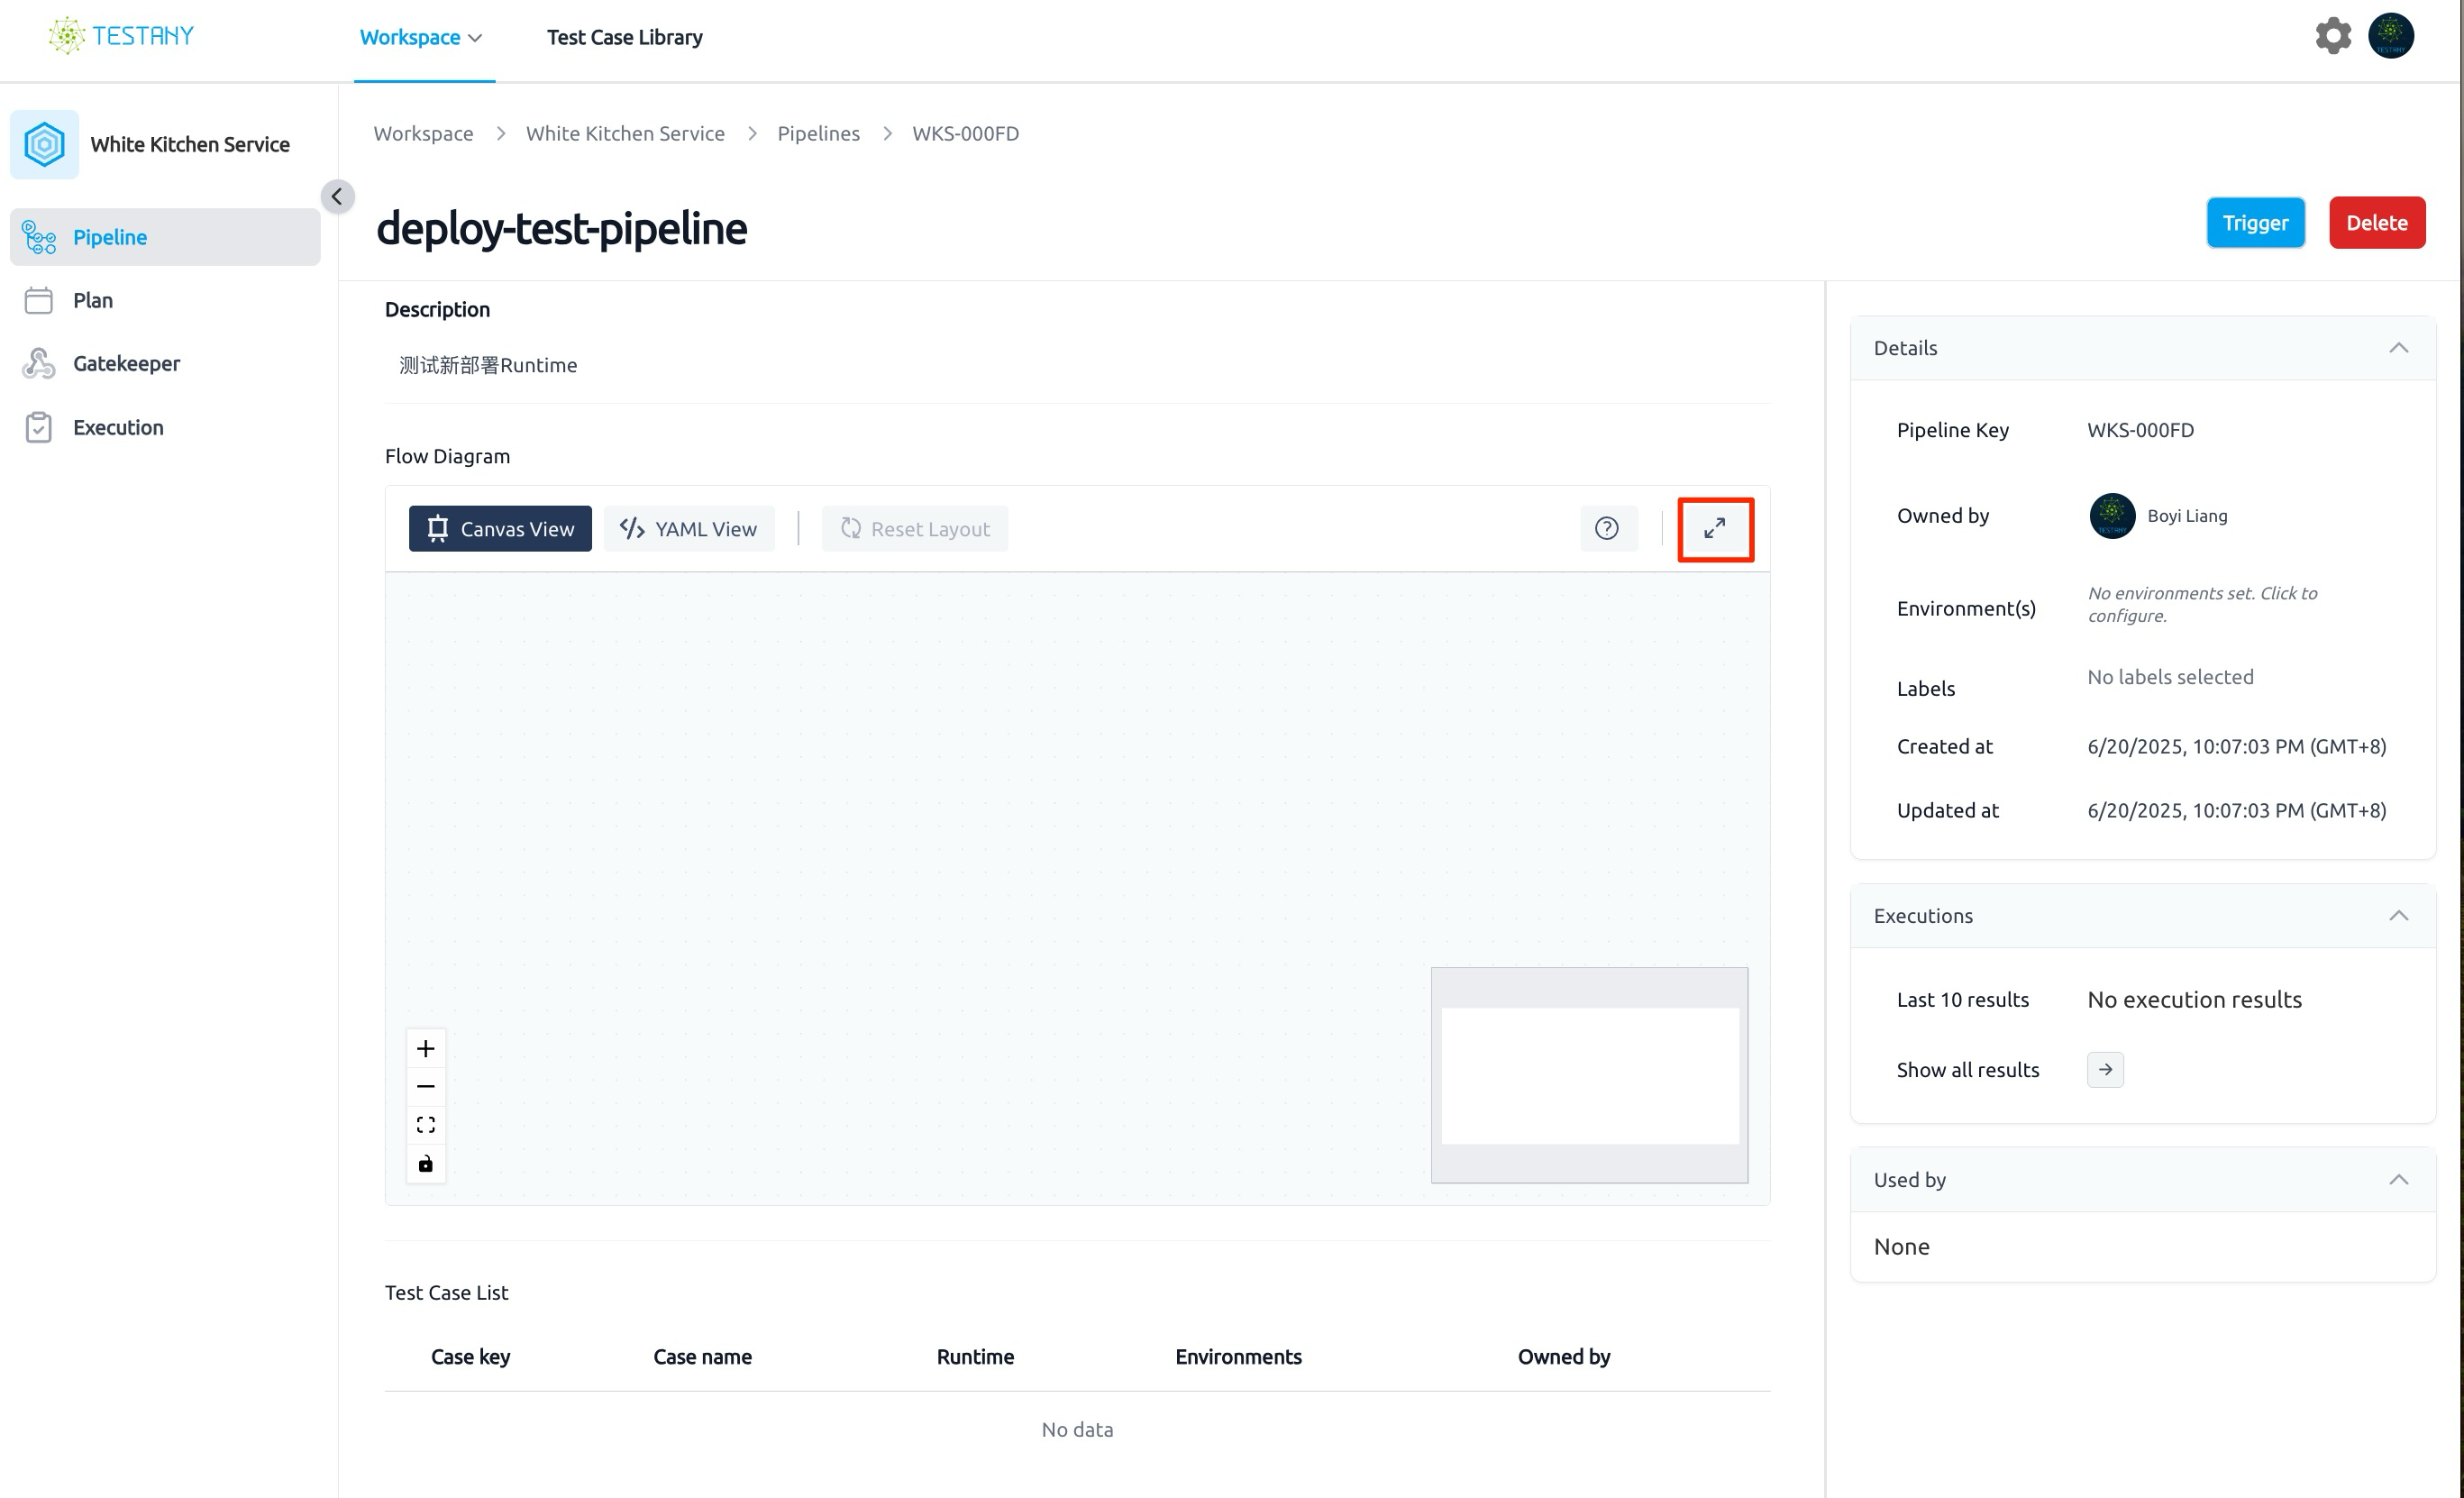
- Click the expand button:
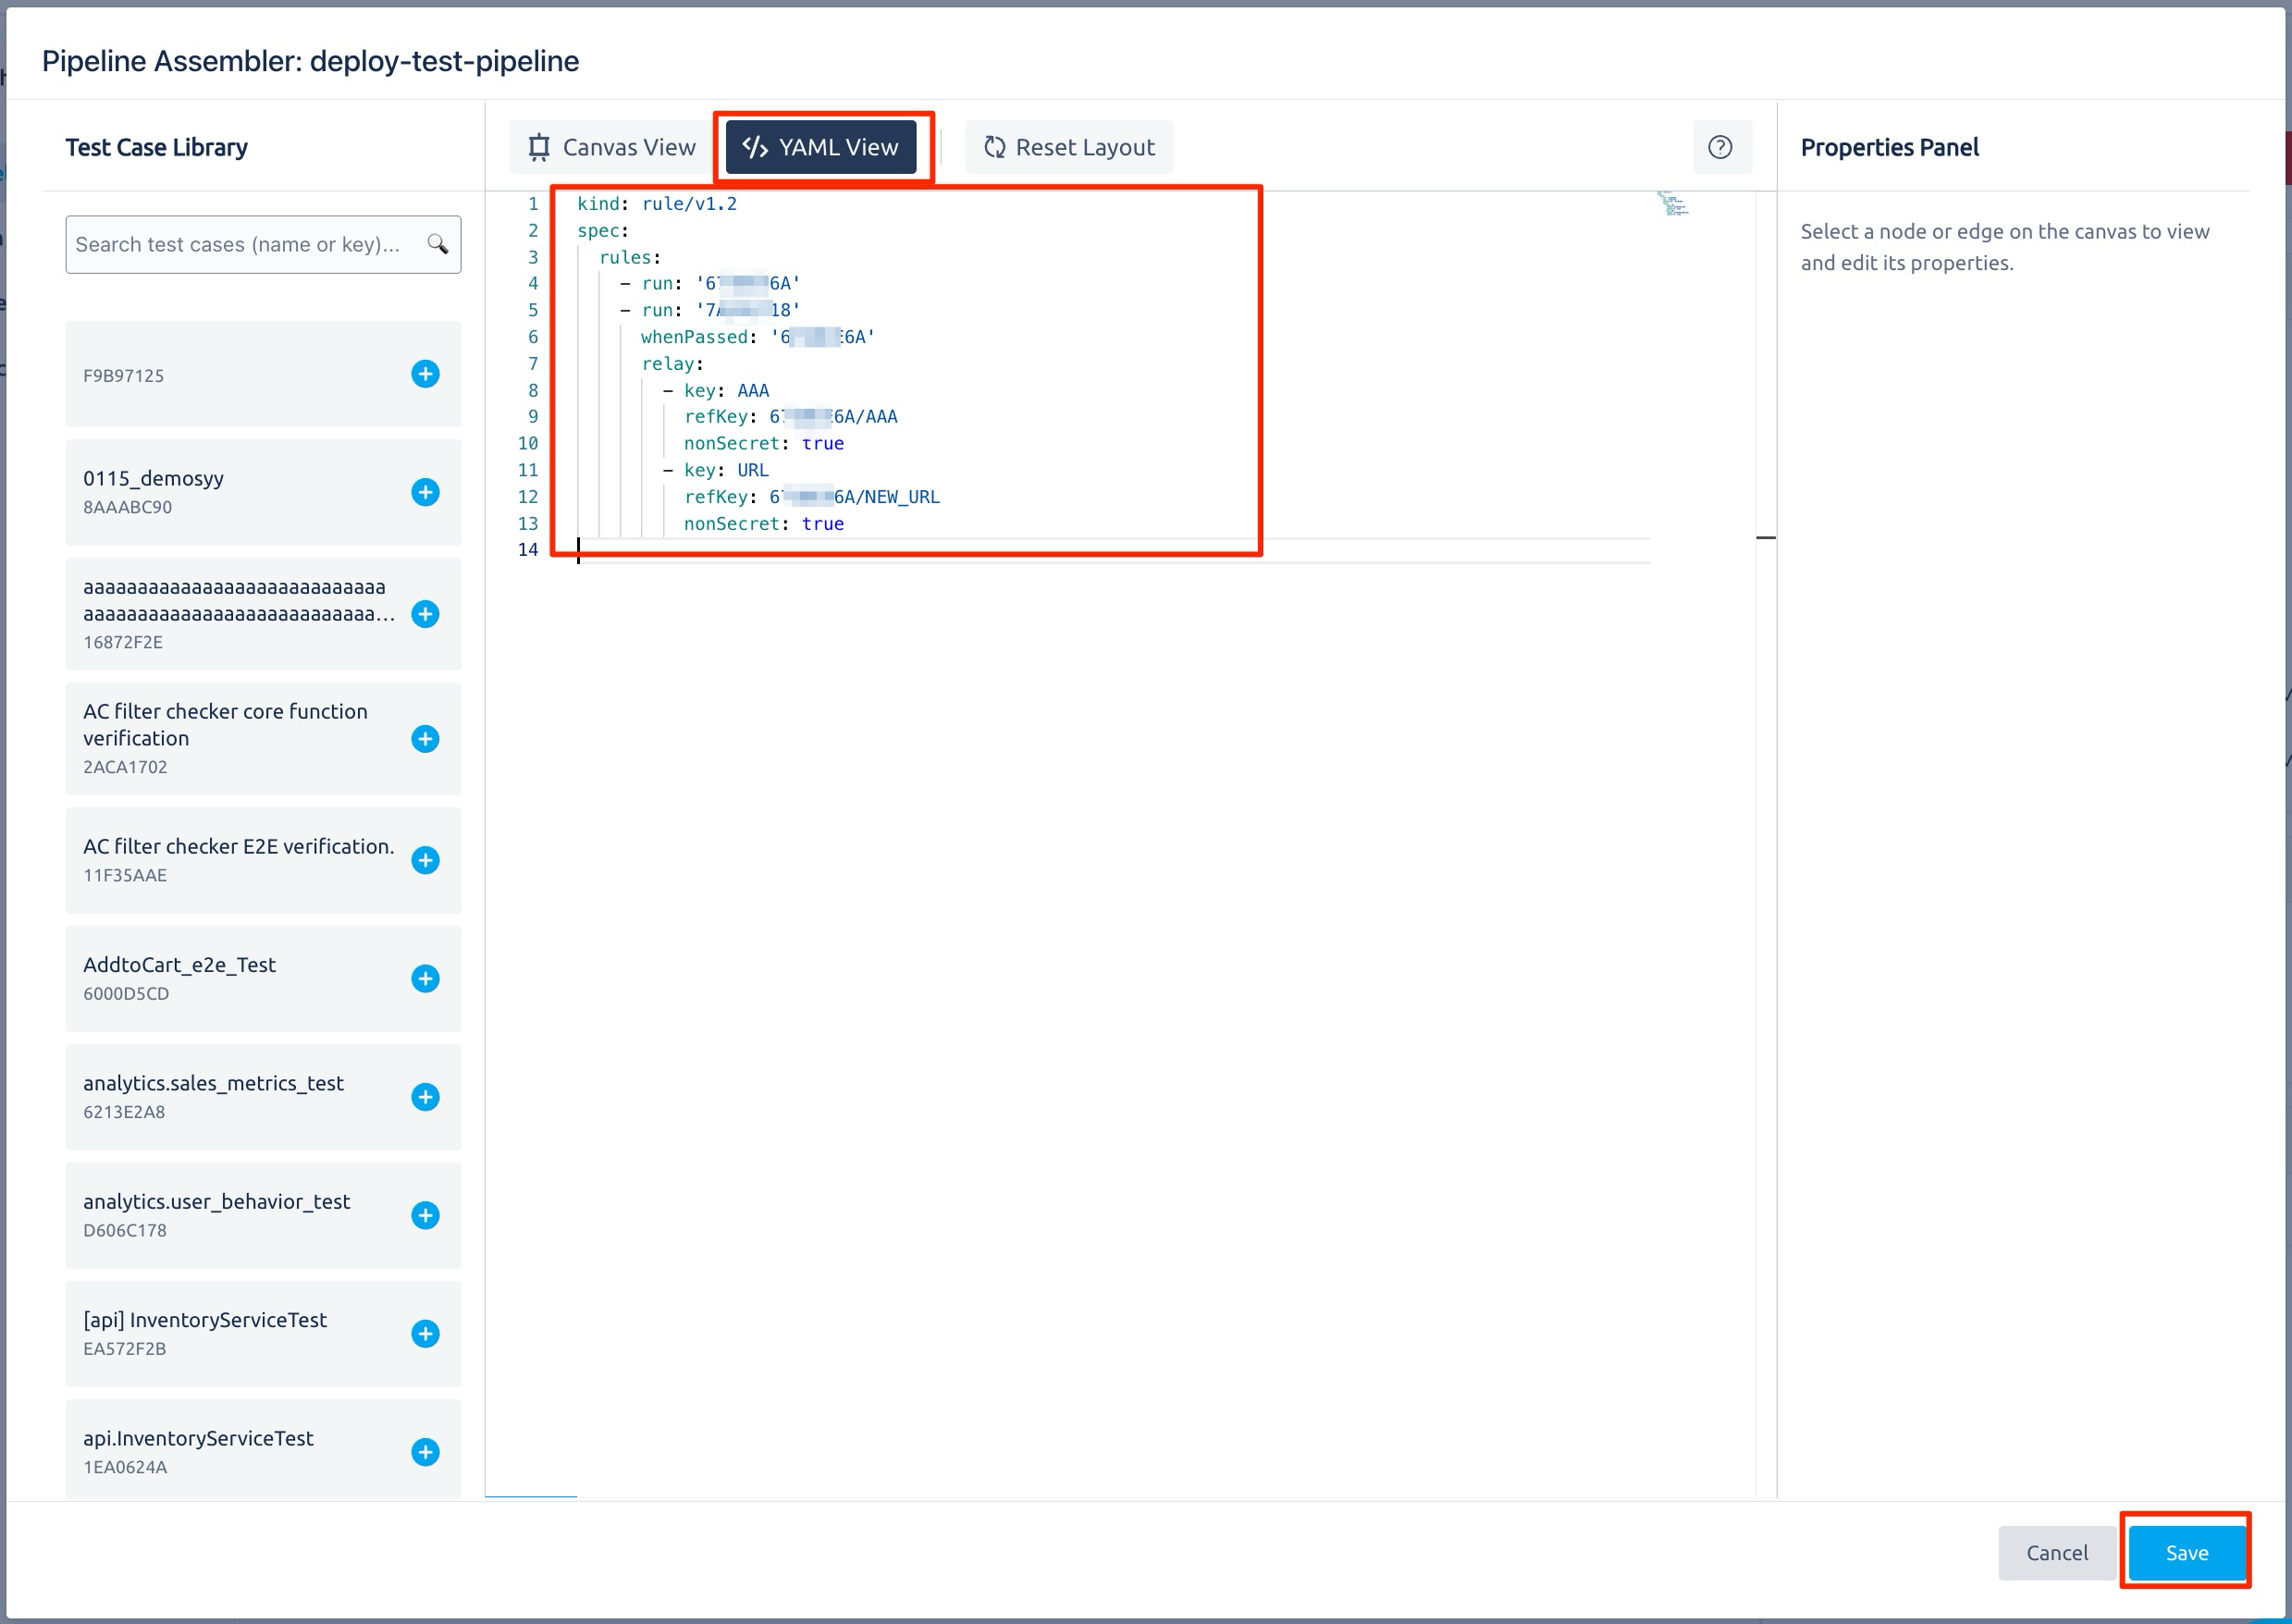
- Select "YAML View" and configure Pipeline rules:
YAMLkind: rule/v1.3 spec: rules: - run: 'CASE1_KEY' - run: 'CASE2_KEY' whenPassed: 'CASE1_KEY' relay: - key: AAA refKey: CASE1_KEY/AAA nonSecret: true - key: URL refKey: CASE1_KEY/NEW_URL nonSecret: true
Replace CASE1_KEY and CASE2_KEY with the actual Case Keys (8-character strings).
For this newly created pipeline, rule/v1.3 is the recommended version. rule/v1.2 is retained only for backward compatibility.
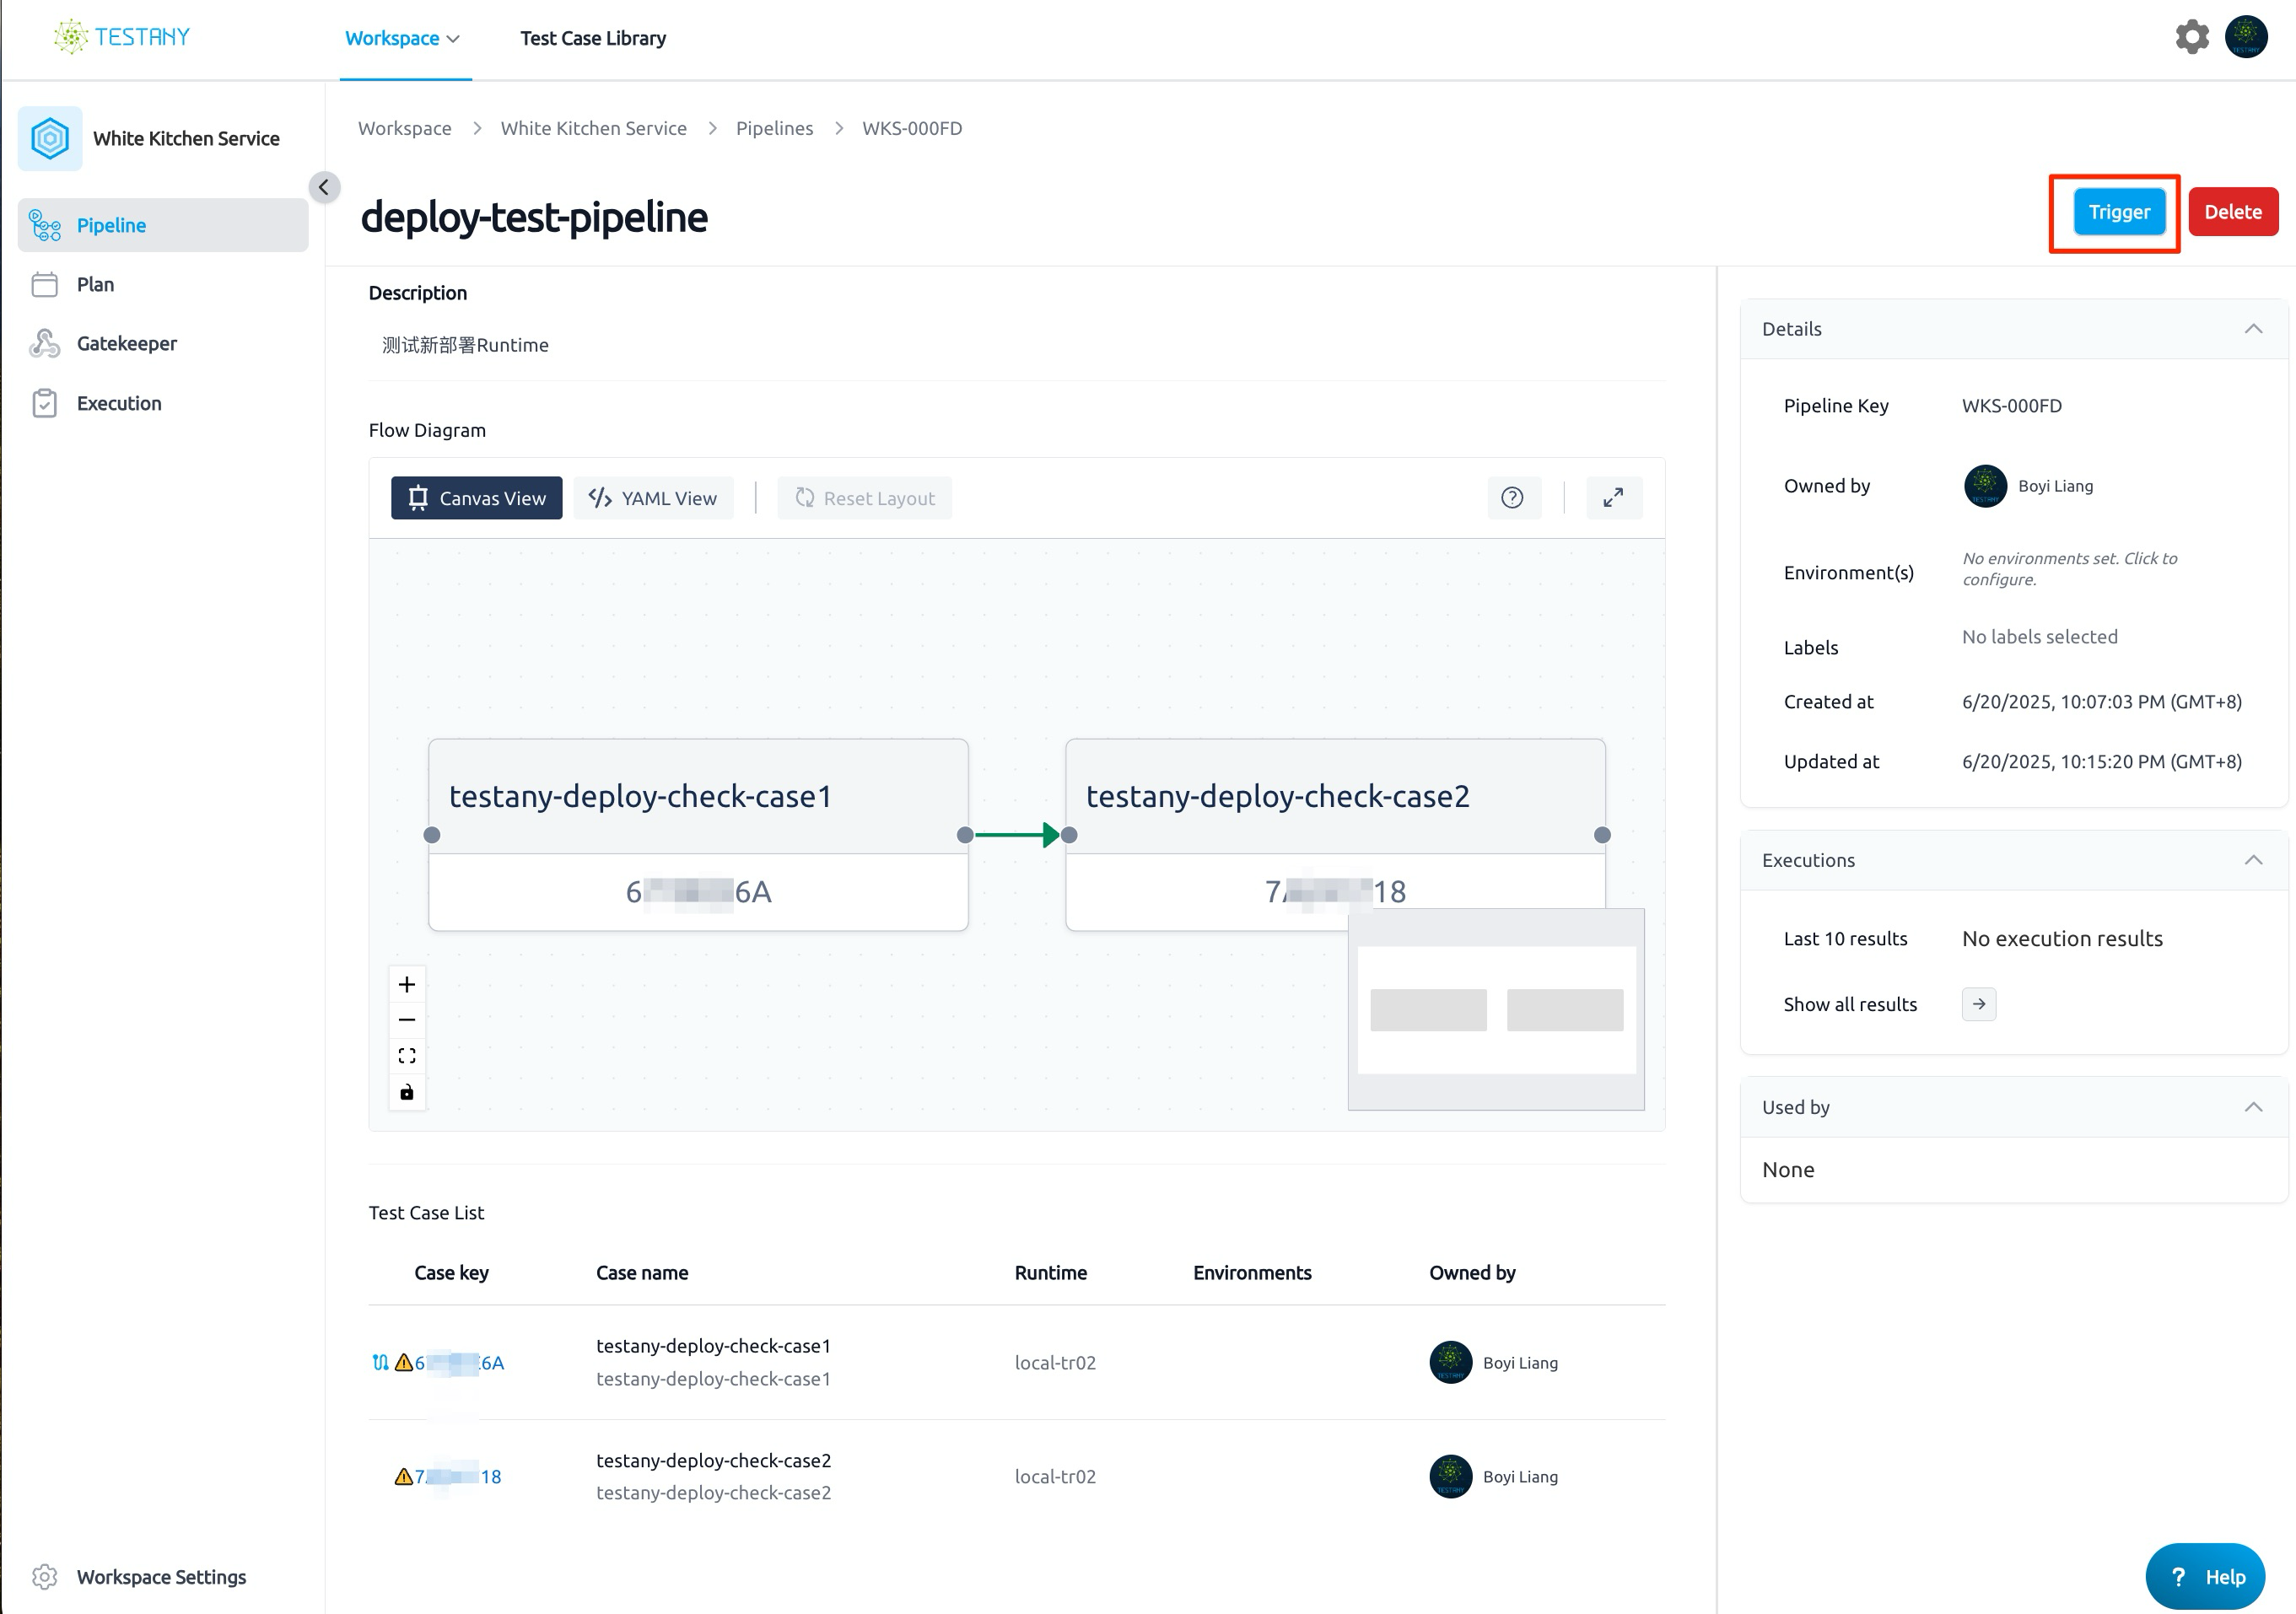
- Refresh the Pipeline page and click the "Trigger" button to execute the Pipeline:
4. View Execution Results
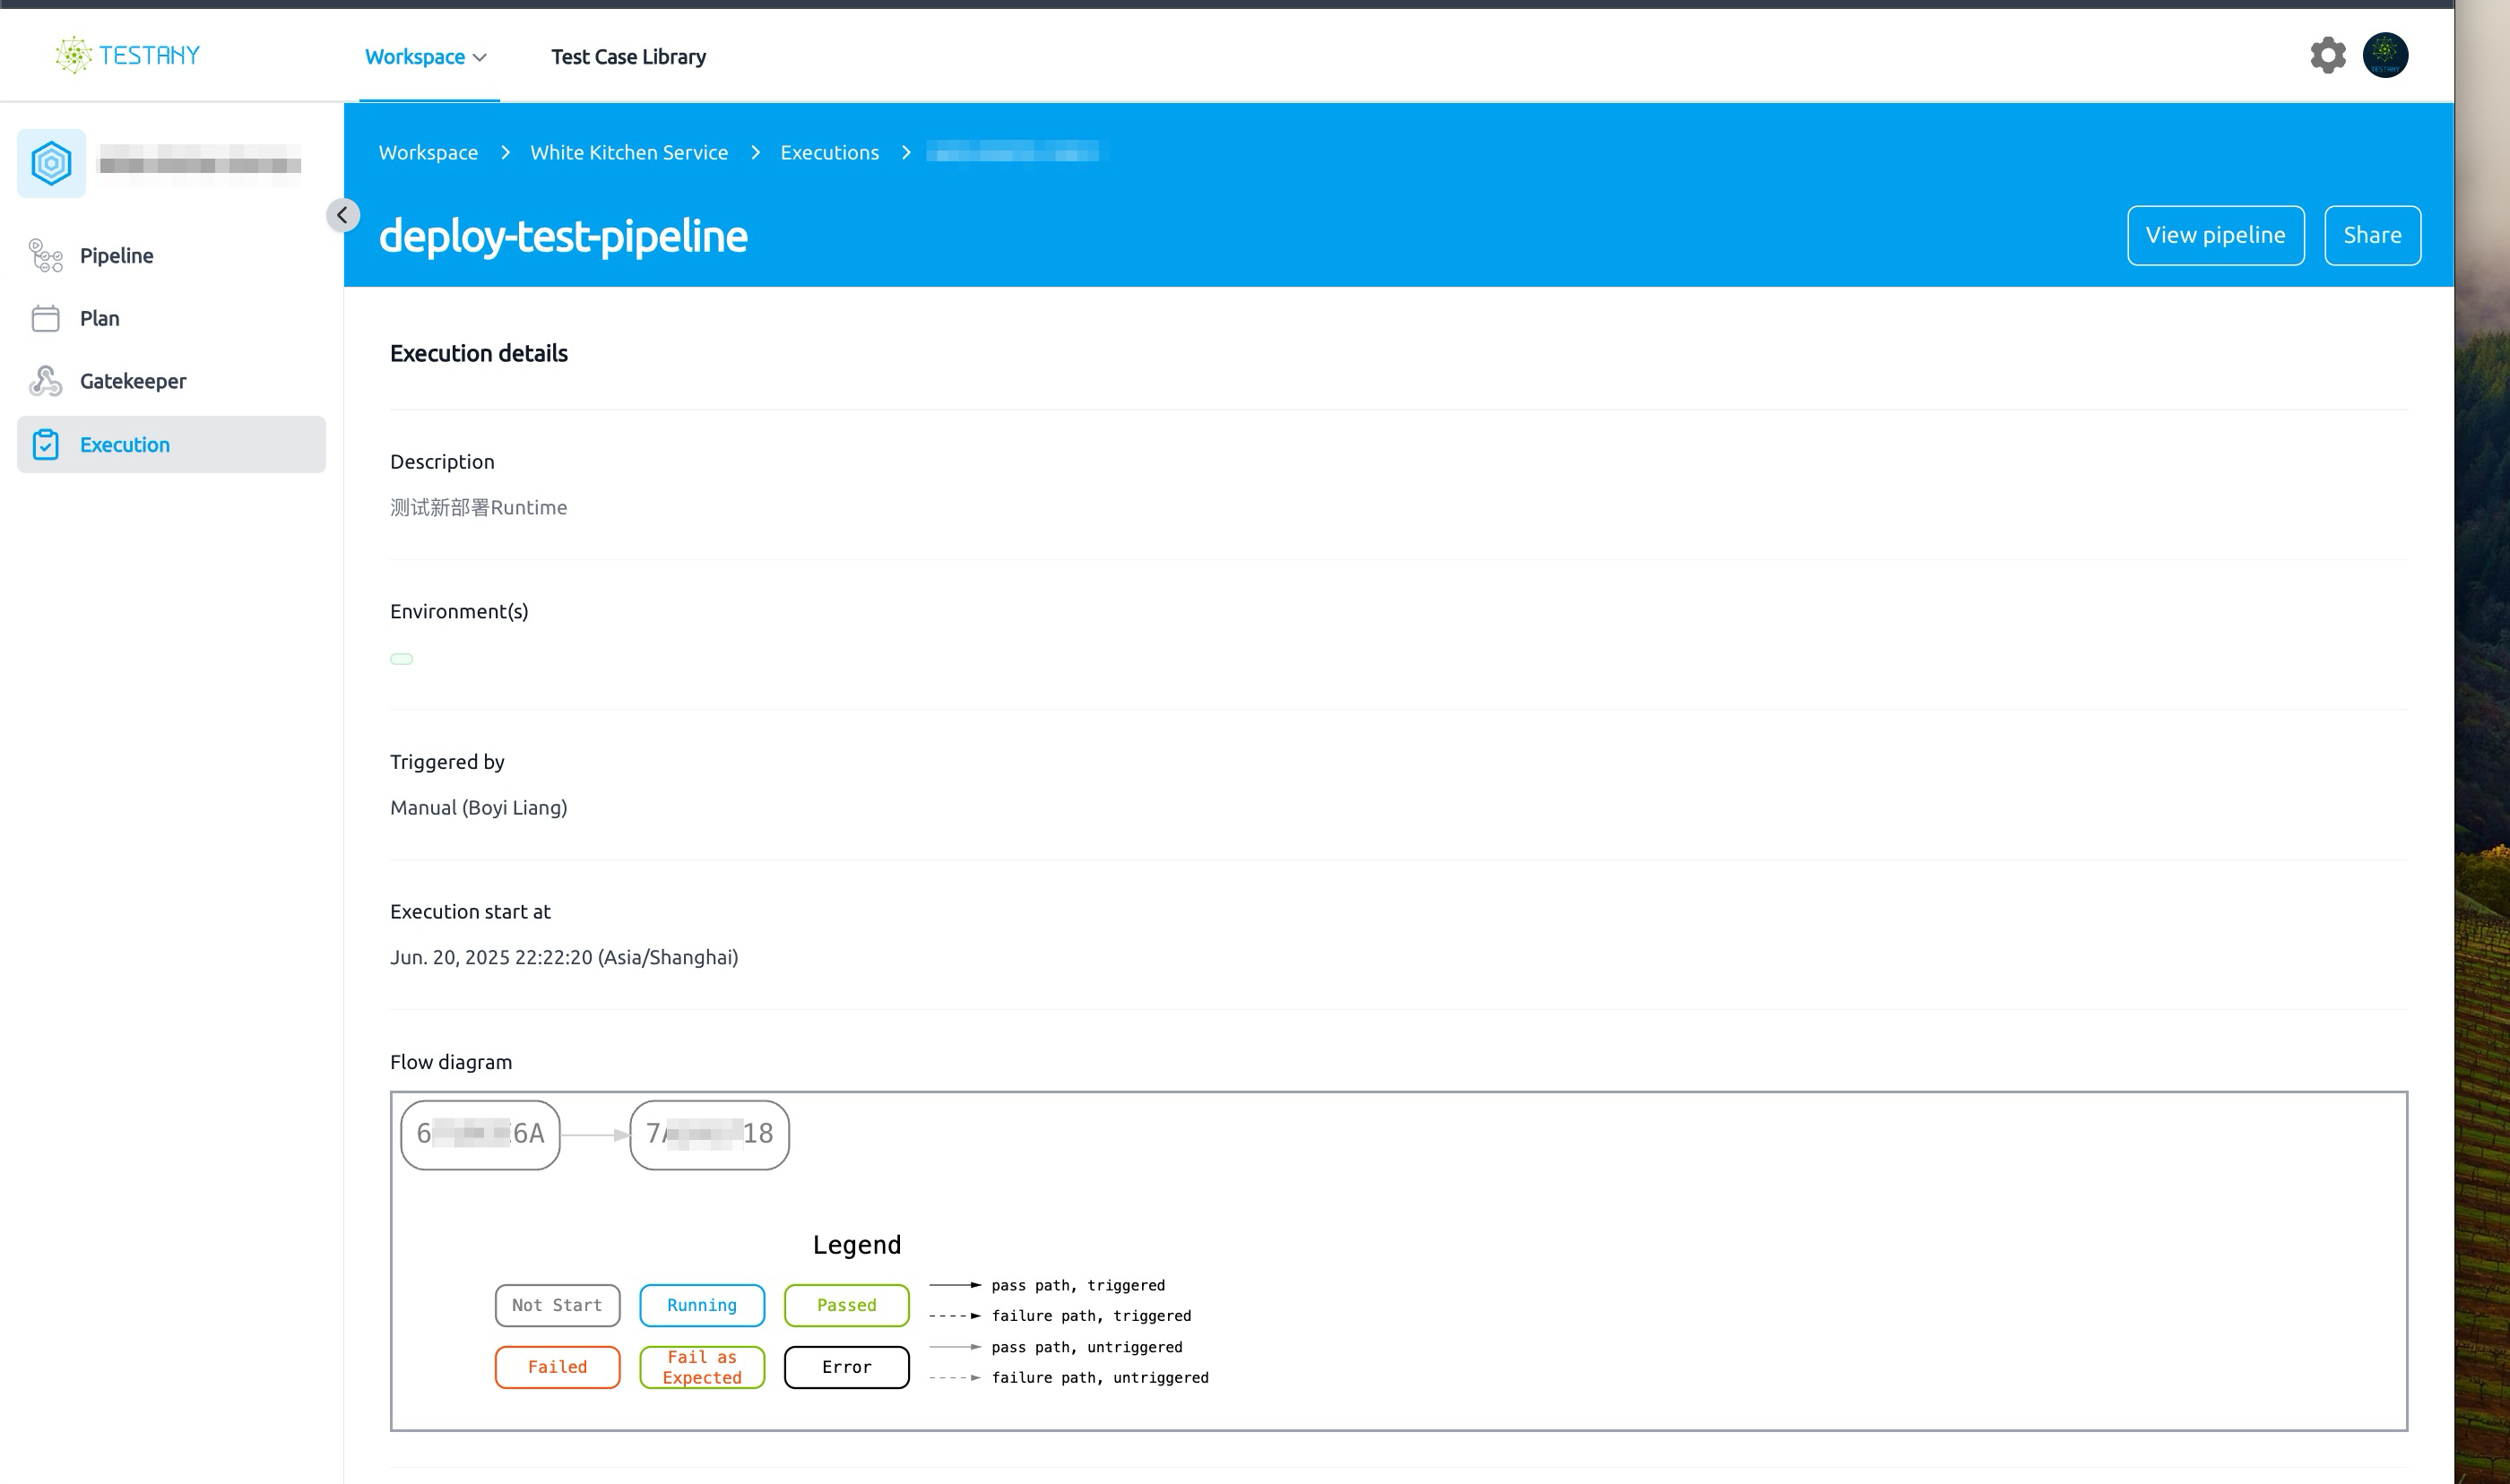
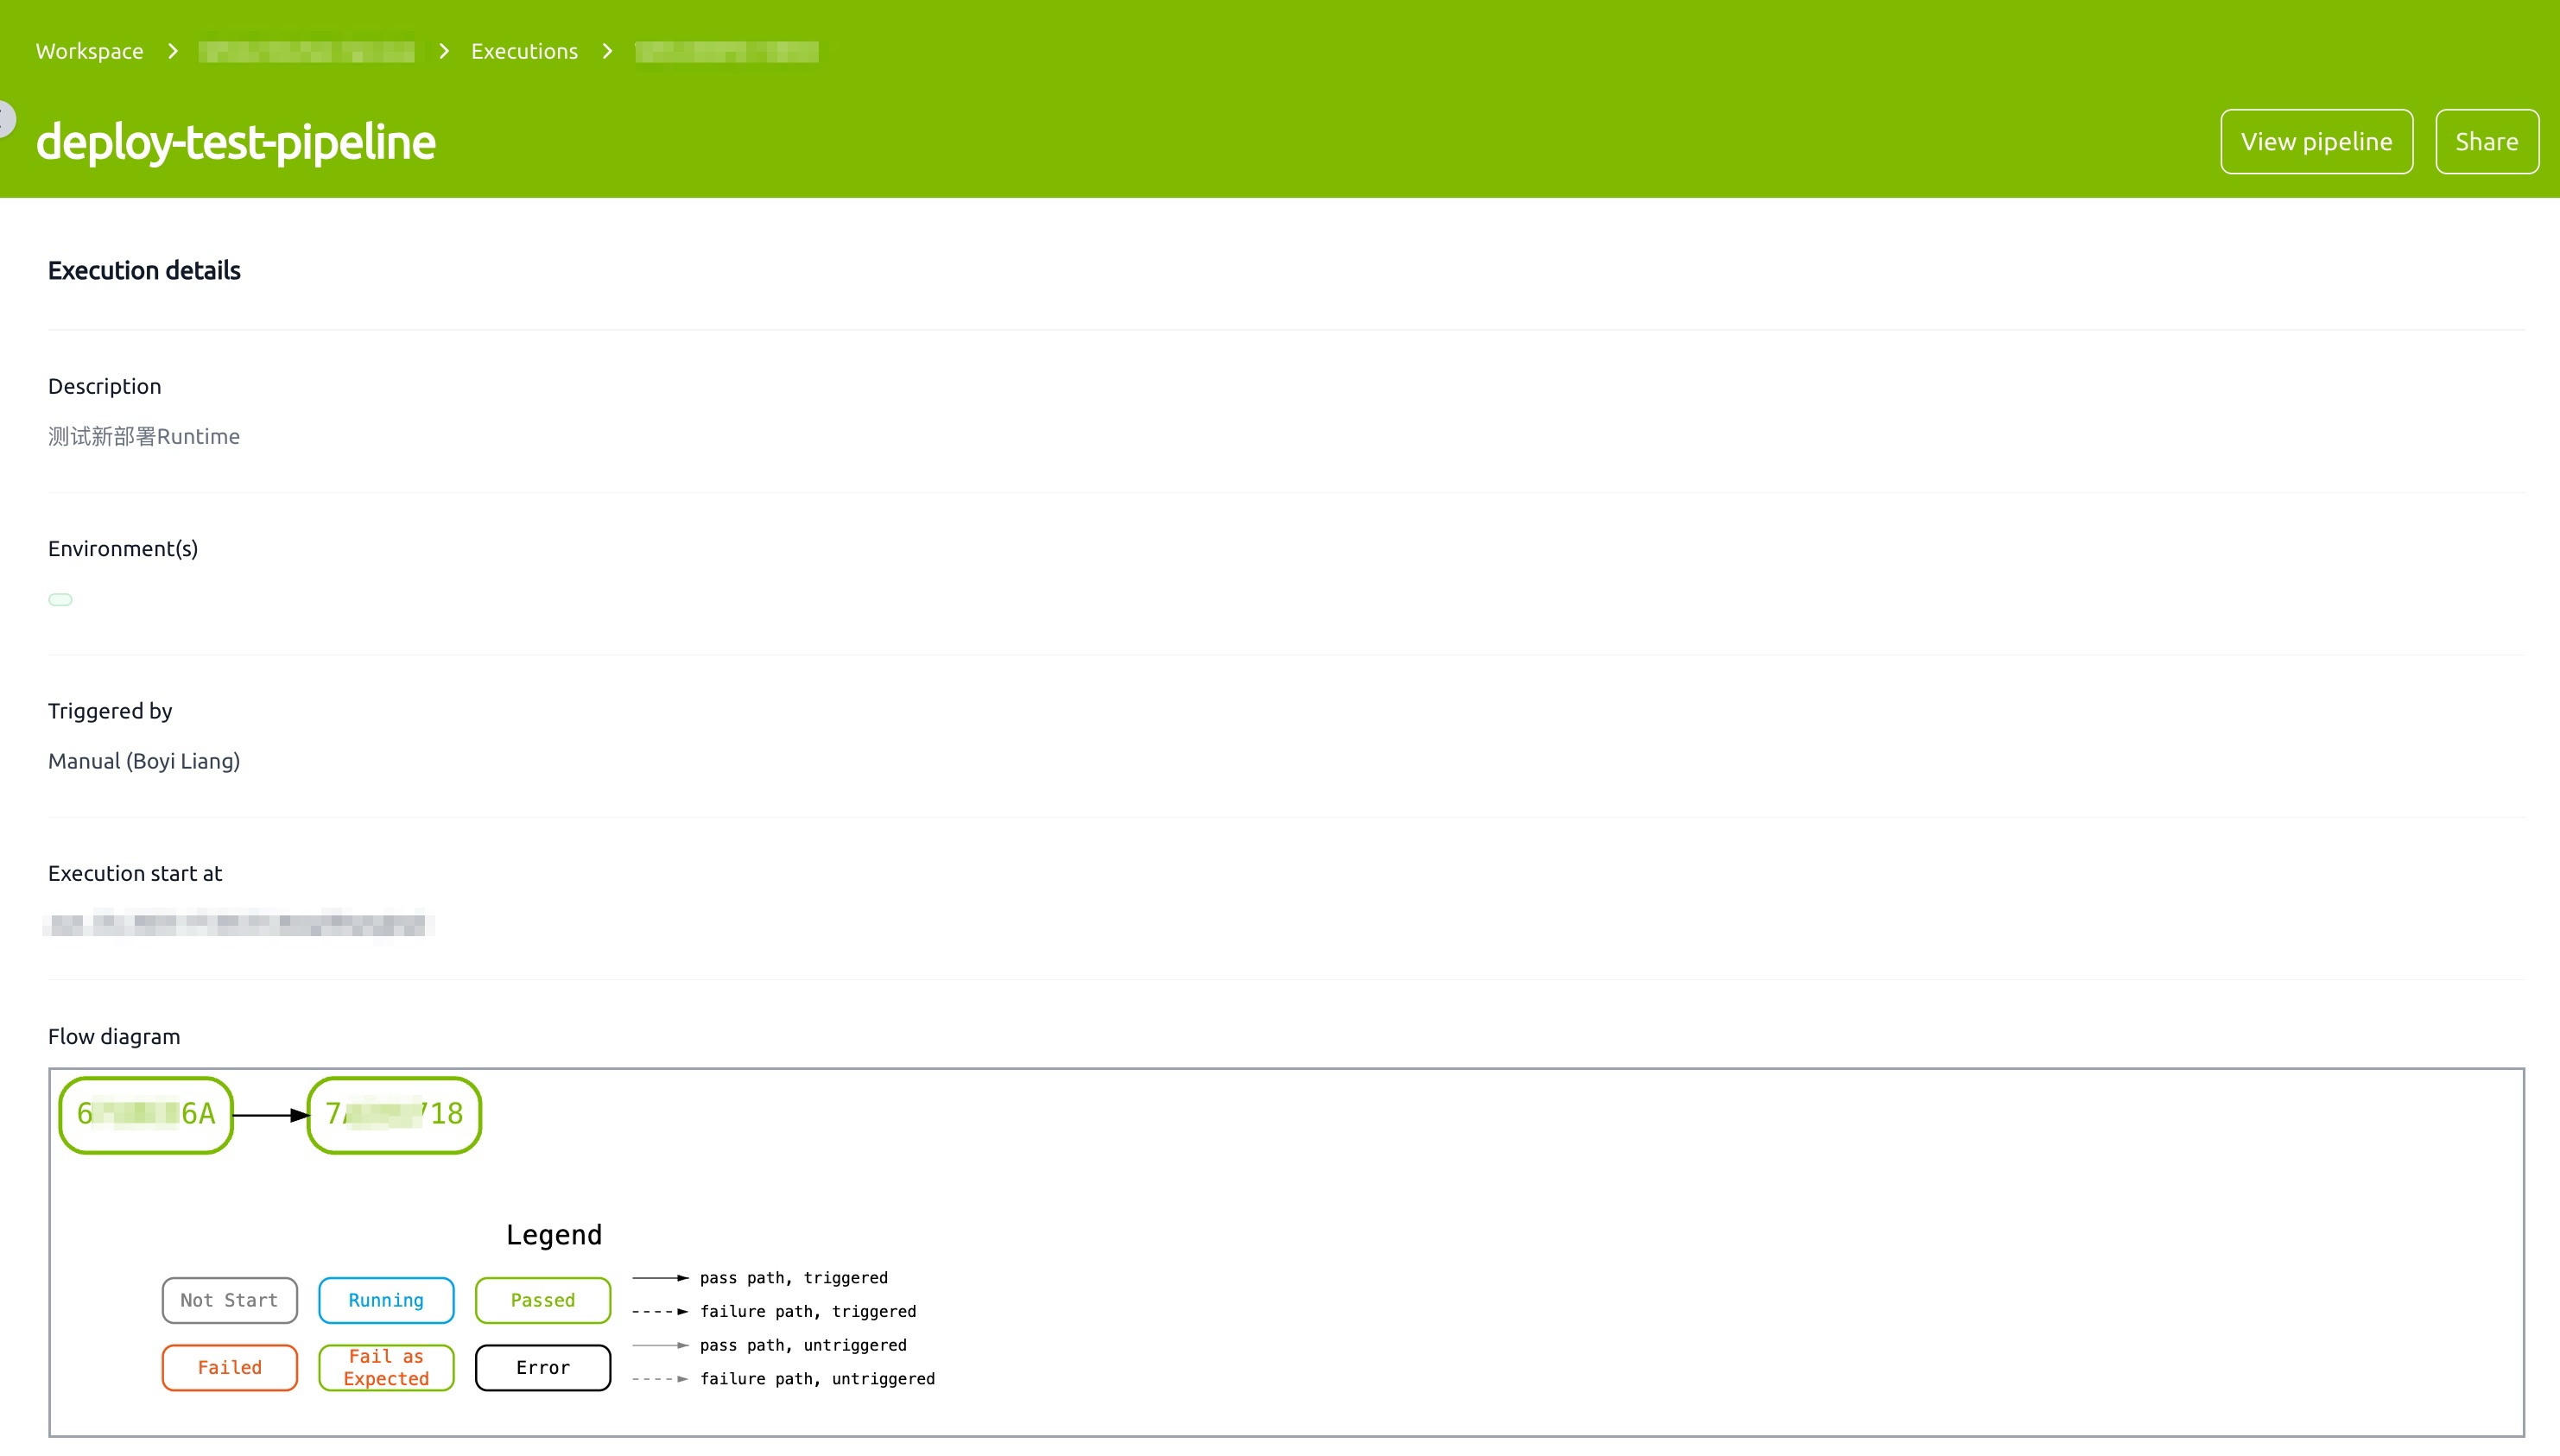
- View Pipeline execution status:
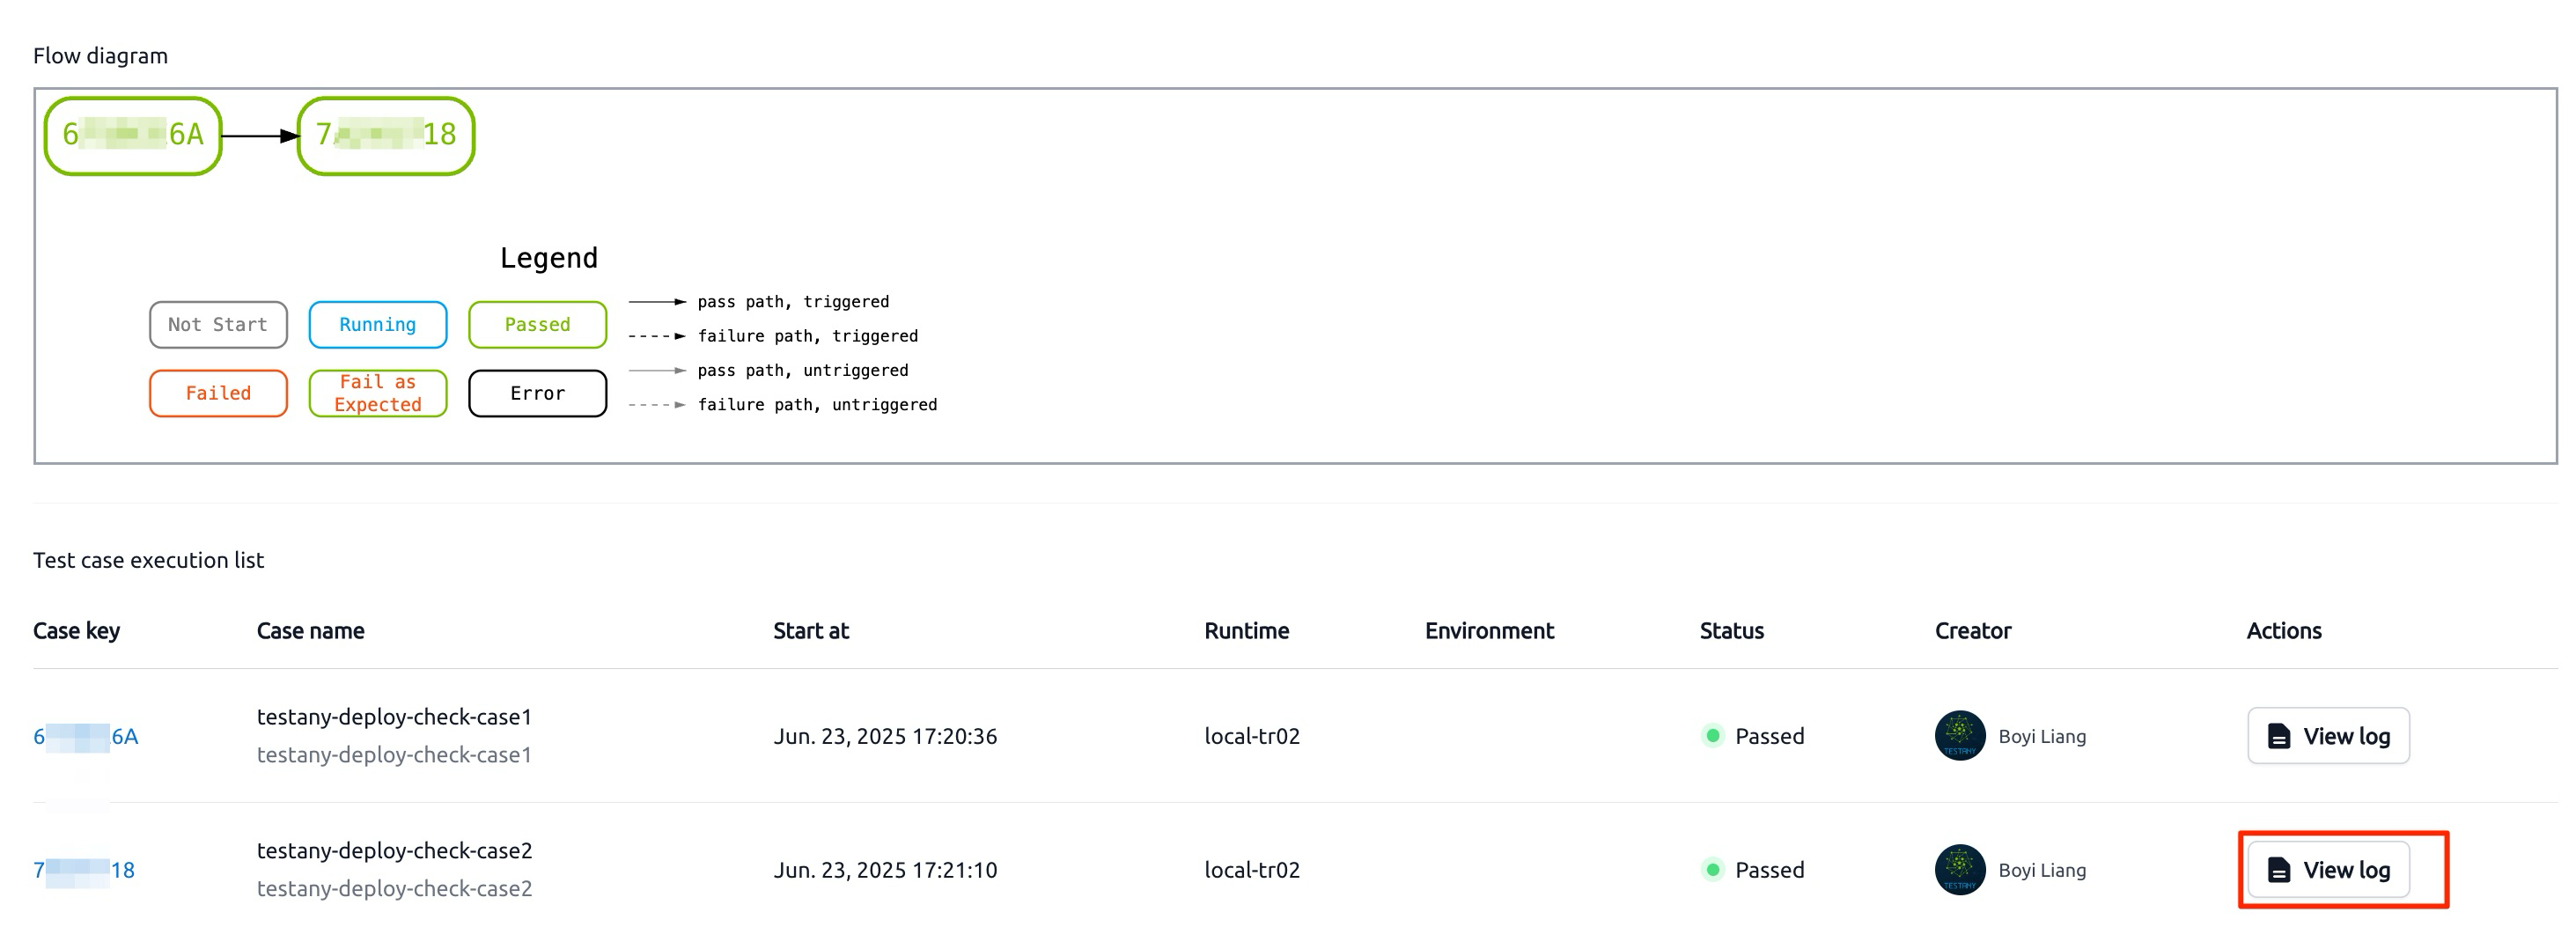
- Click the "View log" button for Case 2 to view execution logs:
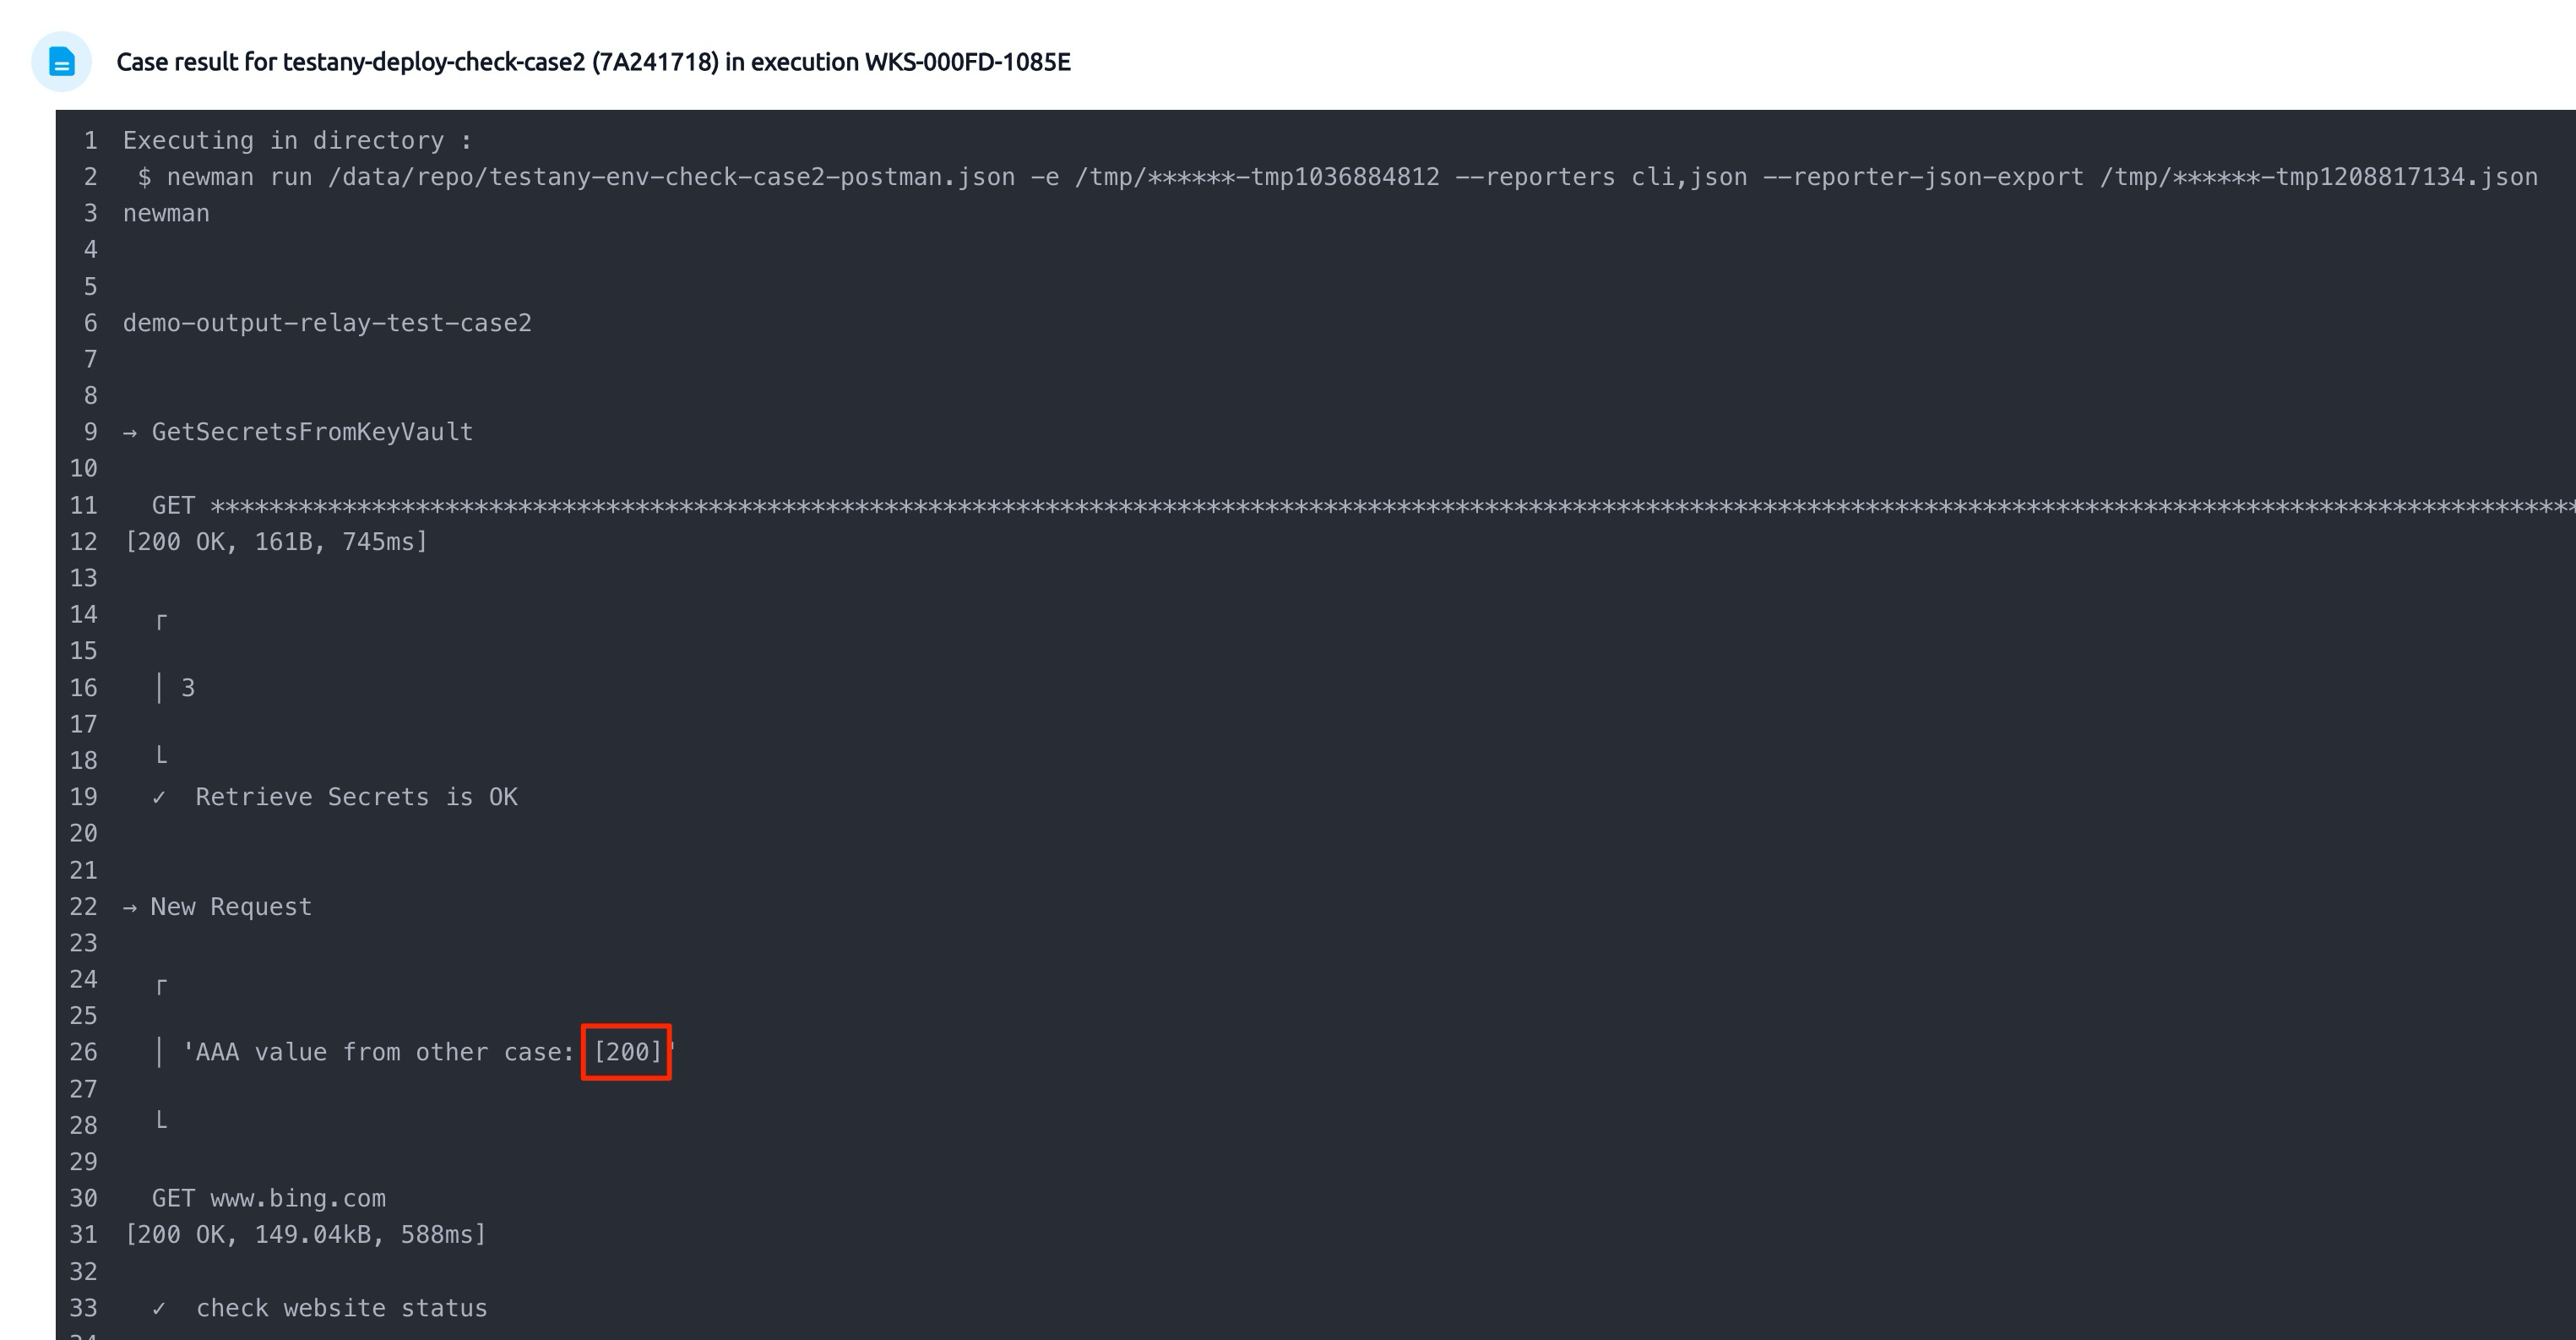
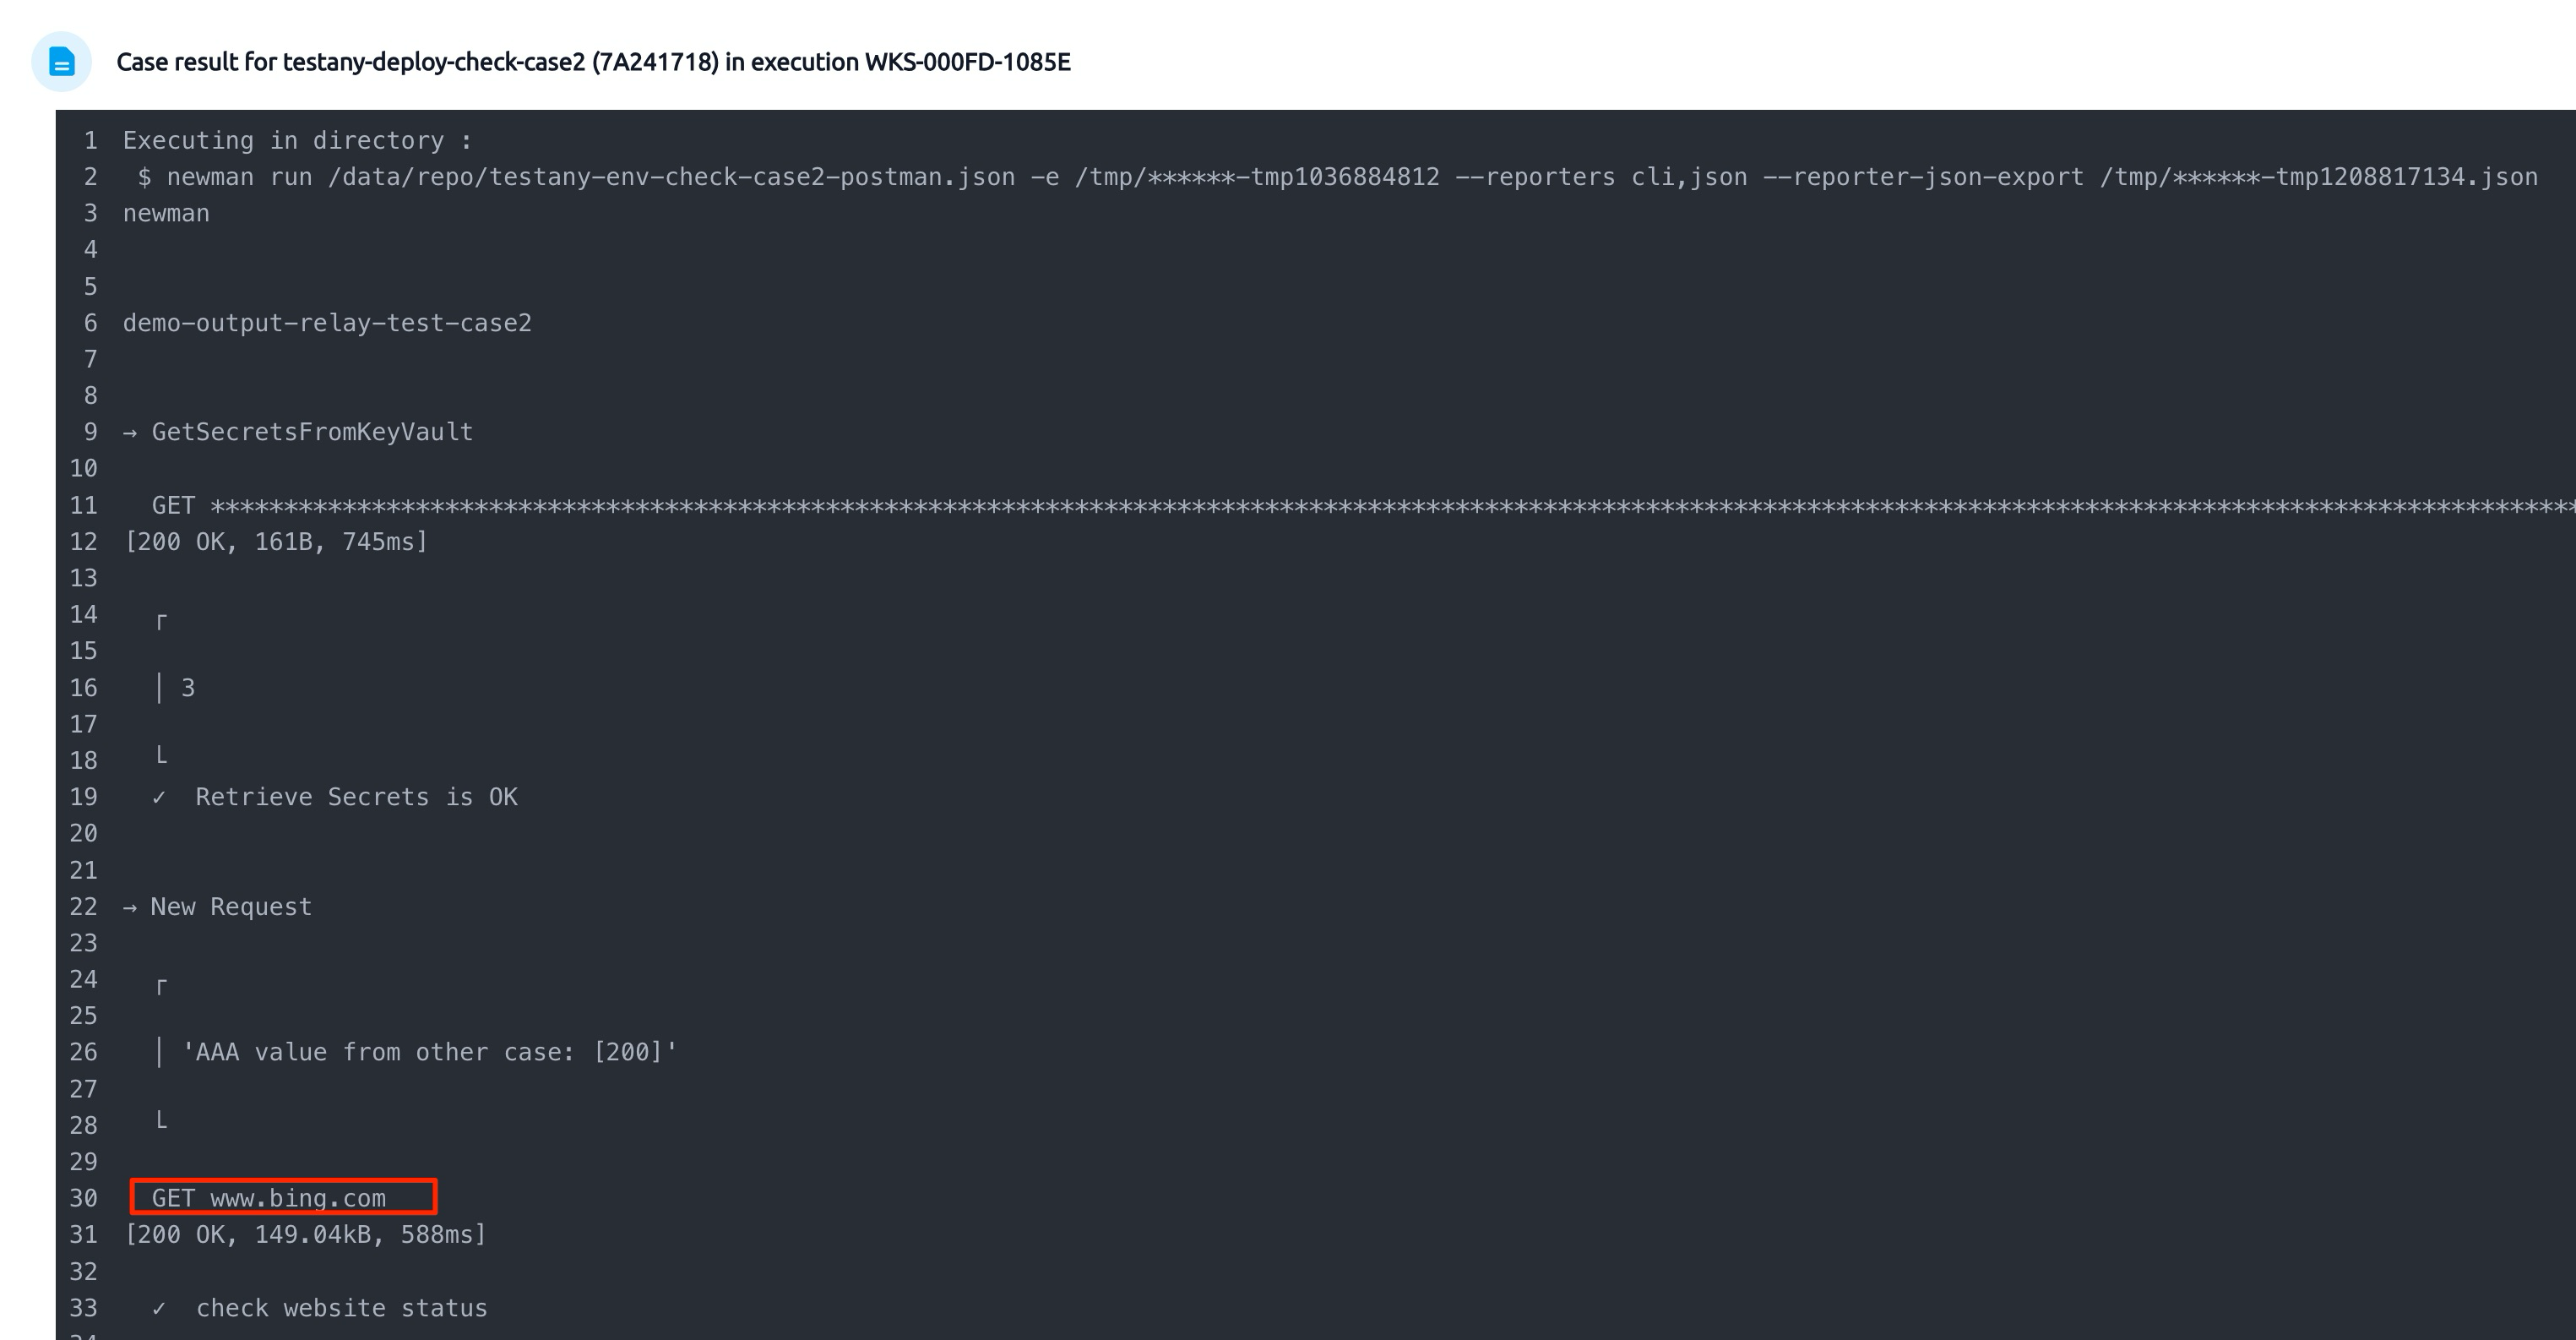
- Verify Case 1 information is passed to Case 2:
- AAA value should display
200(HTTP status code)
- AAA value should display
- URL value should be
http://www.bing.com
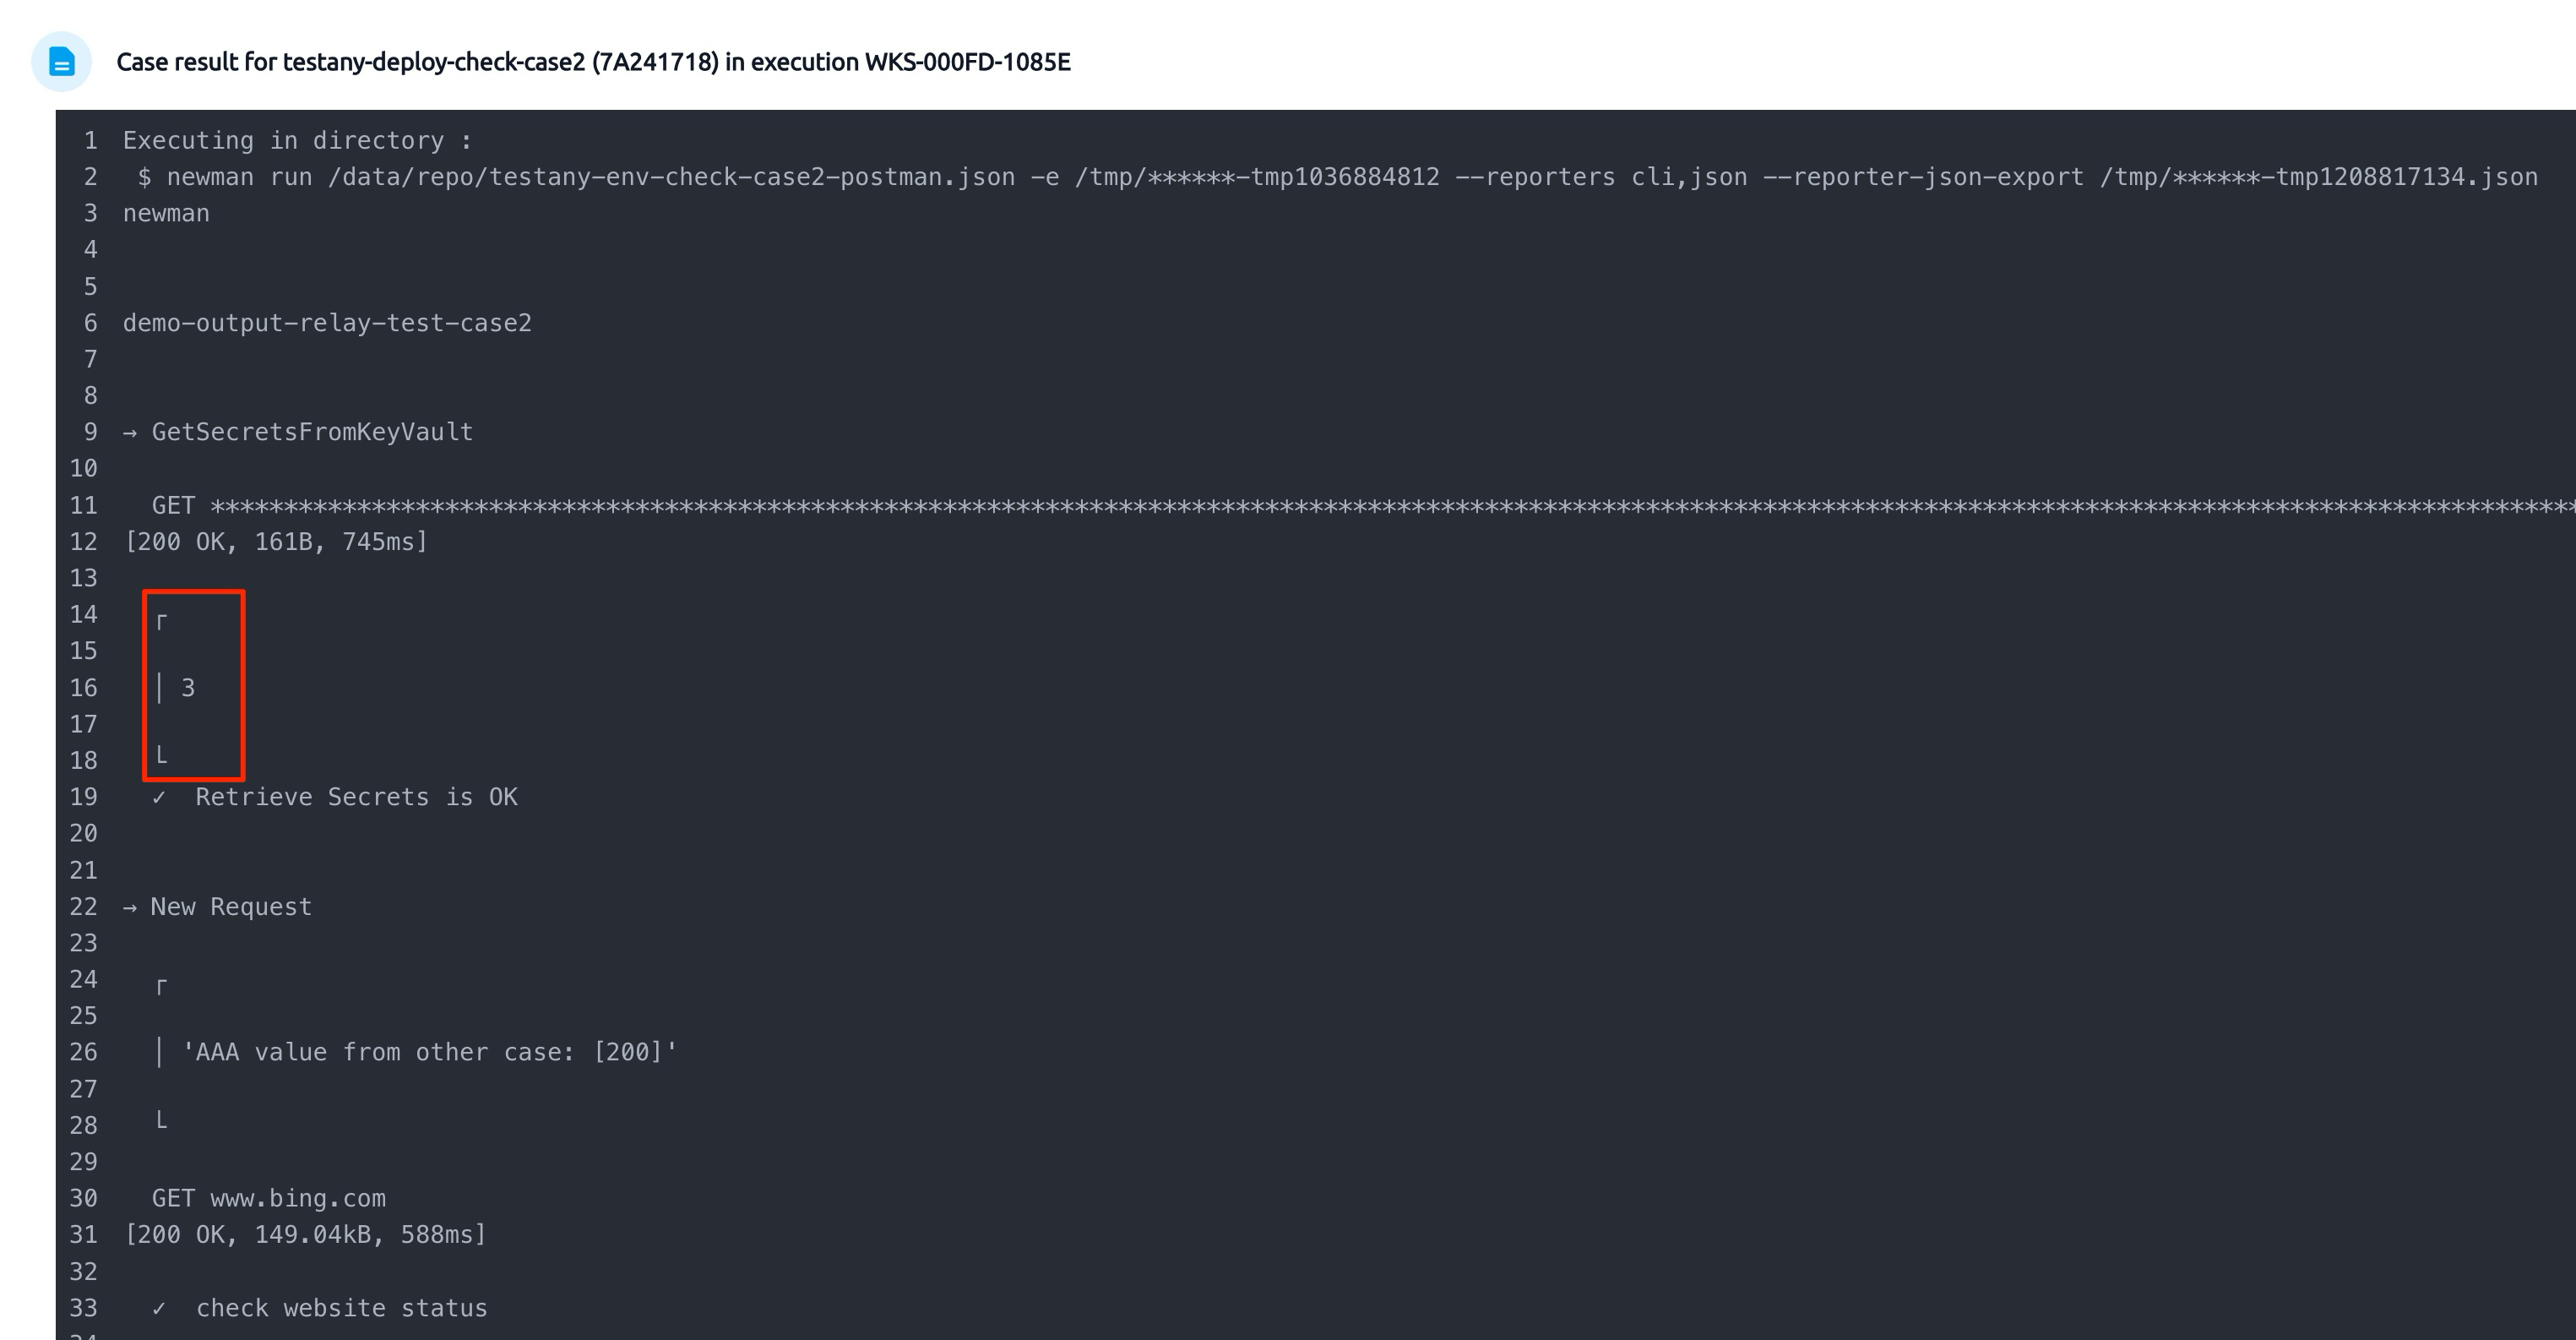
- Verify Secrets are retrieved correctly:
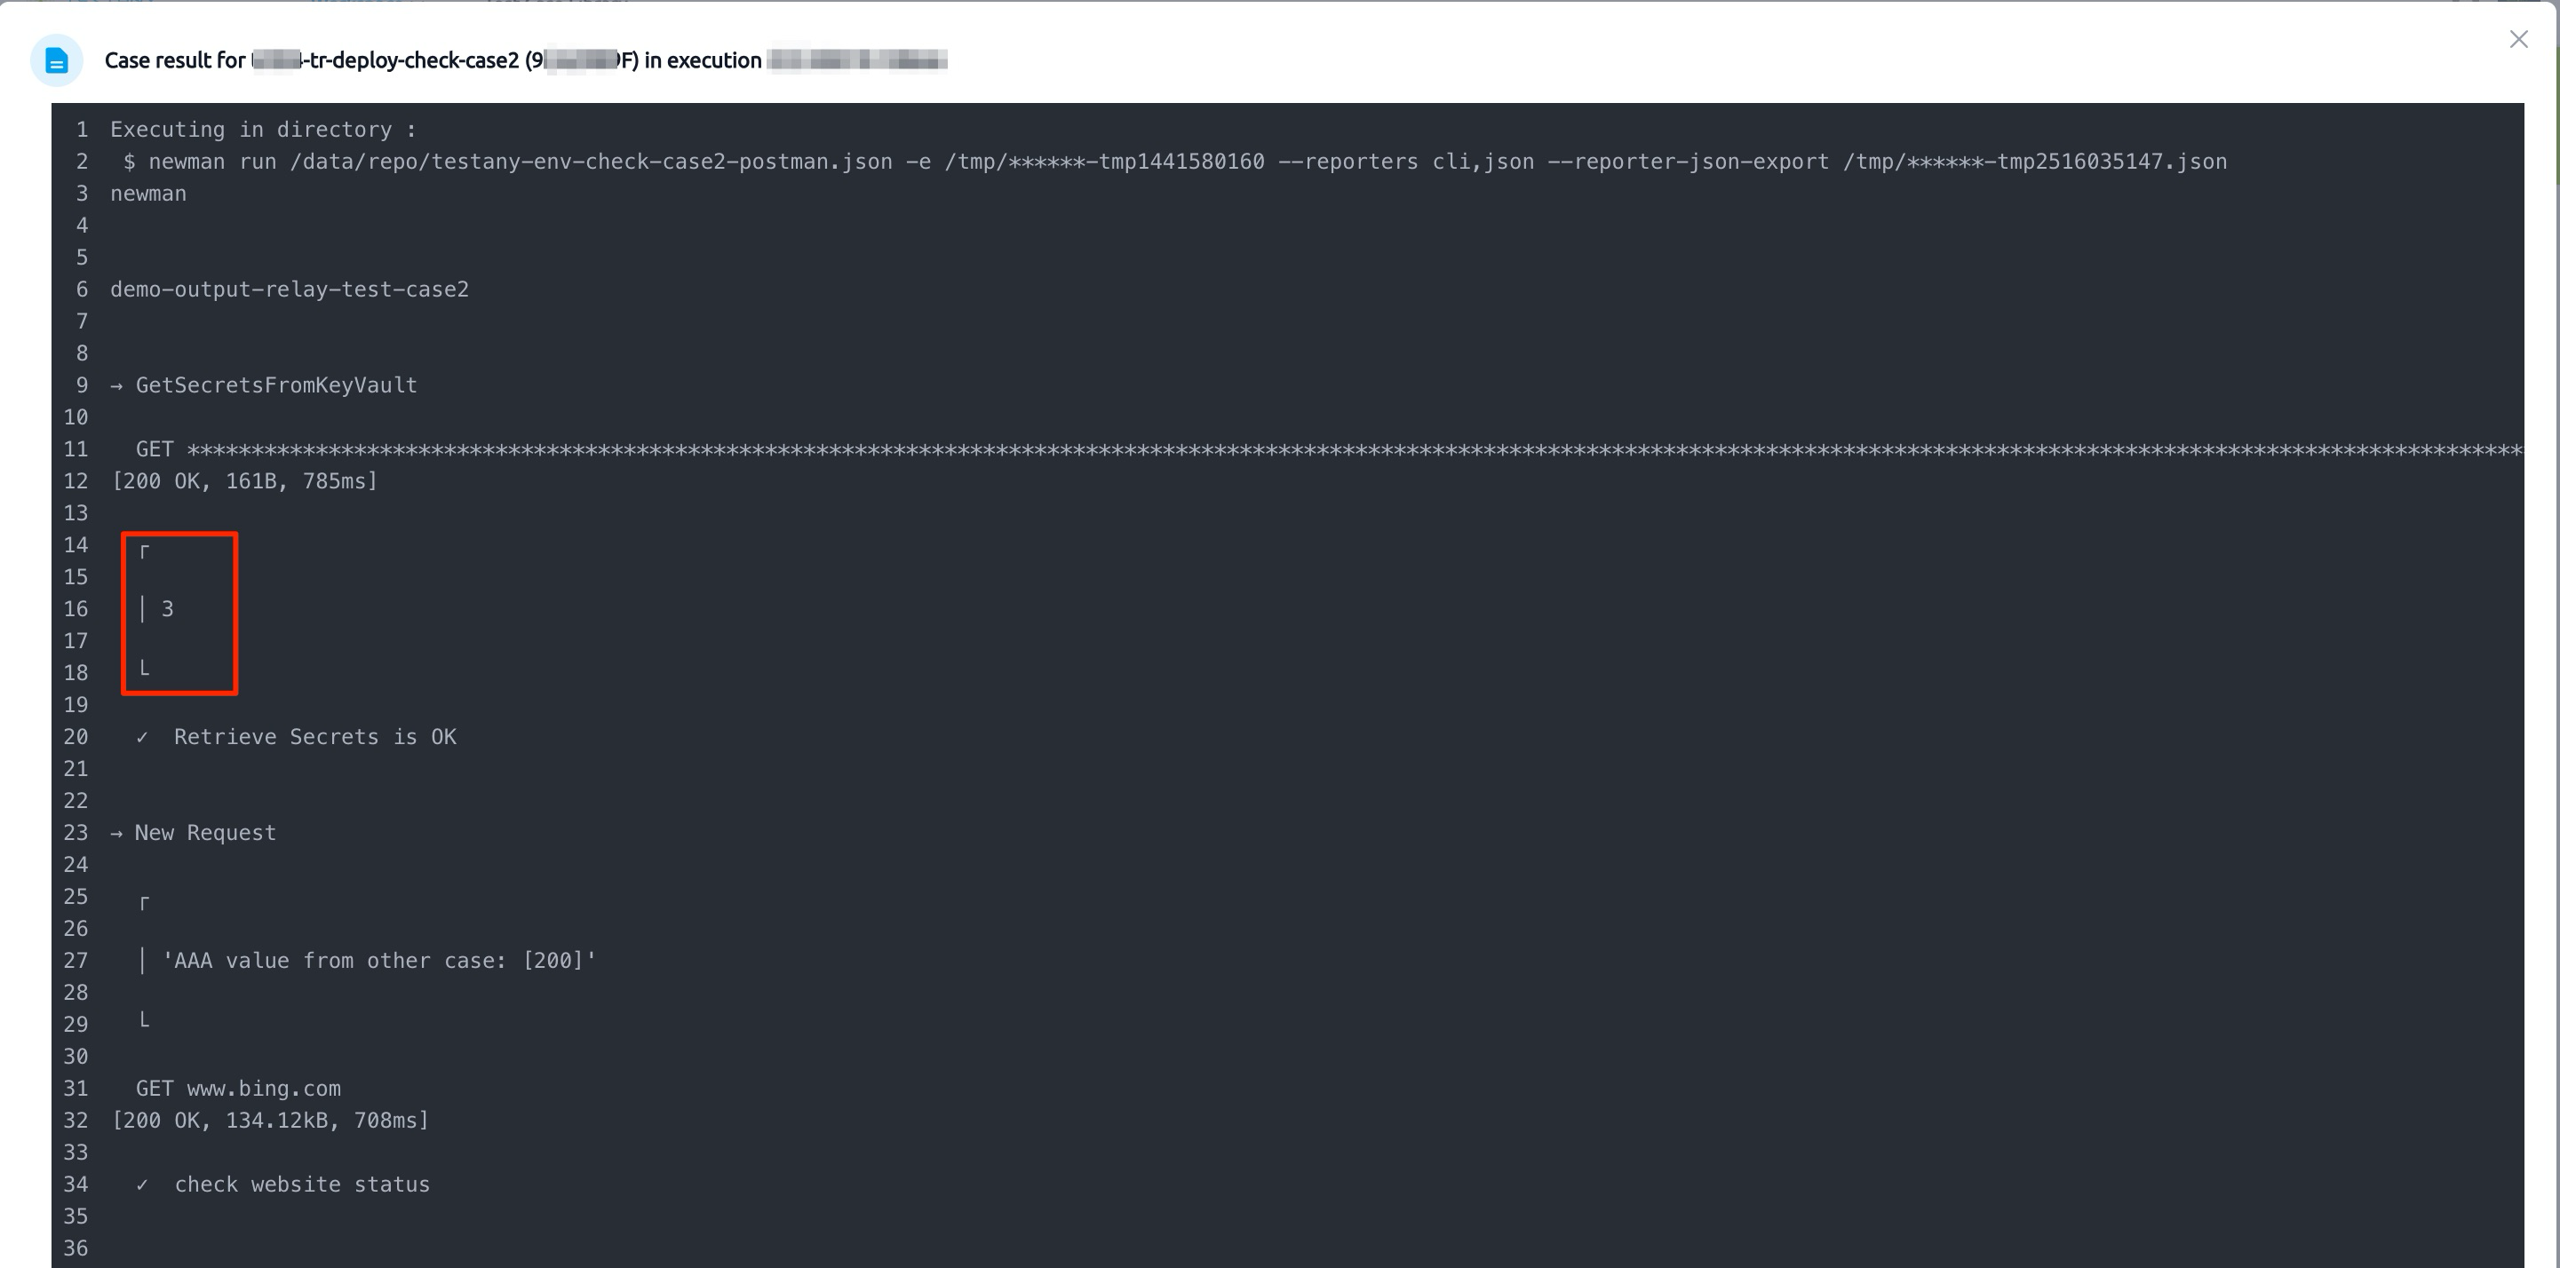
- Returned secret length should be
3(length of value123)
- Returned secret length should be
Method 2: Script Operations
Suitable for users who want to quickly verify deployment.
This script requires Testany Workspace Admin permissions.
1. Locate Script Directory
The verification script is included in the deployment package, located in the deploy-checker directory:
deploy-checker
├── linux
│   ├── env.txt
│   └── register.sh
├── windows
│   ├── env.txt
│   └── register.ps1
├── requirements.txt
├── testany-env-check-case1-postman.json.zip
├── testany-env-check-case2-postman.json.zip
└── tr_deploy_check.py
2. Configure Environment Variables
Linux/macOS:
Bashexport BASE_URL=YOUR_SAAS_URL export RUNTIME_UUID=YOUR_RUNTIME_UUID export WORKSPACE_KEY=AAA export ACCESS_TOKEN=XXXXXXXXXXX export KEY_VAULT_URL=https://xxx.vault.azure.cn
Windows (PowerShell):
PowerShell$env:BASE_URL="YOUR_SAAS_URL" $env:RUNTIME_UUID="YOUR_RUNTIME_UUID" $env:WORKSPACE_KEY="AAA" $env:ACCESS_TOKEN="XXXXXXXXXXX" $env:KEY_VAULT_URL="https://xxx.vault.azure.cn"
3. Execute Script
Linux/macOS:
Bashcd linux bash register.sh
Windows:
PowerShellcd windows .\register.ps1
After execution, the console will output:
********************************************************************************
All Related information:
Credential Safe Key: XXX-CS-XXXX
Credential Key: testany-env-secret-test
Case 1 Key: XXXXXXXX
Case 2 Key: XXXXXXXX
Pipeline Key: XXX-XXXXX
********************************************************************************
4. Trigger Pipeline Verification
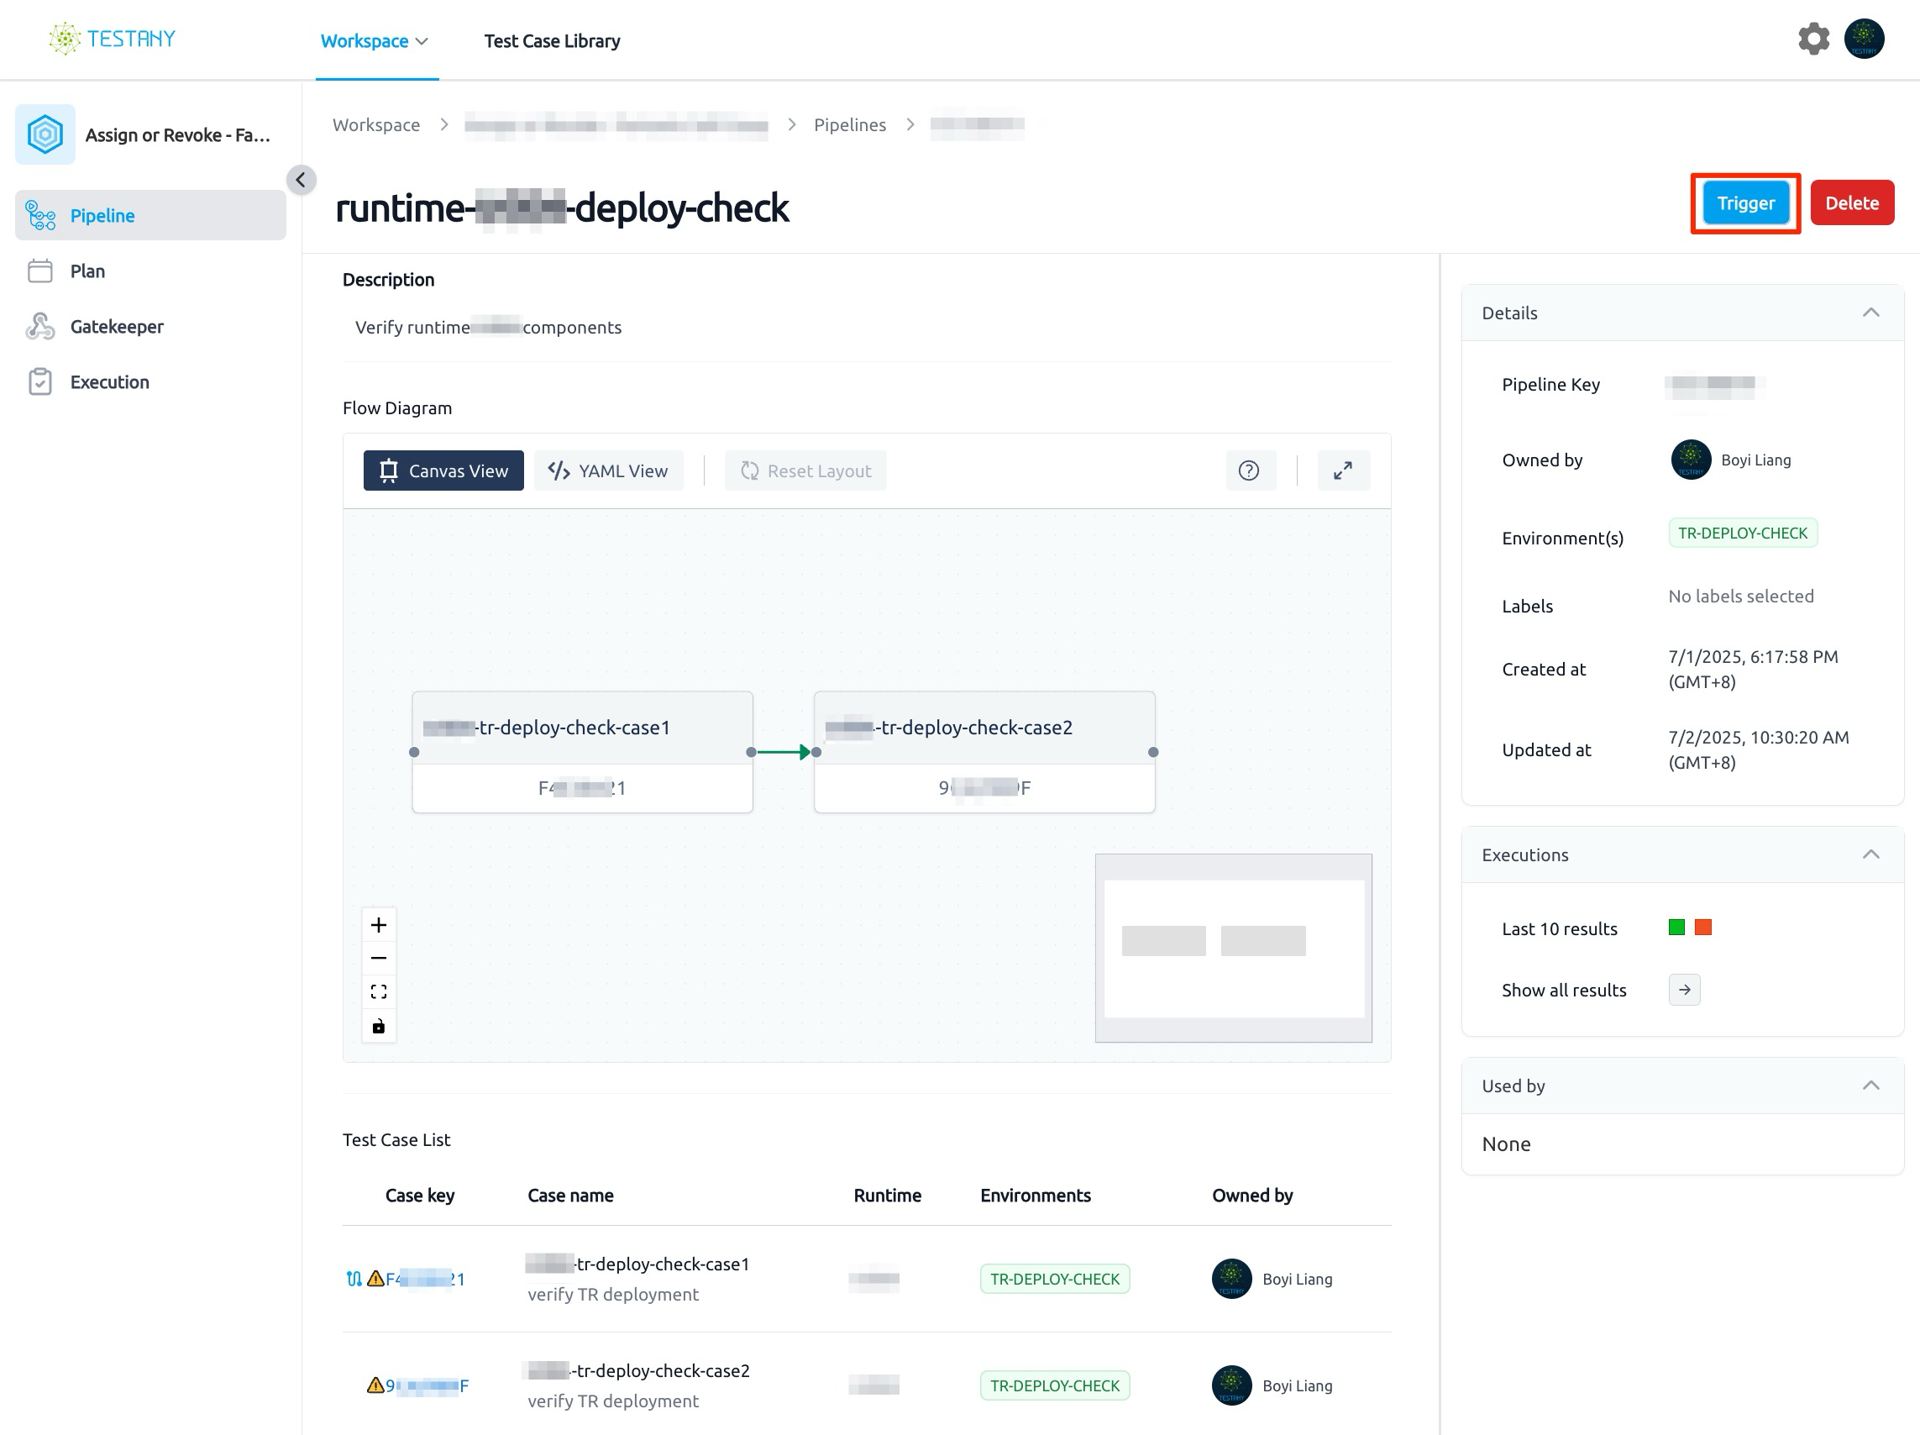
- Find the newly created Pipeline in the Testany interface (naming convention:
runtime-<runtime-name>-deploy-check) and click the "Trigger" button:
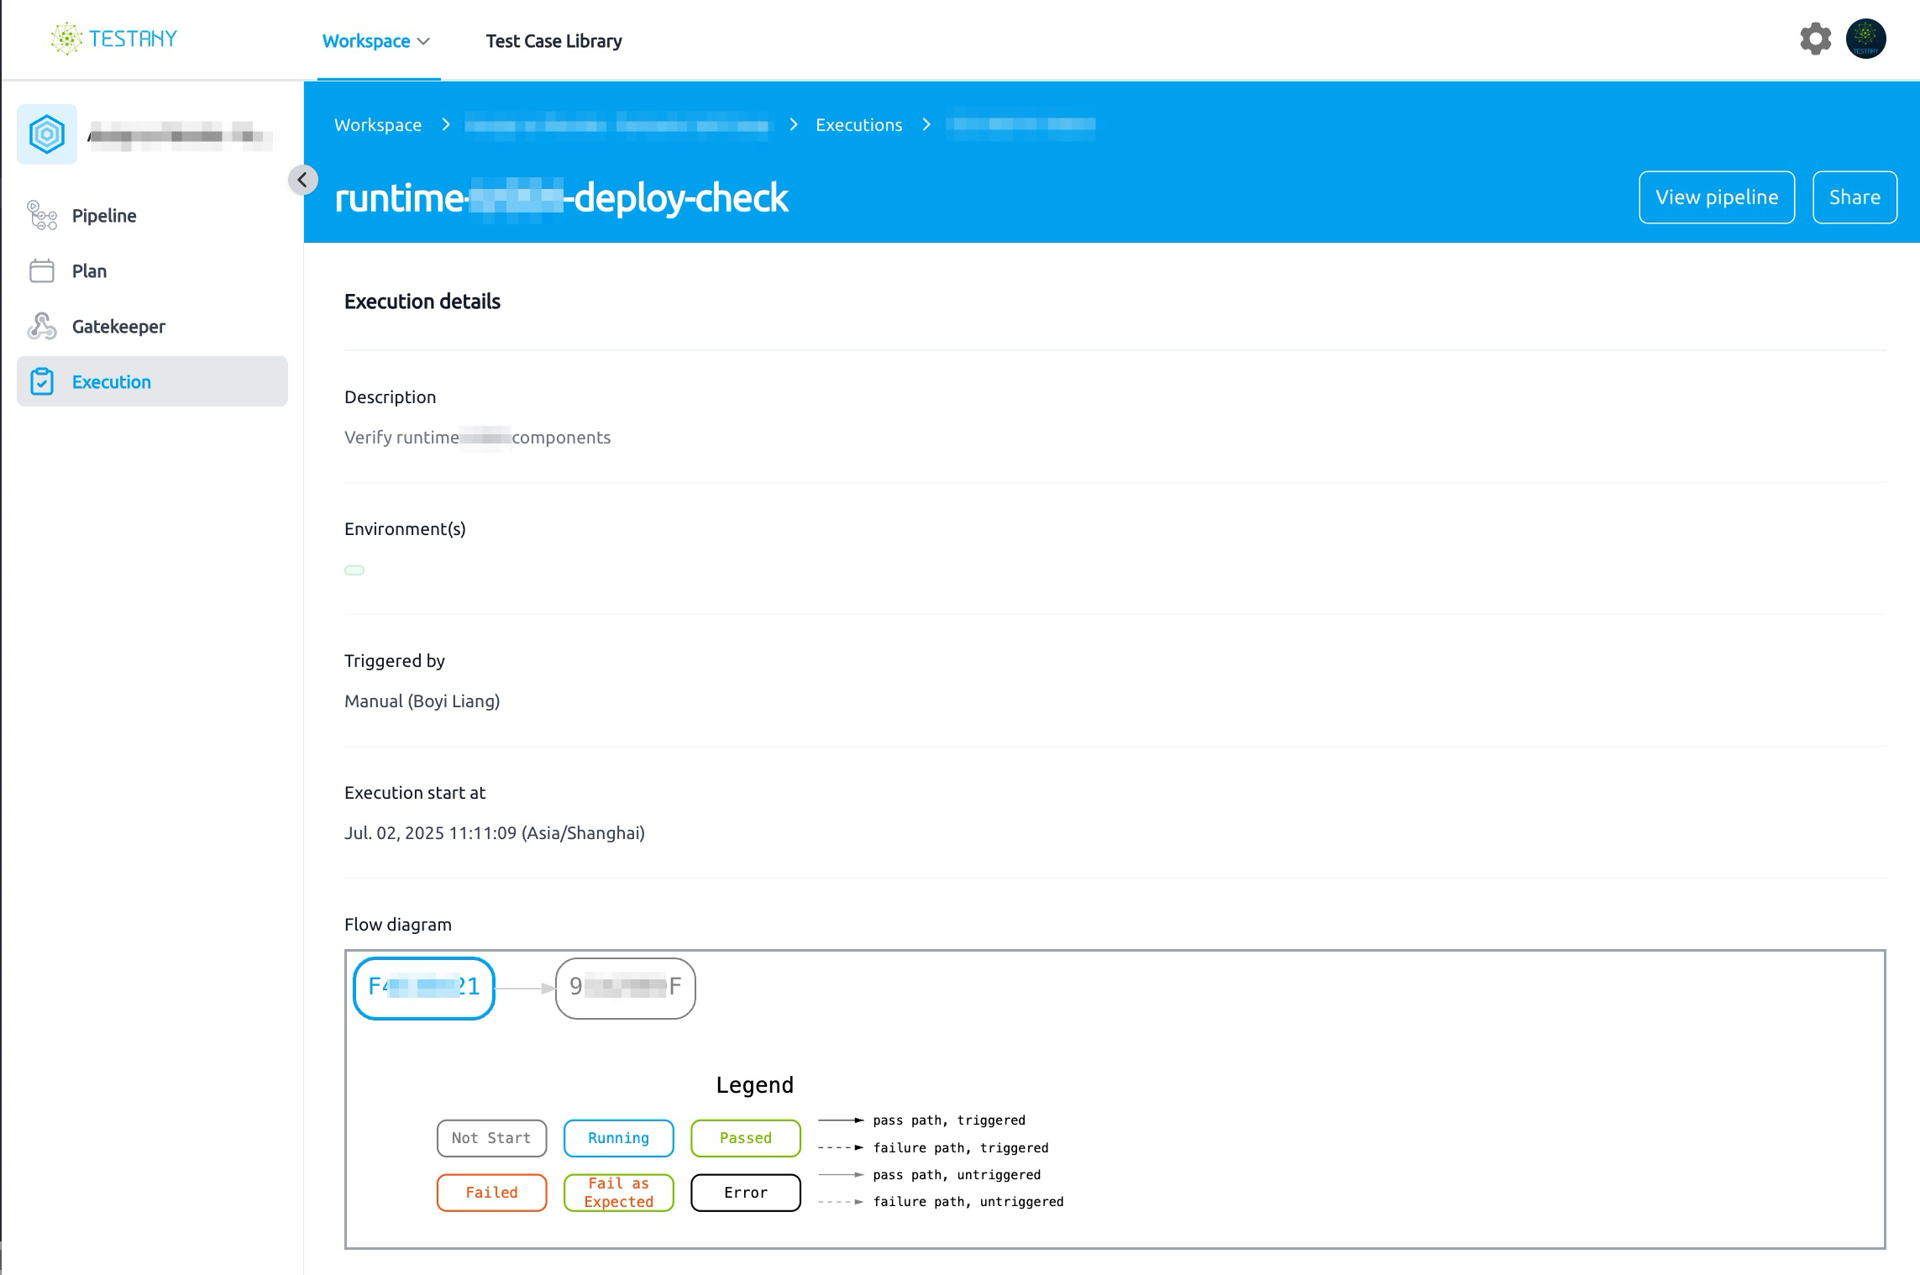
- View execution status:
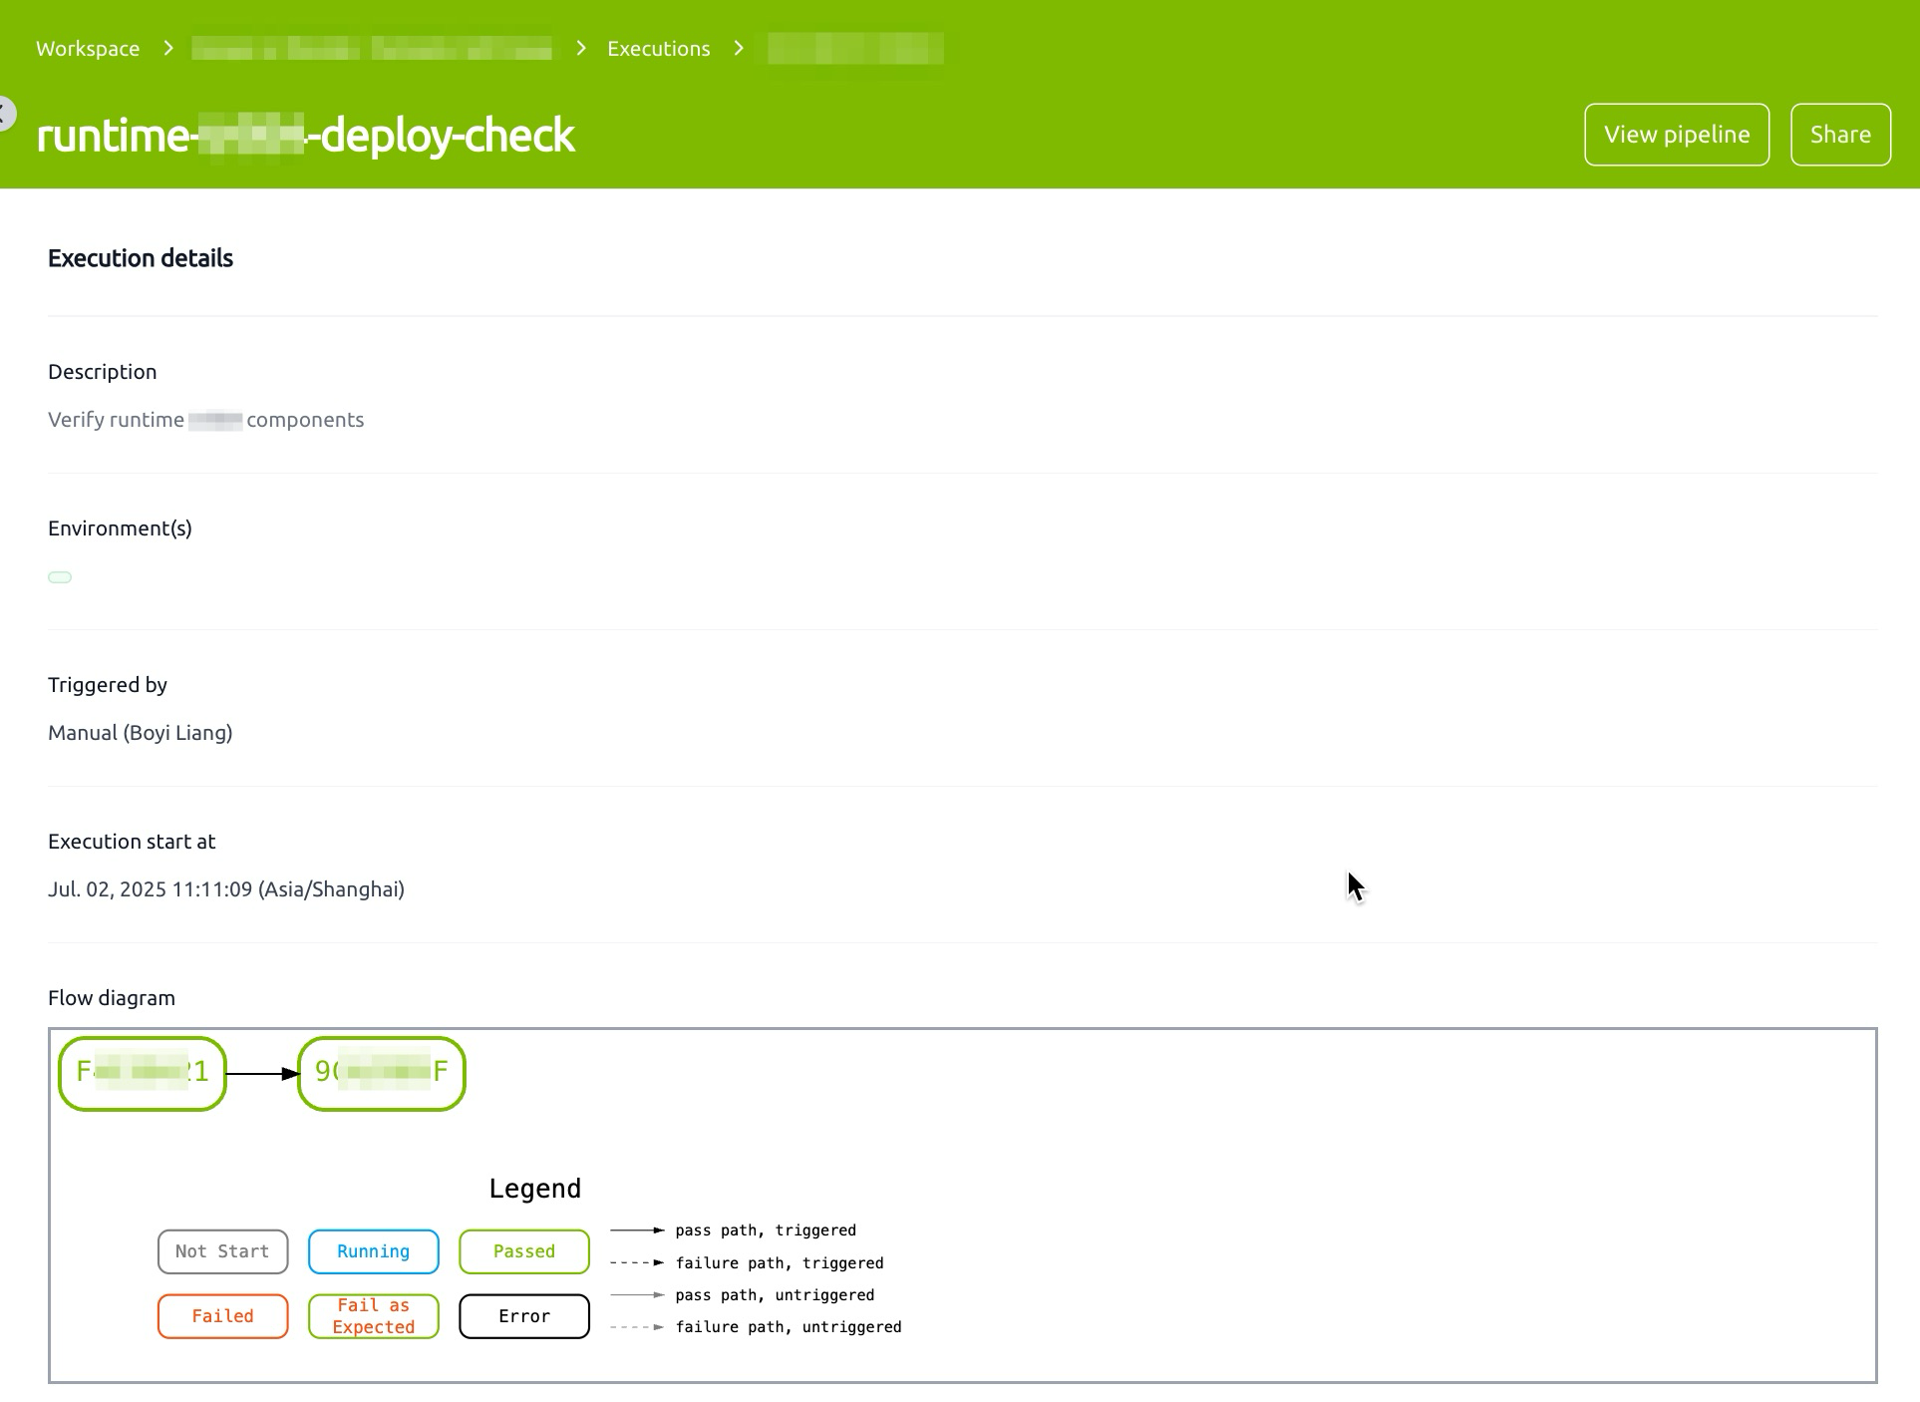
- Wait for execution to complete:
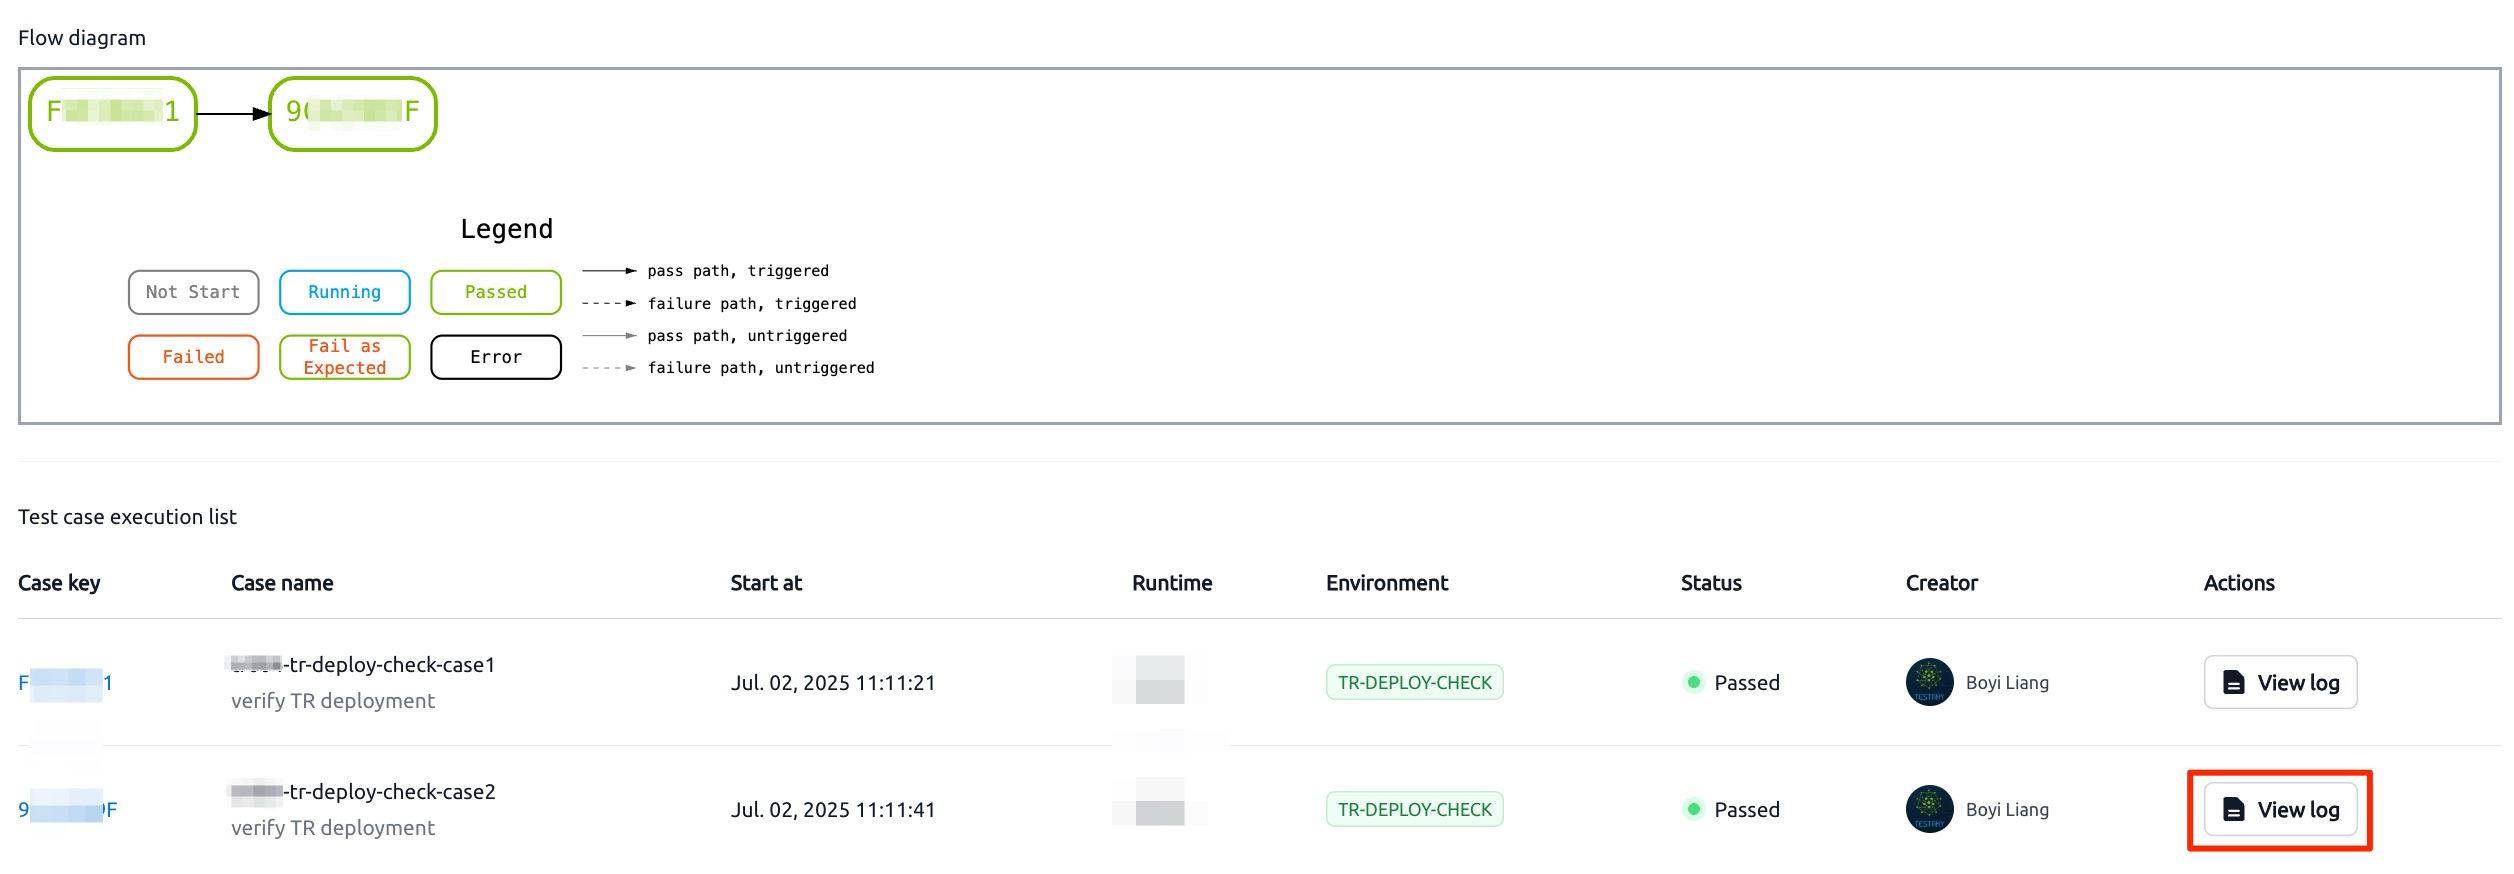
- Click the "View log" button for Case 2 to view execution logs:
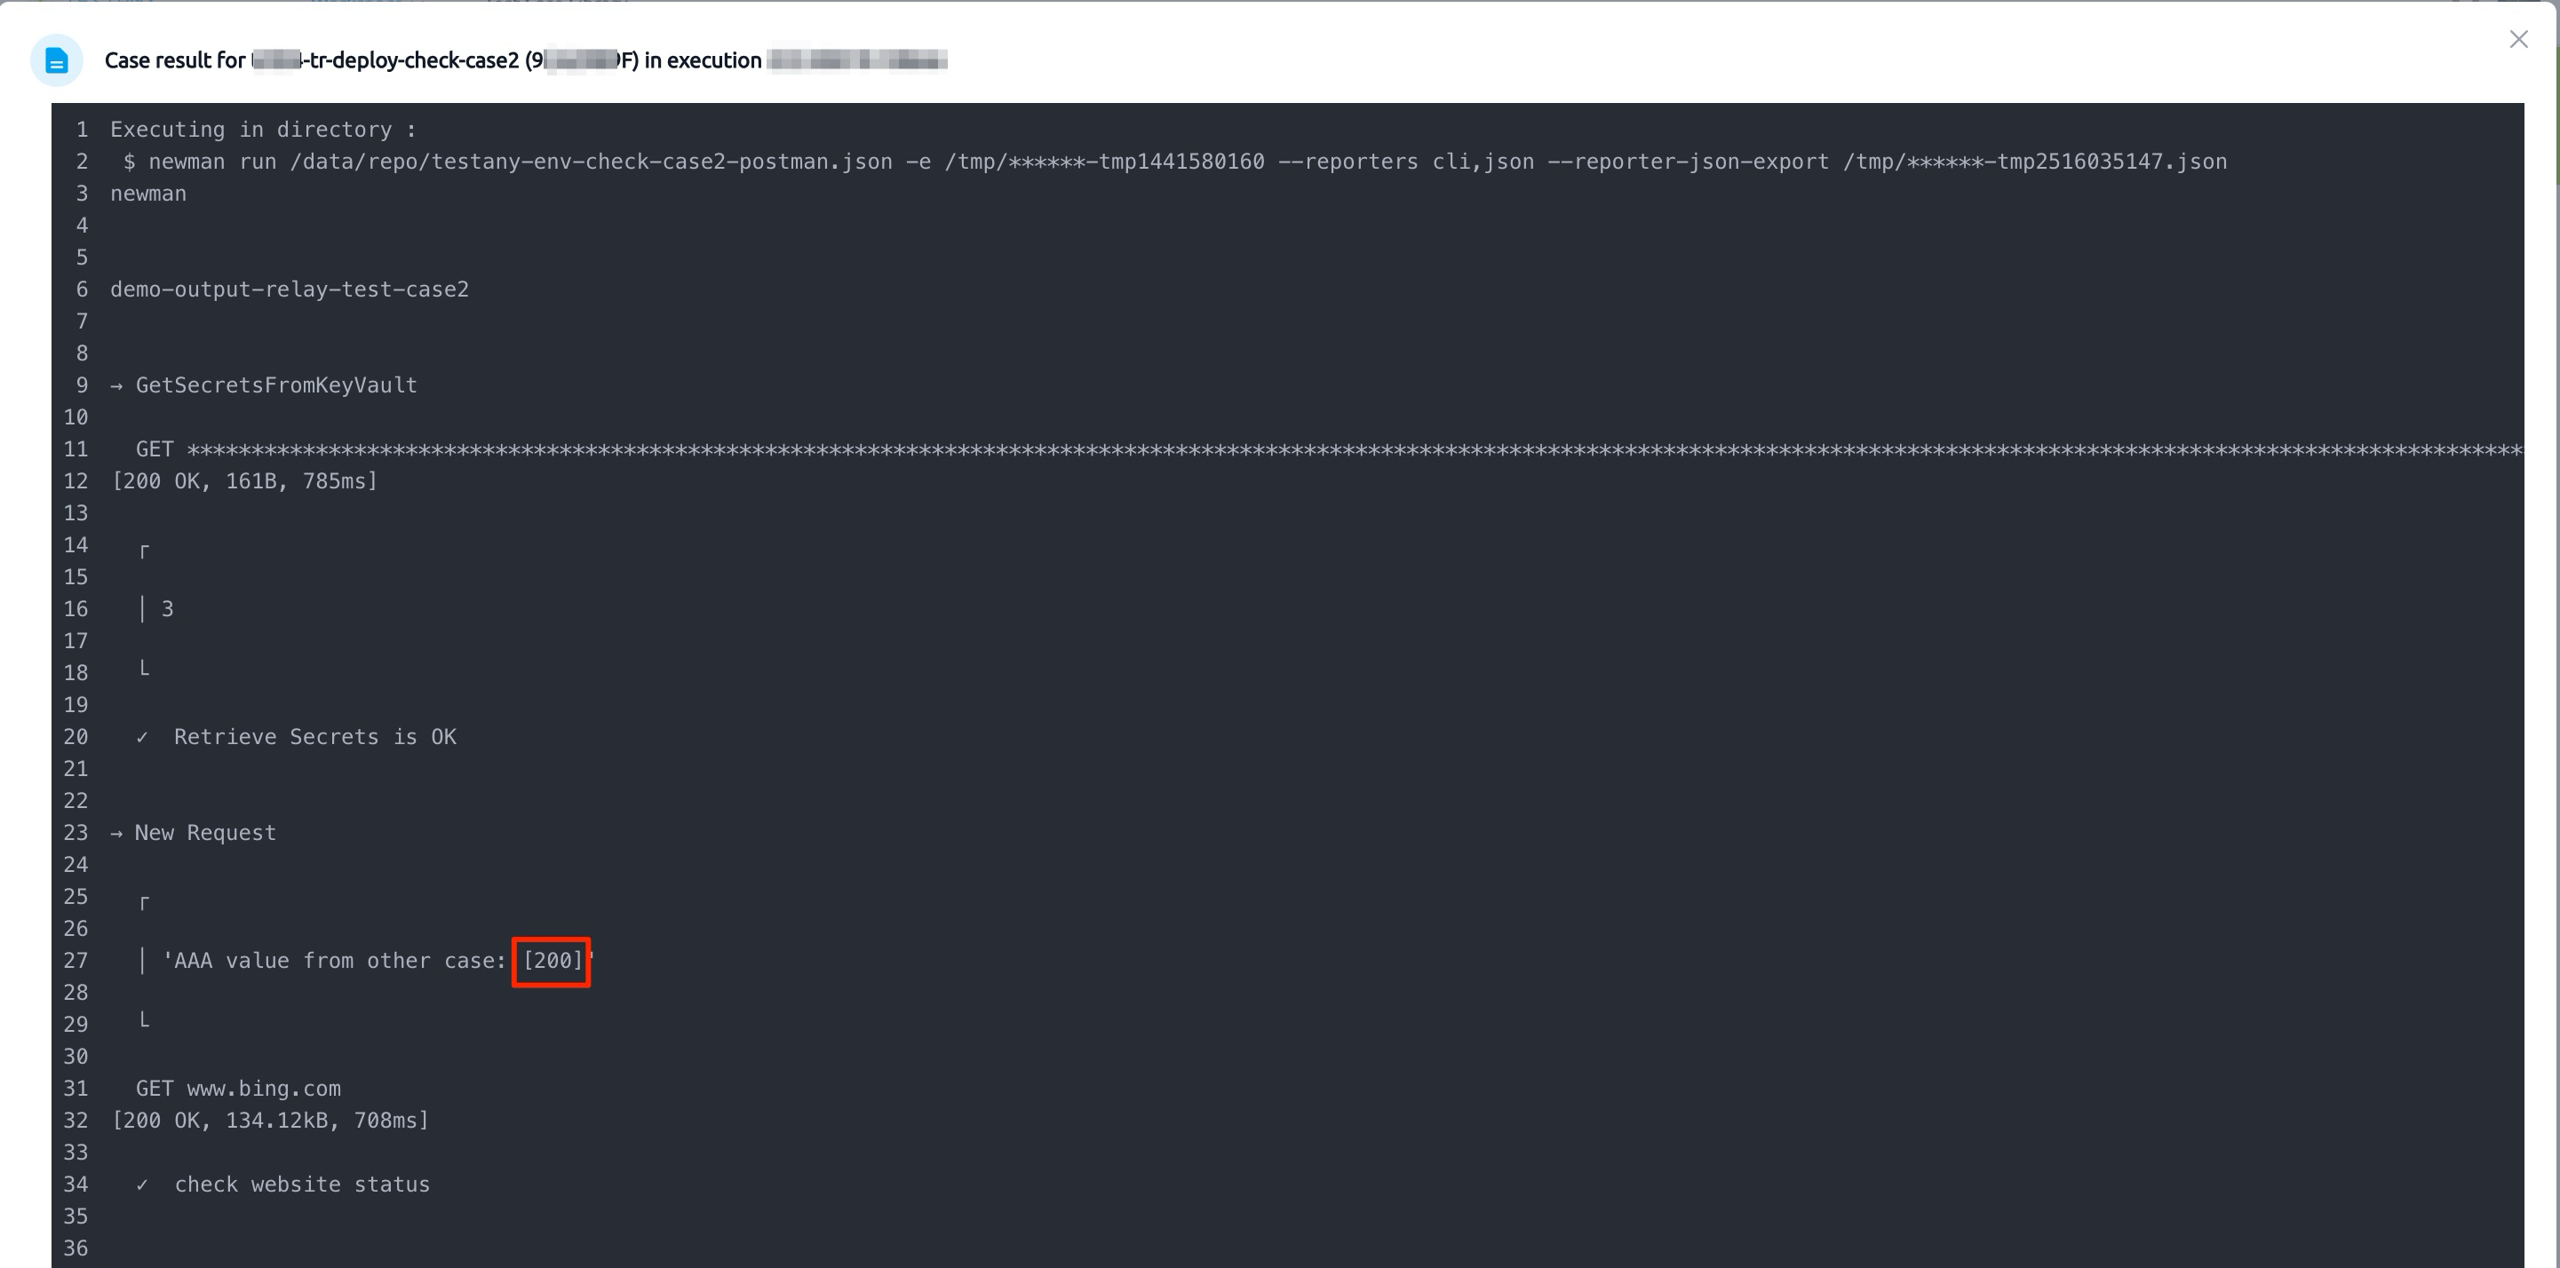
- Verify AAA value is
200:
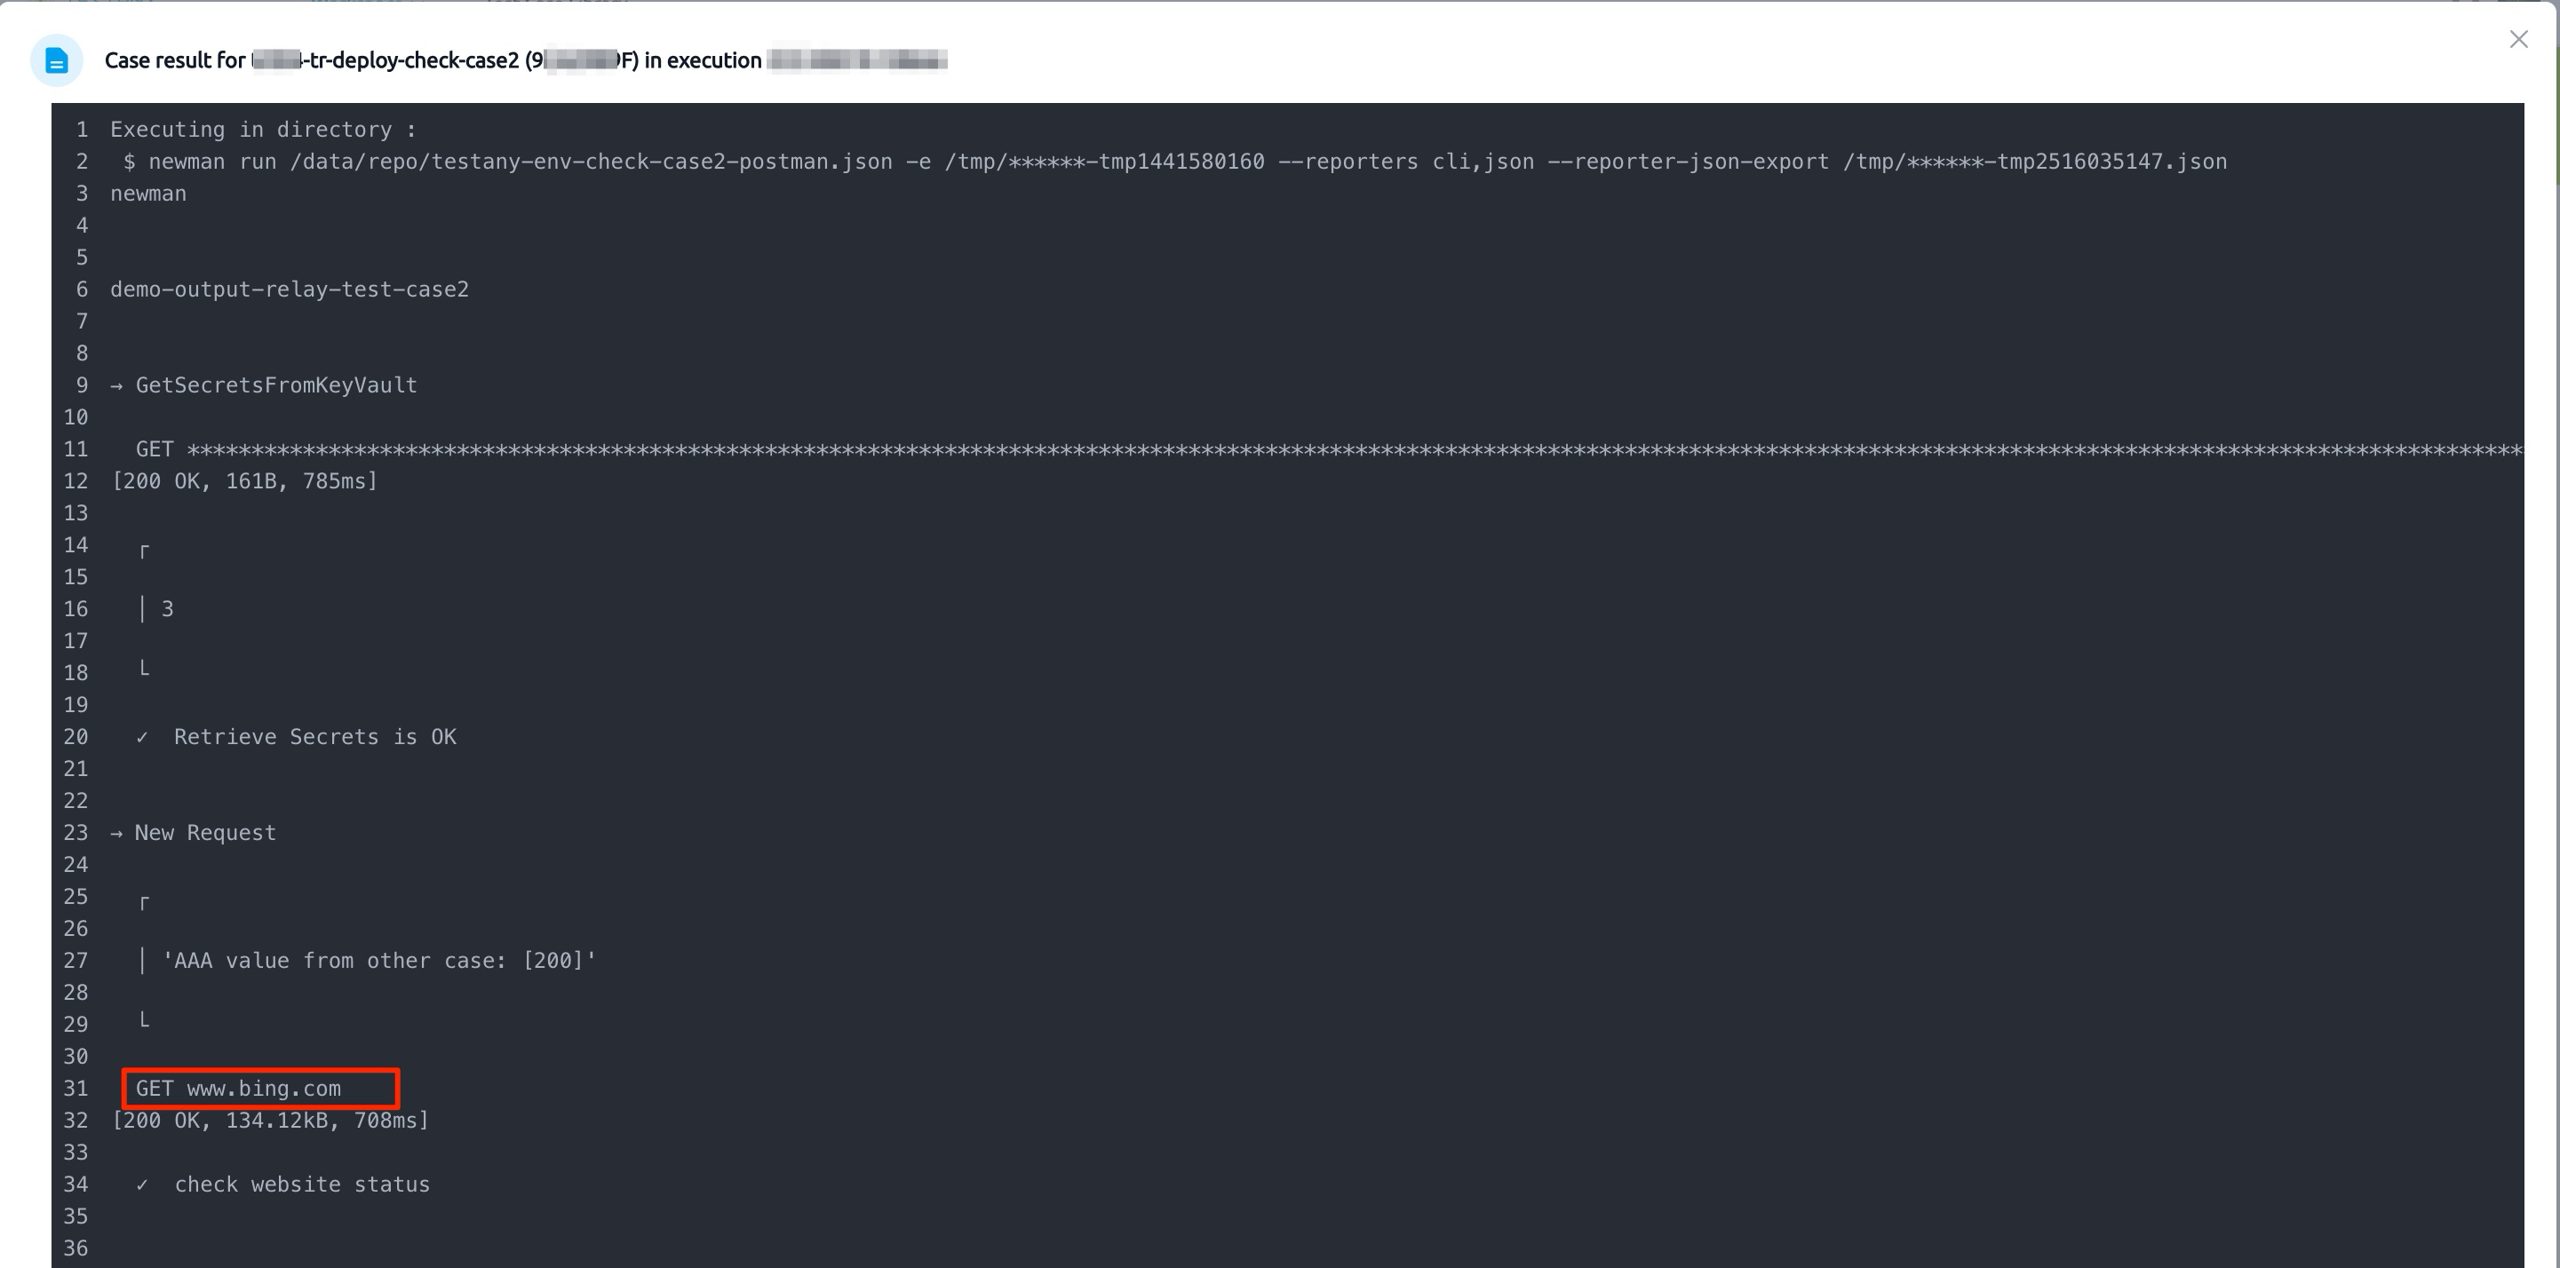
- Verify URL value is
http://www.bing.com:
- Verify Secret length is
3:
Contact Support
If you encounter issues that cannot be resolved, please contact the Testany support team:
- Email: customer-support@testany.io
- Documentation: https://docs.testany.io ↗
Still have questions?
Our team is here to help. Get in touch and we'll get back to you as soon as possible.