
Quick Start
Run Your First Automated Test in 5 Minutes
This guide walks you through creating and running your first automated test on the Testany Platform. By the end, you'll understand the core workflow and be ready to automate your own tests.
What you'll accomplish:
- Create a Test Case
- Assemble a Test Pipeline
- Trigger a Test Execution and view results
Prerequisites:
- A Testany account:
- China Edition ↗
- International Edition ↗ (Coming Soon)
- No coding experience required
Understanding Core Concepts
Before diving into the tutorial, let's understand the three core concepts that form the foundation of Testany:
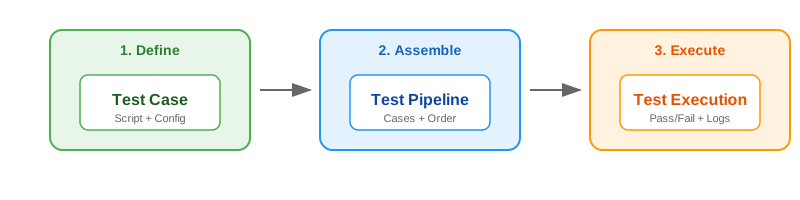
| Concept | What It Is | Analogy |
|---|---|---|
| Test Case | Your test script packaged with configuration | A recipe |
| Test Pipeline | A collection of test cases to run together | A meal plan |
| Test Execution | One run of a pipeline with results | Cooking the meal |
The workflow is simple:
- Define - Create test cases that contain your test logic
- Assemble - Combine test cases into a pipeline
- Execute - Run the pipeline and view results
Tutorial: Your First Test
We'll create a simple API test that verifies the Testany Demo API returns a successful response. We'll use Postman format since it's the easiest to get started with.
Testany provides a dedicated demo page and API for testing purposes. You can view it at https://testany.com.cn/demopage.html ↗.
Step 1: Prepare Your Test File
First, create a Postman collection file that tests the Testany Demo API.
1.1 Create the collection file
Create a file named my-first-test.json with the following content:
JSON{ "info": { "name": "My First API Test", "schema": "https://schema.getpostman.com/json/collection/v2.1.0/collection.json" }, "item": [ { "name": "Health Check", "request": { "method": "GET", "url": "https://dev.testany.com.cn/api/v2/demo/health-check" }, "event": [ { "listen": "test", "script": { "type": "text/javascript", "exec": [ "pm.test('Status code is 200', function () {", " pm.response.to.have.status(200);", "});", "", "pm.test('Response has status field', function () {", " var jsonData = pm.response.json();", " pm.expect(jsonData).to.have.property('status');", "});" ] } } ] } ] }
This test sends a GET request to the Testany Demo Health Check API and verifies:
- The response status code is 200
- The response body contains a
statusfield (value can behealthyorunhealthydepending on system state)
1.2 Create the zip package
Zip the JSON file:
Bashzip my-first-test.zip my-first-test.json
Or right-click the file and select "Compress" on macOS / "Send to > Compressed folder" on Windows.
Step 2: Create a Test Case
2.1 Navigate to Test Case Library
Log in to Testany Platform and click Test Case Library in the top navigation bar.
2.2 Click "Register Test Case"
Click the Register Test Case button in the top right corner.

2.3 Fill in basic information
- Name:
my-first-api-test - Description:
A simple Health Check API test to verify the Testany Demo API is responding
Click Register & Next to continue.
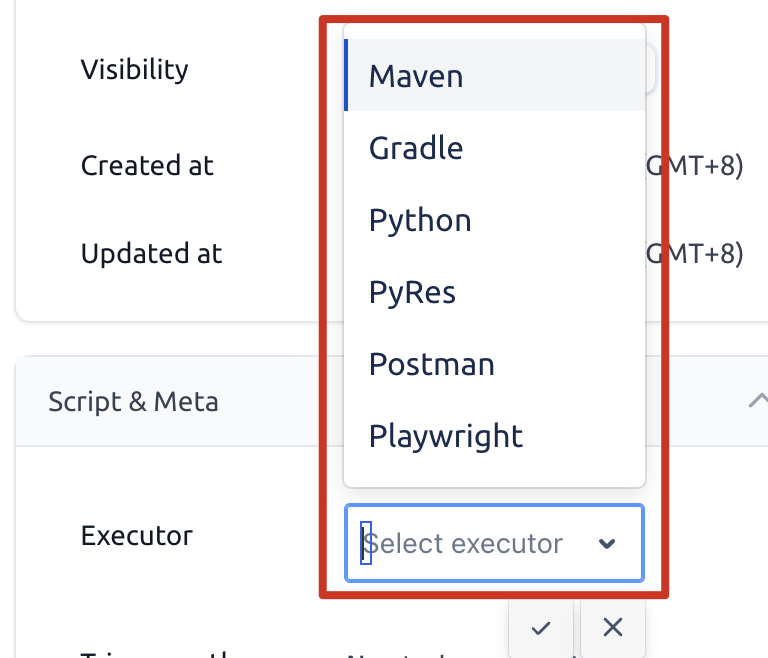
2.4 Configure the test executor
On the test case detail page:
-
Test Executor: Select
Postmanfrom the dropdown -
Path: Enter
my-first-test.json(the name of your collection file inside the zip) -
Definition file: Click to upload your
my-first-test.zipfile -
Environments: Enter
DEMO(or any environment name you prefer)
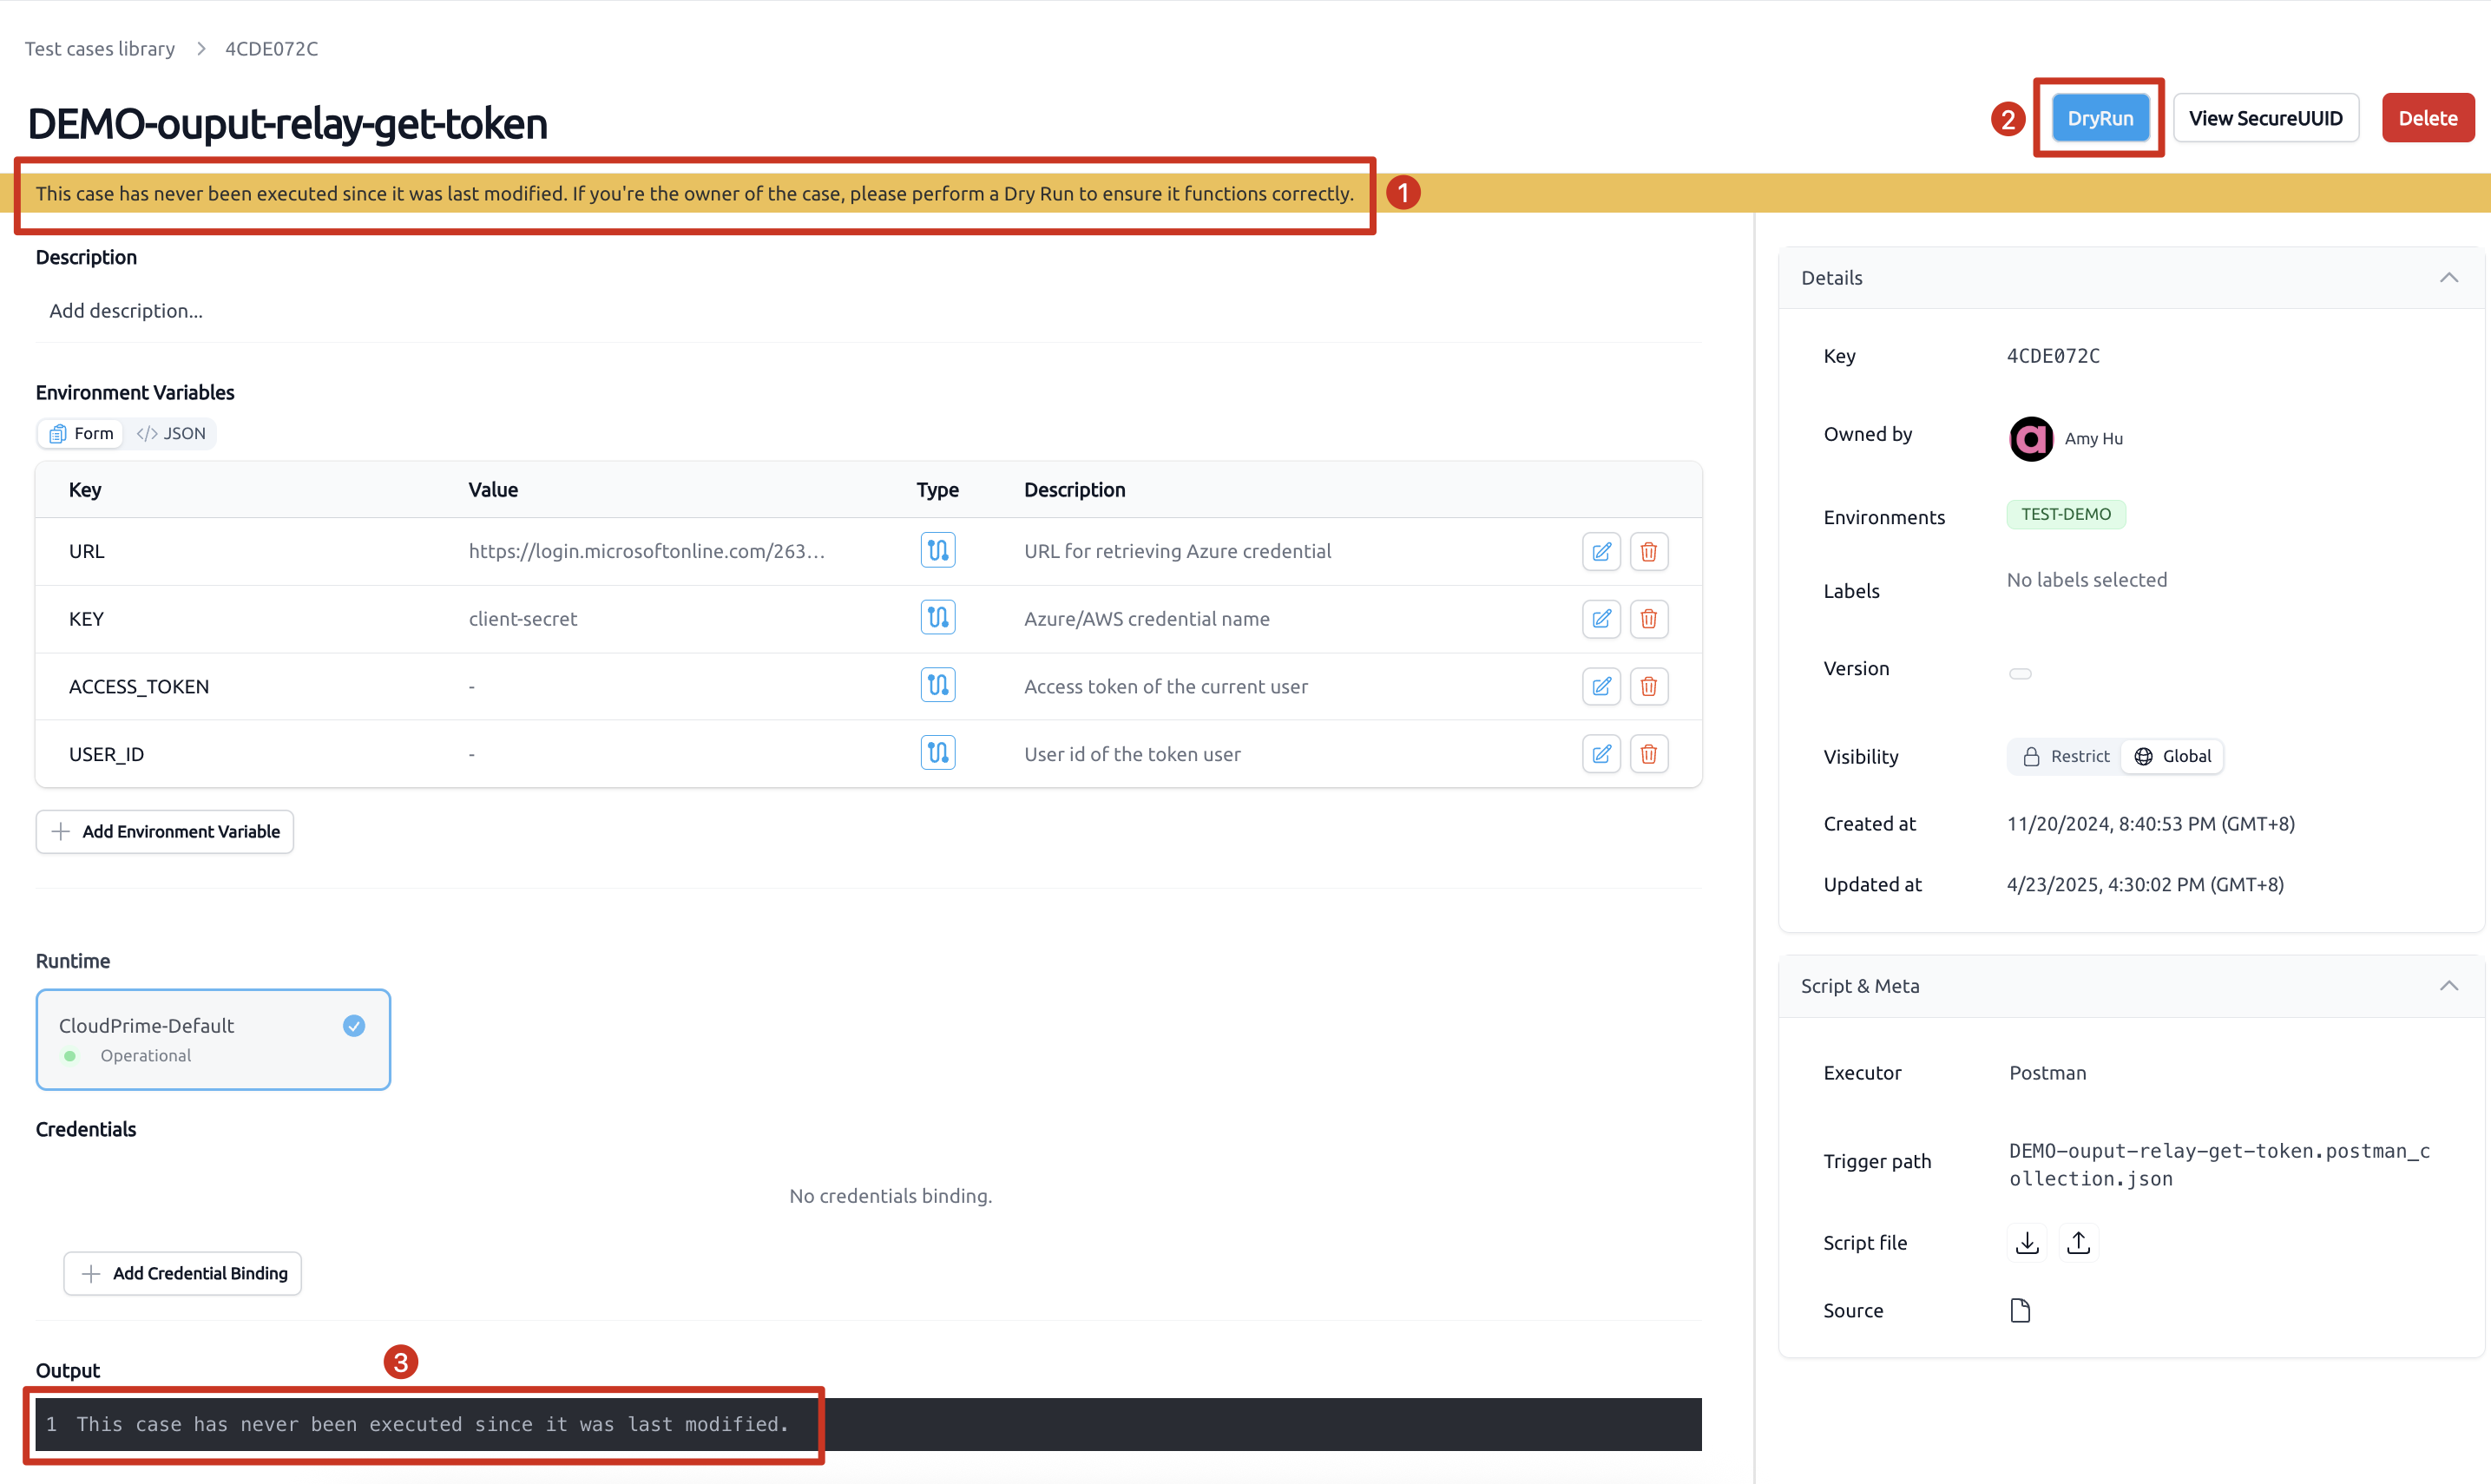
2.5 Verify with Dry Run
Click the Dry Run button to verify your test case is configured correctly.
Wait for the dry run to complete. You should see a green checkmark indicating success.
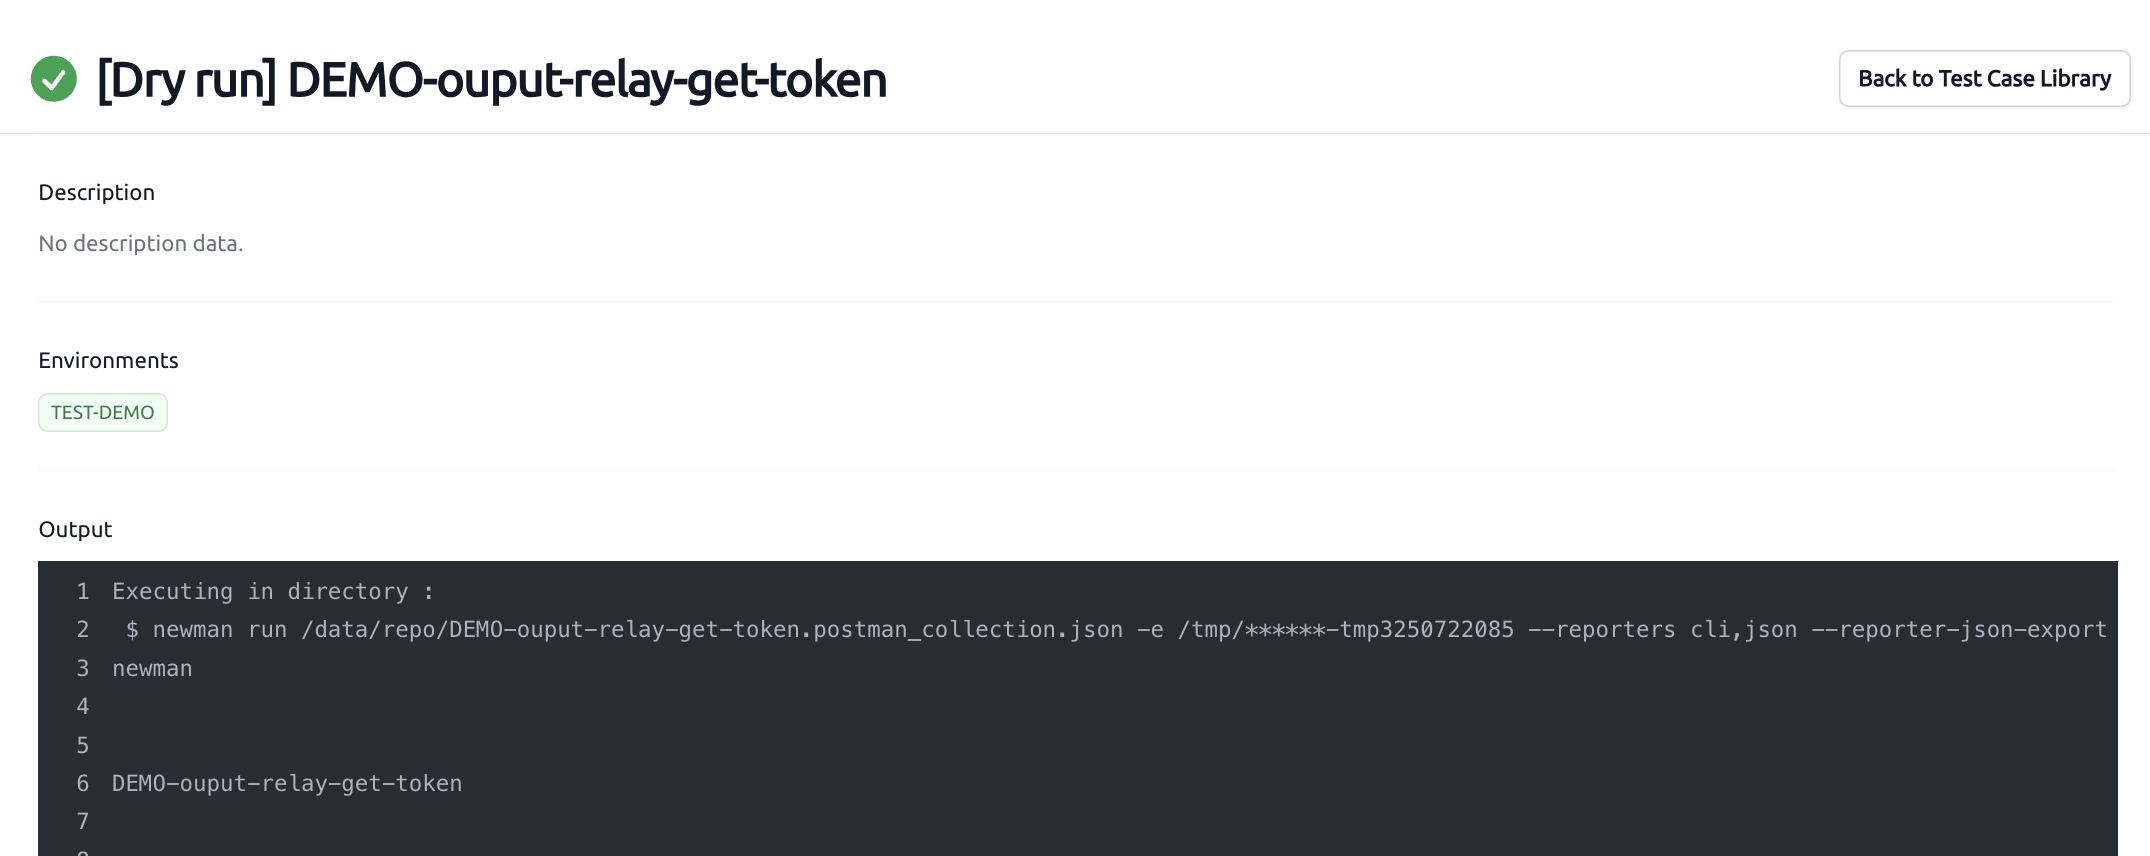
Congratulations! Your test case is now ready.
Step 3: Create a Test Pipeline
3.1 Navigate to Test Pipelines
Select a Workspace from the left sidebar, then click the Pipelines tab.
3.2 Assemble a New Pipeline
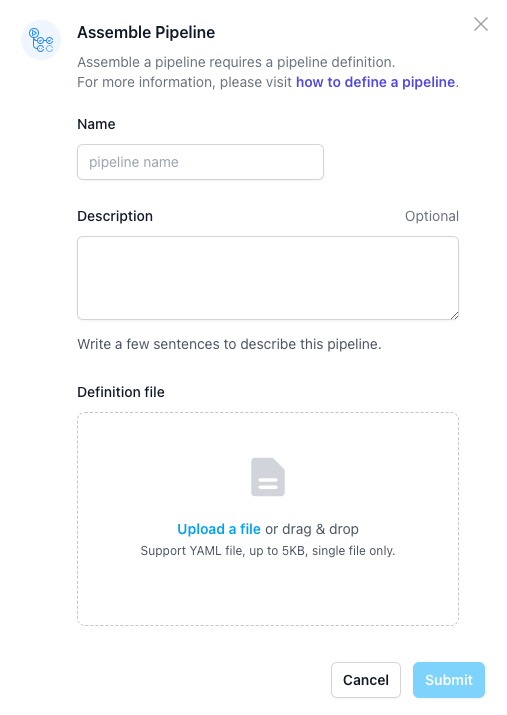
Click the Assemble Pipeline button in the top right corner.
3.3 Fill in pipeline information
- Name:
my-first-pipeline - Description:
Quick start tutorial pipeline
3.4 Upload Pipeline YAML
Create a file named pipeline.yaml with the following content:
YAMLkind: rule/v1.3 spec: rules: - run: <TEST-CASE-KEY>
This quick start uses rule/v1.3 for the new pipeline example. That is also Testany's recommended version for all new pipelines. rule/v1.2 is retained only for backward compatibility.
Replace <TEST-CASE-KEY> with the key of the test case you created (the Key field on the test case detail page).
Drag and drop this file to the "Definition file" box, then click Submit.
3.5 Confirm the pipeline
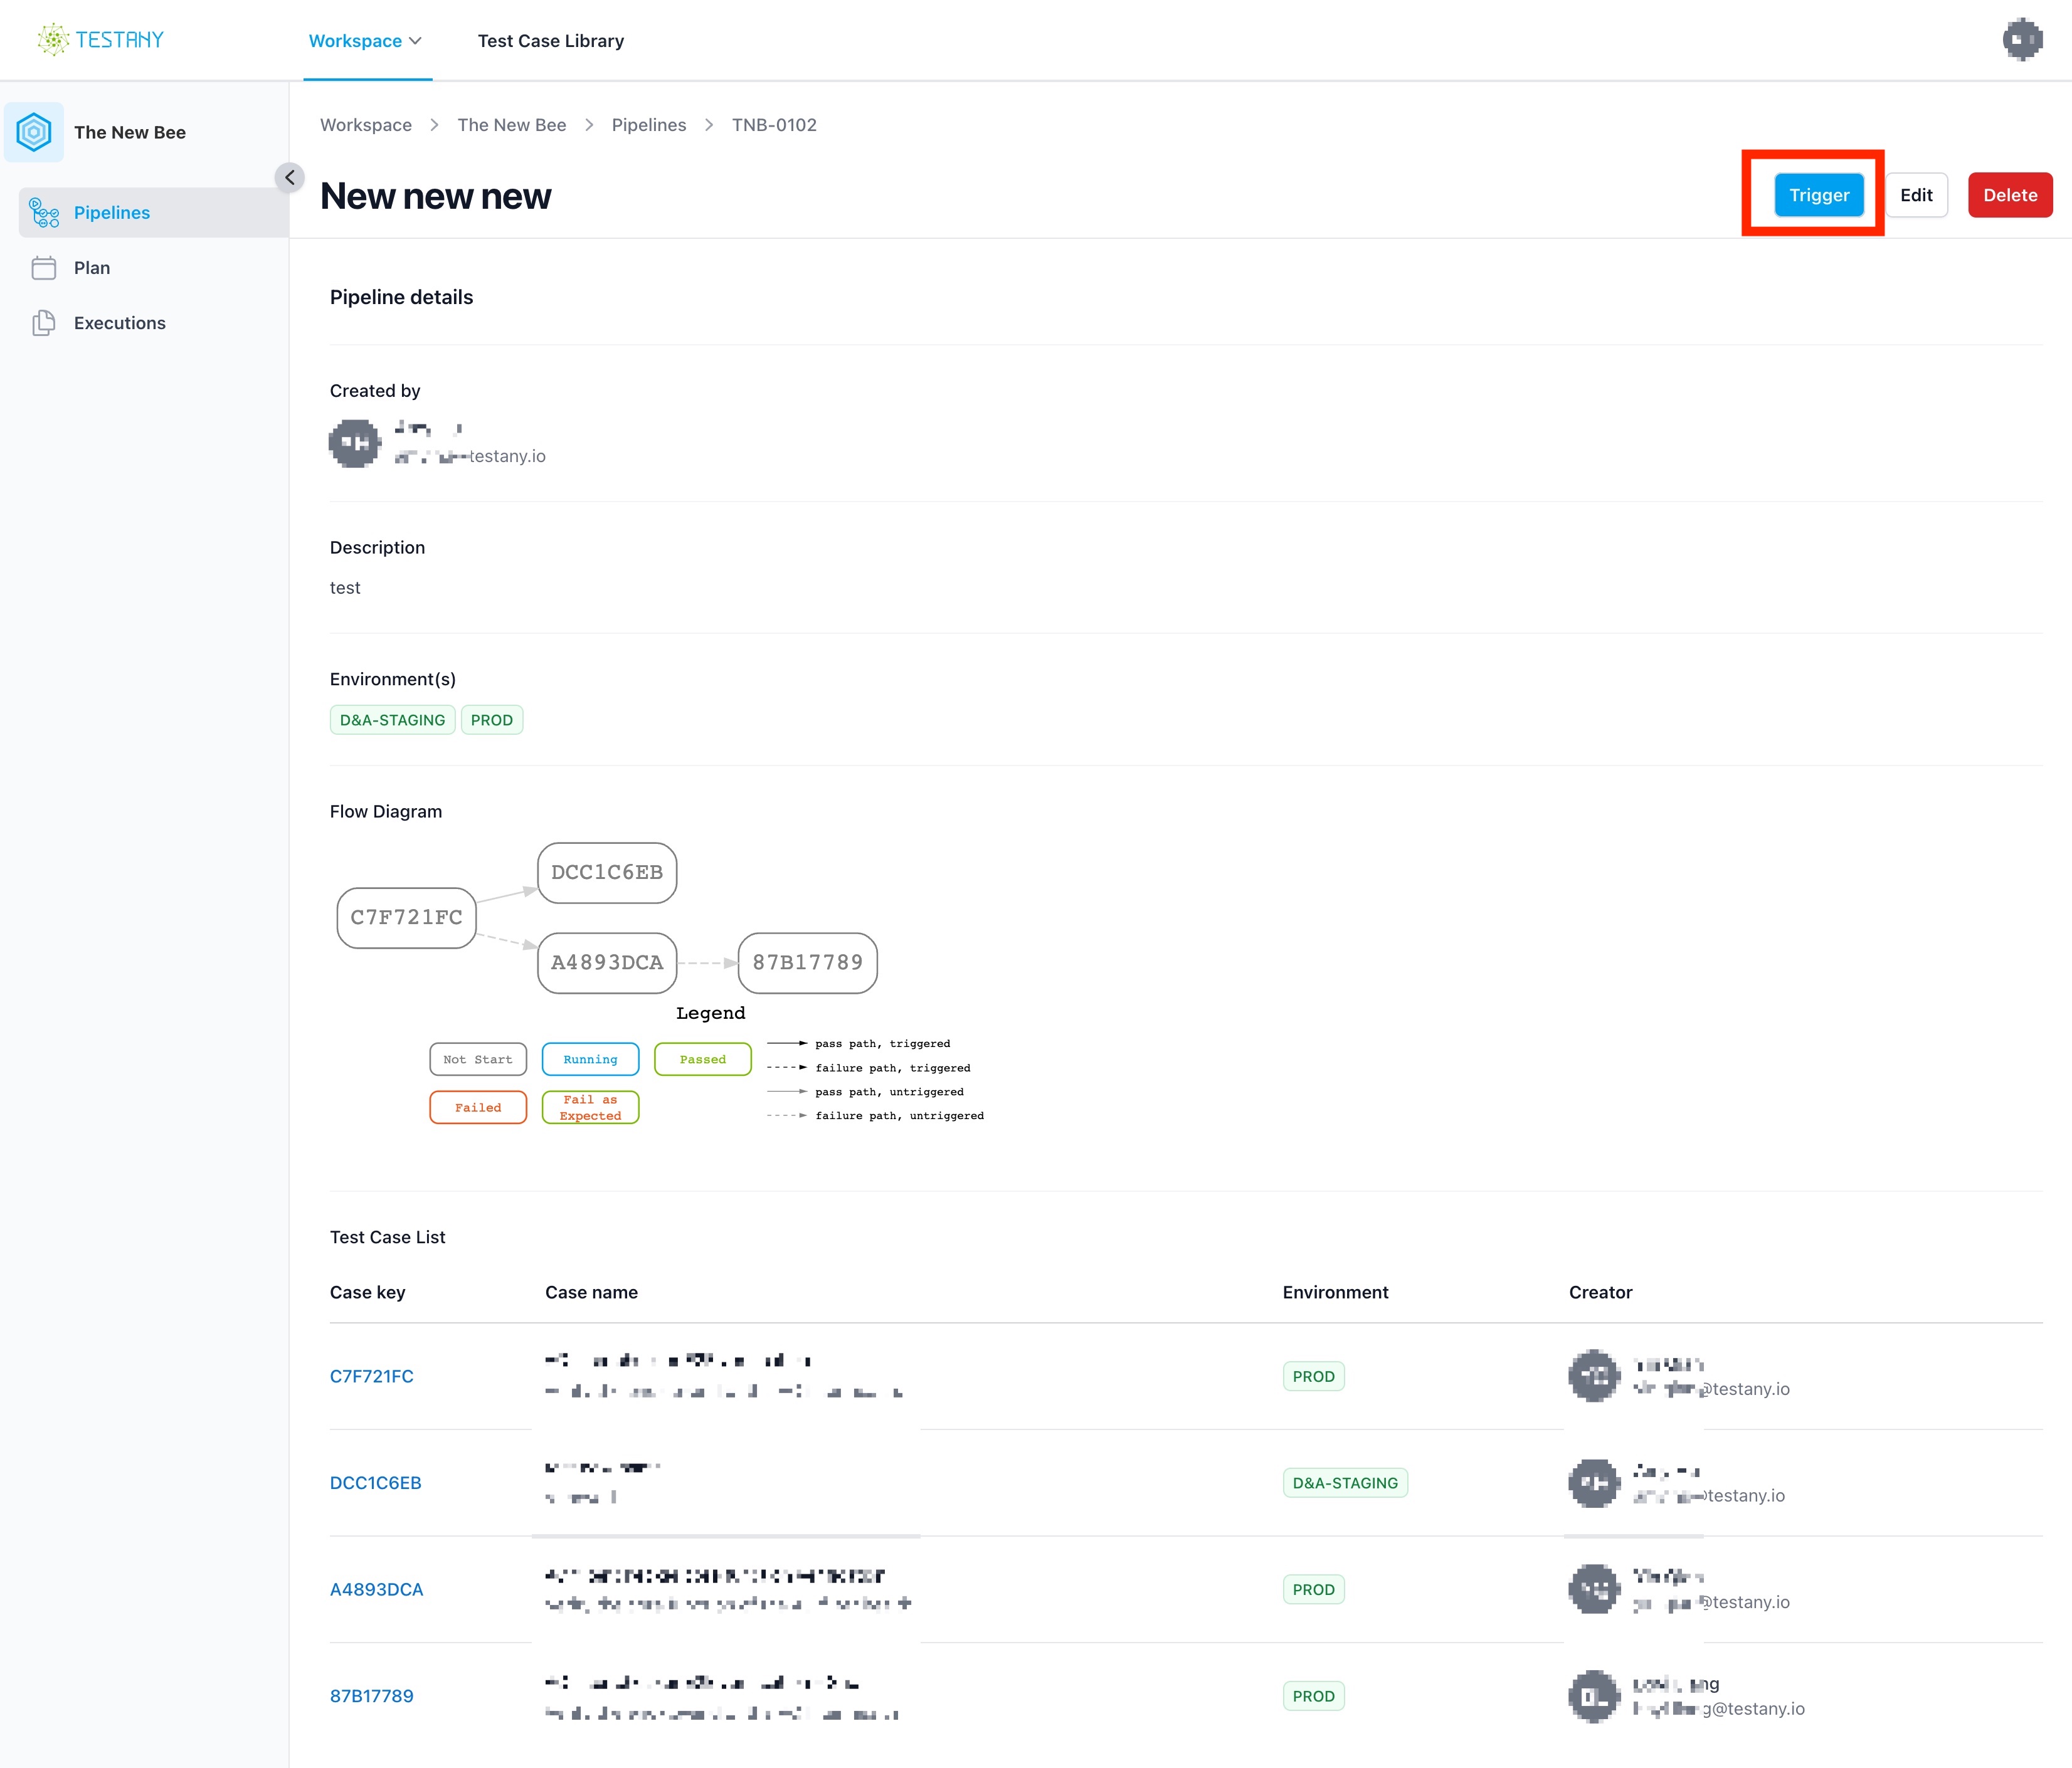
Review the pipeline information (environment, flow diagram, test case list). If everything looks correct, click Confirm to complete the assembly.
Step 4: Run the Test
4.1 Trigger execution
From the pipeline detail page, click the Trigger button in the top right corner.
4.2 View execution progress
You'll be redirected to the execution detail page where you can watch the test progress in real-time.
4.3 View results
Once complete, you'll see:
- Overall Status: PASSED (green checkmark)
- Duration: How long the test took
- Logs: Detailed output from the test
You've successfully run your first automated test on Testany!
Step 5: Try Modifying the Test
Now that you have a working test, try these experiments:
Experiment 1: Make the test fail
Modify your my-first-test.json to expect status code 404:
JSON"exec": [ "pm.test('Status code is 404', function () {", " pm.response.to.have.status(404);", "});" ]
Re-zip, upload the new file, and run again. Observe the failure.
Experiment 2: Test the Hello World API (Experience an Unstable Service)
Testany Demo also provides another API: https://dev.testany.com.cn/api/v2/demo/helloworld
This API simulates an unstable service: it runs in cycles of 3 calls, returning 503 status code for the first 2 calls and 200 for the 3rd call. You can create a new test case to verify it and experience test failure scenarios.
Experiment 3: Add another test case
Create a second test case and add it to the same pipeline to see multiple tests run in sequence.
What's Next?
Now that you understand the basics, here's your learning path:
Recommended Reading Order
| If you want to... | Read this |
|---|---|
| Upload different test frameworks | Managing Test Cases |
| Organize tests into suites | Managing Test Pipelines |
| Store API keys securely | Managing Credentials |
| Run tests on a schedule | Manage Test Trigger Methods - Plan Trigger |
| Trigger tests from CI/CD | Managing Gatekeeper |
| Get notified of results | Notifications Overview |
Explore Test Frameworks
Testany supports multiple testing frameworks:
| Framework | Best For | File Type |
|---|---|---|
| Postman | API testing | .json collection |
| Playwright | Browser/E2E testing | .js or .ts |
| Python Unit Test | Python projects | .py |
| PyRes | Python regression testing | .py |
| JMeter | Performance testing | .jmx |
For detailed setup guides, see Managing Test Cases.
Troubleshooting
| Issue | Solution |
|---|---|
| Dry Run fails with "File not found" | Check that your Path matches the file name inside your .zip exactly |
| Test case doesn't appear in pipeline selector | Refresh the page; ensure the test case is saved |
| Execution stuck in "Pending" | Check that a runtime is available; contact your admin if needed |
| "Status code" test always fails | Verify the URL is accessible from the internet |
Quick Reference
- Testany Dashboard:
- China Edition ↗
- International Edition ↗ (Coming Soon)
- Demo Page: https://testany.com.cn/demopage.html ↗
- Documentation: https://docs.testany.io ↗
- Glossary: View all terms
Summary
In this guide, you learned the Testany workflow:
- Test Case - Package your test script with configuration
- Test Pipeline - Assemble test cases into an executable unit
- Test Execution - Run the pipeline and view results
This simple pattern scales to complex testing scenarios. As you grow, you can:
- Add credentials for secure API testing
- Schedule tests with Plans
- Trigger tests automatically with Gatekeepers
- Send results anywhere with Webhook Dispatch
Happy testing!
Still have questions?
Our team is here to help. Get in touch and we'll get back to you as soon as possible.