
Import from Git V2: Connect GitHub and Create an Import
1. Before you start
Before creating your first V2 import, make sure:
- You can sign in to the target GitHub account in Testany.
- The target repository owner already granted
Testany Git Connectoraccess, or you know who can do it. - At least one available
Runtimeexists in your tenant.
If the repository belongs to a GitHub organization, the target repository usually needs to be added into the Testany Git Connector access scope before you can continue. This can be done either by a GitHub organization admin in the organization installation, or by an admin of the target repository on the repository side.
2. Open Import from Git V2
- Go to
Test Case Library. - Click
Register Test Case. - Select
Import from Git. - In the version selector, choose
Import from Git V2.
After that, you enter the V2 page, which contains:
Connection ManagementImportsAdd an ImportImport History
3. Step 1: Source & Environment
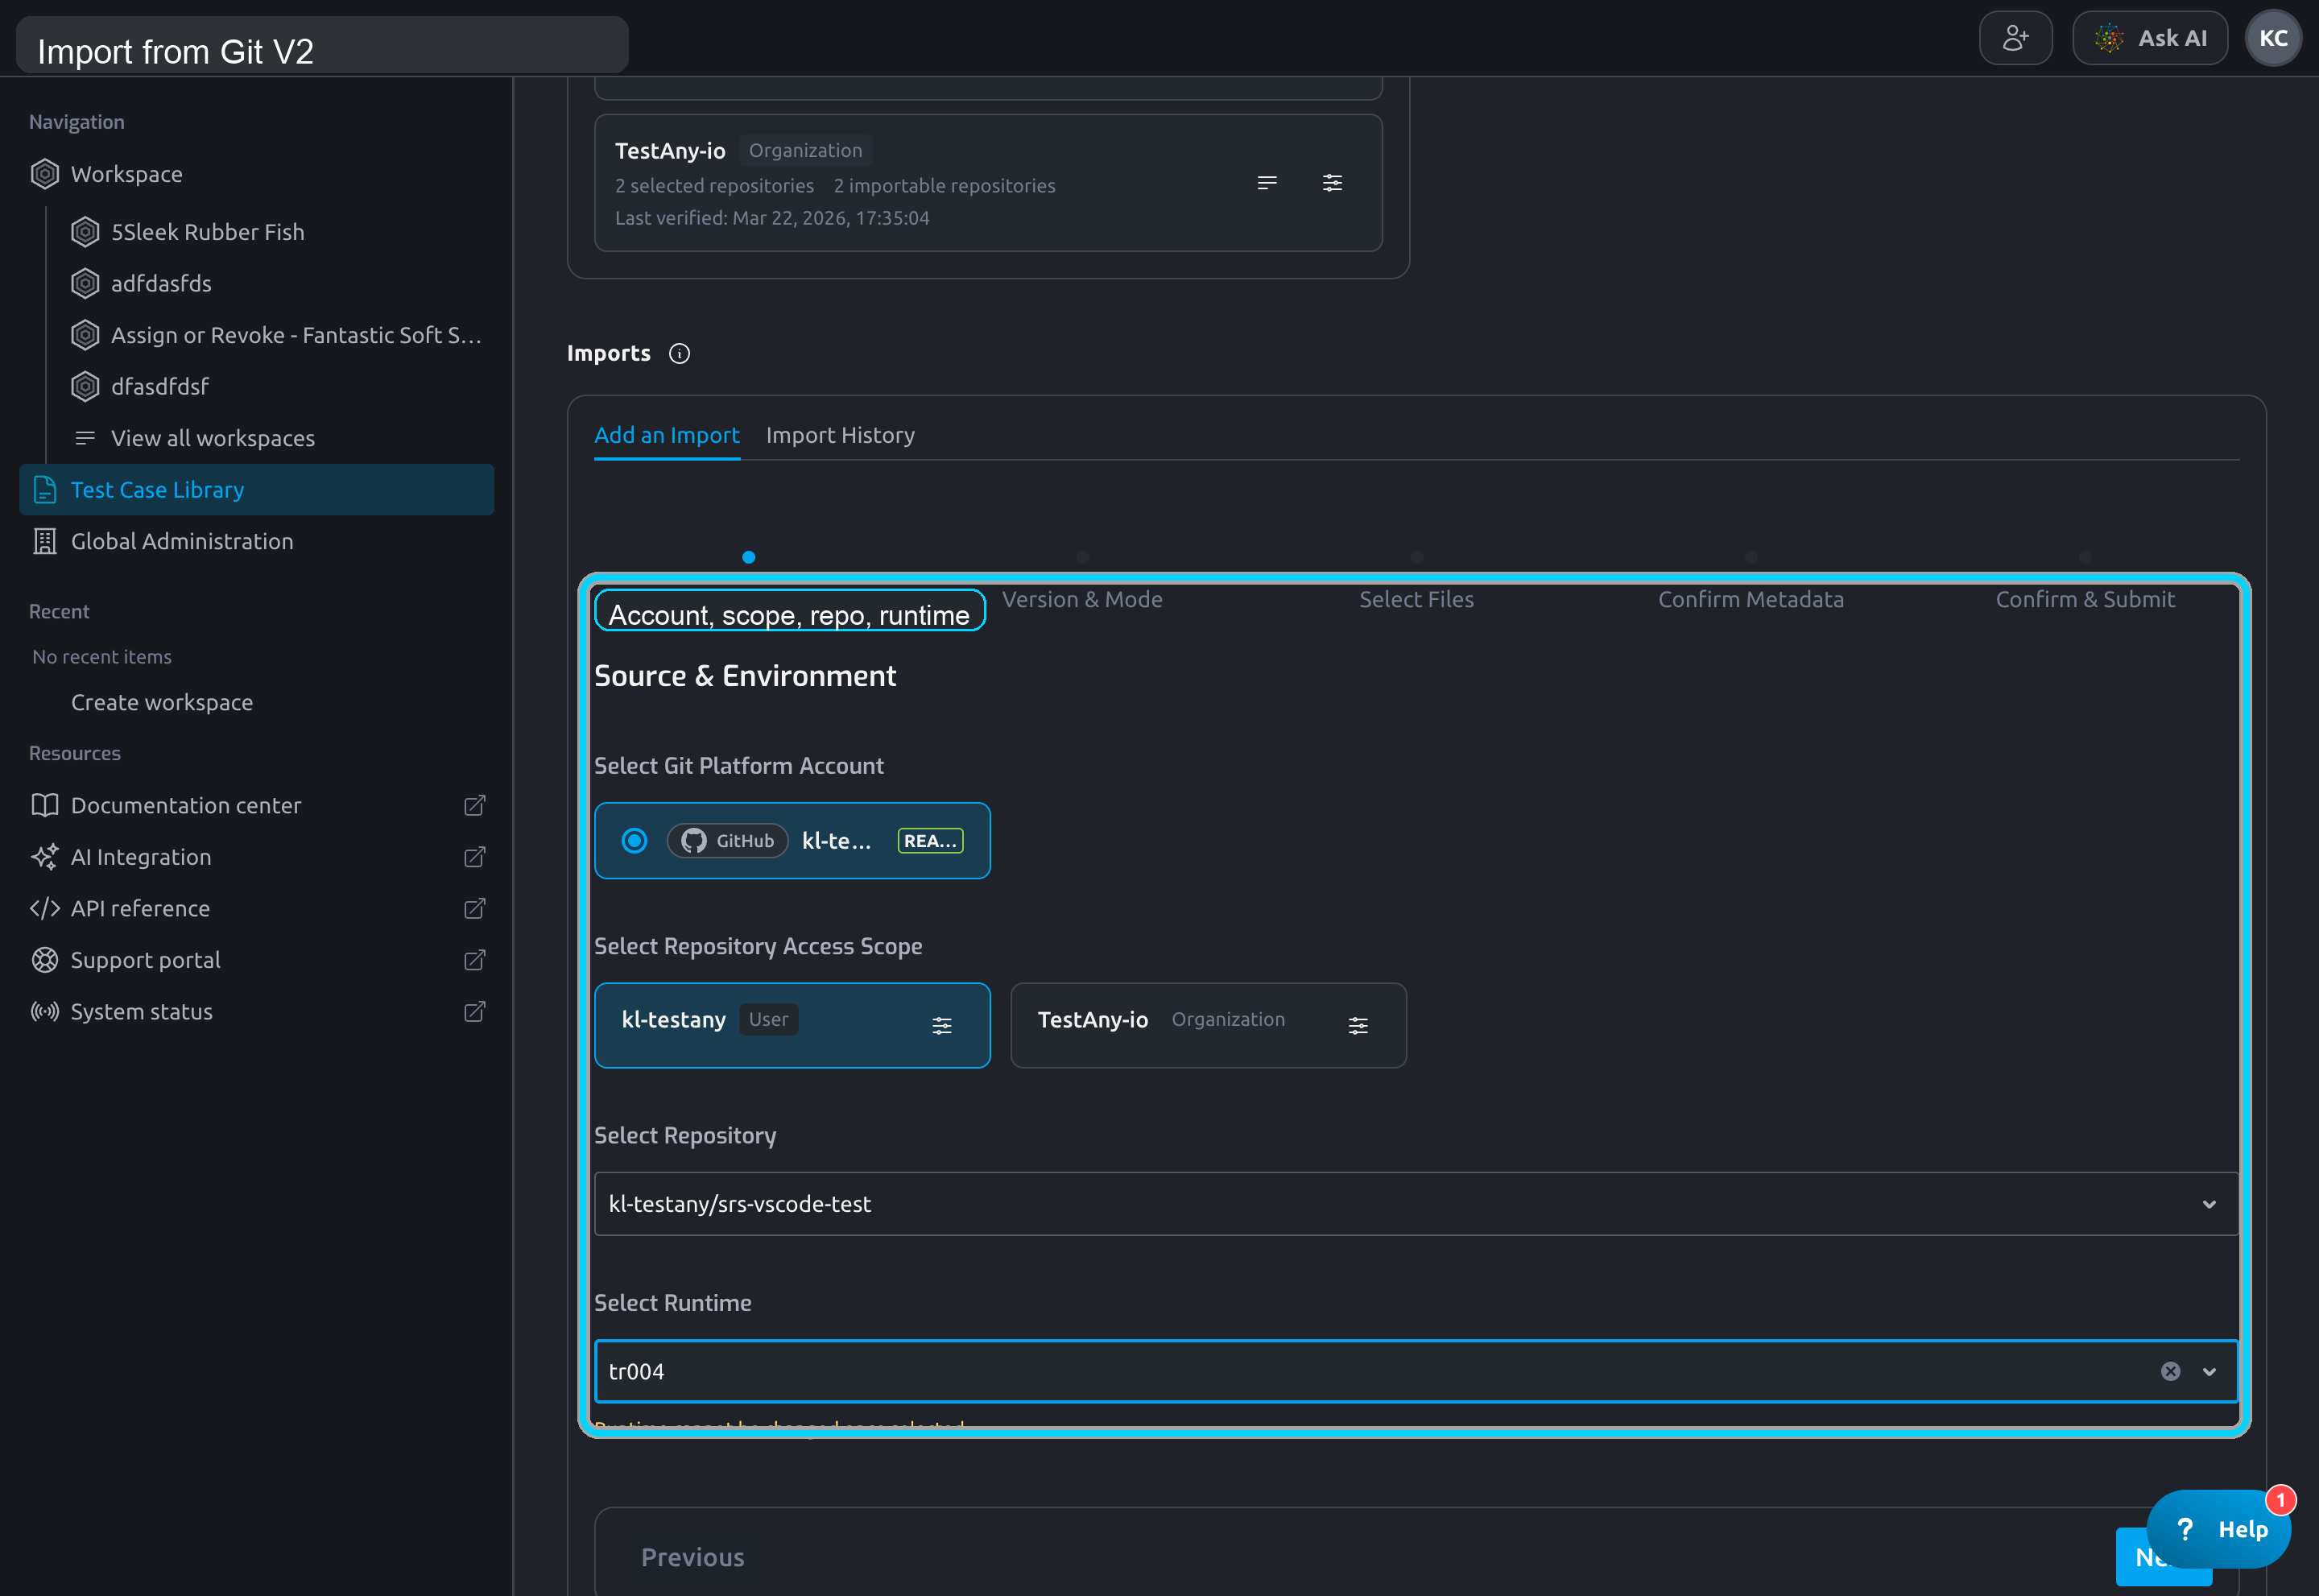
In Add an Import, step 1 is Source & Environment.
3.1 Select Git Platform Account
Choose the GitHub account you want to use for this import.
If you do not have a connected account yet, go back to the Connection Management section on the same page and connect one first.
3.2 Select Repository Access Scope
After selecting the account, choose the repository access scope that matches the repository owner.
In practice, this means choosing the correct GitHub App installation:
- a personal account installation
- or an organization installation
If this step shows no available scope, the GitHub account is connected, but the repository owner has not granted usable GitHub App access yet.
3.3 Select Repository
Once the scope is ready, search and select the repository.
The repository dropdown only shows repositories that are currently importable under the selected scope.
3.4 Select Runtime
Choose the target Runtime.
Once selected, the Runtime cannot be changed for this import history.
4. Step 2: Version & Mode
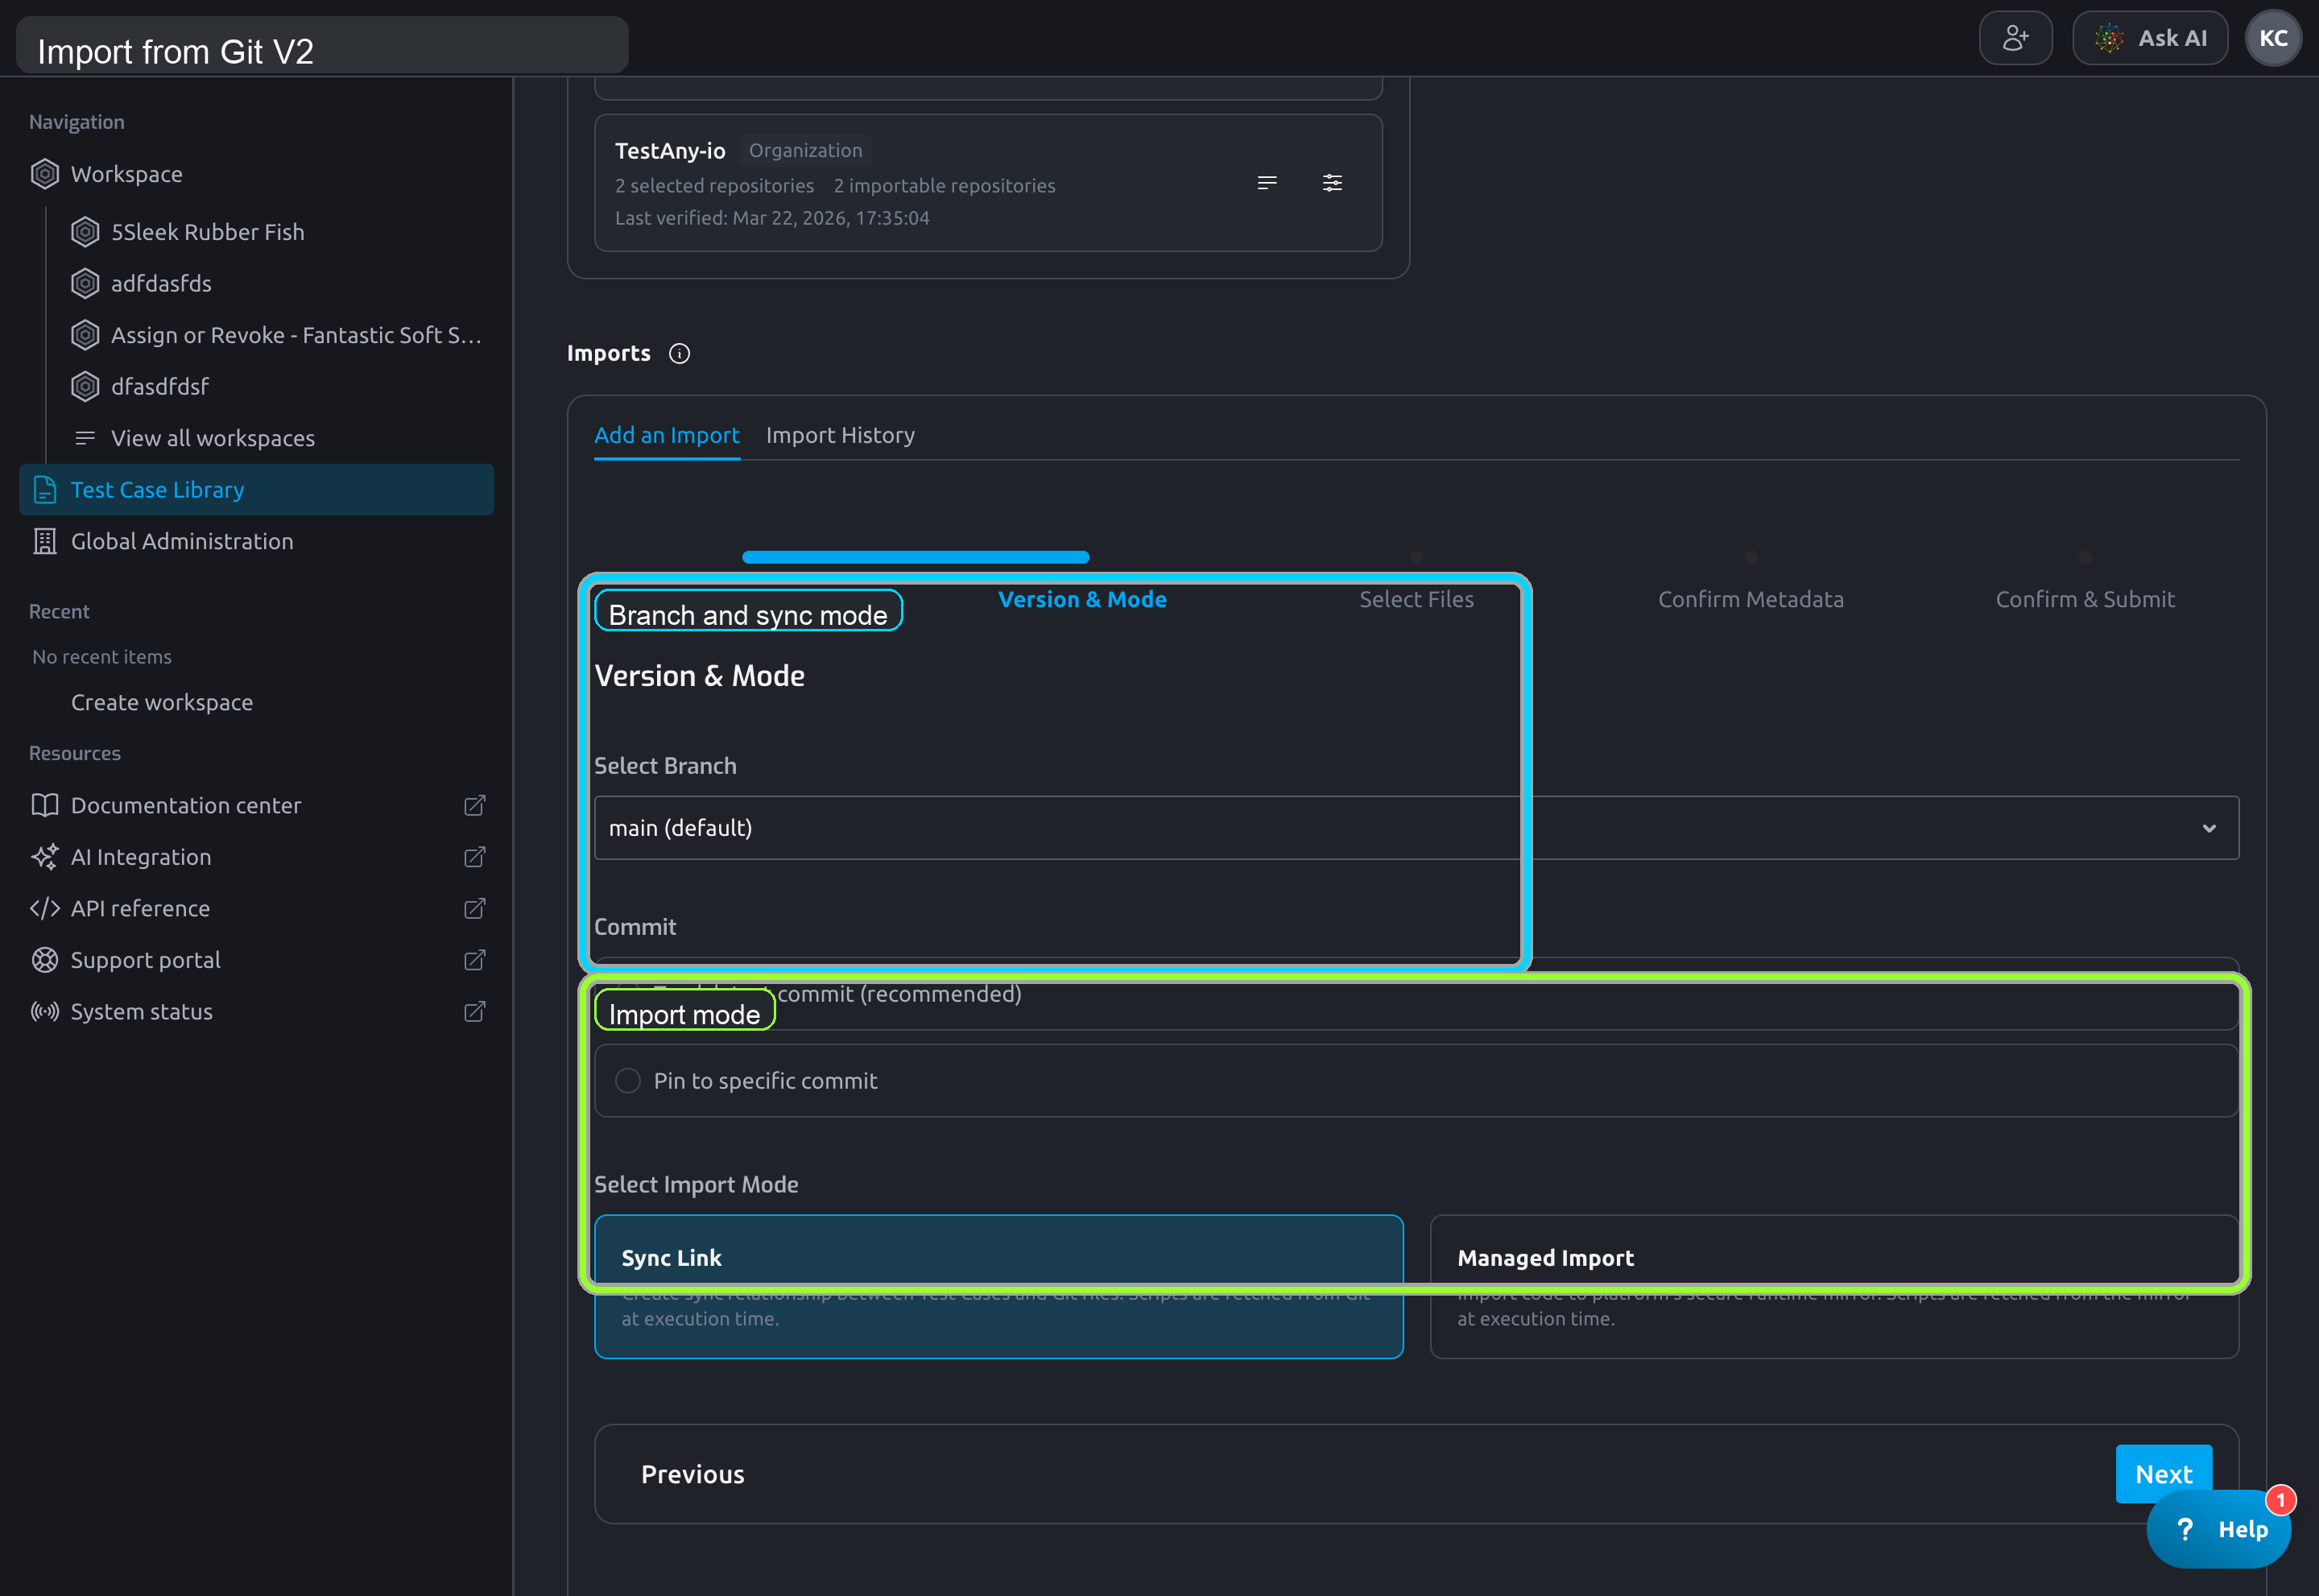
Step 2 is Version & Mode.
4.1 Select Branch
Choose the branch that this import history should follow.
If you do not choose a branch manually, Testany preselects the repository default branch when possible.
4.2 Choose Track Latest or Pinned Commit
You must choose one sync mode:
Track Latest: follow the latest commit on the selected branchPin to specific commit: lock this import history to one commit
If you choose Pin to specific commit, Testany loads recent commits from GitHub and lets you pick one.
Pinned mode does not support webhook sync. To move forward later, you must switch commit or switch back to Track Latest.
4.3 Choose Sync Link or Managed Import
Then choose the import mode:
Sync Link: execution fetches scripts from GitManaged Import: execution fetches scripts from Testany Mirror
If Managed Import is unavailable in your tenant, the option stays visible but disabled.
5. Step 3: Select Files
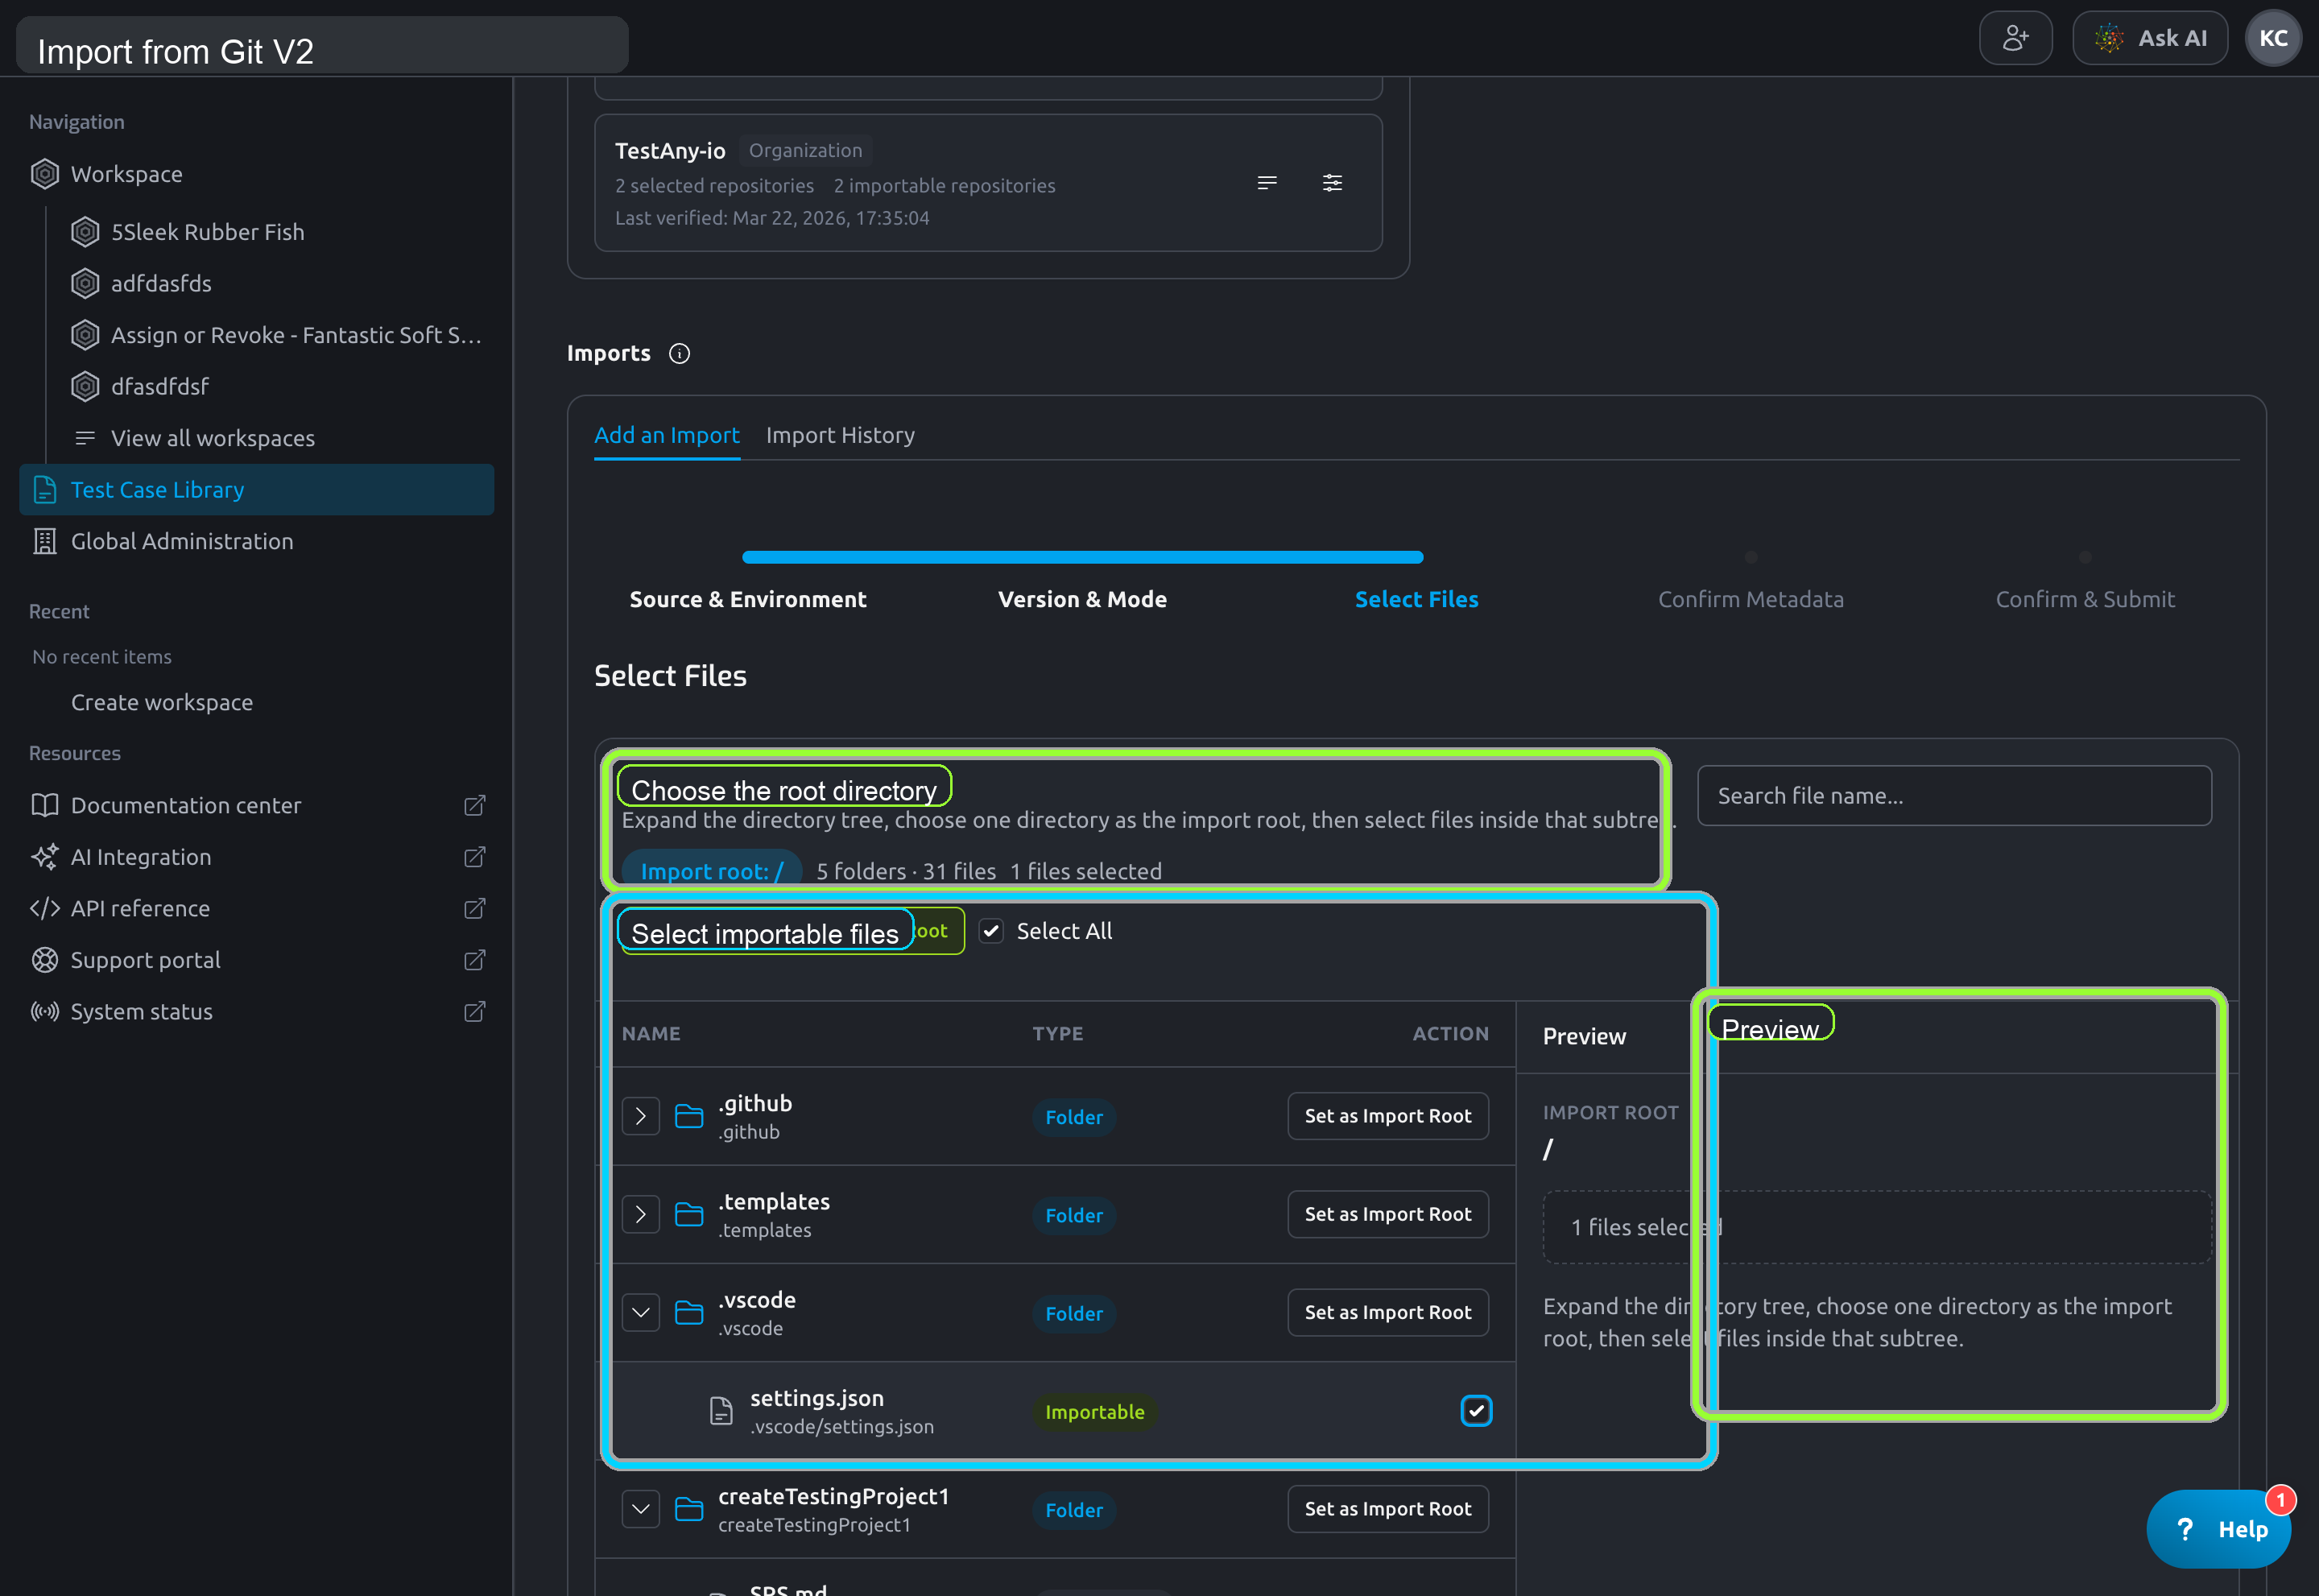
Step 3 is Select Files.
5.1 Choose the import root first
Use the repository explorer to select a directory as the import root.
Only files inside that subtree can be selected for this import history.
5.2 Select supported test files
Supported file types are:
.py.js.ts.jmx.json.java
Unsupported files appear in the explorer but cannot be selected.
5.3 Use preview before selecting
You can click a file to preview its content before selecting it.
Testany also shows a warning when a very large number of files is selected. In that case, consider importing in batches.
6. Step 4: Confirm Metadata
Step 4 is Confirm Metadata.
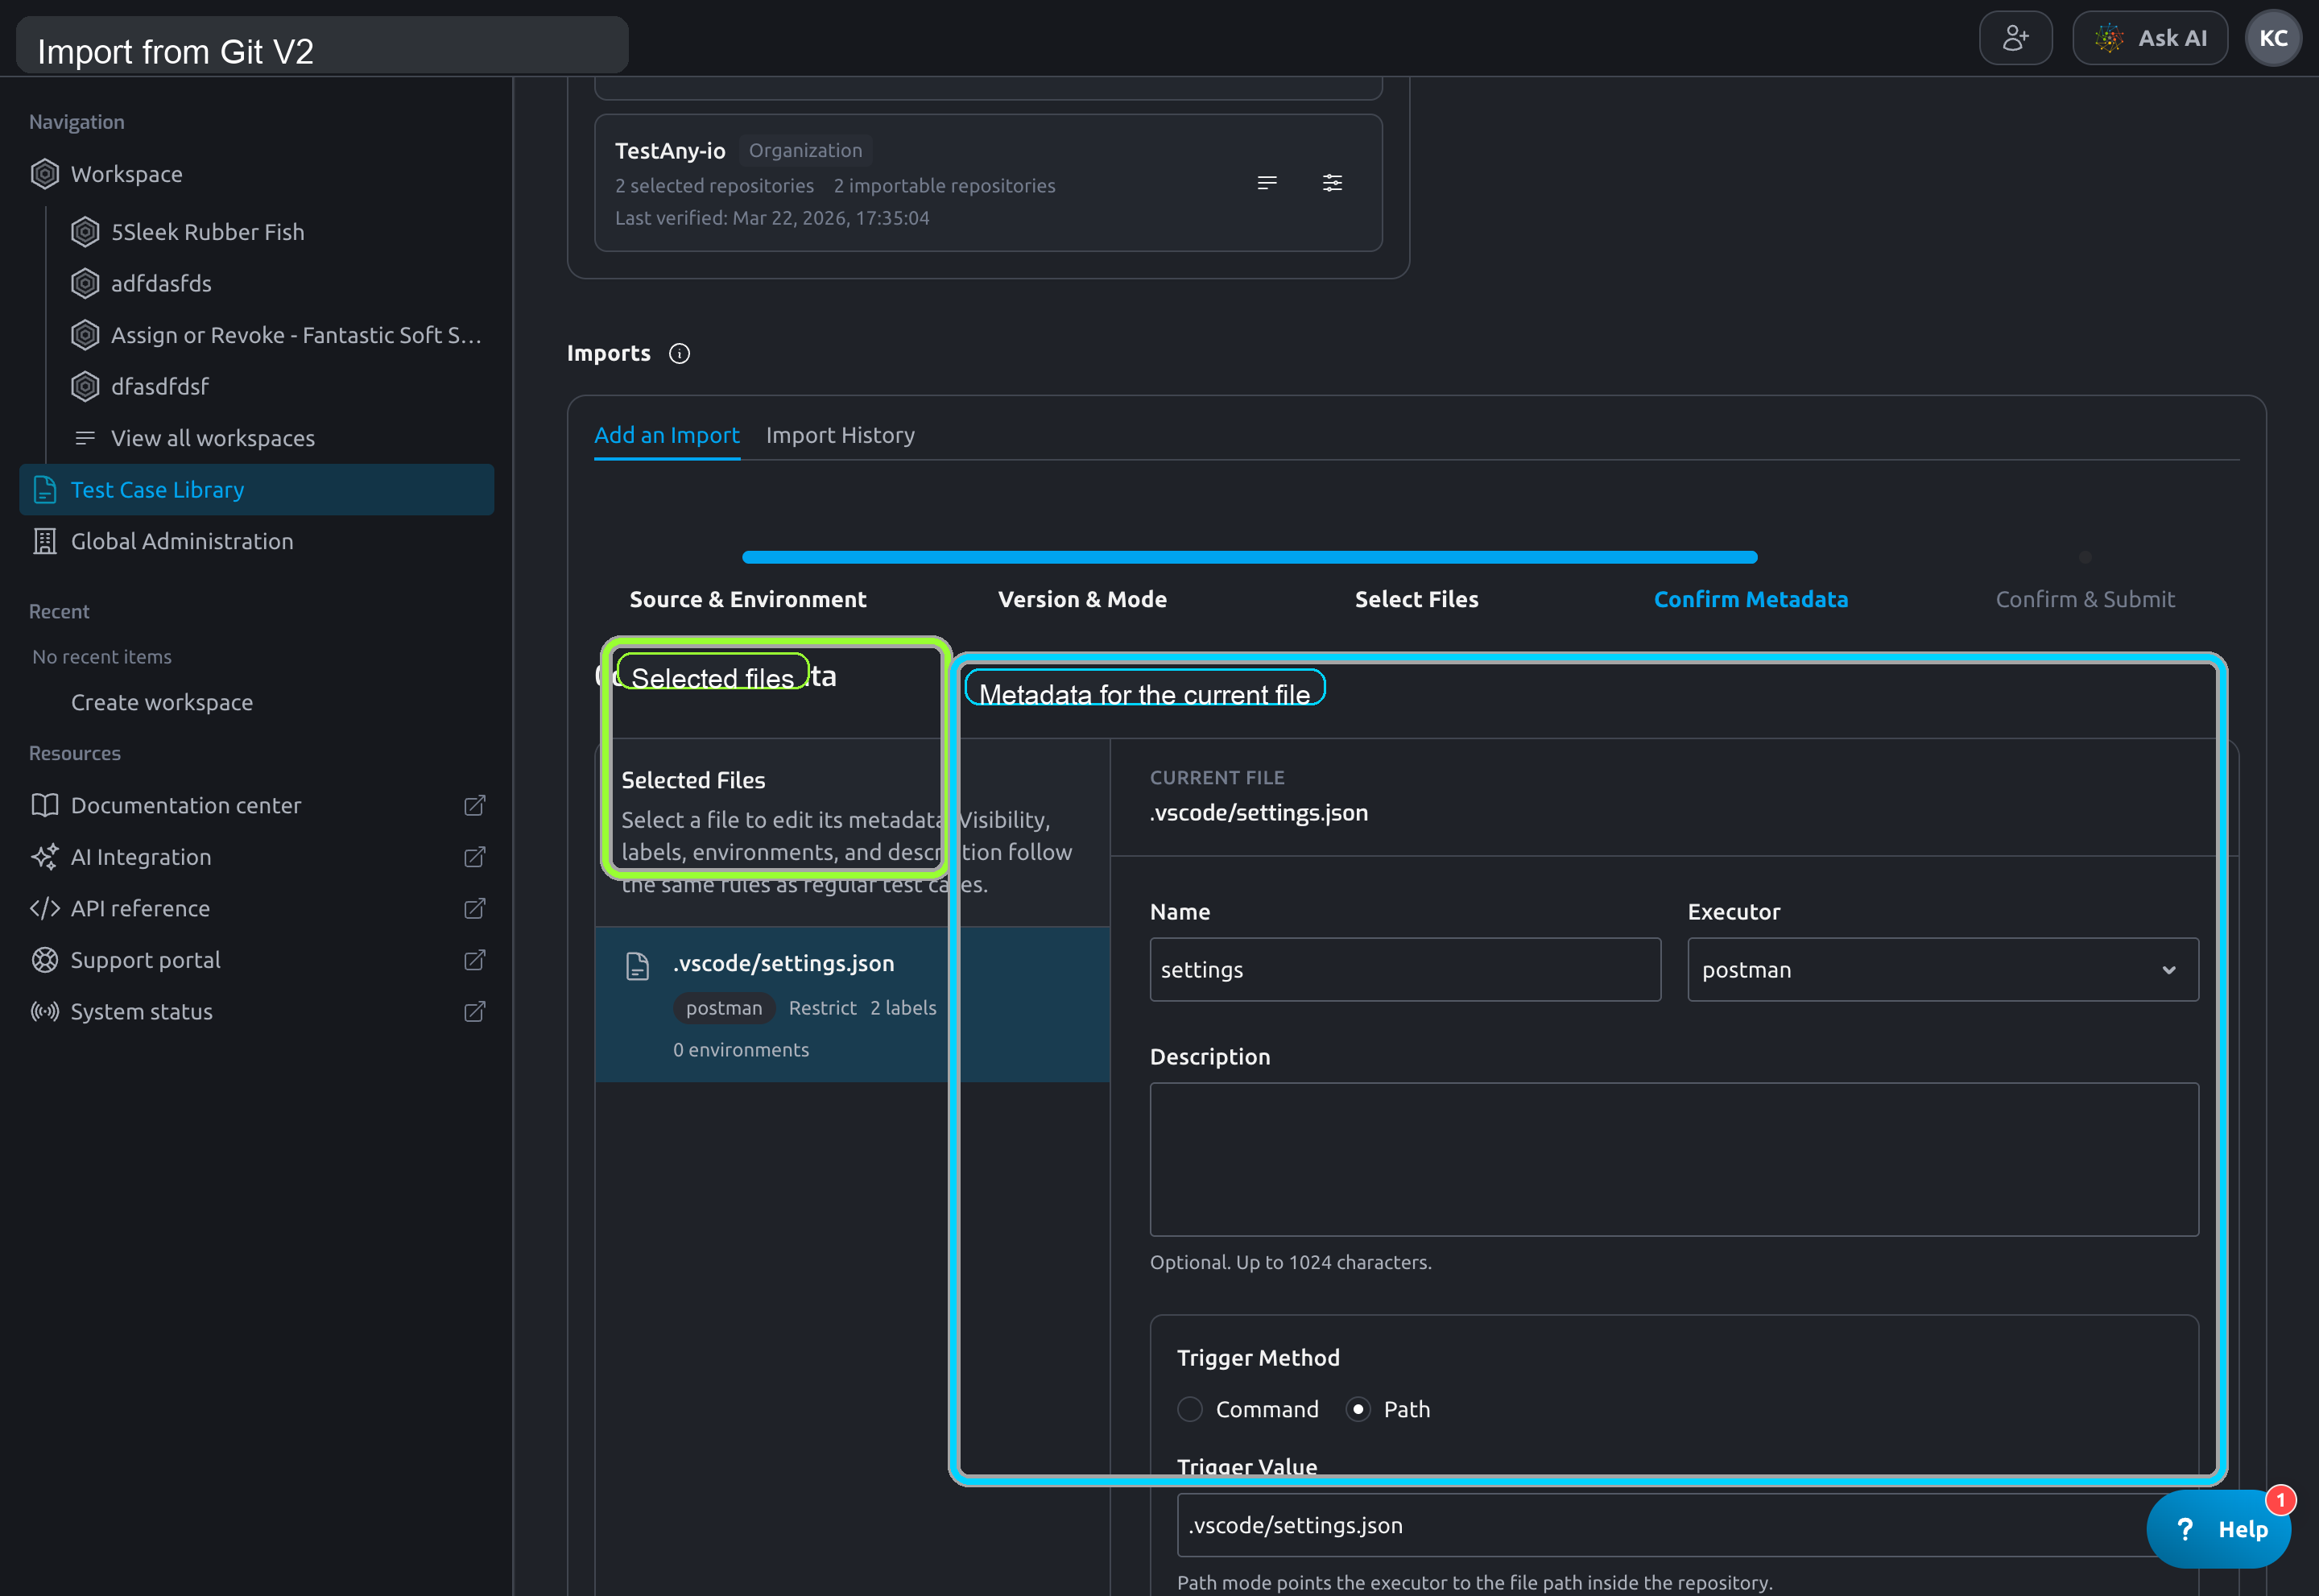
For each selected file, review and adjust:
NameExecutorDescriptionTrigger MethodTrigger ValueEnvironmentsLabelsVisibility
6.1 Executor and trigger method
Testany auto-detects an executor from the file extension when possible, then builds a default trigger method.
You can still change:
- the
Executor CommandvsPath- the actual trigger value
6.2 Apply to Similar Files
Use Apply to Similar Files when multiple selected files share the same extension and should reuse the same metadata pattern.
This can batch-copy:
- executor
- trigger method
- environments
- labels
- visibility
7. Step 5: Confirm & Submit
Step 5 is Confirm & Submit.
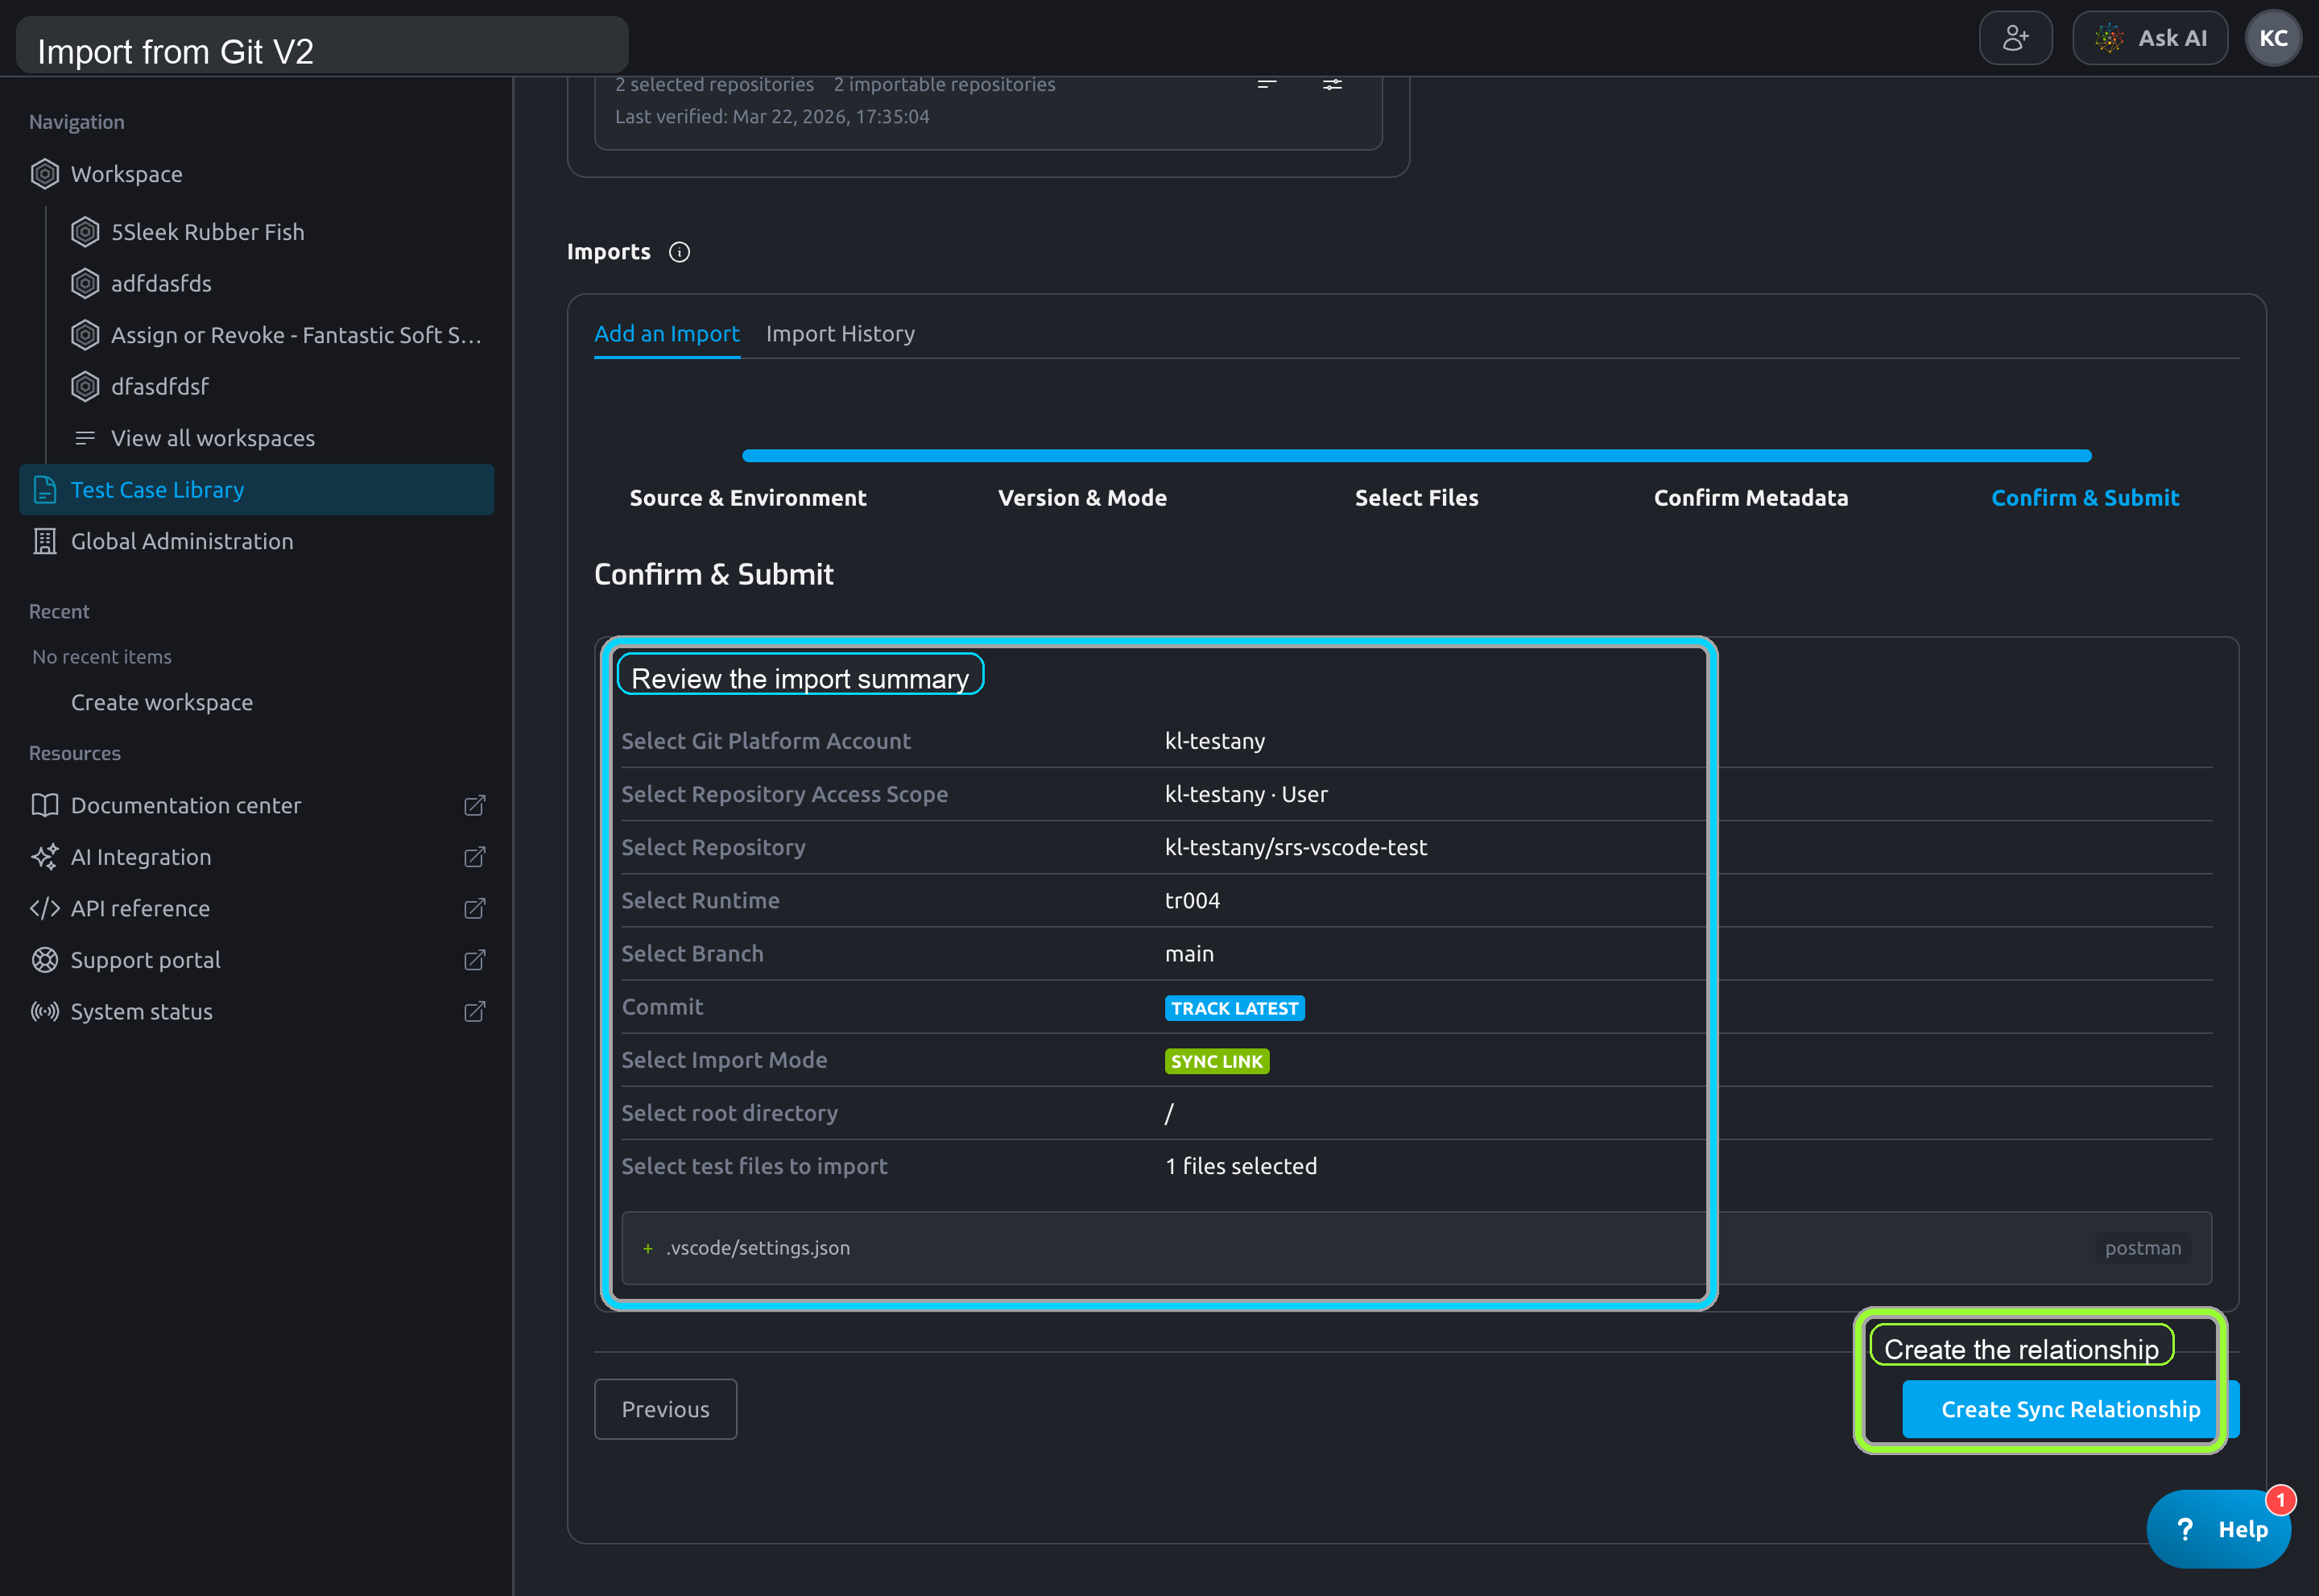
Review the summary:
- account
- repository access scope
- repository
- runtime
- branch
- sync mode
- import mode
- import root
- selected files
Then click:
Create Sync RelationshipforSync LinkImport to MirrorforManaged Import
8. Review the result
After submission, Testany opens the import result page.
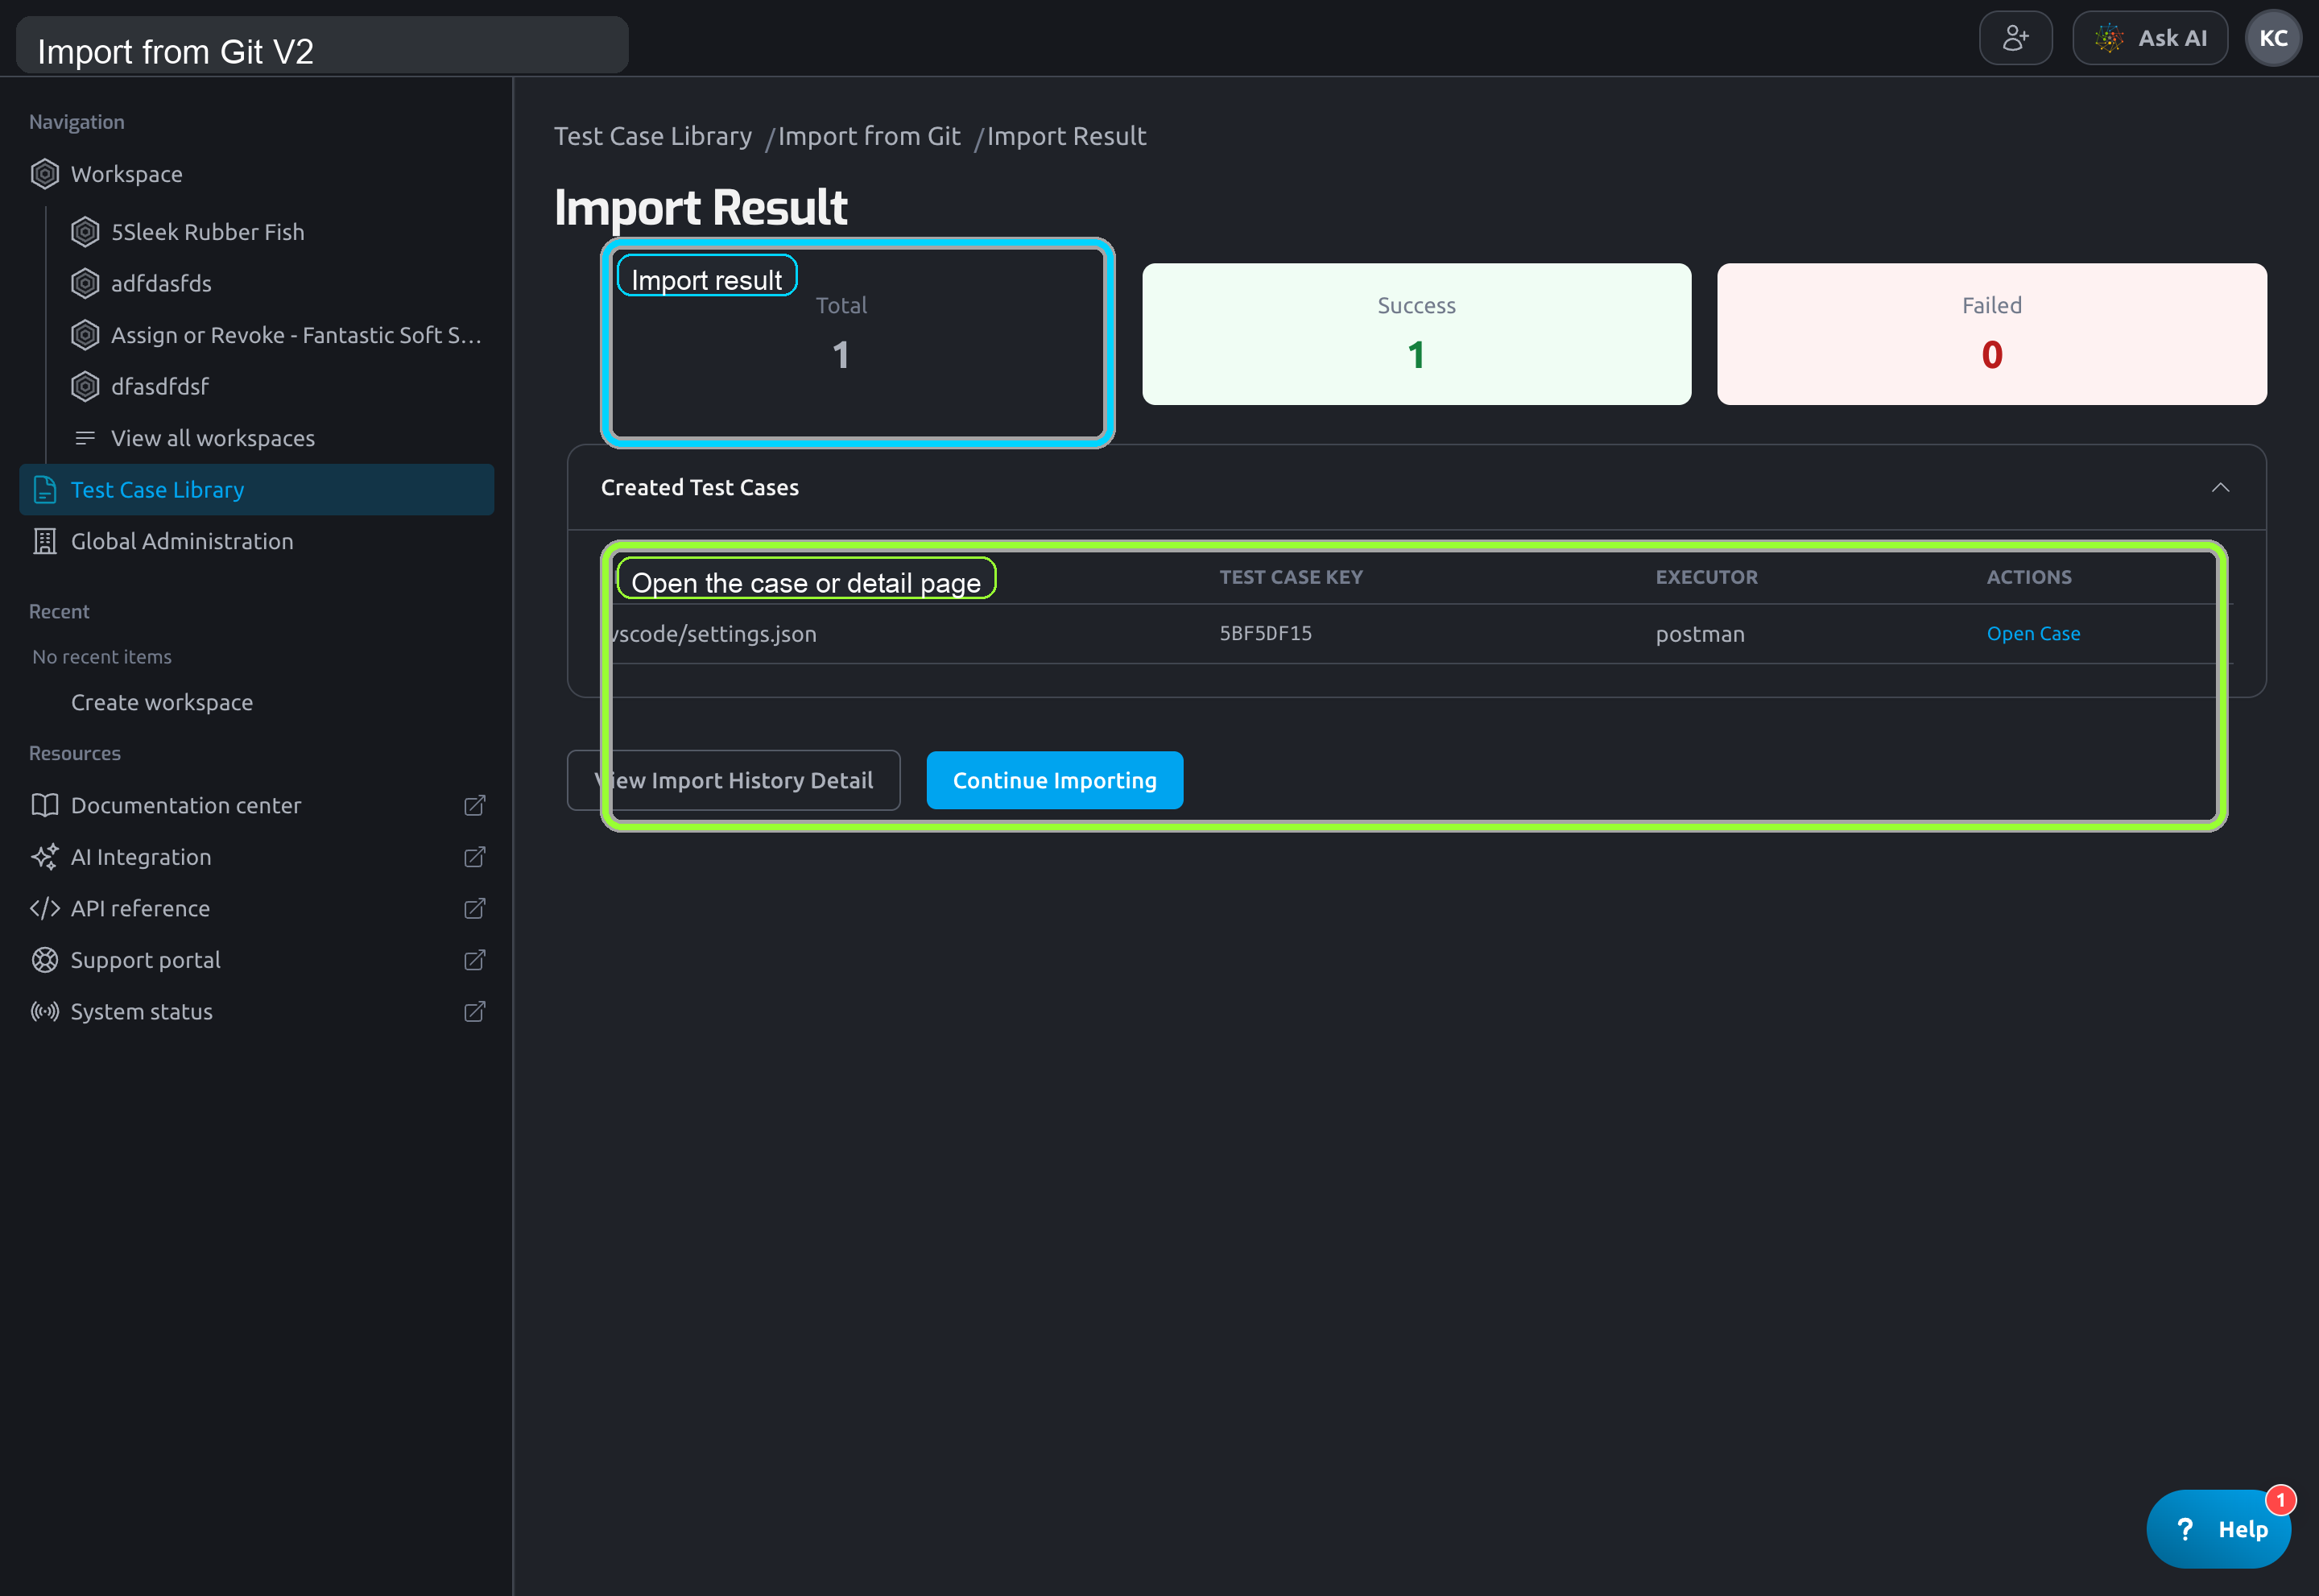
From there, you can:
- open the created
Import History Detail - continue importing more files
- review failed files, if any
For Managed Import, the result page may also show Mirror initialization status.
9. What to do next
After the first import is created, continue with:
Still have questions?
Our team is here to help. Get in touch and we'll get back to you as soon as possible.